Tag: Strumming My Nails

Watermarble Tips

Watermarble Tips

I will be the first one to admit that I have a really hard time with different nail art techniques. I really started out as a swatcher, so that is what I am most comfortable with. However, I don’t want my blog and passion for nails to stagnate so I do try to do things that are outside of my comfort zone. Stamping was one of the first things that I tried so it became something that I have continued to enjoy because I find it easy and fun. Enter watermarble. I have been dealing with trying to watermarble for probably a year if not longer. I went through phases where I tried, gave up for a while, tried again and gave up again. It was just so frustrating because it seemed that no matter what I did, nothing worked. Finally, I am here to tell you that you can master this technique because if I can, anyone can! While there is no one technique that will guarantee success, I will be sharing with you what worked for me.

Water

You would never think that choosing the right water would make such a huge difference. There are people who will say that tap water works just fine or that you have to use distilled water. I’ve tried both and tap water never worked for me. I guess it could be that tap water differs from region to region, but distilled water is the only thing that has worked for me. The temperature of the water was also important because only room temperature water seemed to work well.

Polishes

Once you have the water issue figured out, you have to figure out what polishes work well for marbling. This is all about trial and error because not all polishes work well and some don’t work well together. Personally, the best polishes for marbling that I have used are OPI cremes. They spread well, are very pigmented and don’t dry too quickly. I’ve tried some cheaper polishes and they seem to dry out quickly. Certain holos and shimmers work very nicely as well, but to be honest, you just have to play around with polishes to see which ones will work best.

Creating your design

So you got the water right and your polishes spread nicely into rings. YAY! This is where my next womp womp moment occurred. I could not, for the life of me, get a nice even design. The easiest and most common design is the flower design where you drag your needle from the outside in and join the petals at the center. Well, I could not get this right. I figured out that my issue was that I was trying to drag from the outermost ring which was already beginning to set so I was breaking up the rings and just ruining everything. This might seem like common sense, but I was constantly messing up on this. I also wasn’t cleaning my needle/toothpick in between each drag so the excess polish on the tool wasn’t letting me create clean lines. Why must this be so hard???

The Big Dipper

You’re almost there, right? WRONG. Now you have to figure out how to dip your fingers into the design and not mess it up. I also managed to mess this up time and again. It’s easy enough to line up the design, but if you dip your fingers like a dumbass, you can get a big old mess. I also always got a billion air bubbles on my design which would then pop and ruin the design. The only solution for this, in my experience, is to dip your fingers at an angle and pull out your fingers very slowly.

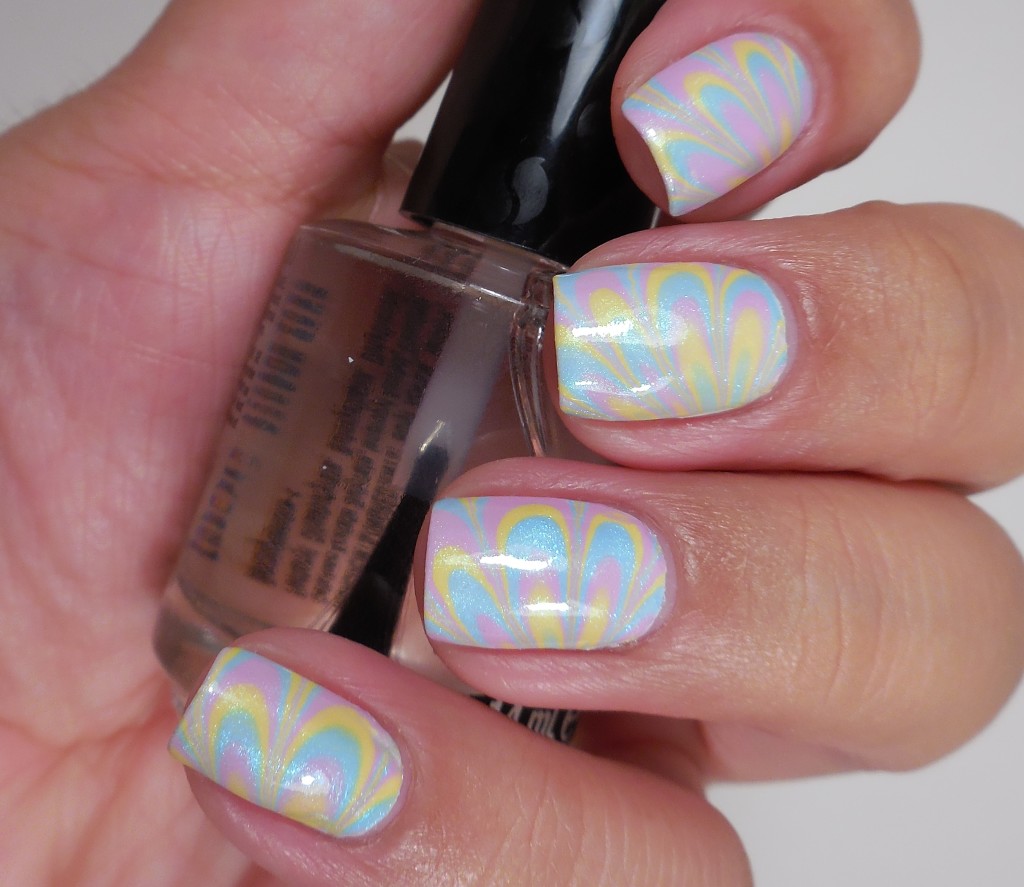
After all this, why would anyone want to even bother with watermarbling? Well because when you get it right, it looks awesome. Let me show you what I did for my last watermarble.
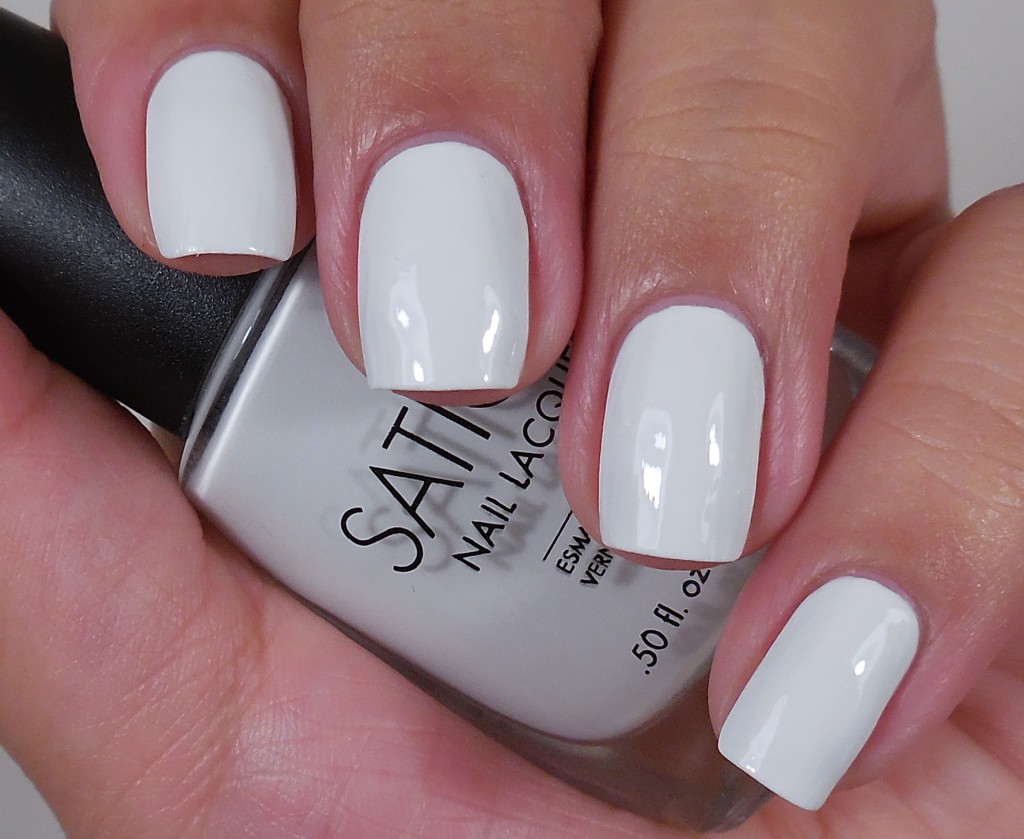
1First you will want to paint your nails a solid color. White works well most of the time so I’ve used one of my favorite whites: Sation Strumming My Nails (press sample) which is a dupe for OPI MBSW. I think the formula on this one is slightly better than the OPI.
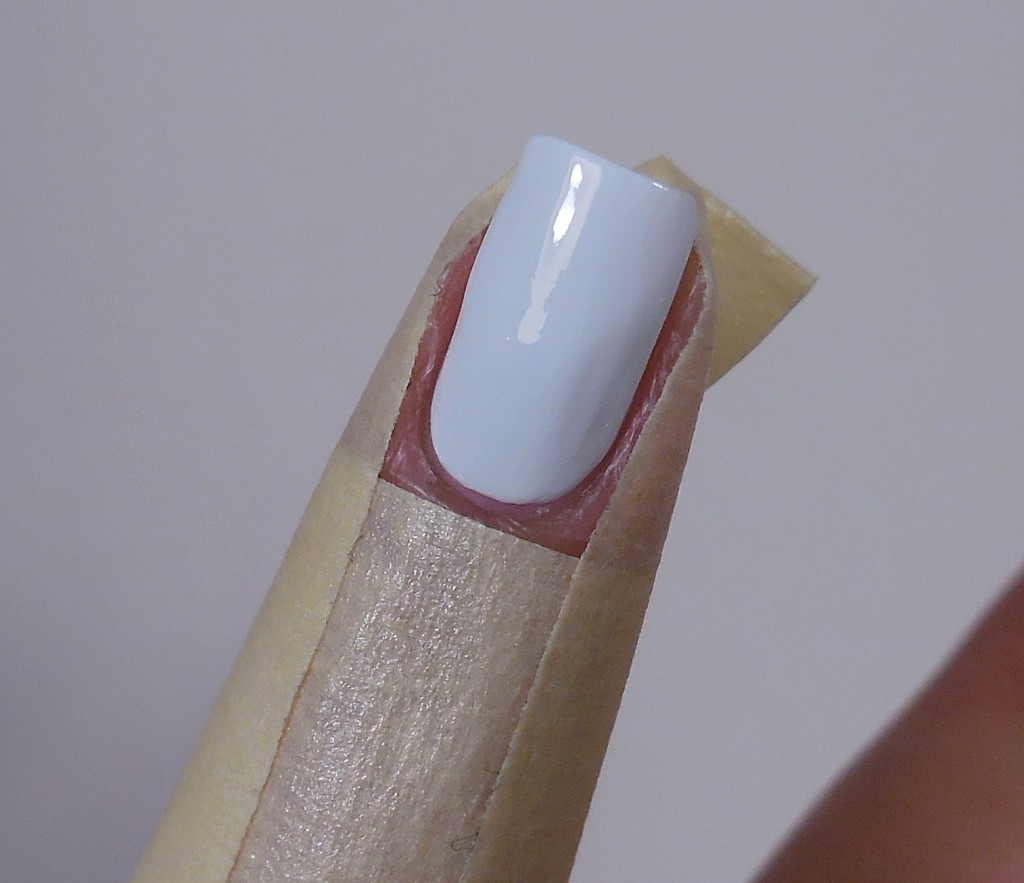
2Then you are going to want to tape up your finger to protect your skin from all the mess. I also applied a little glue around my cuticle area that would still be exposed to make clean up easier–especially because the polishes I chose have a lot of shimmery particles.
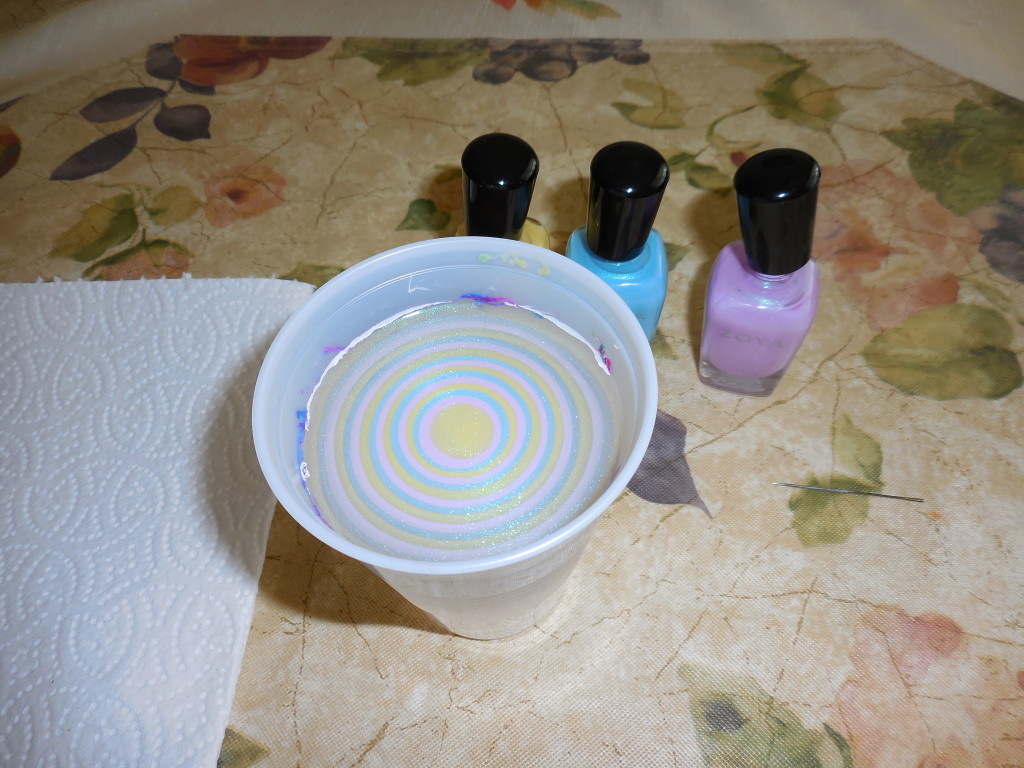
4For this watermarble I used the three shimmers from the Zoya Delight Collection (press sample): Daisy, Leslie and Rayne which work beautifully. In fact, the cremes from this collection also work perfectly.
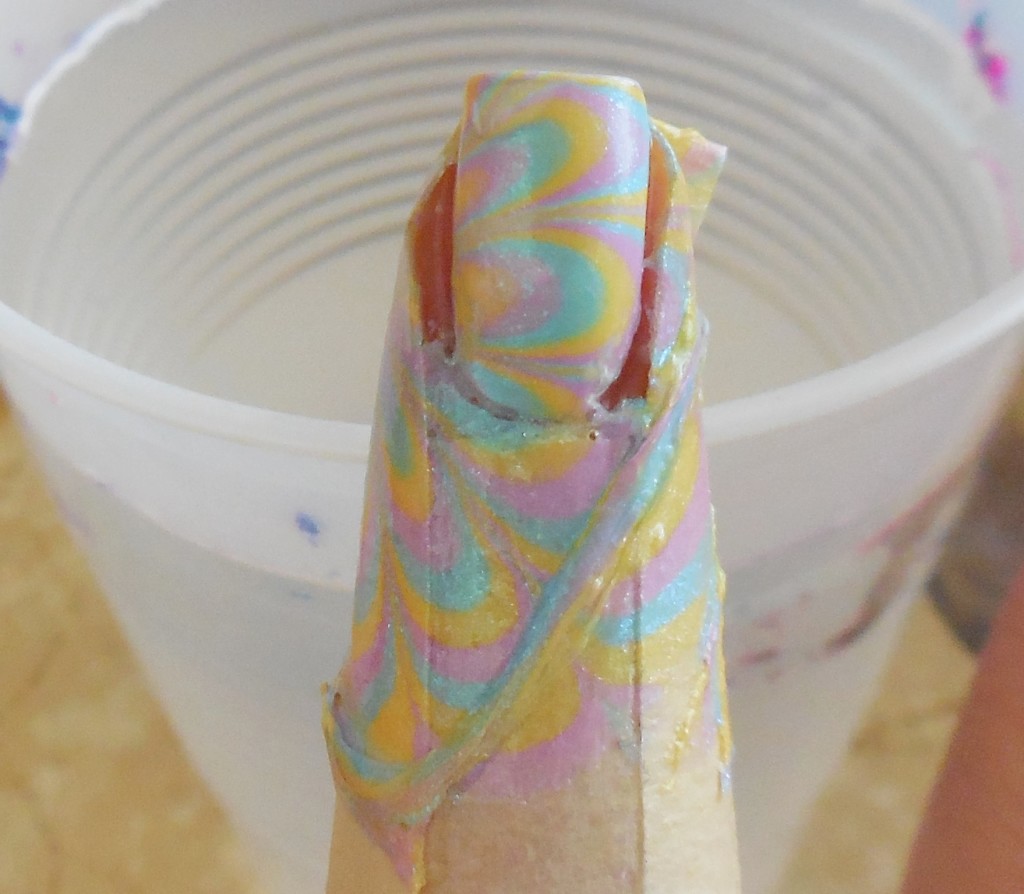
5Imagine if you didn’t tape up your finger…you would have all this polish on your skin.
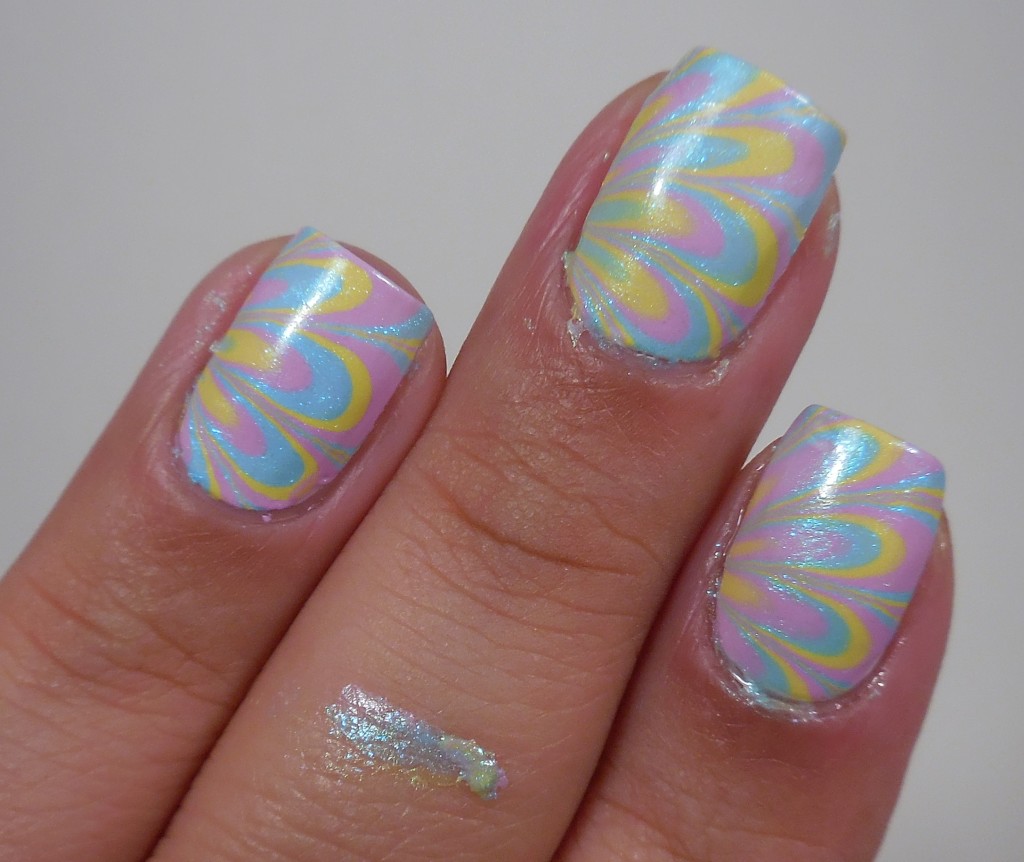
6With the glue and tape, this is what my clean up job ended up being. Not bad, right?
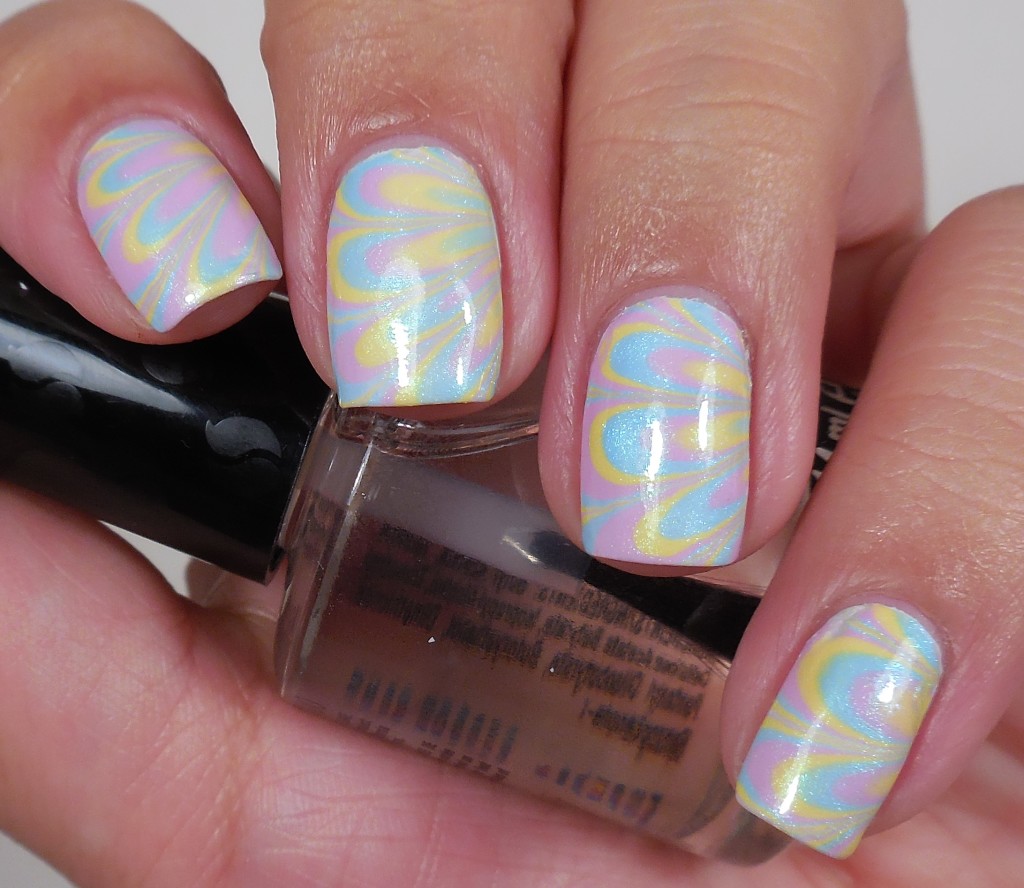
78And this is the finished mani after all the clean up was done. This looks like Easter exploded on my nails, but I think it looks pretty.

So do you think this technique is worth all the fuss? Do you have any other tips that might help others who are watermarble challenged? Thanks so much for stopping by today, and I will talk to you soon!


Have you entered my giveaway? Click the image below to enter!

giveawaycollage

Shimmer Polish Part 1

Press Sample


Guess what? I am a total mess because I just finished watching the series finale of The Office. I nearly had a heart attack when Michael showed up an uttered his signature line, “That’s what she said.” I seriously lost it at that point because he uttered it with so much emotion that I felt it touch me. Isn’t it funny how a television show can become a part of your life to the point where you feel like you almost know the characters and you look forward to catching up with them every week? Ok, I don’t want to sound like a total weirdo, but I know there are tons of The Office fans out there so you know how I feel. I felt this was a perfect way to end the show–I’m just say it’s the end of it. (I know Lesley and Amanda are shedding a tear with me right now!) So anyway, as I watched the last episode of The Office I had a bunch of polish out trying to decide what to swatch next so I decided to try some new pretties from Shimmer Polish. Those of you who have known me since the beginning of my blogging days–as if it were that long–know that I was a serious glitter hater. I used to cringe at the idea of wearing glitter polishes and a few people always teased me for it. (I’m looking at you, Nicole!) Then one day, it’s like something in my brain just clicked and I saw the error of my ways. All of a sudden, the more glittery and shiny something was, the more I loved it. Yes, ladies, I am reformed glitter hater.

I had seen so many lovely swatches of Shimmer Polishes all over the place so I am super excited to be sharing these with you today. I don’t normally like to wear glitterbombs on their own so I decided to layer these over a colored base. The formula on all of these polishes can be summed up in one word: delicious.  The glitter applies very smoothly and is plentiful; one coat gives you beautiful coverage over a colored base. If you want to wear these sparklers on their own, I do recommend applying one thin coat and then dabbing on a second coat to get even and full coverage. Let me show you these sparkling gems before I talk your ear off.


1


2


3


Shimmer Polish Valerie (Sation Heather)


4


5


6


 Shimmer Polish Sarah (Sation RV There Yet?)


7


8


9


Shimmer Polish Kim (Sation Board Girl Blue)


10


11


12


 Shimmer Polish Alice (Sation Strumming My Nails)

Aren’t these gorgeous combinations? It pained me to remove them as I moved from swatch to swatch because they were all just so glittery and decadent. What is your preferred method for wearing glitterbombs? Do you layer them on top of colored bases like I did or do you just jump in full force and wear them alone? Do you have a favorite Shimmer Polish? Let me know!

For news on Shimmer Polish and to keep up with all the gorgeous beauties that Cindy creates, don’t forget to follow her on all of her social media sites:

Website: http://www.shimmyshimmer.com/

Facebook: https://www.facebook.com/ShimmerPolish

Twitter: https://twitter.com/ShimmerPolish

Etsy: http://www.etsy.com/shop/ShimmerPolish

I’ll be posting a couple more installments of these Shimmer Polishes in the coming weeks so I hope you enjoy the glitter overload. Thanks so much for stopping by today and have a great weekend!


Cacee BFF Nail Lacquer Sky

It’s Friday which means that I have made it through my first week at my new job! Woot! I am still in training and it really is tons of information to process, but things are starting to fall into place so I’m not feeling so overwhelmed anymore. I still haven’t worn nail polish to work yet, but I’ll probably start wearing it next week. After work today, I headed over to my nail polish places to see if they had anything new…and they didn’t. I hate it when I go in hoping that they have some new collection early so I can get the scoop but end up with nothing. Well, you know what nothing means to me: 5 polishes, some Seche Restore and a new brush for clean-up. One of the polishes I picked up is what I decided to try out tonight: Cacee BFF Nail Lacquer Sky.

Cacee BFF Nail Lacquer Sky

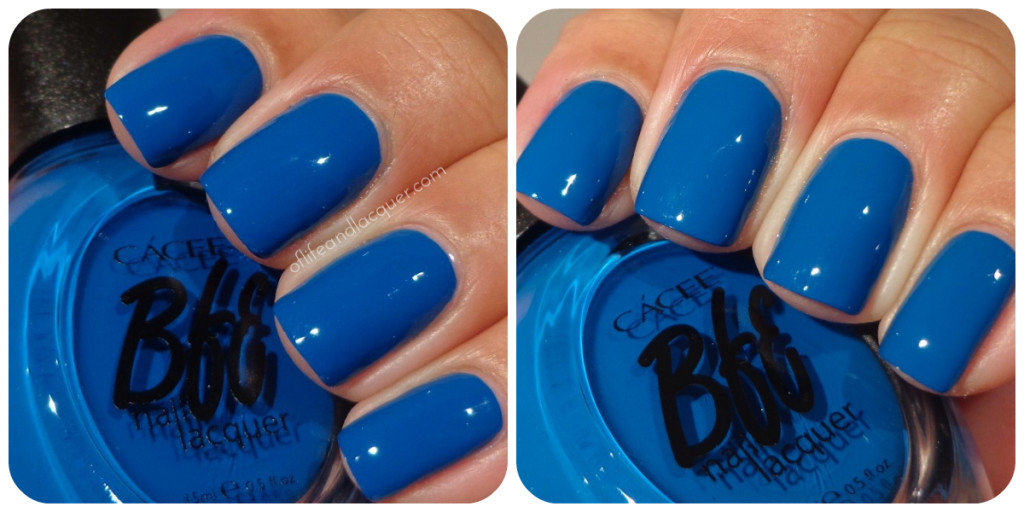
Sky seems like a run of the mill vibrant blue but beejus the formula is great! This beauty is so incredibly pigmented, and I was very sorry when I got it on my cuticles because it was a biatch to remove.

collage2

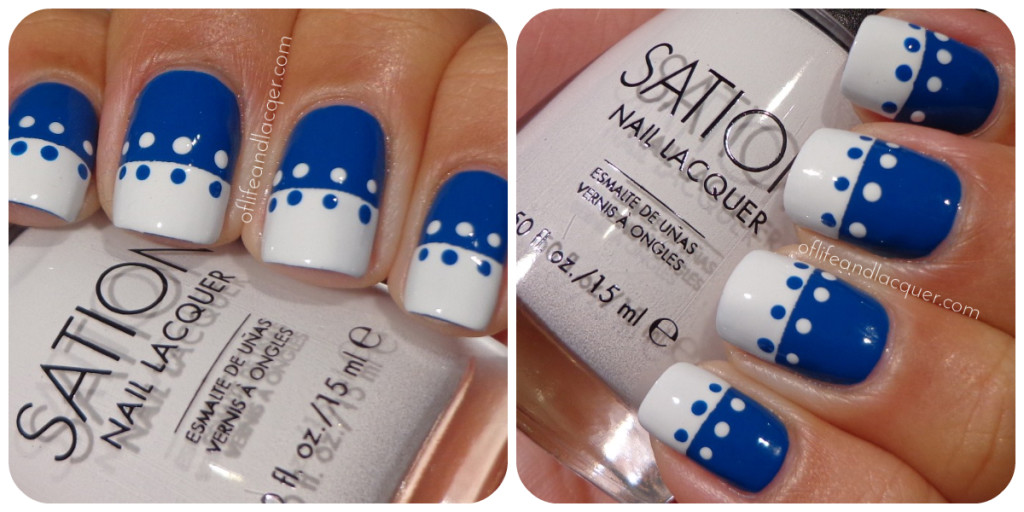
For this design, I used Sation Strumming My Nails to paint the tip of my nails white and for the white dotting. I’ve mentioned Strumming My Nails before and I can’t believe that I haven’t done a proper mani with it to show you just how amazing this polish is. It’s not a pure white–it has some grey tones which I looooooove. Even better, this polish is almost a one-coater! These nails are a direct copy of the mani that Siobhan has on her blog’s banner. Every time I would see that picture, I immediately wanted to copy it and I finally did!

I’m not that talk-y tonight. I should have posted this hours ago, but I got sucked into watching puppy videos on youtube for hours. I’m not kidding…HOURS. It was sooooooo worth it! Thanks for stopping by today. I have a new Spring collection to share with you this weekend so don’t forget to check in. Talk to you later!


Disclosure: Sation Strumming My Nails was provided to me by the manufacturer or their PR firm.  All other products featured in this post were purchased by me.  For more information, please see my disclosure policy tab here.


On ne voit bien qu’avec le cœur…

The very first book in French that I ever read is Antoine de Saint-Exupéry’s Le Petit Prince. I was 14 years old and my French teacher was trying to slowly introduce us into reading something a little more complicated than our grammar books.  If you’ve never read this deceptively simple little book, I strongly recommend that you go out and get yourself a copy. Although it is a “children’s book,” it speaks to us adults on a different level. Even the most jaded and hardened amongst us will see that the story and ideas behind The Little Prince will remind us that too often we let ourselves get wrapped up in things that don’t really matter in the grand scheme of things. Sometimes the most simple of things are truly the most important. Before I show you my mani, here are the polishes and items I used to create my manicure:

1

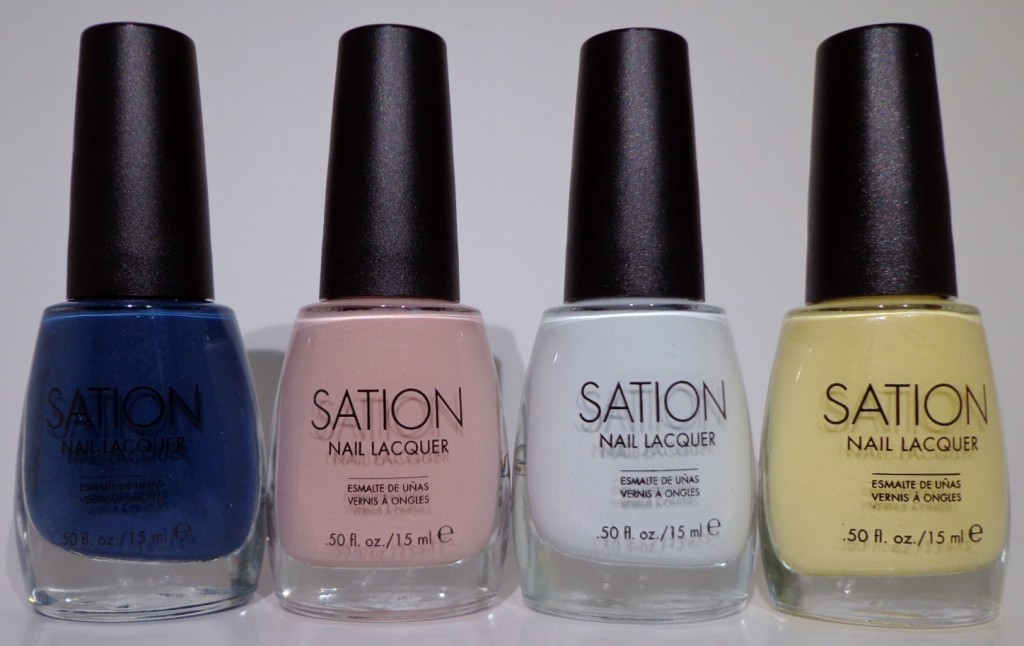
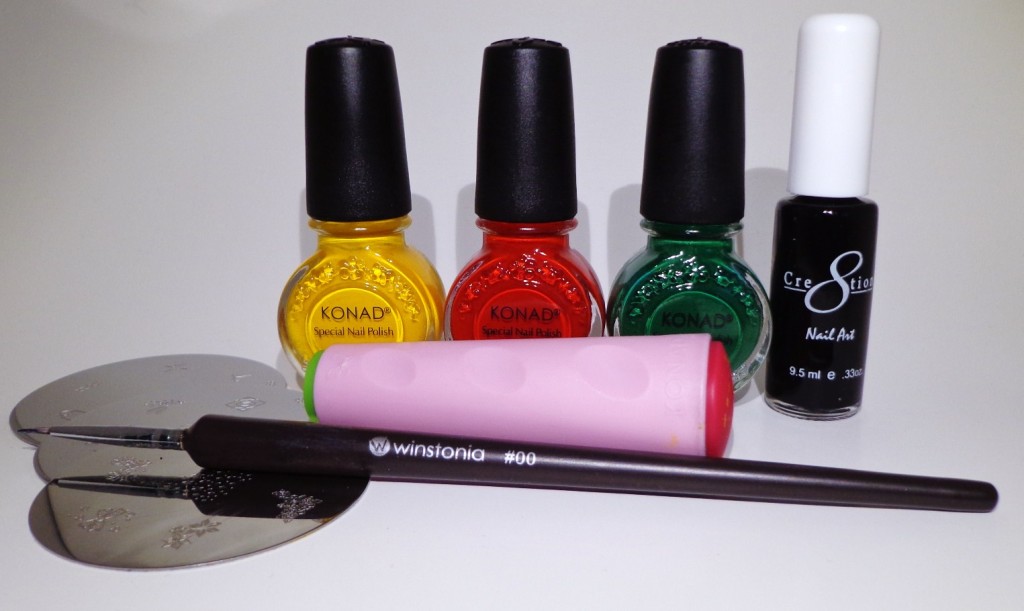
The polishes I used are all from Sation: Dance With The Drummer, Down and Dirty Flirty, Strumming My Nails and Lemon Pearl.  I am going to have to do a review of all of these polishes individually because they are gorgeous. I think I have found my new favorite white…it was seriously perfection.

2

I also used three stamping plates and Konad stamping polishes in yellow, red and green. I used the black stripping polish for the details in drawing The Little Prince as well as the Winstonia nail art brush. The plates I used are: Konad M84 for the stars, Mash 36 for the rose and Mash 33 for the shooting stars.

collage1

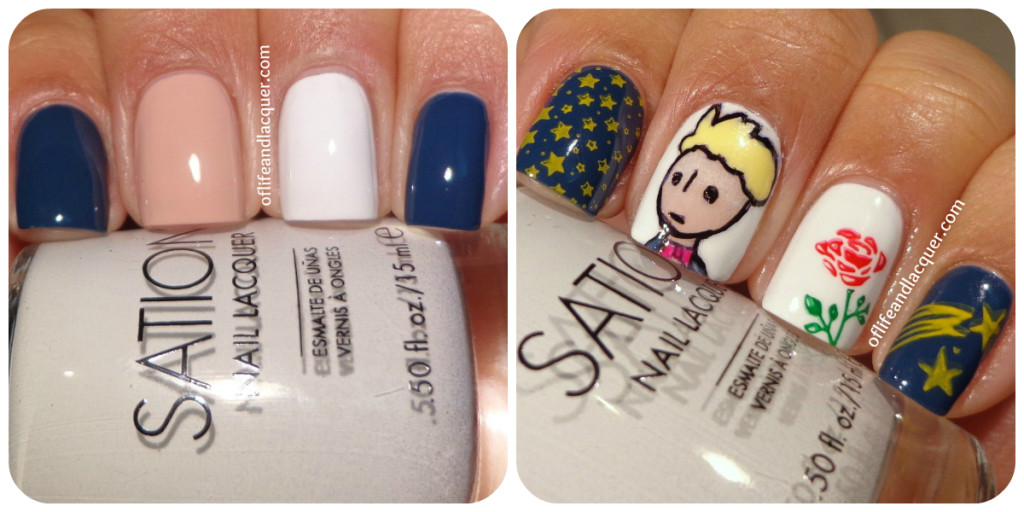
I started out by painting my nails with the base colors. As I said before, these colors are amazing–super buttery and smooth. Second, I stamped my three nails with the star designs and the rose before I moved on to my middle finger. I seriously redid that nail about 4 times–I just could not get The Little Prince to look right which kind of shocked me considering how simple the drawing is.

collage2

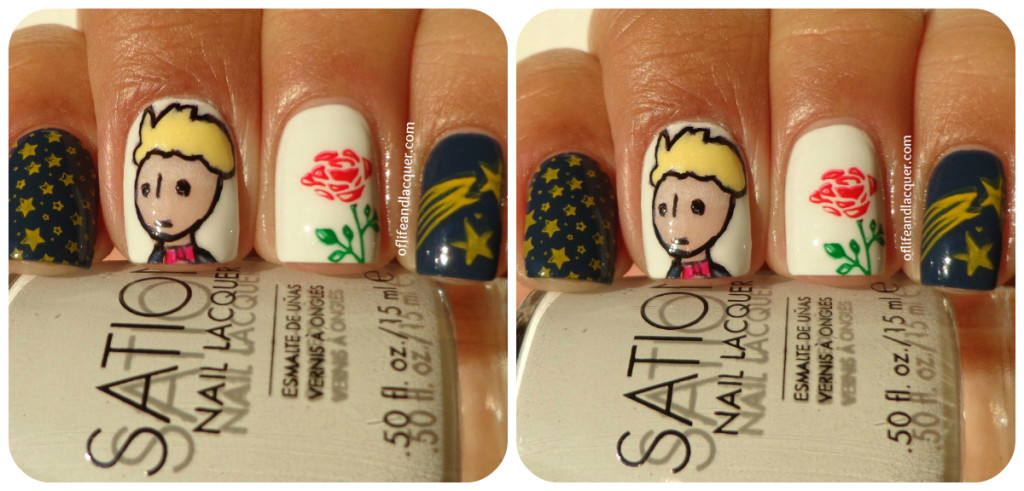
I took these pictures out in direct sunlight so the colors warmed up a bit, but I liked how they turned out nonetheless.  I think that out of all the manicures I have done over the past year, this is the one I am most proud of not only because of the cuteness factor but because I adore The Little Prince.

Let me know what you think about this mani…and it better be positive or else we’re going to have some problems. 😛 Just kidding…sort of. I’ve been in a very bad mood lately, and I think I just realized that it’s due to all the bottled up anger coming from the situation with the mooch. Have you read The Little Prince? Anyway…thanks for checking in with me today, and I will talk to you soon!

P.S. In case anyone was wondering, the title of this post comes from one of my favorite lines in this book: “Voici mon secret. Il est très simple: on ne voit bien qu’avec le cœur. L’essentiel est invisible pour les yeux.”

“Here is my secret. It is very simple: One sees clearly only with the heart. What is essential is invisible to the eye.”


Disclosure: All Sation polishes and the Winstonia Store brush were provided to me by the manufacturer or their PR. All other products featured in this post were purchased by me.  For more information, please refer to my disclosure policy tab.