How you doin’? Yes, I said that in my best Joey Tribbiani voice sans the pervert tone. I’m not up to much, just working and living, living and working. I am gearing up to starting my gym stuff. I know that I’ve been saying this forever but now that it’s been a couple of weeks since my mom’s surgery, she is doing a bit better and now I don’t have to be worrying about her needs 24/7. This weekend I’m going to purchase a few sets of workout clothes, and I’ll see if I need more once I get going. Today I have a beautiful and vampy shade to share with you. I have always been a fan of dark and saturated colors so it’s no wonder I like this one. Le me show you some swatches of Sally Hansen Miracle Gel V-Amplified. Continue reading “Sally Hansen Miracle Gel V-Amplified”
Category: Nail Art

Incoco Coconut Nail Art
Hey there! How’s it going today and thanks so much for stopping by my little corner of the nail interwebs. I feel like I’ve gotten so lazy lately; not just with my blog but with life in general. What can do you do to get yourself motivated? I feel that working from home makes it very easy to not want to do stuff because I basically move from my bed to my desk to the couch and finally back to bed. Now, if I were a smart person, I would use the time I save from not having to commute to go to the gym or something active. Since the weather has been nice here, with the exception of some windy days that make my allergies act up, I have no excuses to not get out. And since I’m speaking about being lazy what better way is there to talk to you about Incoco Coconut Nail Art . Badam tssss! Ok, ok, I don’t really consider this lazy nail art, but it is convenient and fast. Let me show you a few patterns below. Continue reading “Incoco Coconut Nail Art”
OPI Purple Gradient + Stamping
I really don’t know why I find the most simple nail art techniques extremely challenging. I remember seeing The Nailasaurus’ gradient nail tutorial a million years ago and thinking that it looked fairly easy. I was excited to try it out…until I wasn’t. It turned out to be super difficult for me to get a decent gradient so I basically gave up…not to mention that it was crazy messy. Well, I think times have changed because I now feel more confident after implementing a few tricks. Today I decided to do an OPI purple gradient (yay to my favorite color!) with some stamping. This was also an idea I put into practice because purple is the color of the month over at the OPI Mad Love Facebook Group, and I wanted to create something fun for the group. So let’s start with the messfest! Continue reading “OPI Purple Gradient + Stamping”
Drip Marble Nails
I know hat I’ve said that I am going to try to incorporate more nail art into my posts, but it’s so hard when you’re a nail art dunce like me. I can paint my nails with my eyes closed, but when it comes to even the simplest of nail art techniques, I have to practice and practice and then practice some more. While I have seen drip marble nails all over the interwebs, I have never actually attempted the technique myself. When I started seeing Tiffany from Polish and Paws do some gorgeous drip marble manis, I decided to give it a try. Let me show you how my first attempt turned out. Continue reading “Drip Marble Nails”
Inspired By: Daisy Print
Today Amy and I have something fun for you: we are doing twin manis inspired by an image and we used the Sea Glass Holo Trio from Seventy Seven Nail Lacquer. We both purchased this trio over the 4th of July weekend, and I’m glad to report that I enabled her to get it. I’ve been doing a lot of that lately, and to be honest I don’t know if that is good or bad. Regardless, we are taking this opportunity to do something fun on our blogs. Let me show you the image that we used as our starting point:
 Cute, huh? I could not believe how well this image paired with the three polishes that we are working with. I’ll have swatches of the individual polishes for you tomorrow, so for now this is what I came up with:
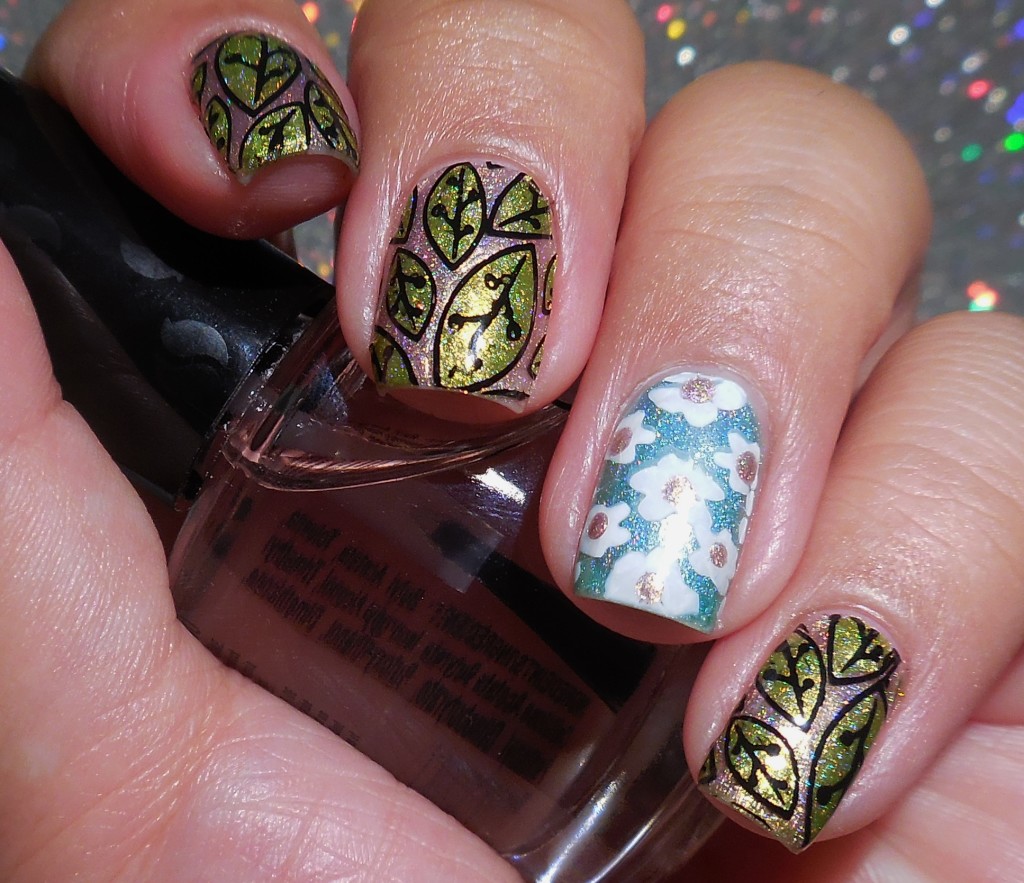
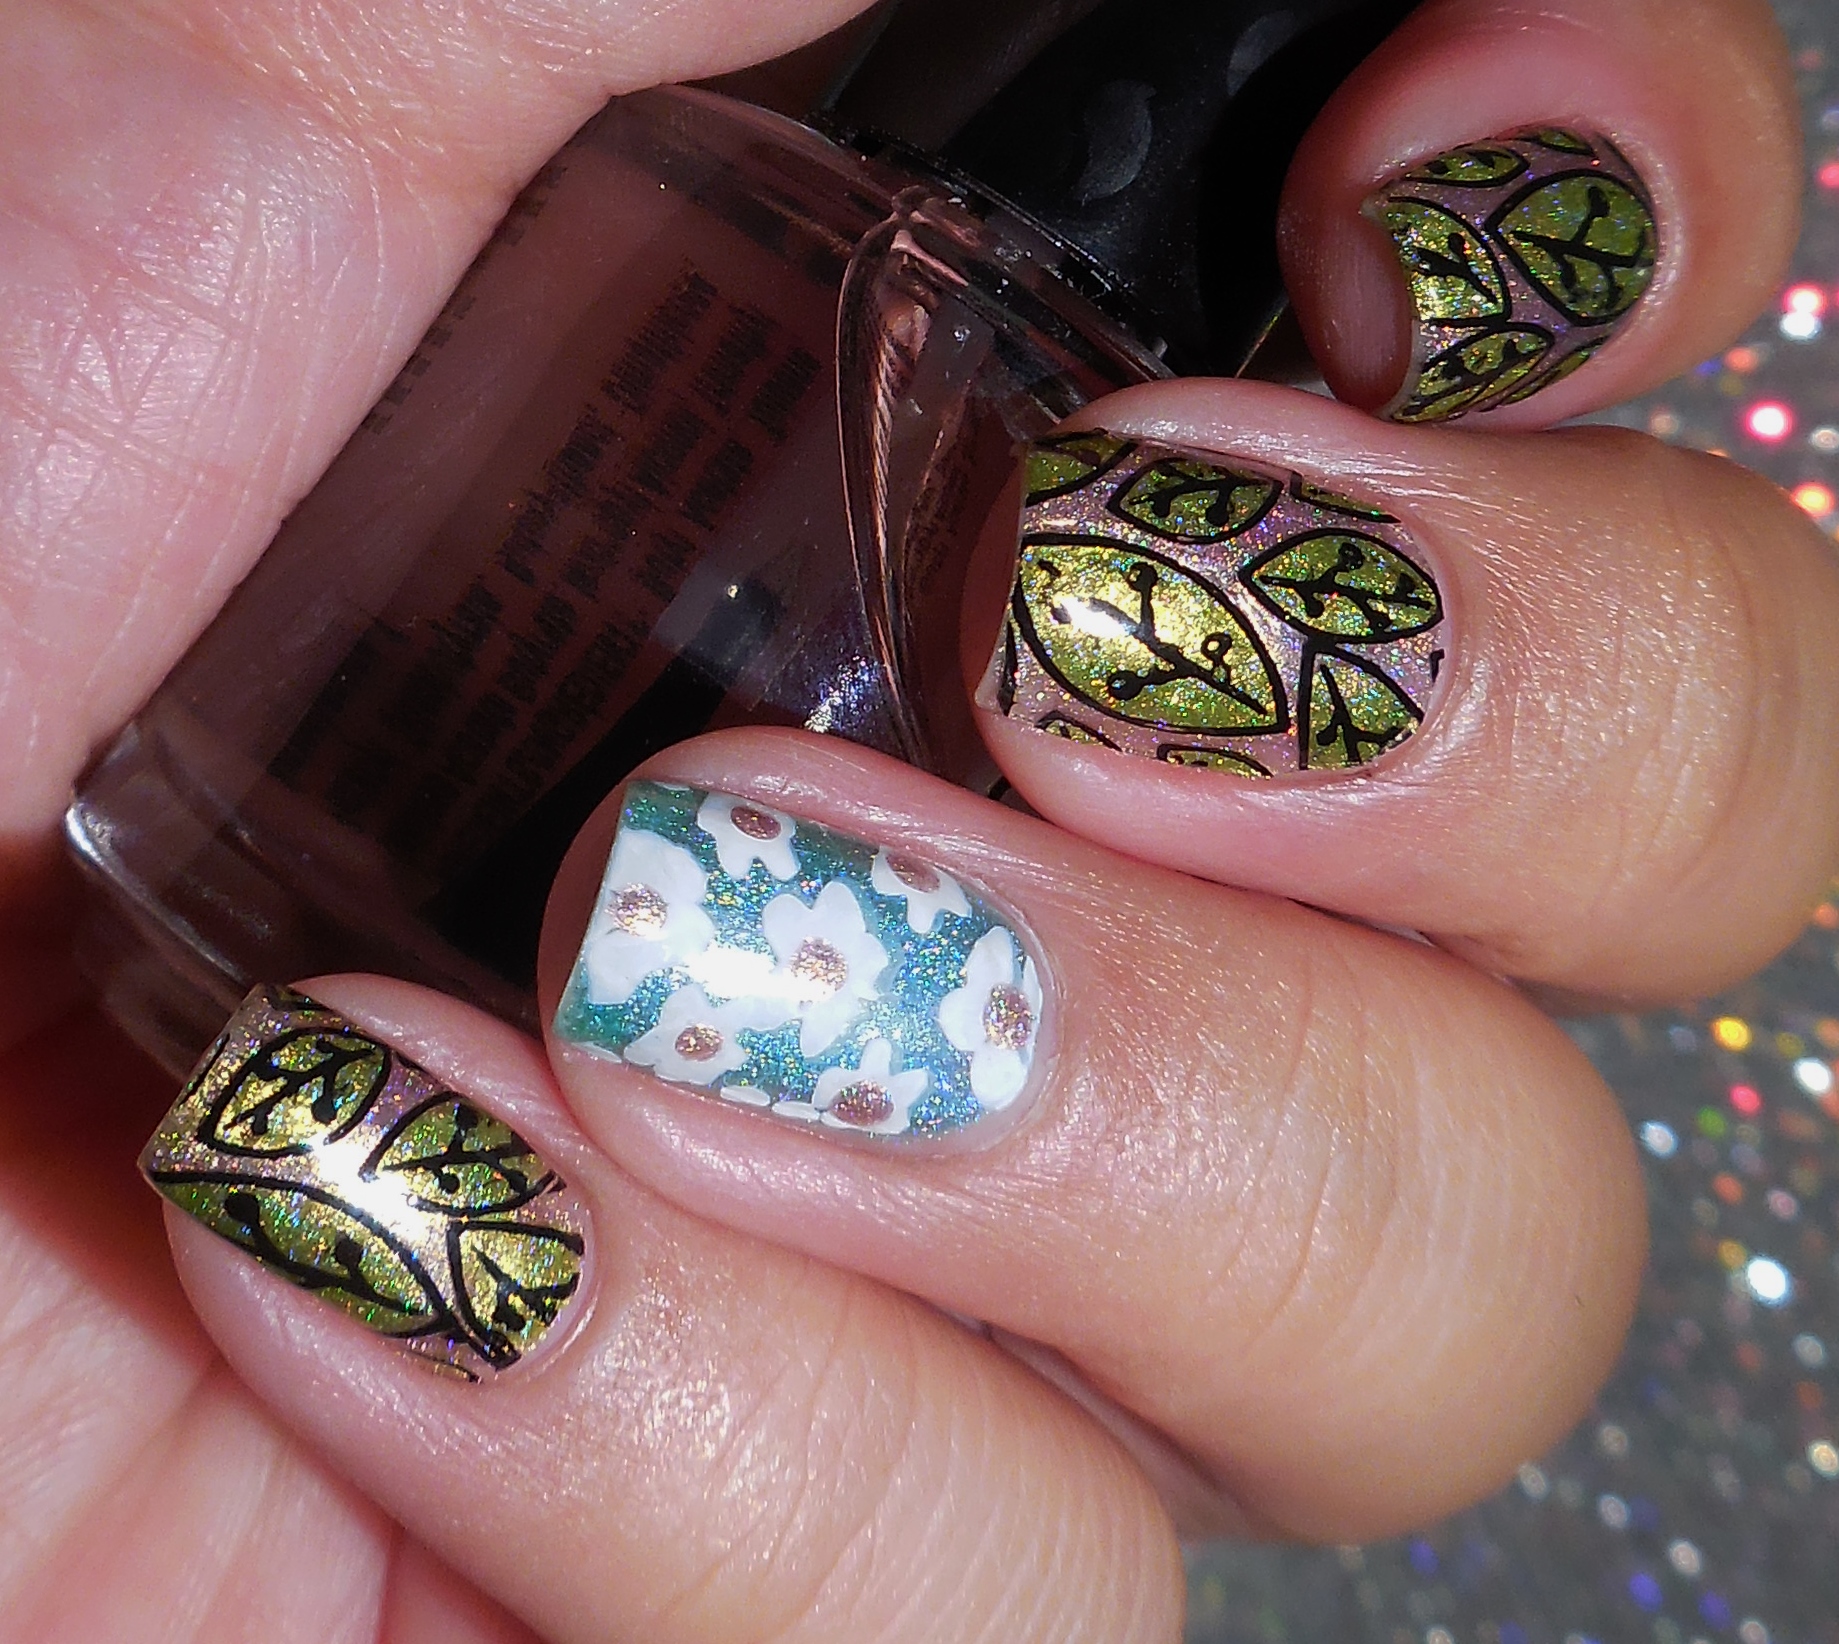
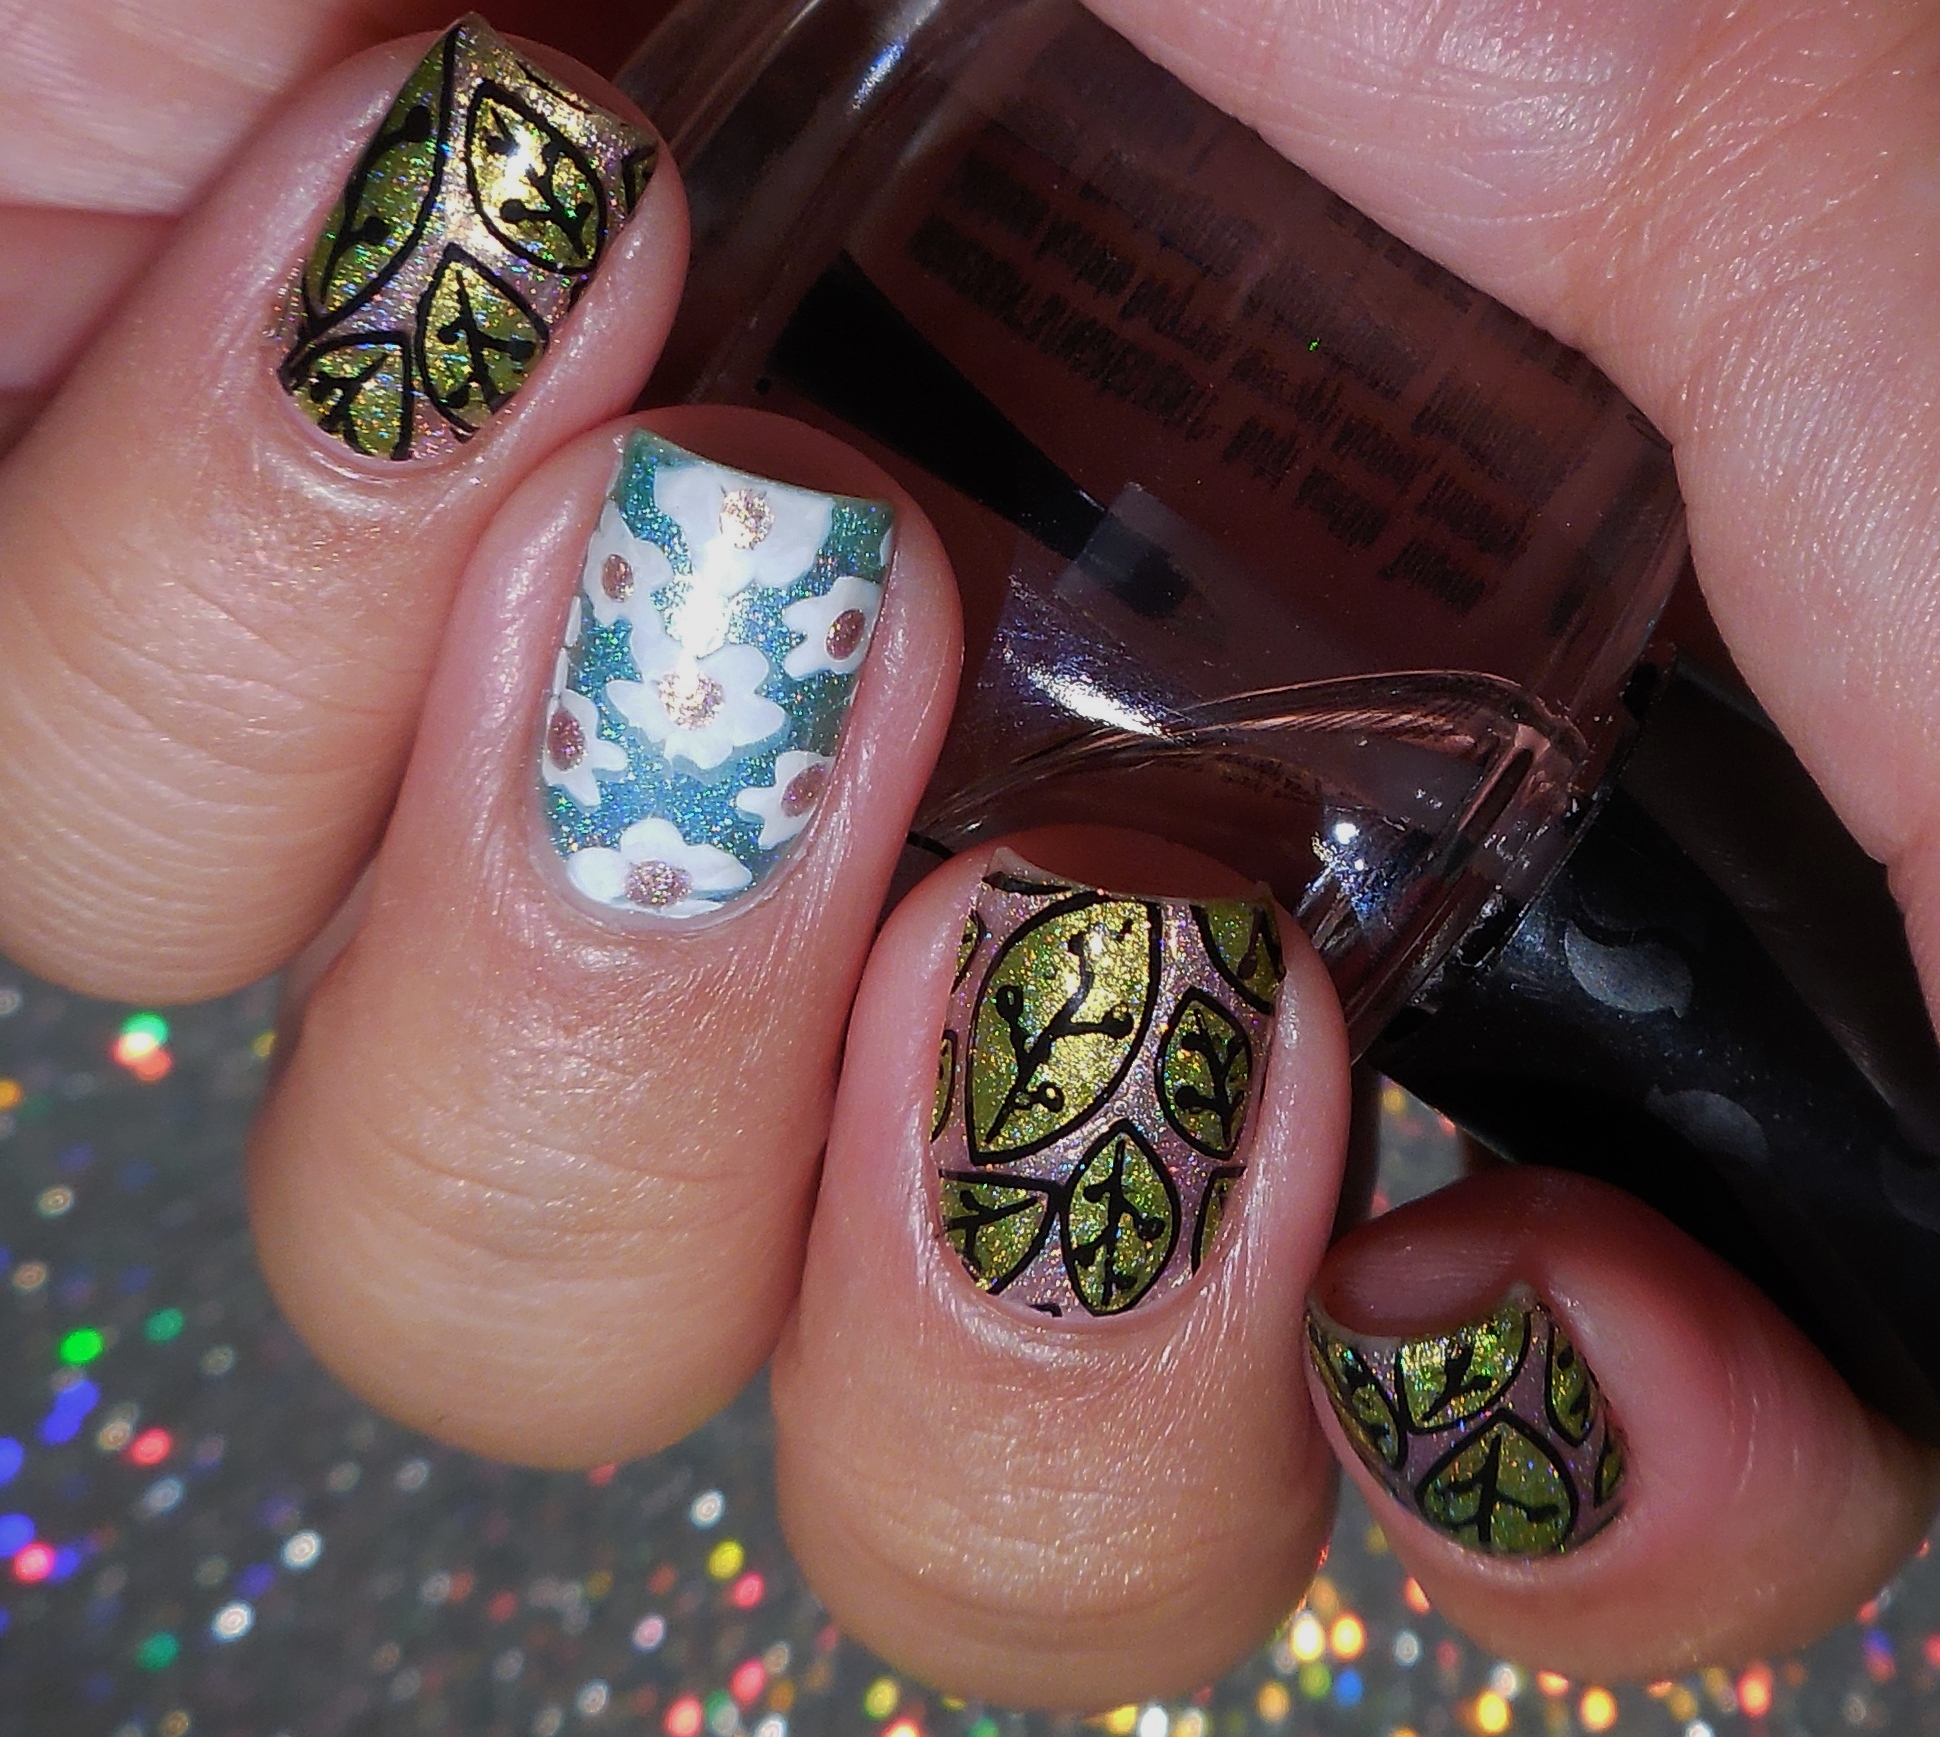 This ended up being more time consuming than I had anticipated because I made decals for the leaf design. Normally I hate working with decals, but I think it actually worked out well here even if they took forever and a half to make and apply. You know what sucks about doing complicated manis where you’re a blogger? You don’t get to wear anything for long. I literally did this mani and took it off after taking the pictures so I could get back to swatching. Womp womp. This seems a little too girly for my taste, but I do like the end result.
So what do you think? Do you like this mani? Don’t forget to check in tomorrow for a full review of the three polishes that I used today. Do you want to know how Amy interpreted this design? Head on over to The Fancy Side to see her mani. Thanks for stopping by today, and I will talk to you soon!
Watermarble Tips
I will be the first one to admit that I have a really hard time with different nail art techniques. I really started out as a swatcher, so that is what I am most comfortable with. However, I don’t want my blog and passion for nails to stagnate so I do try to do things that are outside of my comfort zone. Stamping was one of the first things that I tried so it became something that I have continued to enjoy because I find it easy and fun. Enter watermarble. I have been dealing with trying to watermarble for probably a year if not longer. I went through phases where I tried, gave up for a while, tried again and gave up again. It was just so frustrating because it seemed that no matter what I did, nothing worked. Finally, I am here to tell you that you can master this technique because if I can, anyone can! While there is no one technique that will guarantee success, I will be sharing with you what worked for me.
Water
You would never think that choosing the right water would make such a huge difference. There are people who will say that tap water works just fine or that you have to use distilled water. I’ve tried both and tap water never worked for me. I guess it could be that tap water differs from region to region, but distilled water is the only thing that has worked for me. The temperature of the water was also important because only room temperature water seemed to work well.
Polishes
Once you have the water issue figured out, you have to figure out what polishes work well for marbling. This is all about trial and error because not all polishes work well and some don’t work well together. Personally, the best polishes for marbling that I have used are OPI cremes. They spread well, are very pigmented and don’t dry too quickly. I’ve tried some cheaper polishes and they seem to dry out quickly. Certain holos and shimmers work very nicely as well, but to be honest, you just have to play around with polishes to see which ones will work best.
Creating your design
So you got the water right and your polishes spread nicely into rings. YAY! This is where my next womp womp moment occurred. I could not, for the life of me, get a nice even design. The easiest and most common design is the flower design where you drag your needle from the outside in and join the petals at the center. Well, I could not get this right. I figured out that my issue was that I was trying to drag from the outermost ring which was already beginning to set so I was breaking up the rings and just ruining everything. This might seem like common sense, but I was constantly messing up on this. I also wasn’t cleaning my needle/toothpick in between each drag so the excess polish on the tool wasn’t letting me create clean lines. Why must this be so hard???
The Big Dipper
You’re almost there, right? WRONG. Now you have to figure out how to dip your fingers into the design and not mess it up. I also managed to mess this up time and again. It’s easy enough to line up the design, but if you dip your fingers like a dumbass, you can get a big old mess. I also always got a billion air bubbles on my design which would then pop and ruin the design. The only solution for this, in my experience, is to dip your fingers at an angle and pull out your fingers very slowly.
After all this, why would anyone want to even bother with watermarbling? Well because when you get it right, it looks awesome. Let me show you what I did for my last watermarble.
 First you will want to paint your nails a solid color. White works well most of the time so I’ve used one of my favorite whites: Sation Strumming My Nails (press sample) which is a dupe for OPI MBSW. I think the formula on this one is slightly better than the OPI.
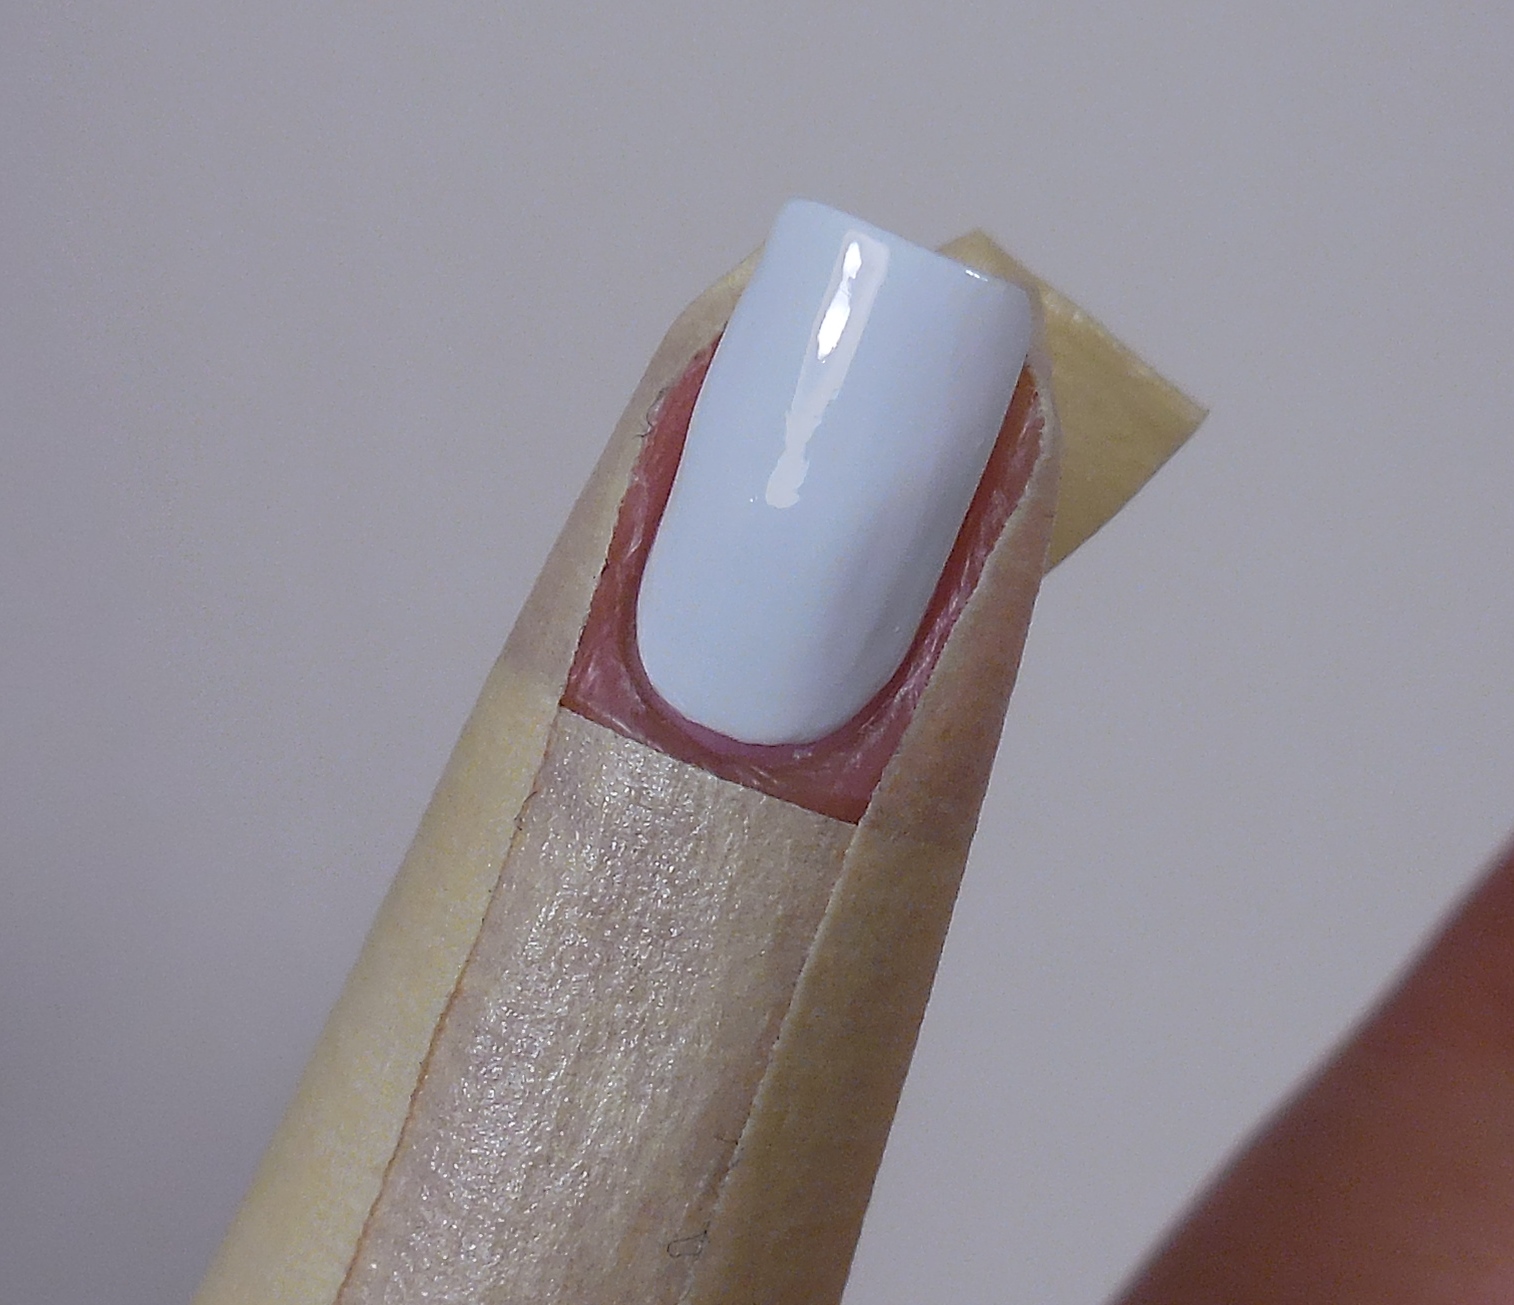 Then you are going to want to tape up your finger to protect your skin from all the mess. I also applied a little glue around my cuticle area that would still be exposed to make clean up easier–especially because the polishes I chose have a lot of shimmery particles.
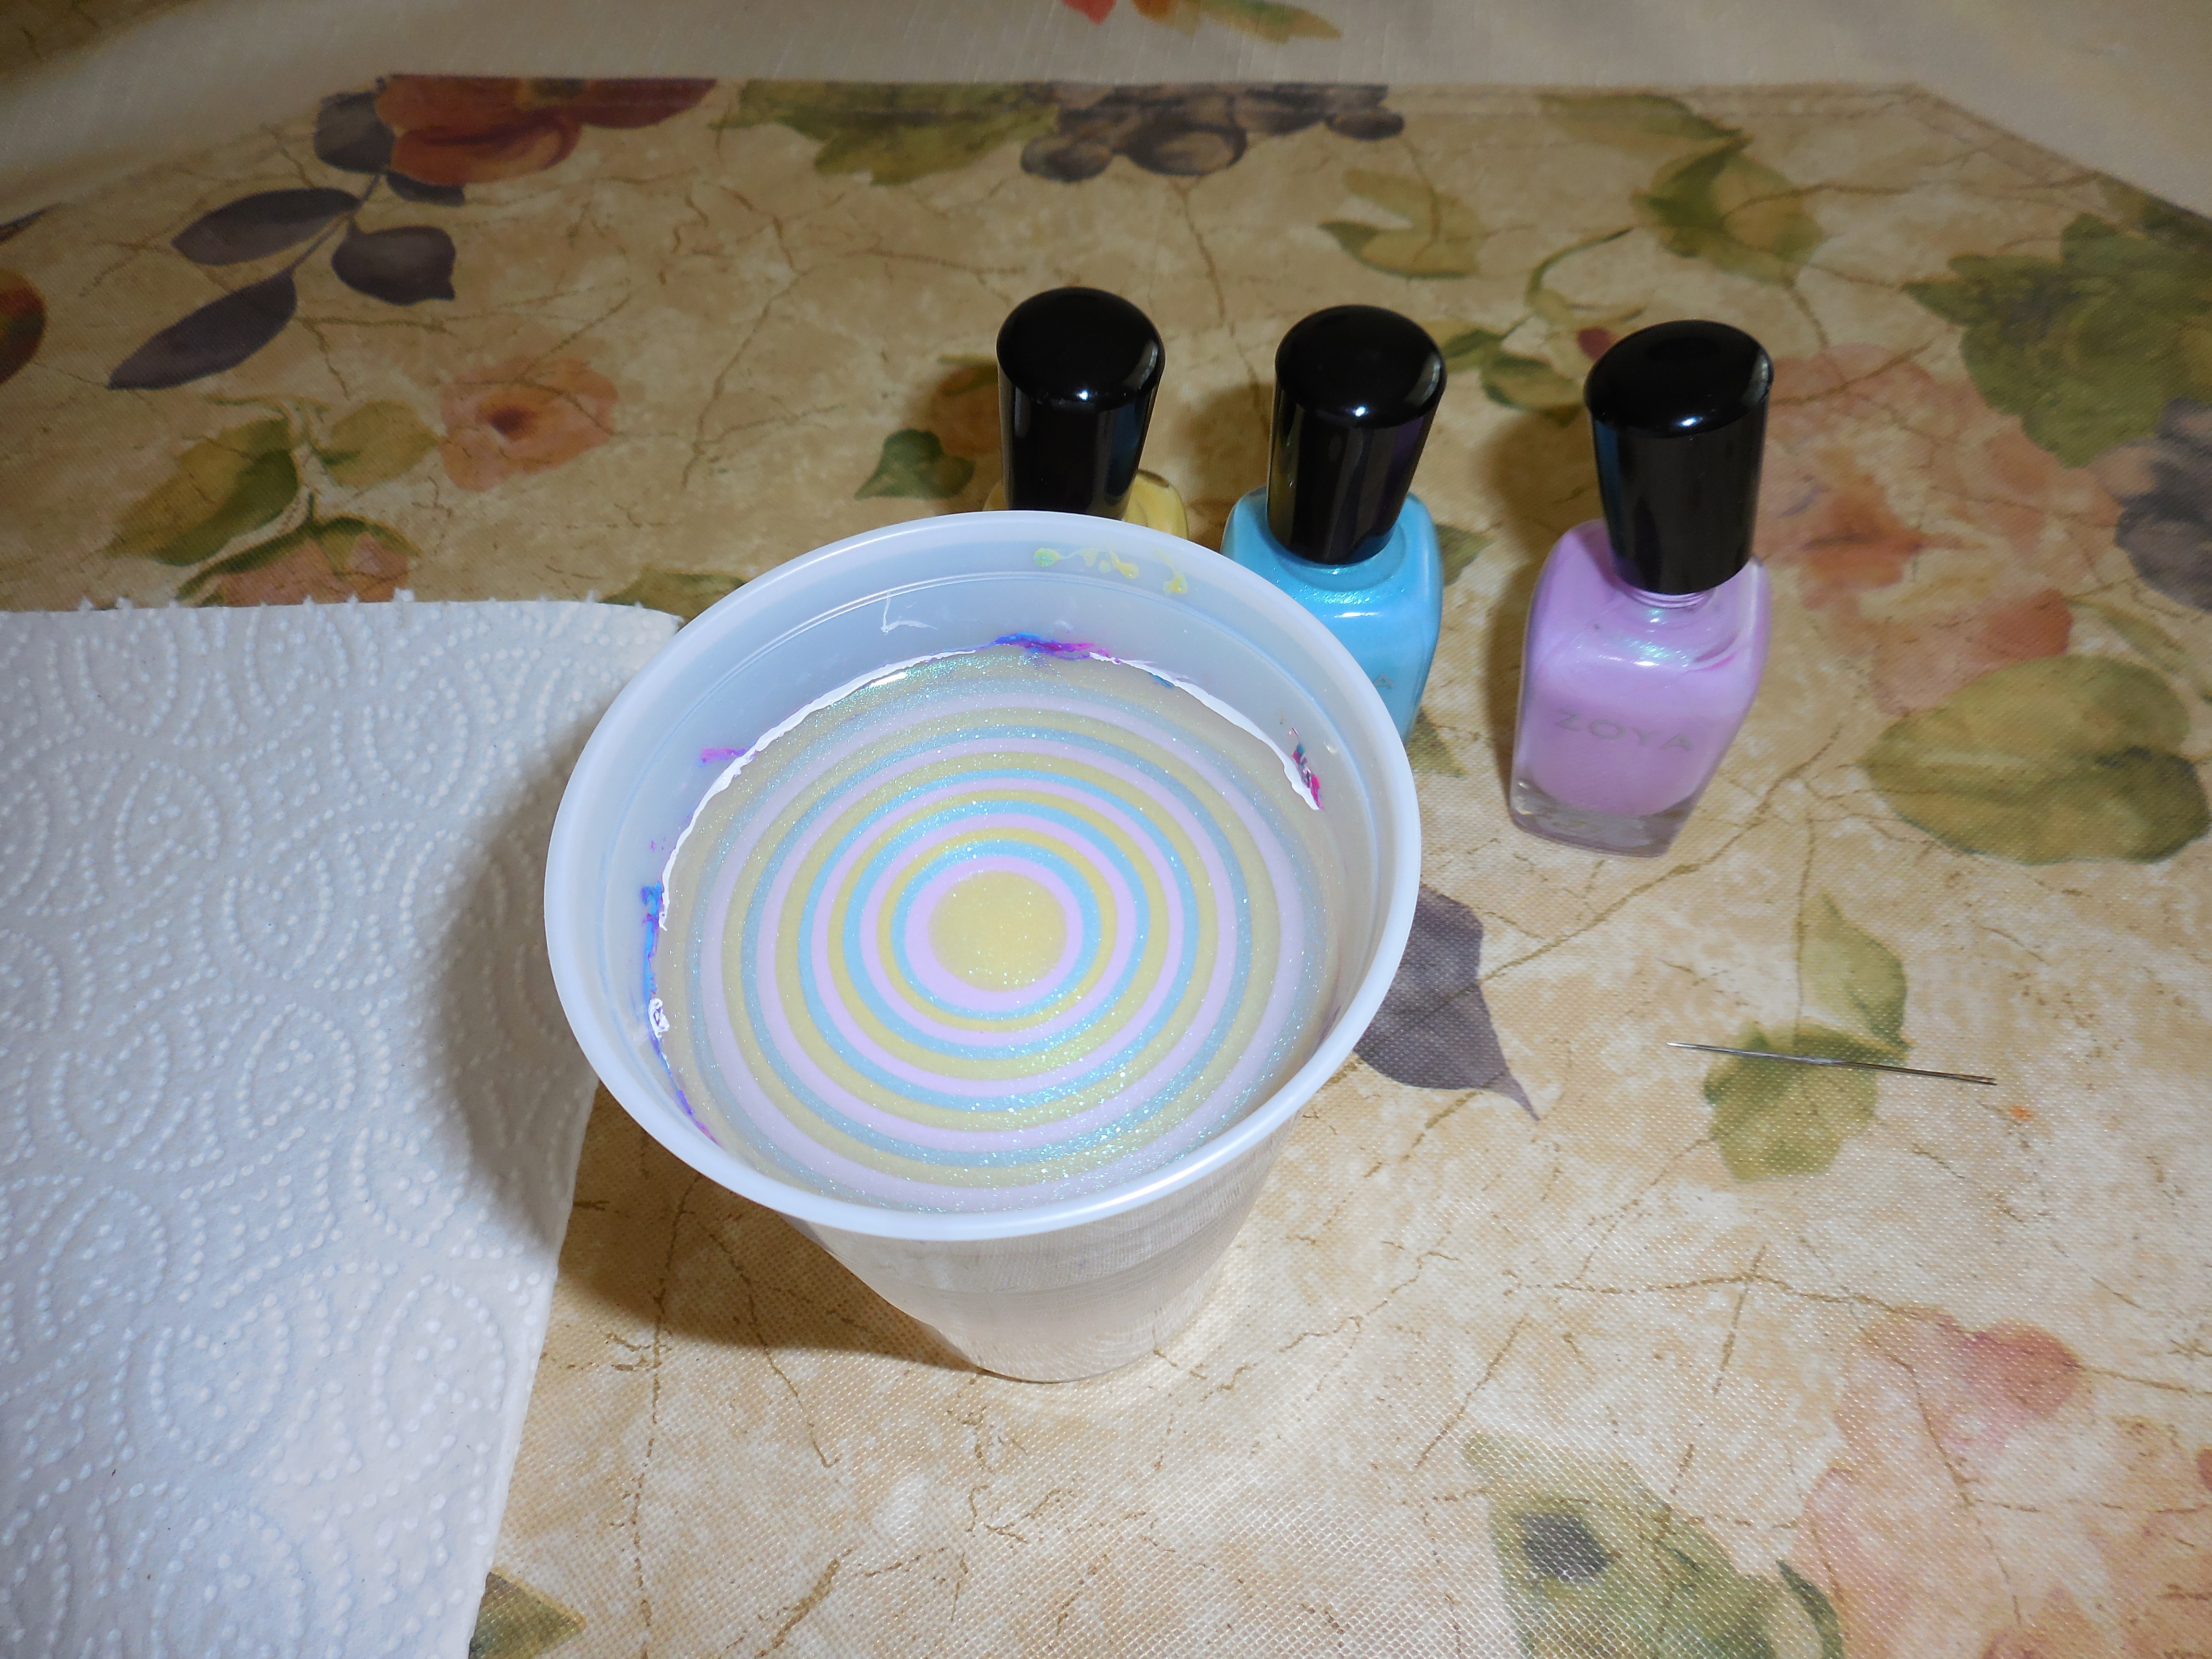 For this watermarble I used the three shimmers from the Zoya Delight Collection (press sample): Daisy, Leslie and Rayne which work beautifully. In fact, the cremes from this collection also work perfectly.
 Imagine if you didn’t tape up your finger…you would have all this polish on your skin.
 With the glue and tape, this is what my clean up job ended up being. Not bad, right?
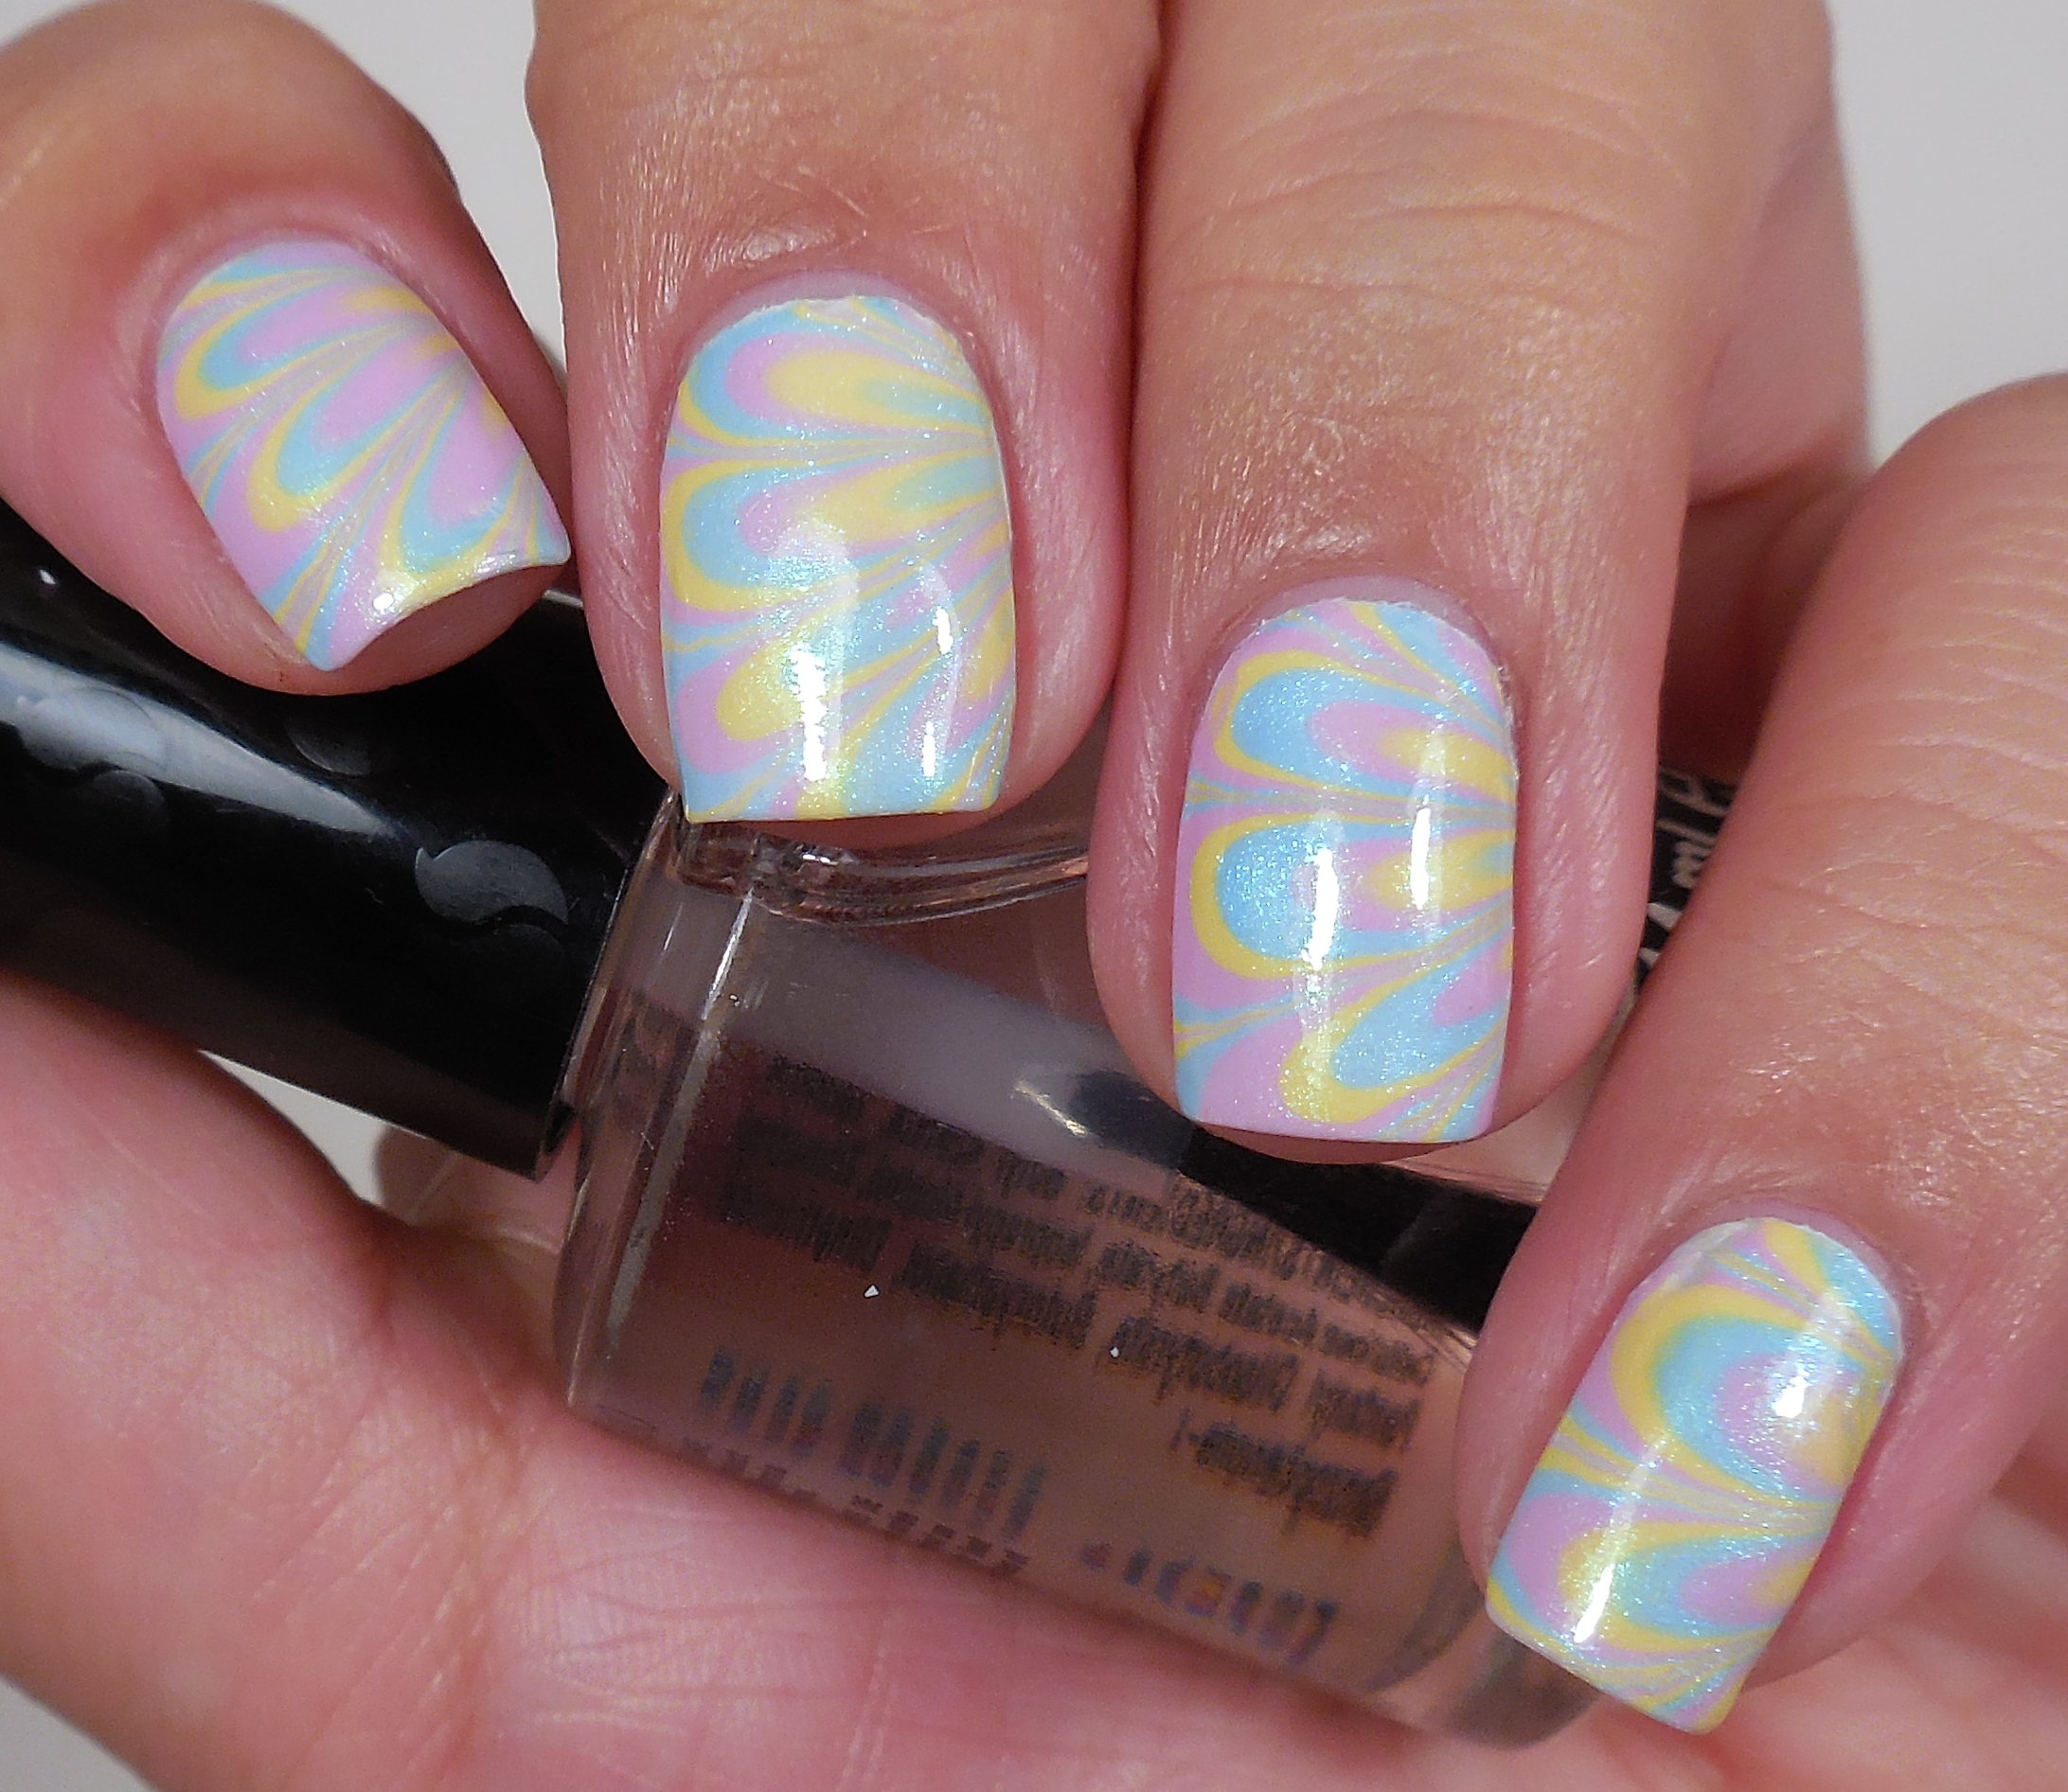
 And this is the finished mani after all the clean up was done. This looks like Easter exploded on my nails, but I think it looks pretty.
So do you think this technique is worth all the fuss? Do you have any other tips that might help others who are watermarble challenged? Thanks so much for stopping by today, and I will talk to you soon!
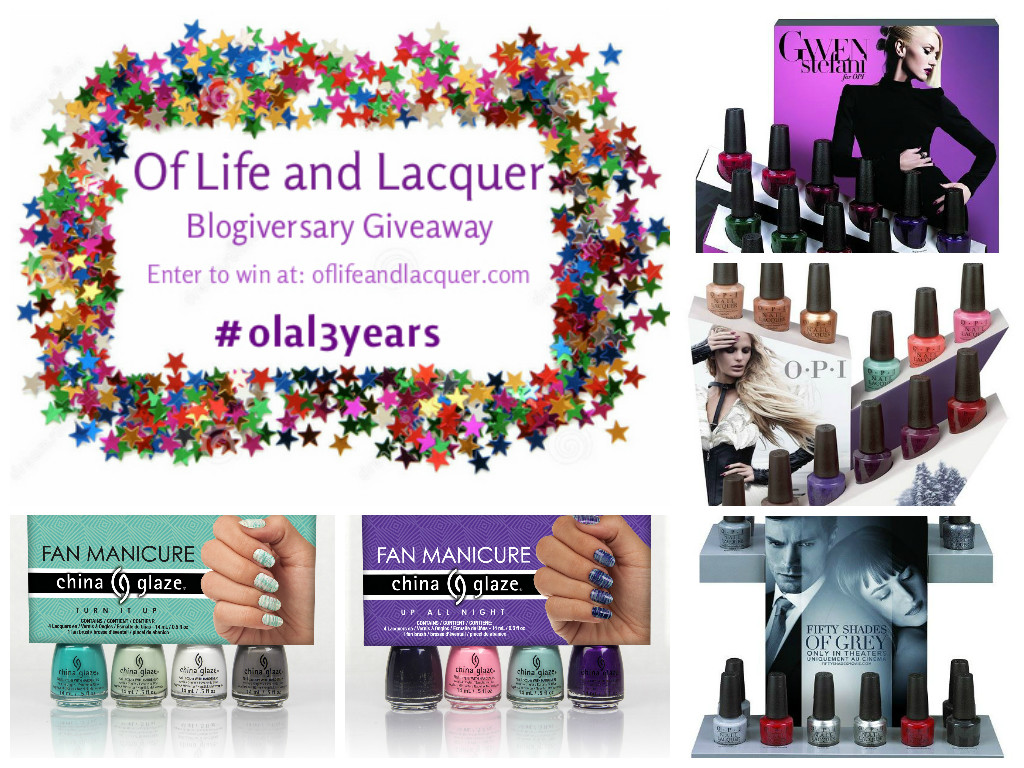
Have you entered my giveaway? Click the image below to enter!
Kilimanjaro
I’m going to tell you a story today. When I was in my late teens, I met one of my best friends in the whole world. We met the first day of college in 1997 (fuck we’re old) in French class. He walked in and I was reading a book. He asked me if this was French 200 and I looked up and said yes and went back to reading my book. Later on he told me he thought I was a total bitch. Hey, maybe I was but whatever–we became friends. In our early 20’s I got the idea what we absolutely had to climb Mt. Kilimanjaro and it seemed like a feasible idea since we were both working for Air France at that time. We made plans to go before our 30th birthdays, but then life happened and we never made it. We’re in our mid-30’s now and still talk about going, but I don’t see how that’s going to happen. Daniel hikes and does a lot of physical stuff while I’m terribly out of shape and can’t climb a few flight of stairs without getting tired. So what did I do when I couldn’t get to Kilimanjaro? I reached for Everest…yes, my Everest of nail techniques: watermarbling. I’m a swatcher at my core so “nail art” has never been my forte, but I try to do some creative things which is why I am so into the Stamping Saturday series. I’ve been trying to figure out watermarbling for the last year–no joke. Every time I have tried it, it has been such a hot mess that I get frustrated and forget about it for a couple of weeks until I get the idea to give it one more shot and end up with the same horrible results. This has been my routine for the last year–isn’t the definition of insanity doing the same thing over and over and expecting a different result? SHUT IT!! Anyway, something clicked last week. I did my first successful watermarble and documented it on Instagram:
After that experience I got a little cocky. I thought I was a watermarble queen and decided that I would now try to do the decal method since I hate the clean up that is involved in the traditional method even when using tape, glue, latex, etc… If you don’t know what I’m talking about, this is a video from Yagala on IG that shows the method in action:
Pretty amazing, right? Well, it started it out well enough for me anyway. I used three OPI polishes for my watermarble because I have found that they work really well for me. In fact, I haven’t found a single OPI creme that doesn’t watermarble beautifully. This was my decal after I pulled it out of the water and let it dry: 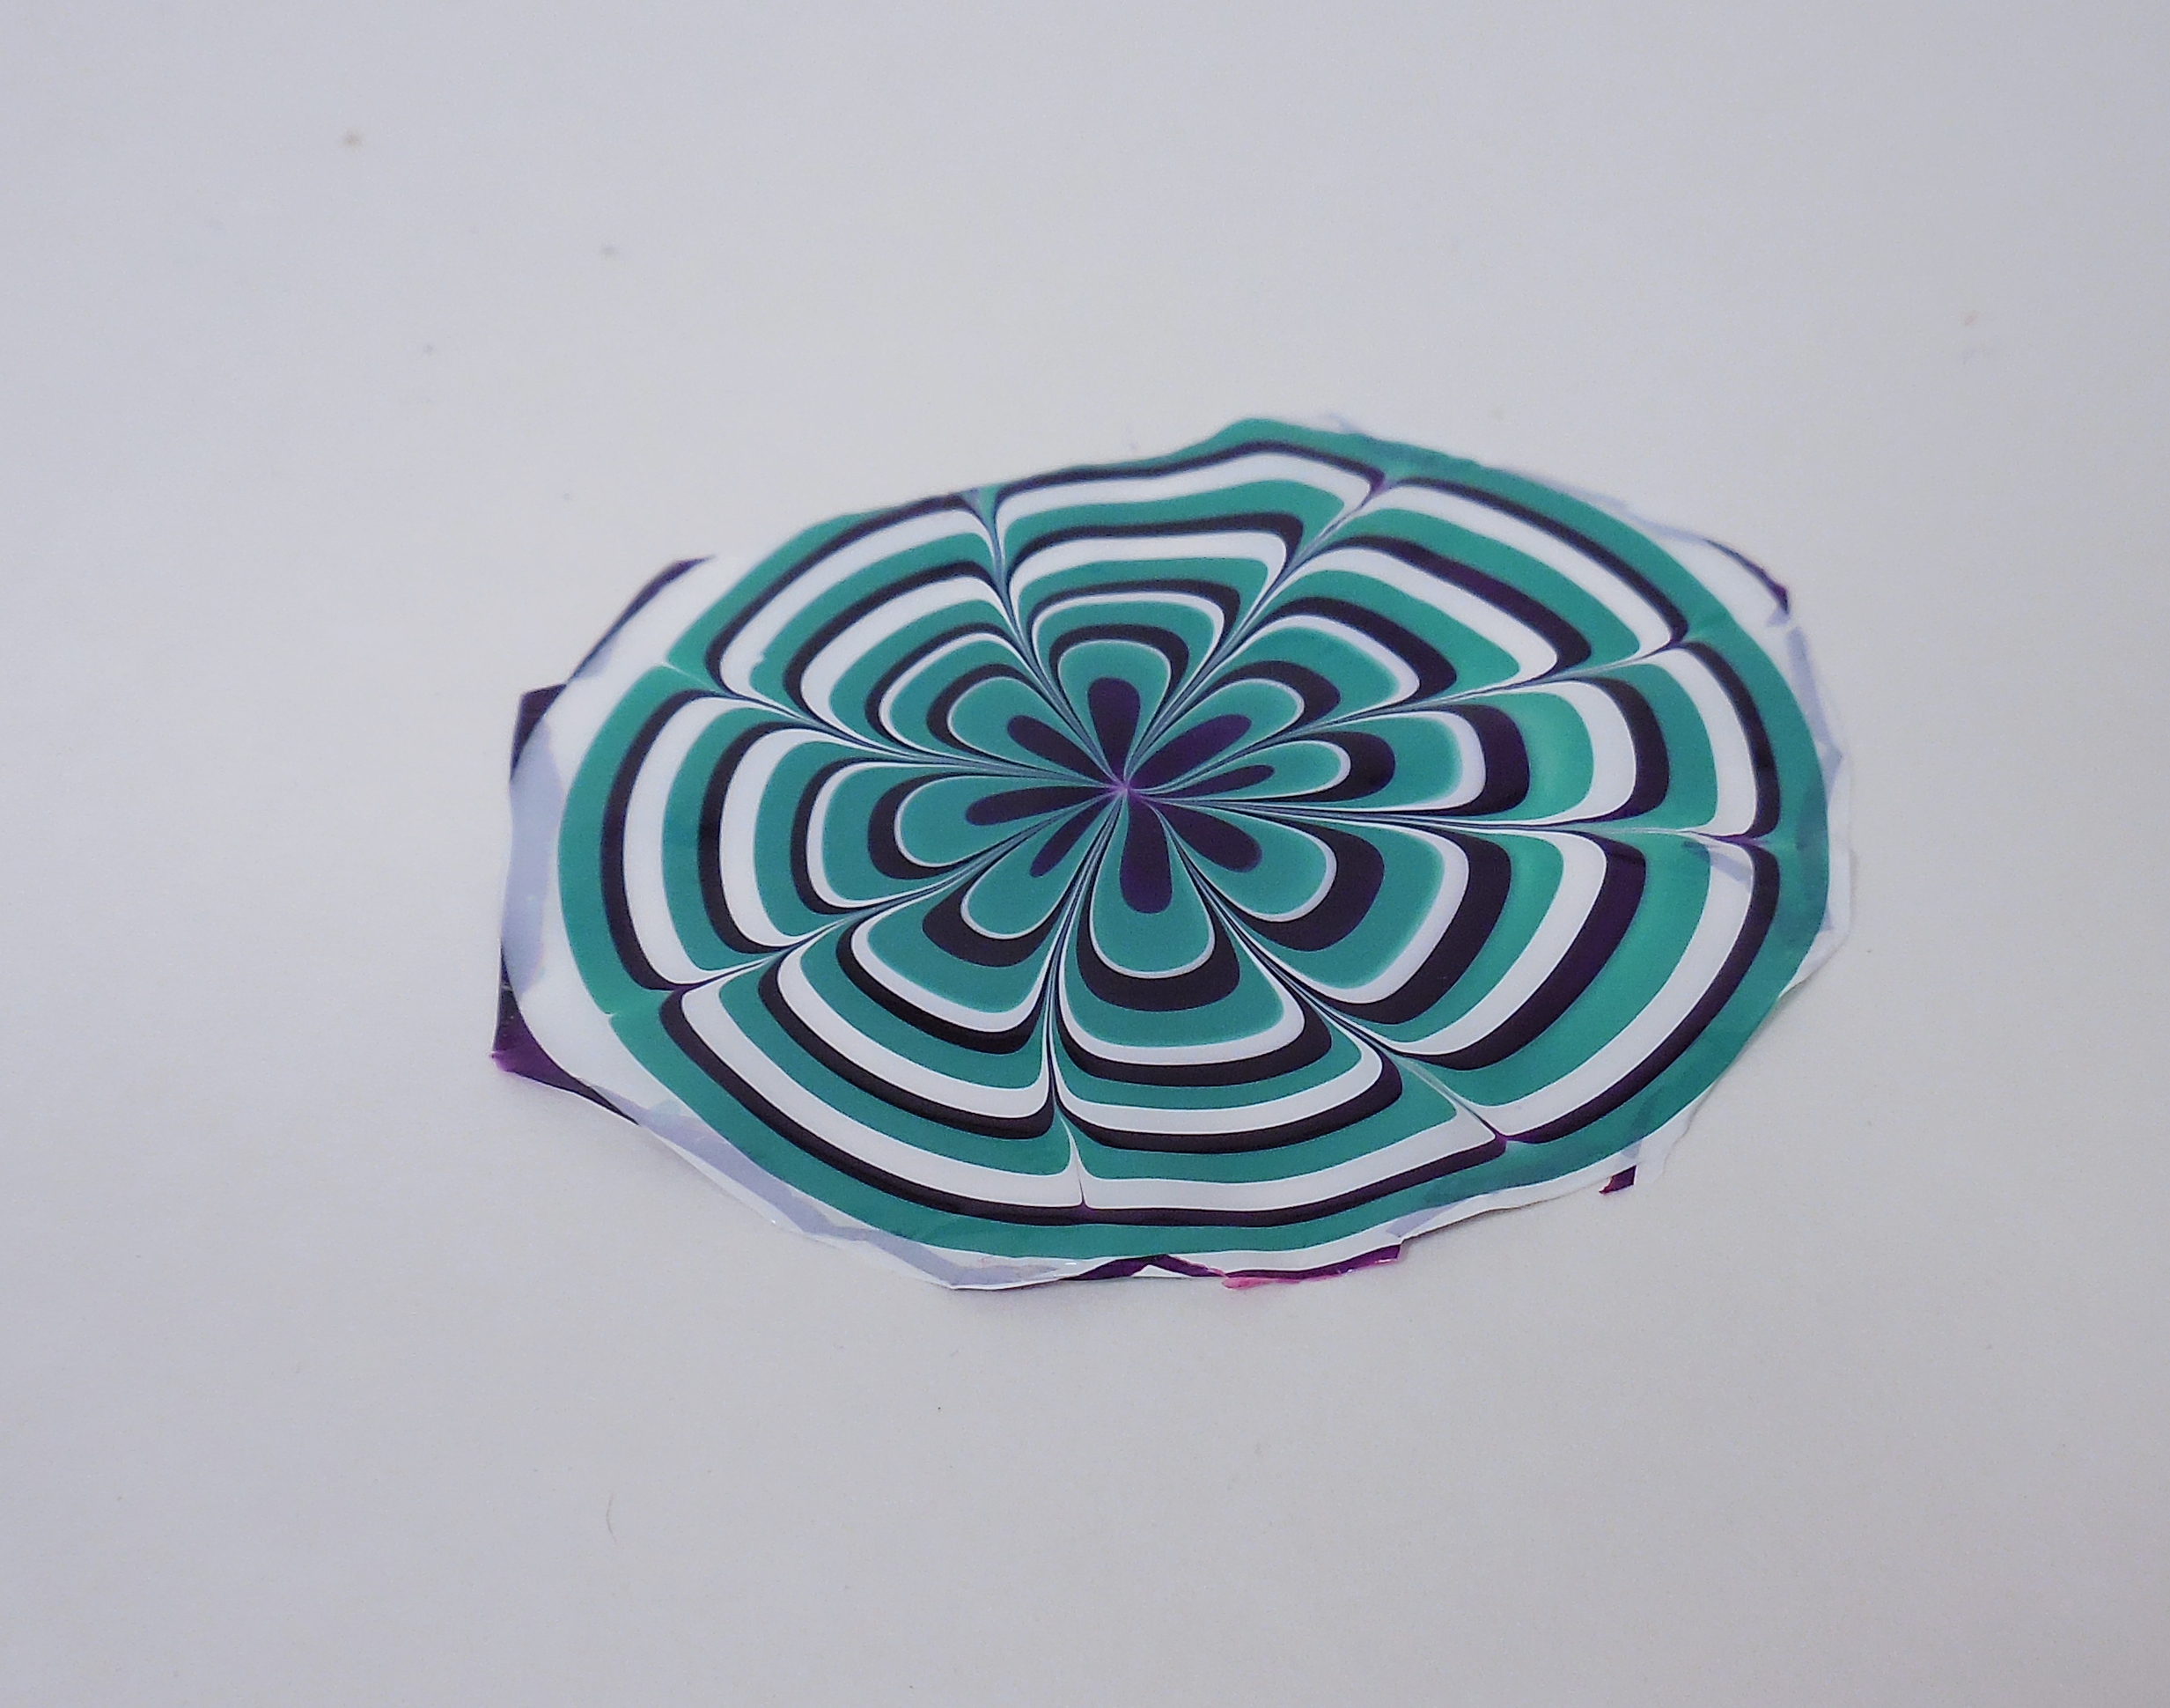 Pretty, right? Once I had my decal done, I basically cut it up into 4 pieces, painted my nails white, and lined up each piece on my nails while the polish was still tacky and kind of cut off the excess. After all that, I still had to do some minor clean up and then top coated everything with Seche Vite.
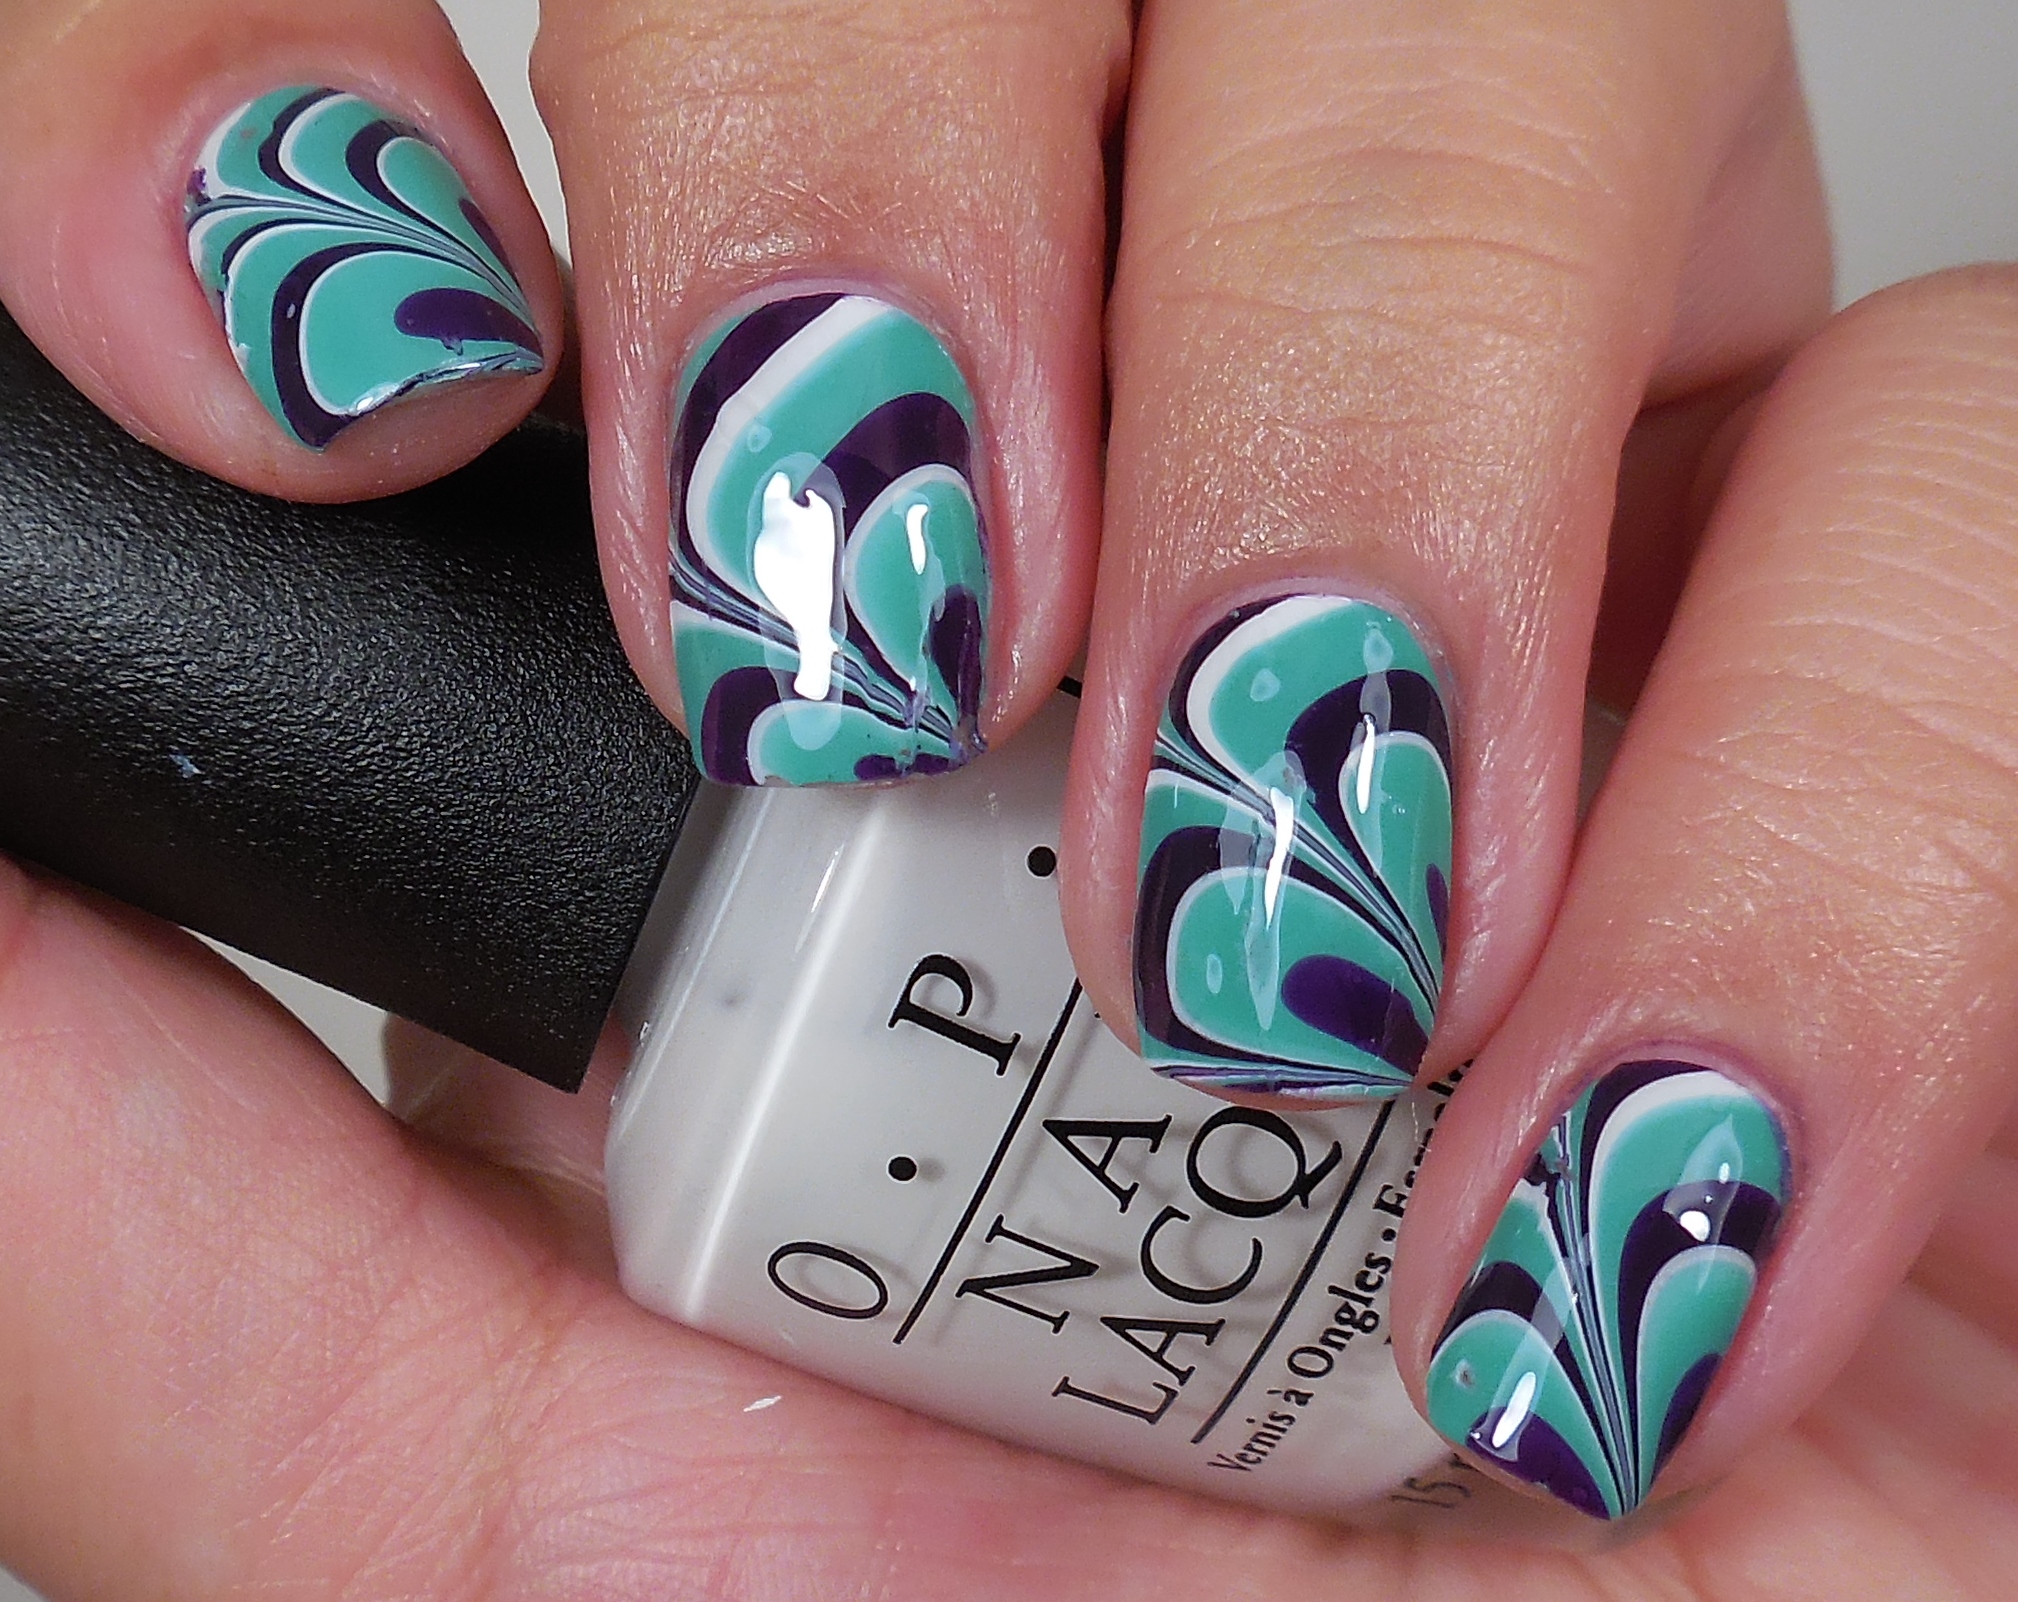
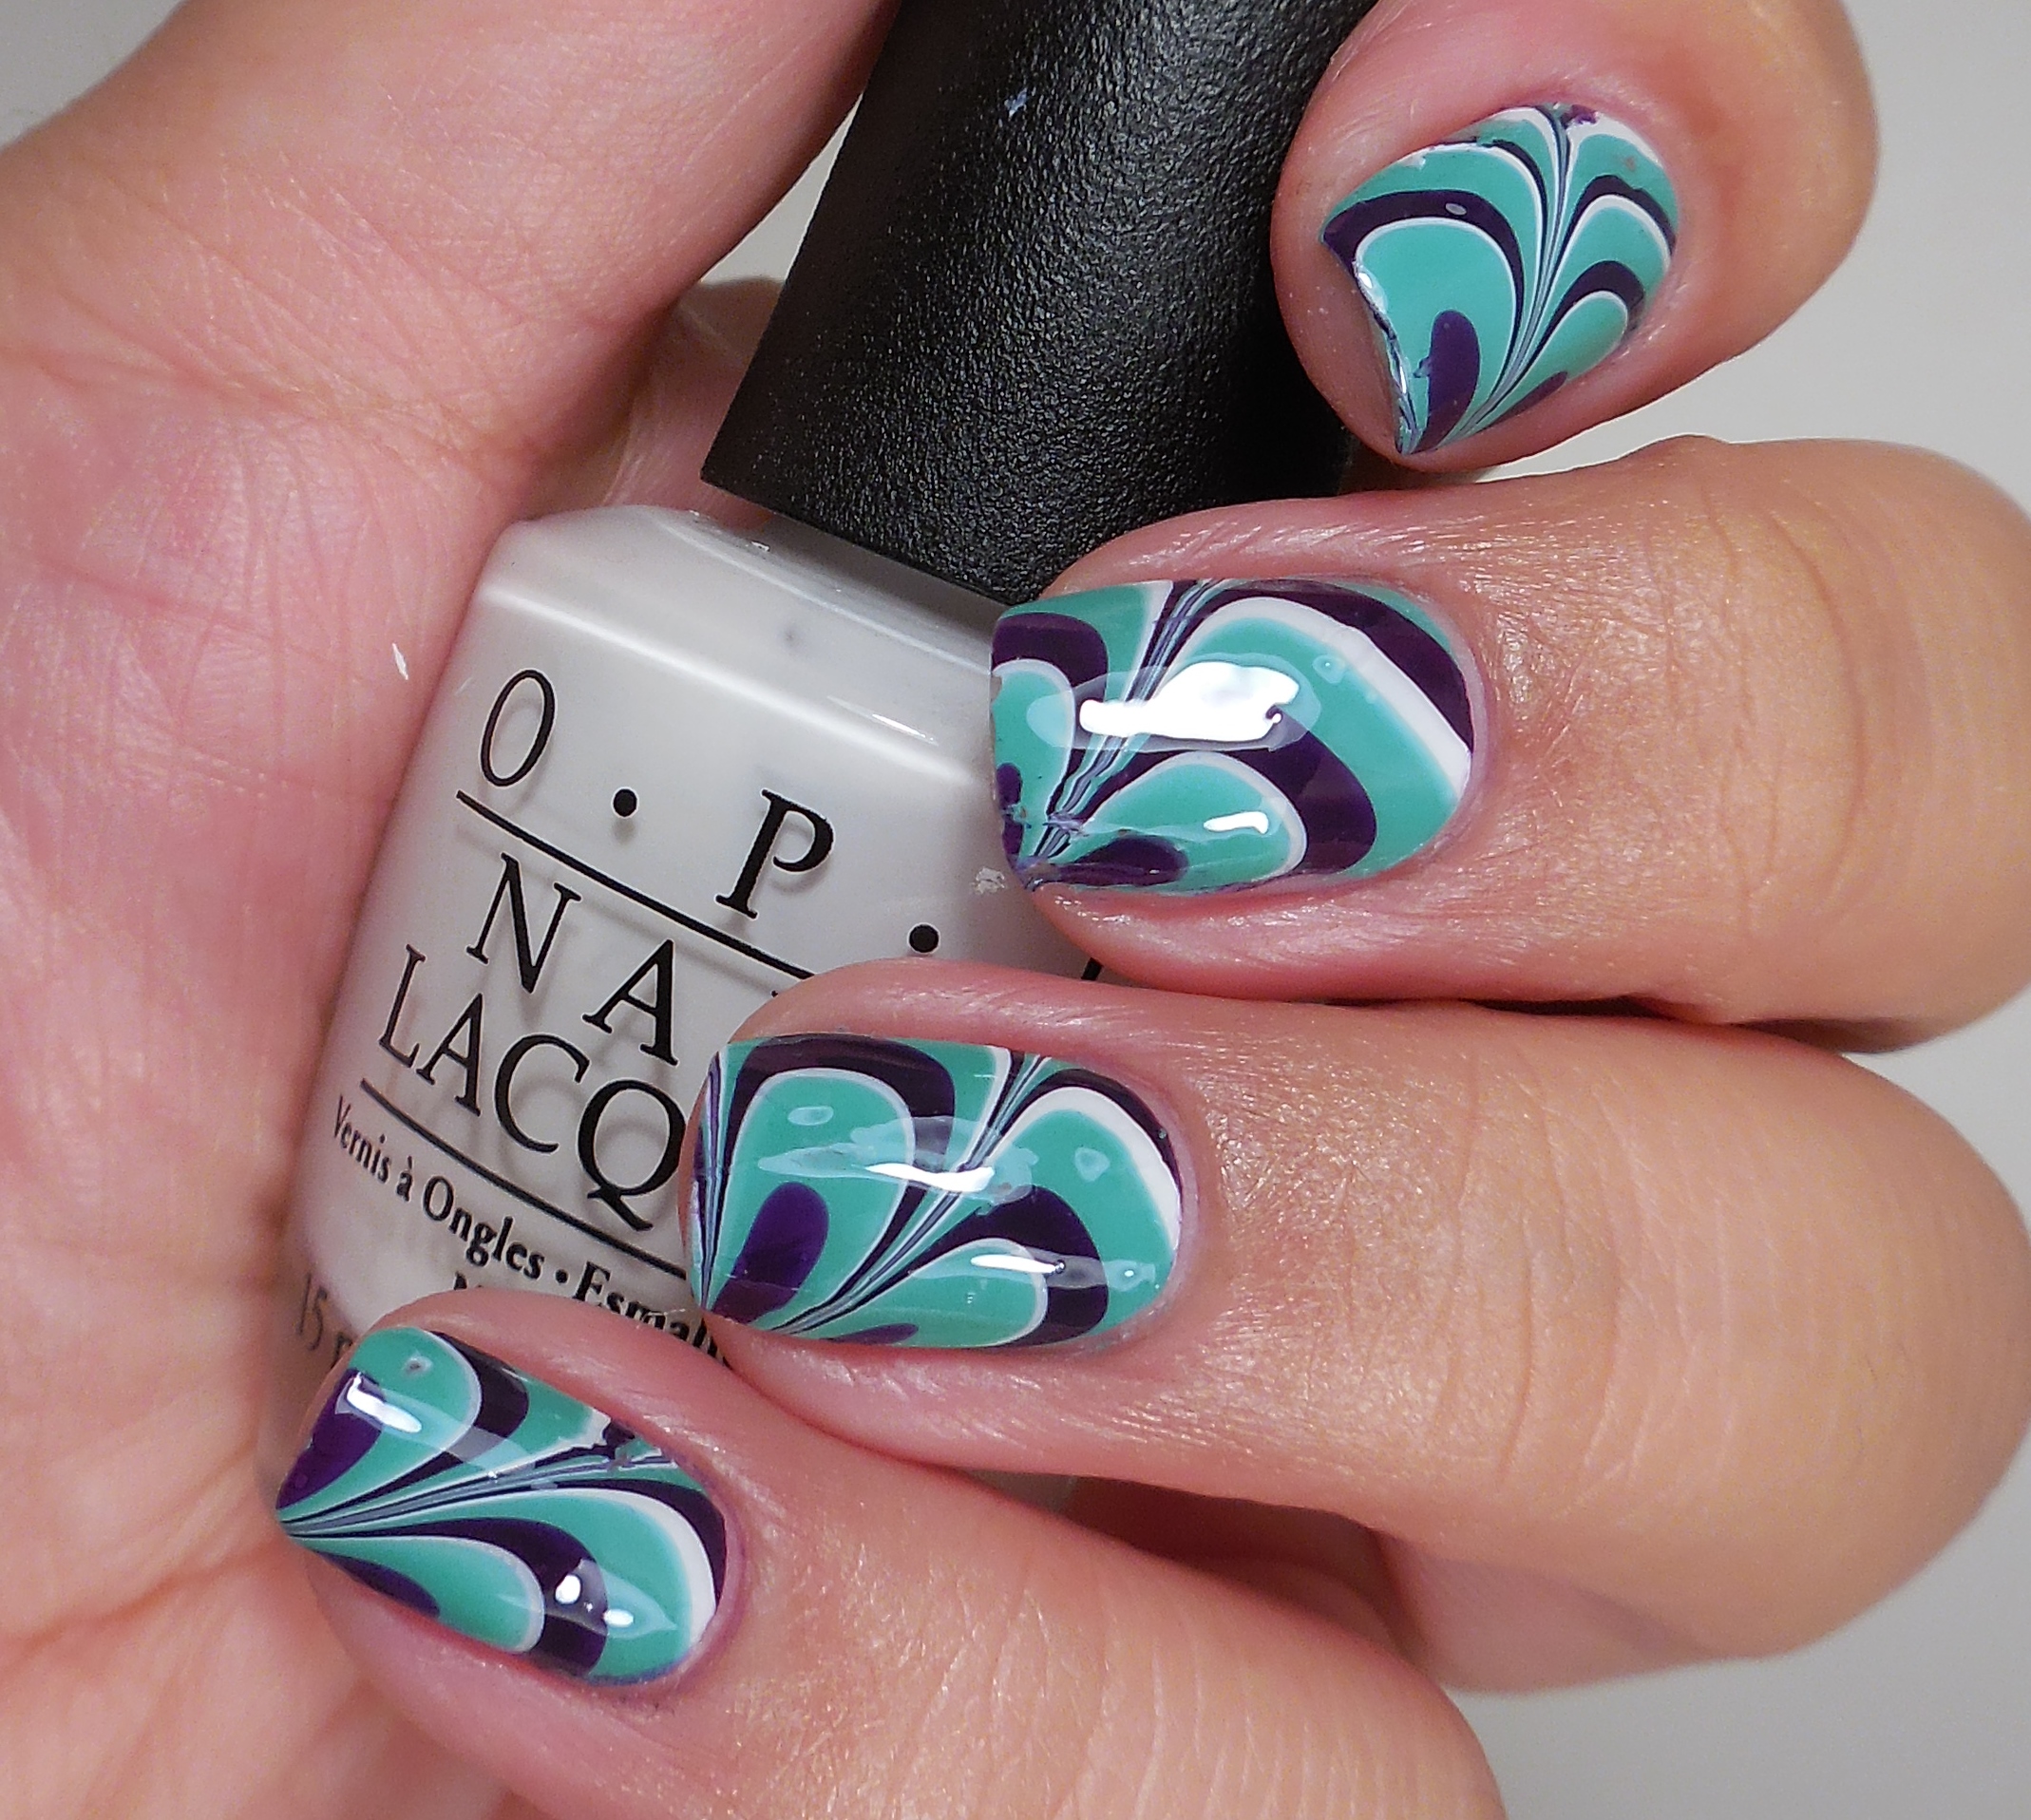 It’s not too bad, but I also don’t think it is that pretty or neat. I kind of smeared the design in certain areas while I was pressing the decal on my nails and that really annoyed me. I really wanted it to be perfect before I posted it on my blog, but I guess it just isn’t meant to be. I think that it looks nice from far away, but you can see all the fails up close. In the immortal words of Cher:
For me, this is the equivalent of getting altitude sickness at Everest Base Camp. Womp womp. Watermarble, I don’t know why you hate me so.
I don’t know if I’m done with you yet, but I think I am ready to move on for a bit. I can’t take the disappointment anymore. What are some of the techniques that you just can’t master? Do you have any tips for me? Thanks so much for stopping by today, and I will talk to you soon.
Inspired By: Rainbow Doodles
I’m currently enjoying the last day of my 4 day weekend so I hear the impending womp womp music in my head for tomorrow morning. I’m really enjoying the idea of keeping up these “Inspired By” posts because I hope it will push me to do more creative things. Last time I did the rose and chevrons mani that I really liked, so I hope that you like what I have for you today. For today’s post, I picked this fun rainbow doodle from Amy’s pinterest post and we set out to create our own interpretation of it.
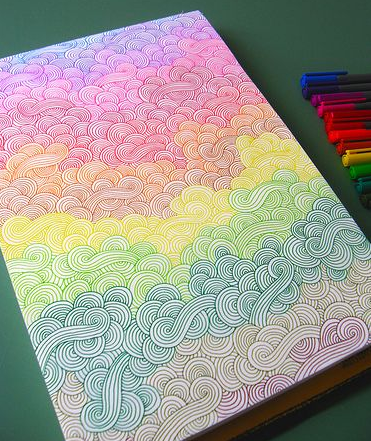 Does this look like snakes to you? Like rainbow snakes….or maybe rainbow spaghetti?
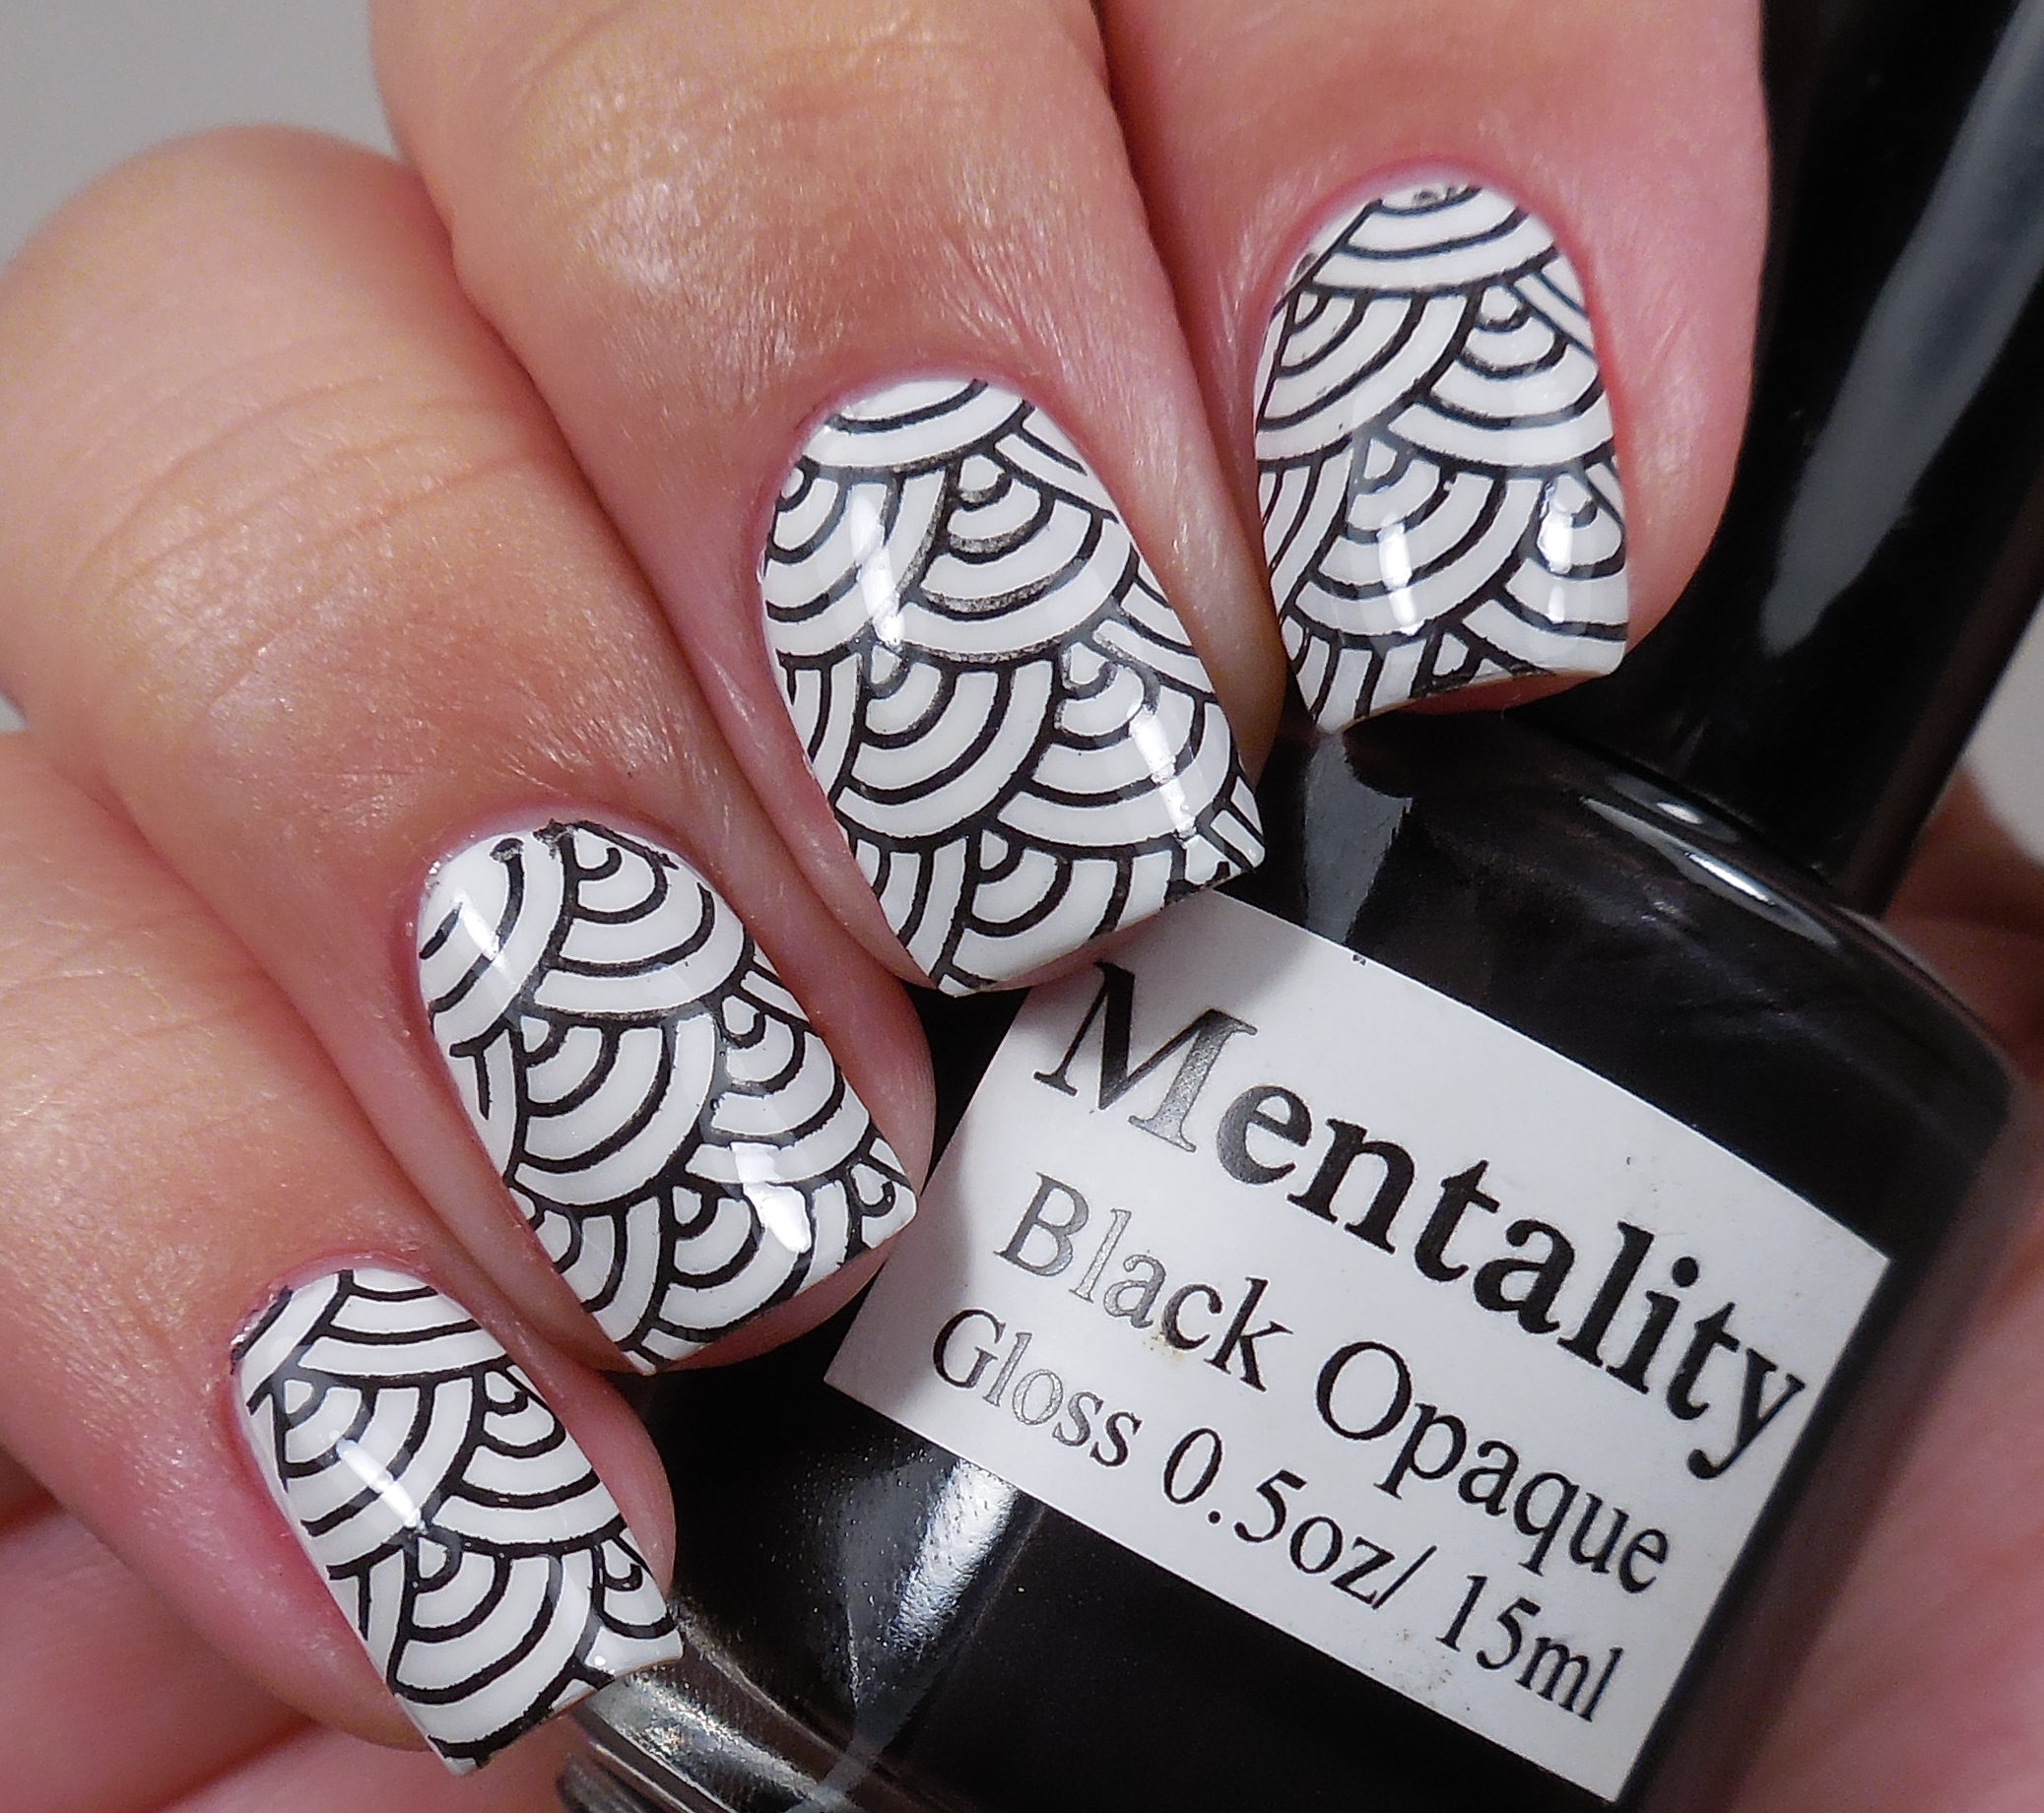
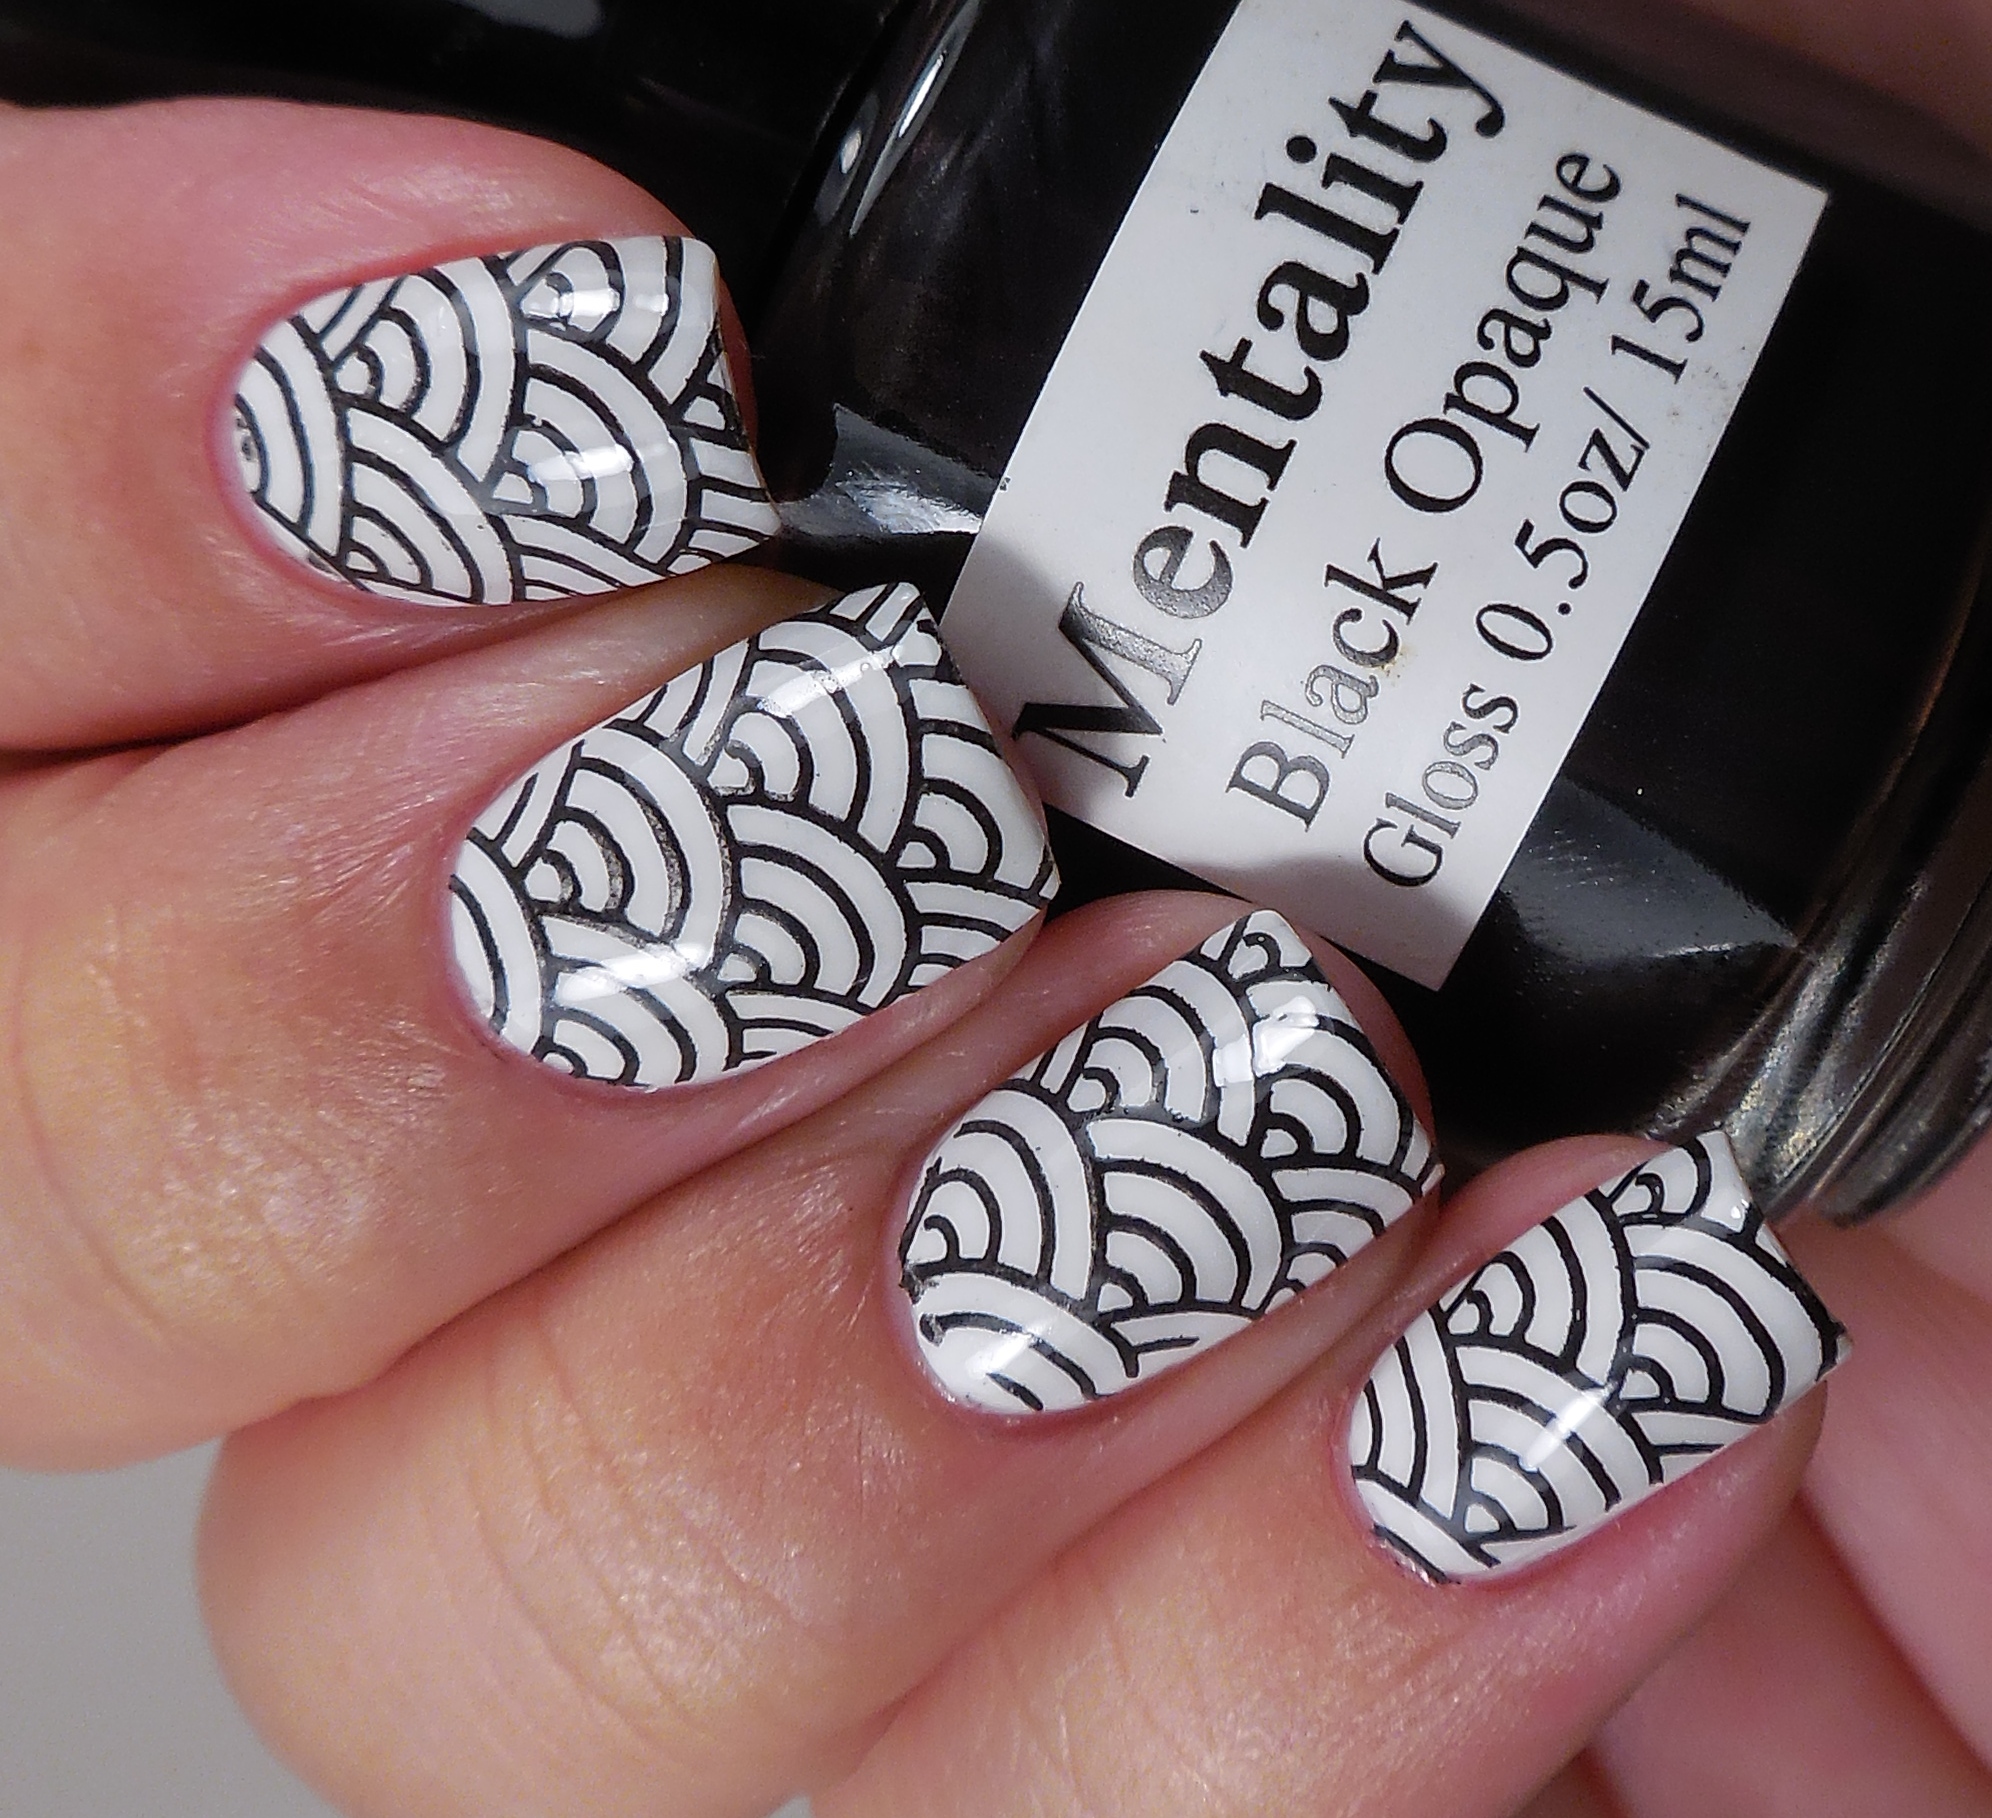 To start with, I used this arch design from MoYou London Pro Collection – 02 (press sample) and stamped with Mentality Opaque Black stamping polish. I think that this has replaced my love for my Konad Black stamping polish for a few reasons: 1) It’s cheap 2) It stamps very well and very opaque 3) It does not stain like the Konad!!!!! For my white base, I used my favorite white polish in the whole wide world: Jessica Sharktooth (press sample).
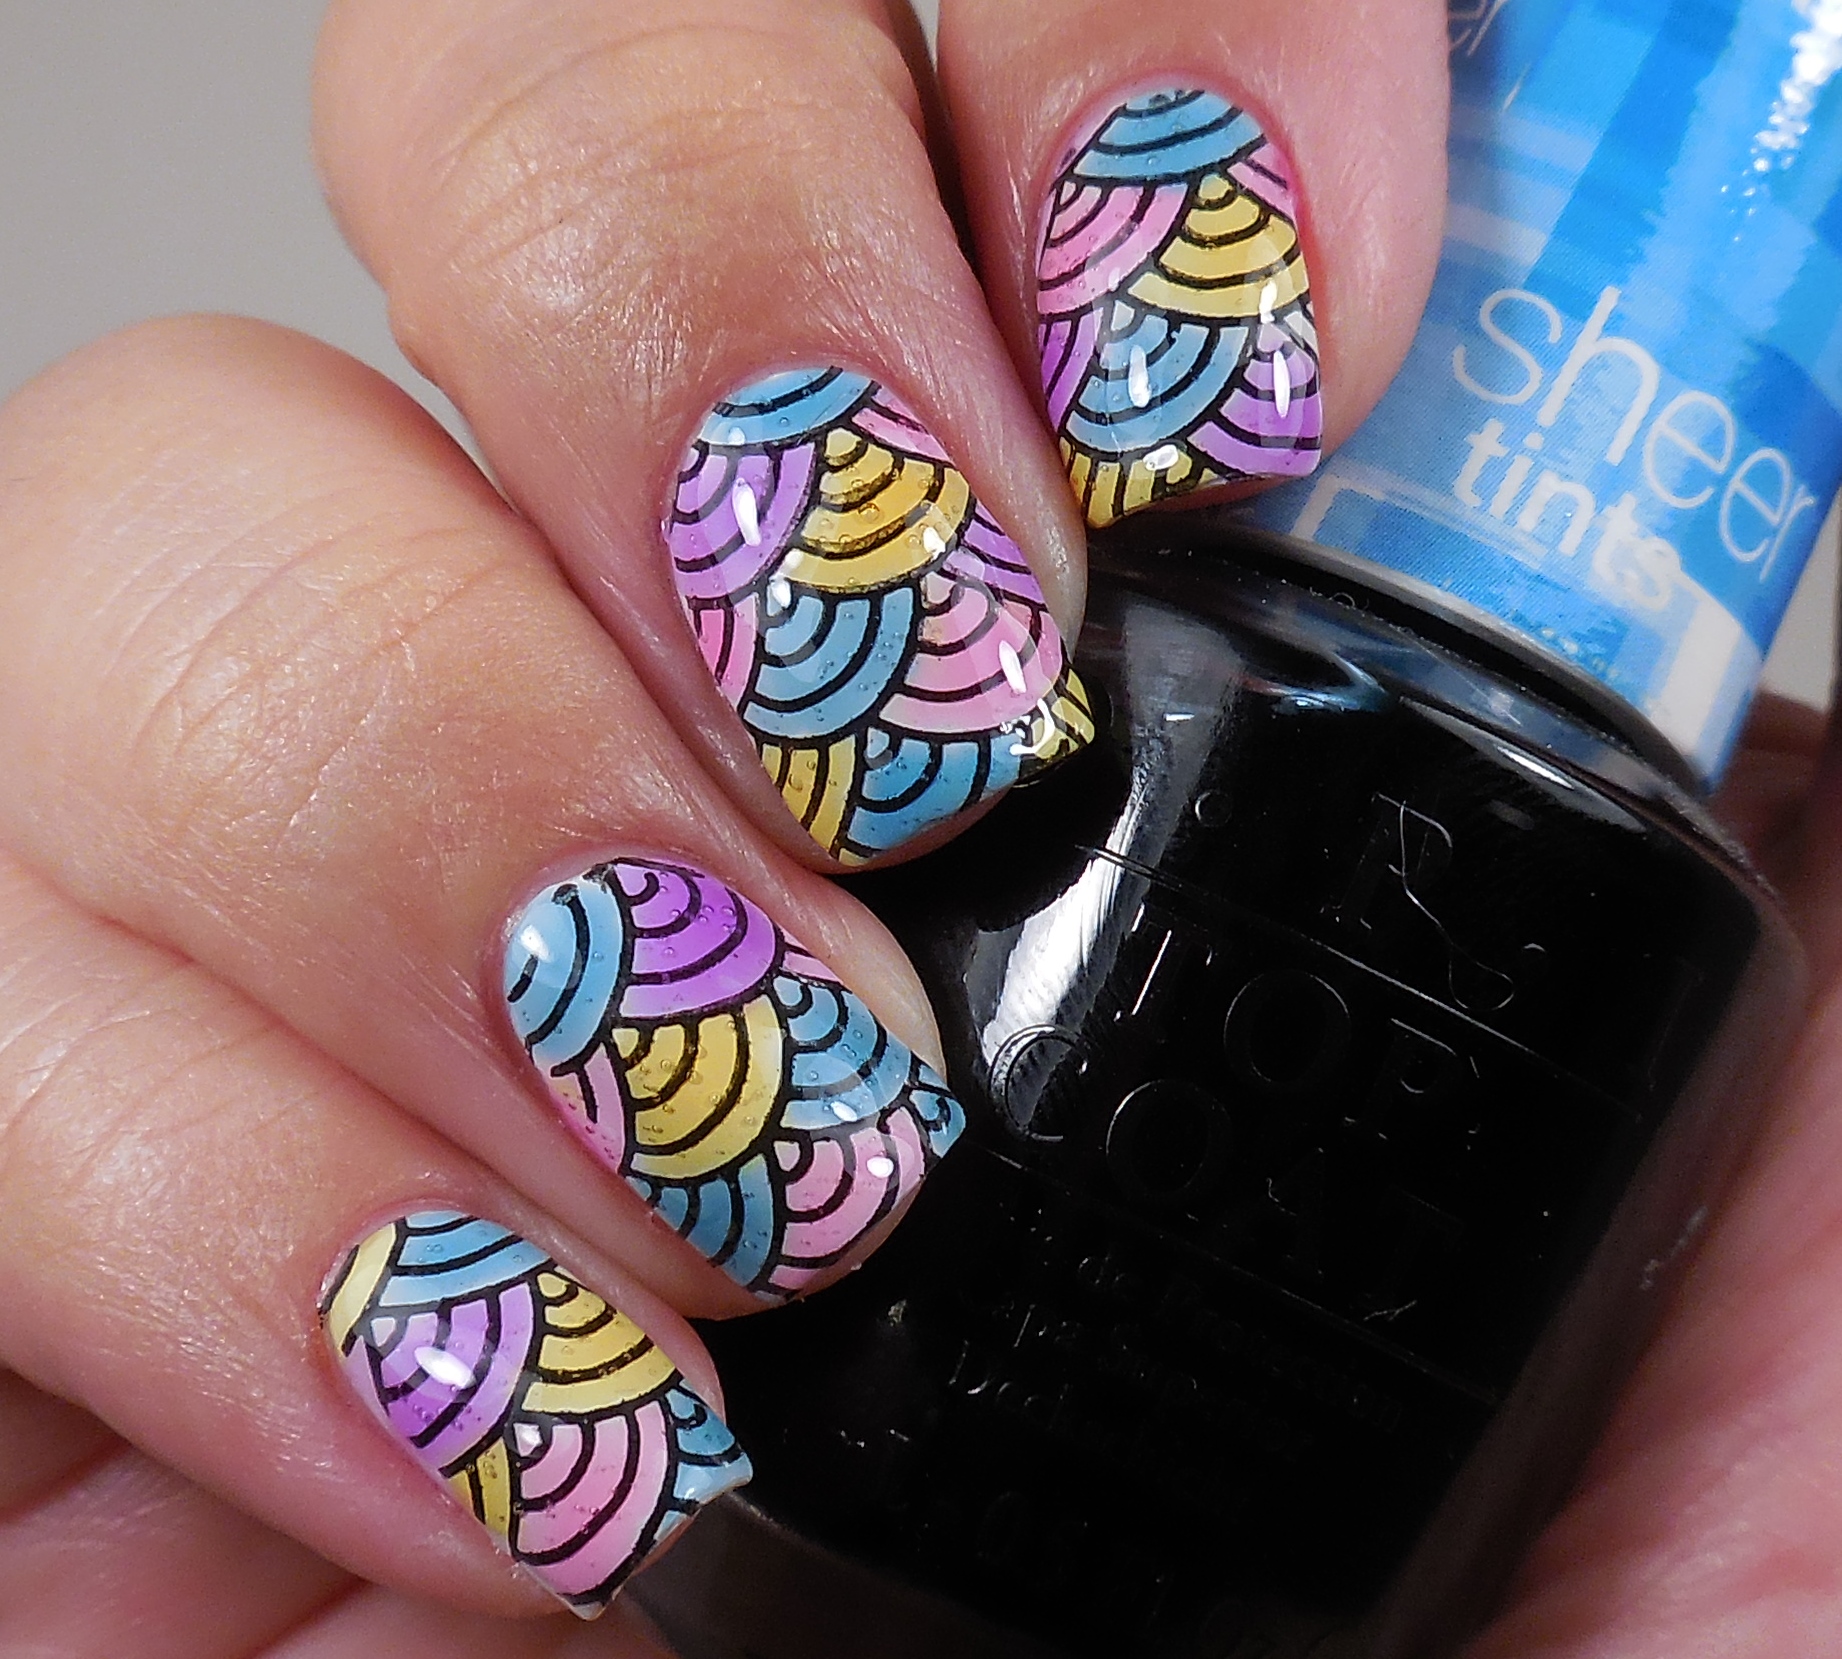
 Ok, so I’m super irritated with all the bubbling going on in this mani. I used all 4 OPI Sheer Tints (press sample) to fill in the design, but because they are so thick and gummy, it’s really hard to manipulate them. Since I applied them a little thick, bubbling was inevitable. Despite the bubbling, I still find the overall effect really fun.

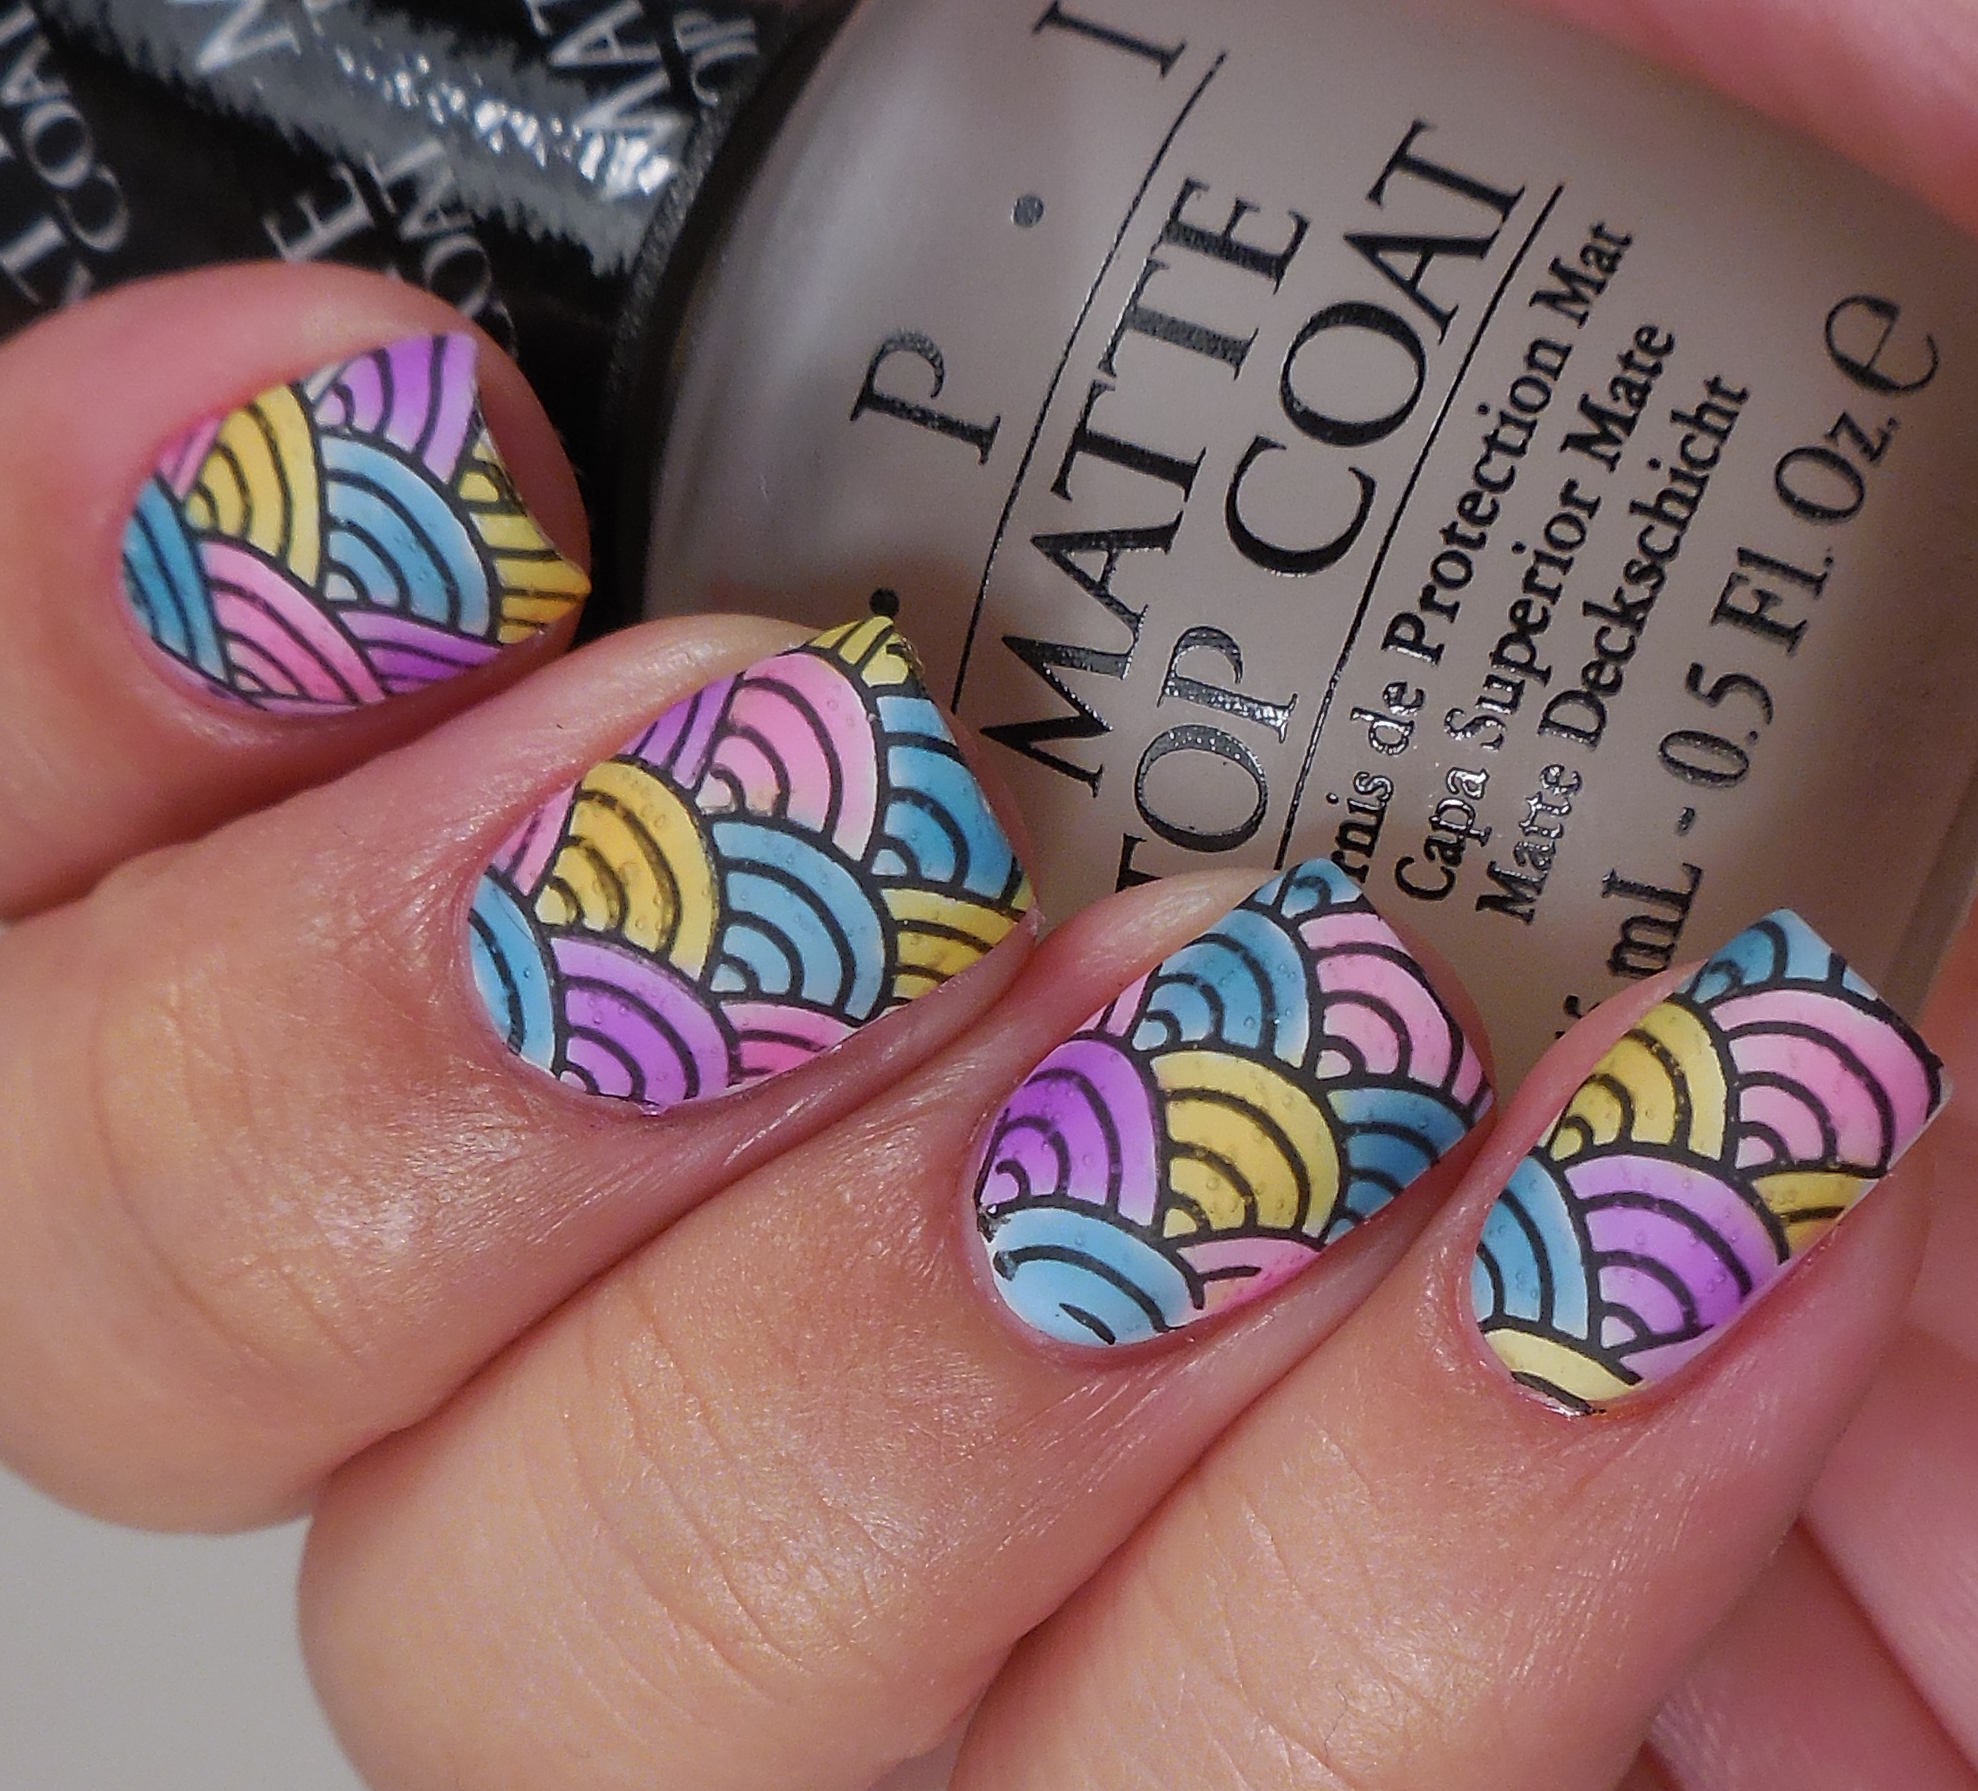
Lastly, I mattified the whole thing with my favorite Matte Top Coat from OPI (press sample). I think that the matte top coat hides the bubbles a bit so I’m all for that. I’ve had this matte top coat for a while, and it has not gotten gunky or weird at all.
So what do you think about this mani? Minus the bubbles, I really like how this turned out. Make sure that you check out the other manis below to see how the other ladies interpreted the design inspiration. Thank you for stopping by today, and I will talk to you soon!
 Loading InLinkz ...
Chevrons and Flowers
Happy Monday, ladies! Ghhhaaaaa! It’s the last week of the year, and I decided that I wanted to try something a little different today. While I admire all of the amazing ladies who do tons of freehand nail art, I am usually a big fat failure when it comes to anything more complicated than stamping. I got together with Amy and Siobhan to do a mani based off an image or pattern just to mix things up a little. Amy found an awesome pattern, and we decided to use it for today’s mani.
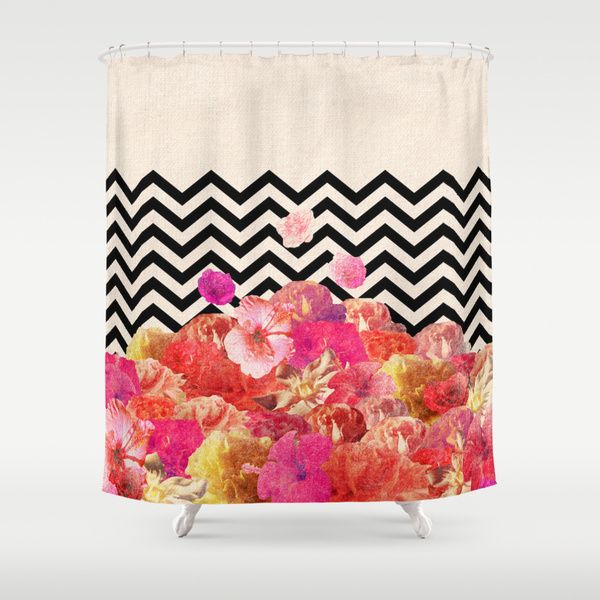 Am I the only one who wants that shower curtain like immediately?

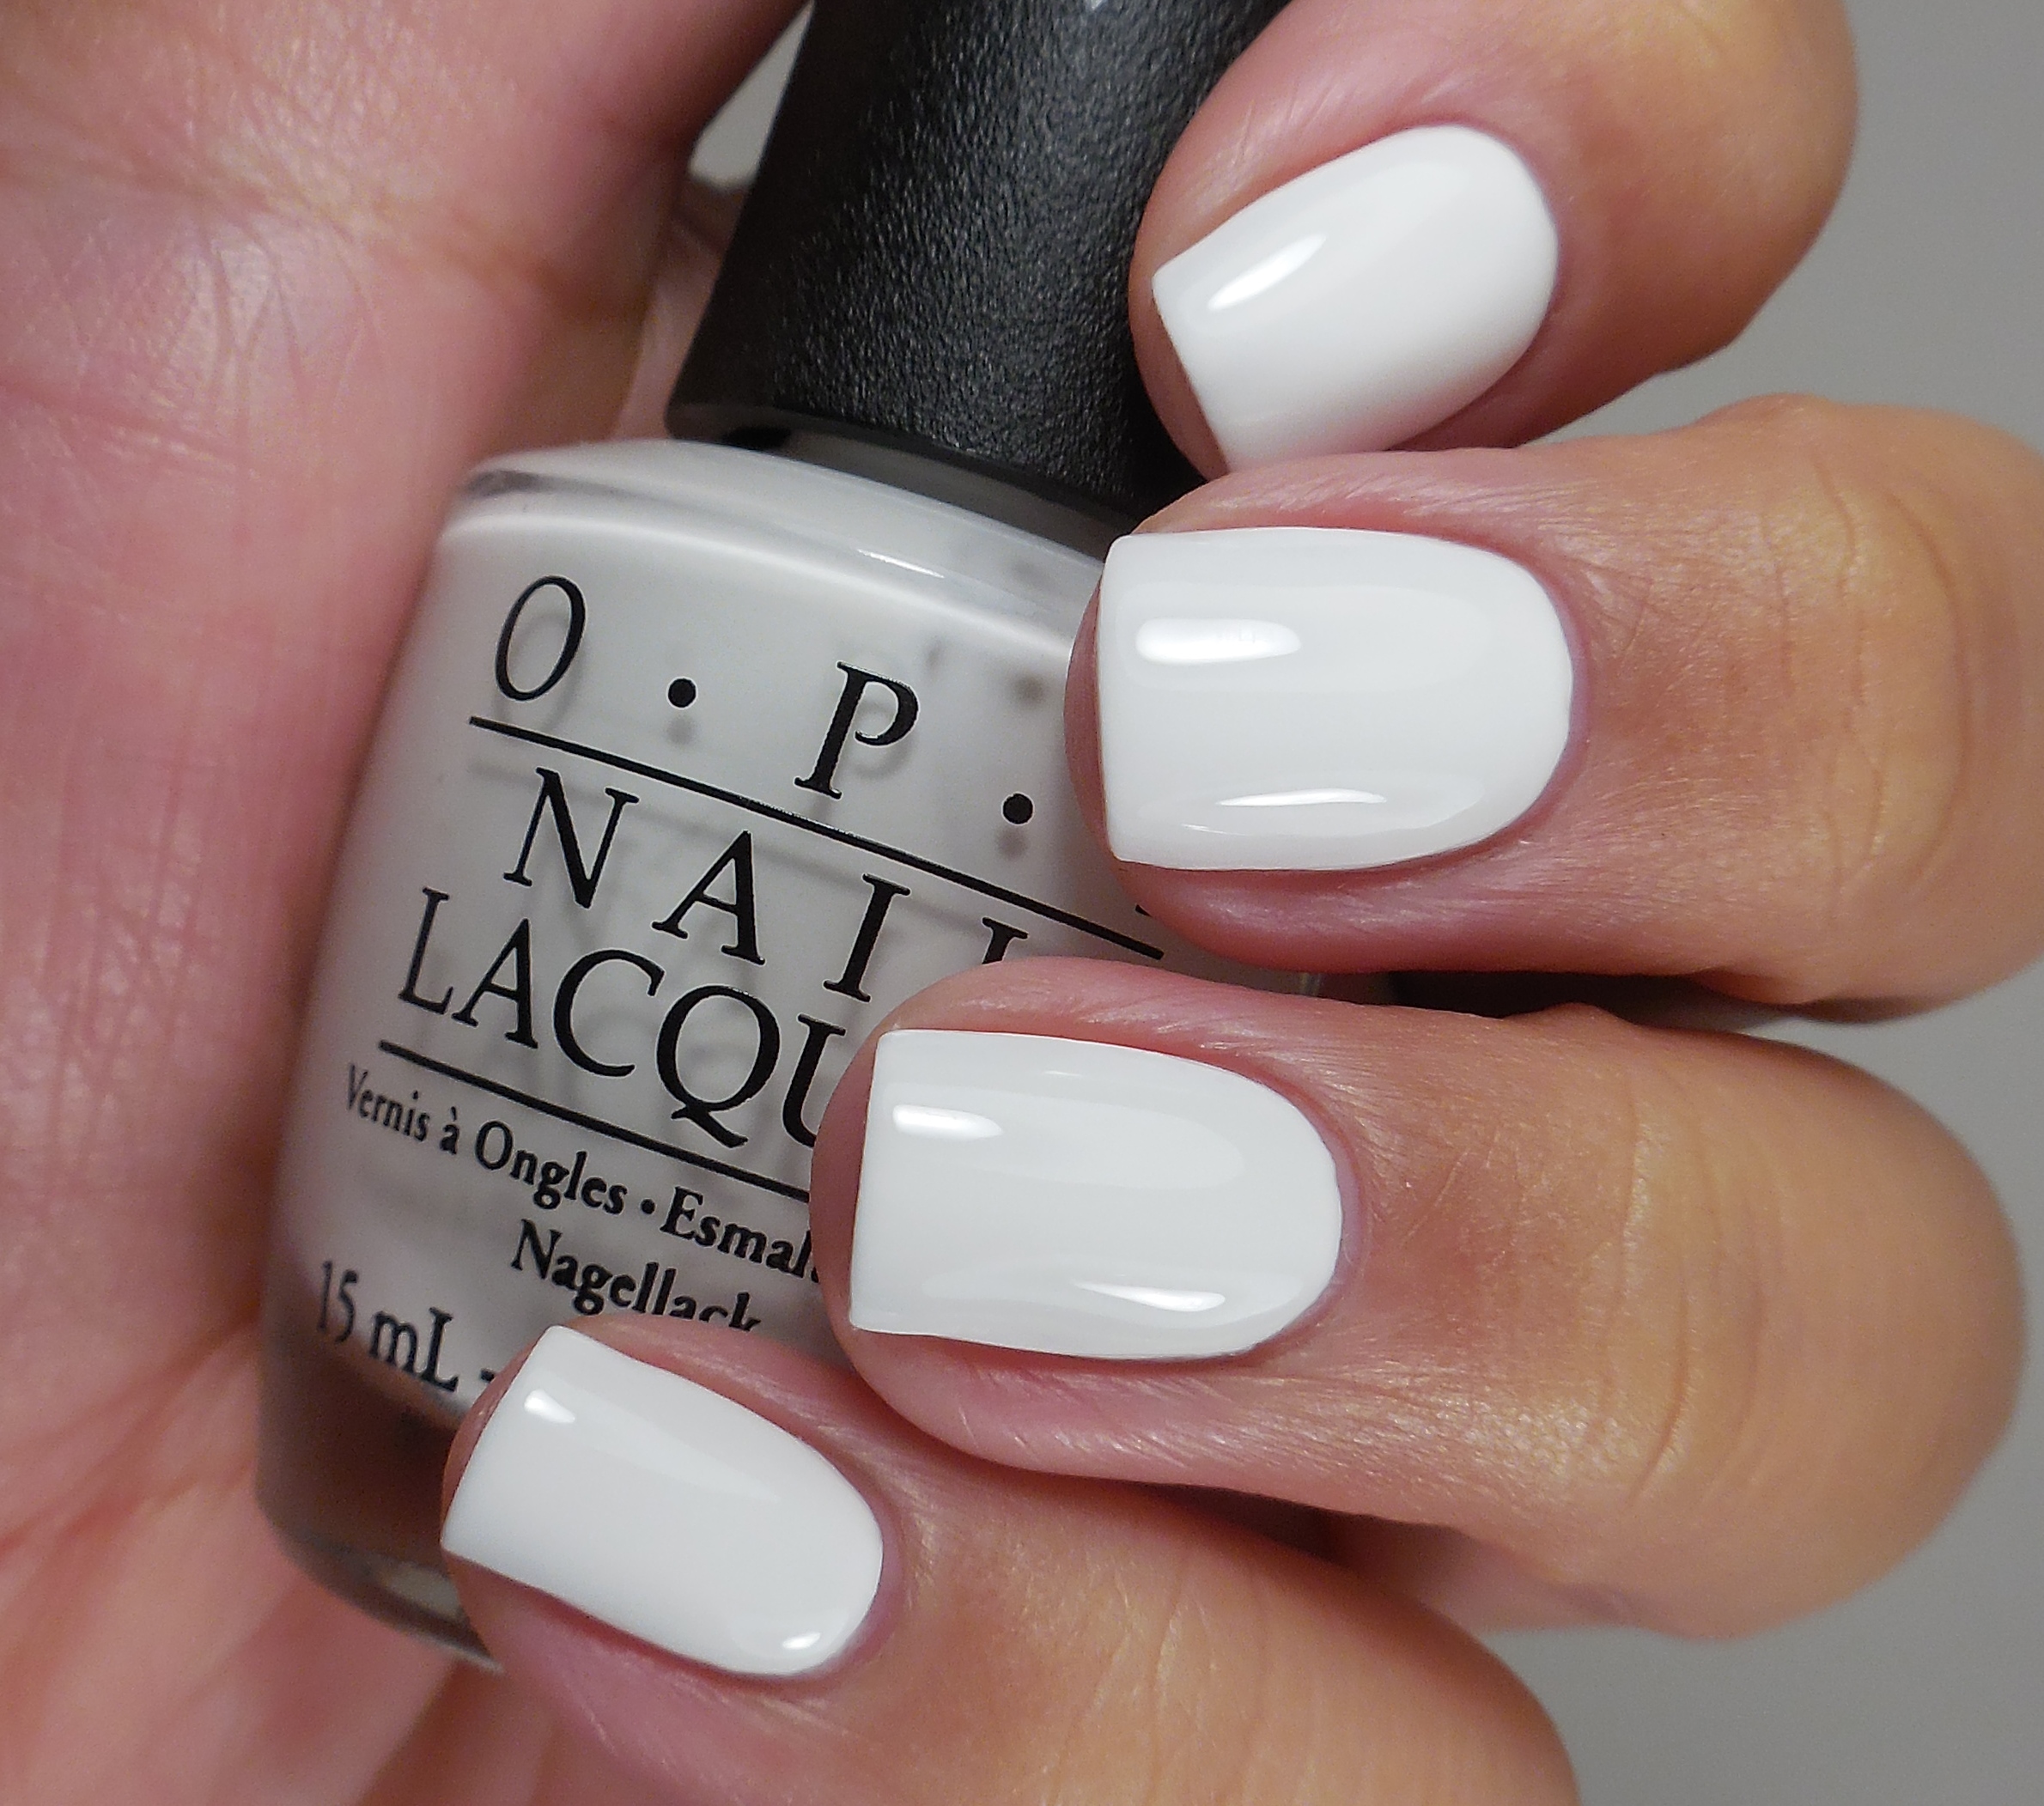 I started off with OPI Angel With A Leadfoot (press sample) as my base. I’ve been using this white a lot lately for my manicures. Can you blame me? It’s so crisp and creamy.
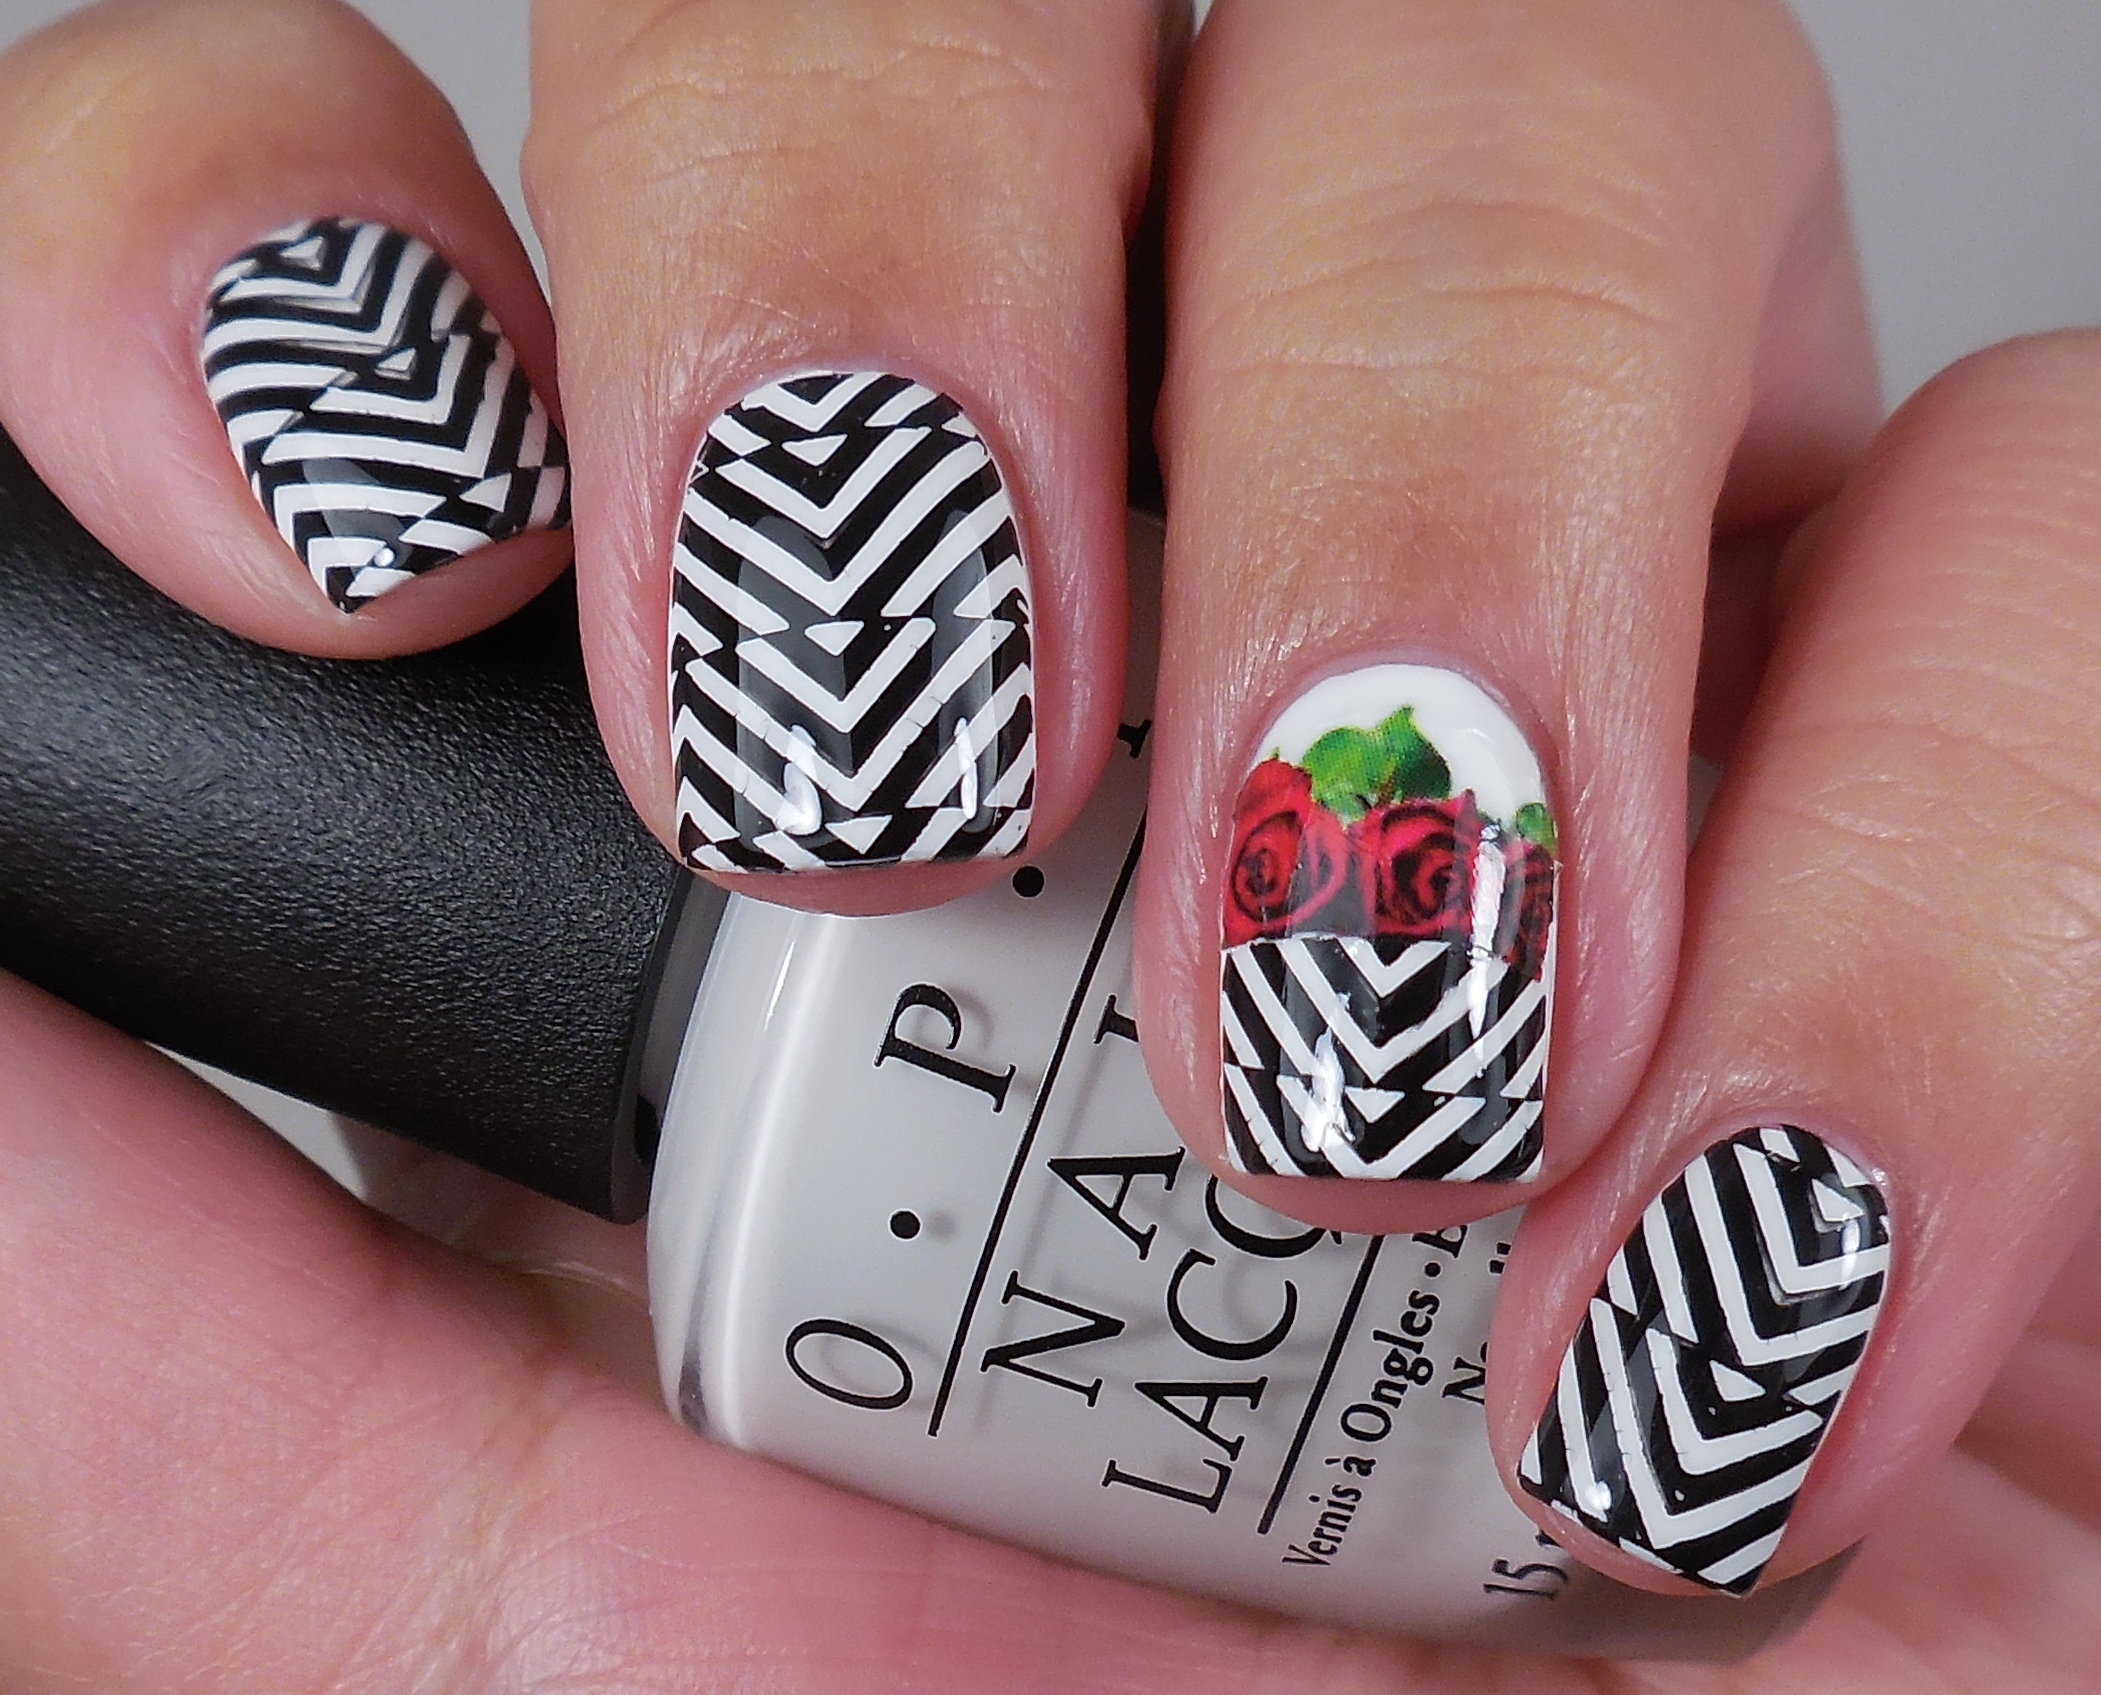
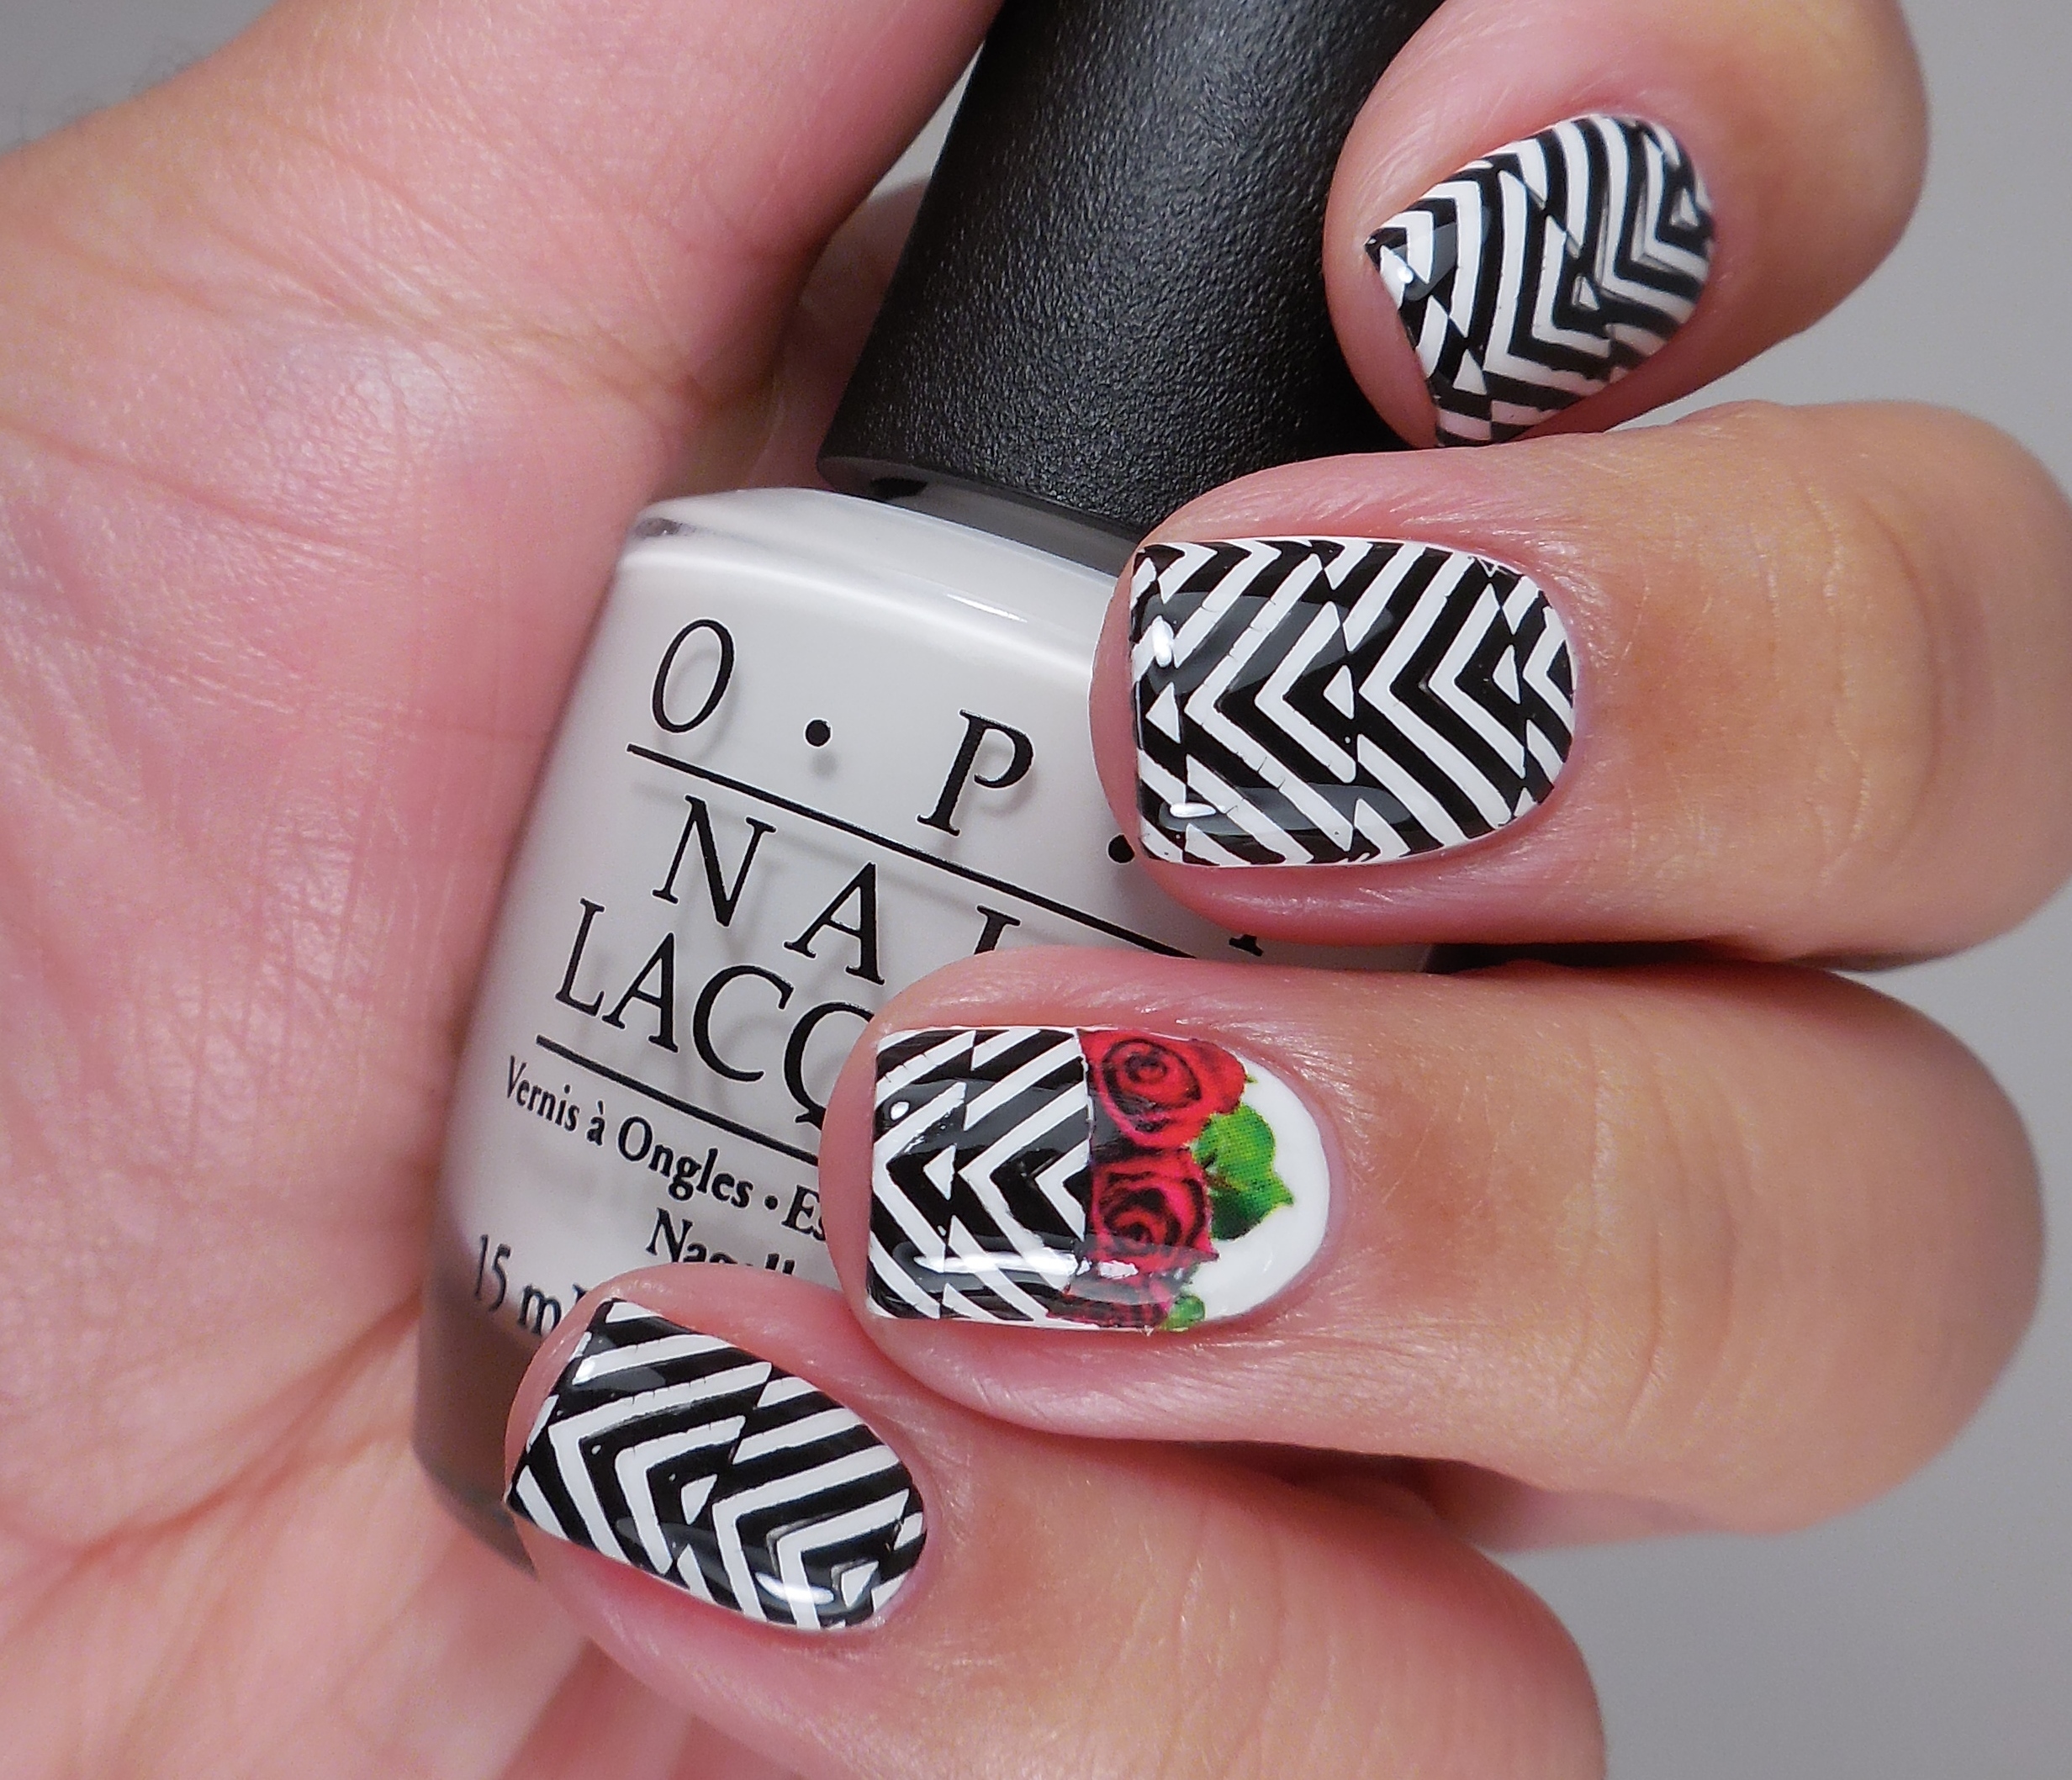
 Since I always end up messing up something simple such as chevrons even with vinyls, I decided to use a stamp for this kind offset chevron design. This image is from plate MoYou London Pro Collection 18 (press sample) and I used my Konad special polish in black. For the flower design, I used a water decal that was sent to me by the lovely Jacqui last year after I mentioned that I had never used them before. She has a great post explaining how to use water decals which I referred to today before I used them. Check out her post here. It was super easy to use the water decal, but I did have to do some trial an error. It’s really important to trim them down do that you don’t have any overhang. Because my nails are naturally very curved, the decal did not lay all the way flat at first so I had to fiddle with it to make sure it was as flat as possible before top coating the entire thing. I really loved this design! Even better, I loved doing this with my girls because sometimes I feel like all I do is swatch. While I love swatching, it can sometimes get tedious so doing something like this can get my creative juices flowing.
Make sure that you check out Amy’s and Siobhan’s designs by clicking their links below. What do you think of this design? It was rather easy to create, and it turned out really cute if I do say so myself. I hope you’re having a great beginning to your week. Thank you for stopping by today, and I will talk to you soon.
Geometric Gumdrops
![]()
Does calling Wednesday “Hump Day” annoy you? It usually doesn’t annoy me but for some reason I cringed when I typed it out. Maybe it’s the fact that my pseudo-diet is putting me in a shitty mood cause I want to eat junk. So how is my diet going, you ask?
Yep, just like that. Now that I’m feeling a little better, I’m going to start incorporating going to the gym after work. I think that’s going to help me in a lot of different ways especially to relieve stress and just put me in a better frame of mind. Let’s hope that all happens and that I don’t end up sad and eating a pint of Ben & Jerry’s Chunky Monkey.
The other day I was talking with some friends about this bare nail design that Chalkboard Nails did with some Nicole by OPI Gumdrops so I totally wanted to do something in that same vein. This is what I came up with:
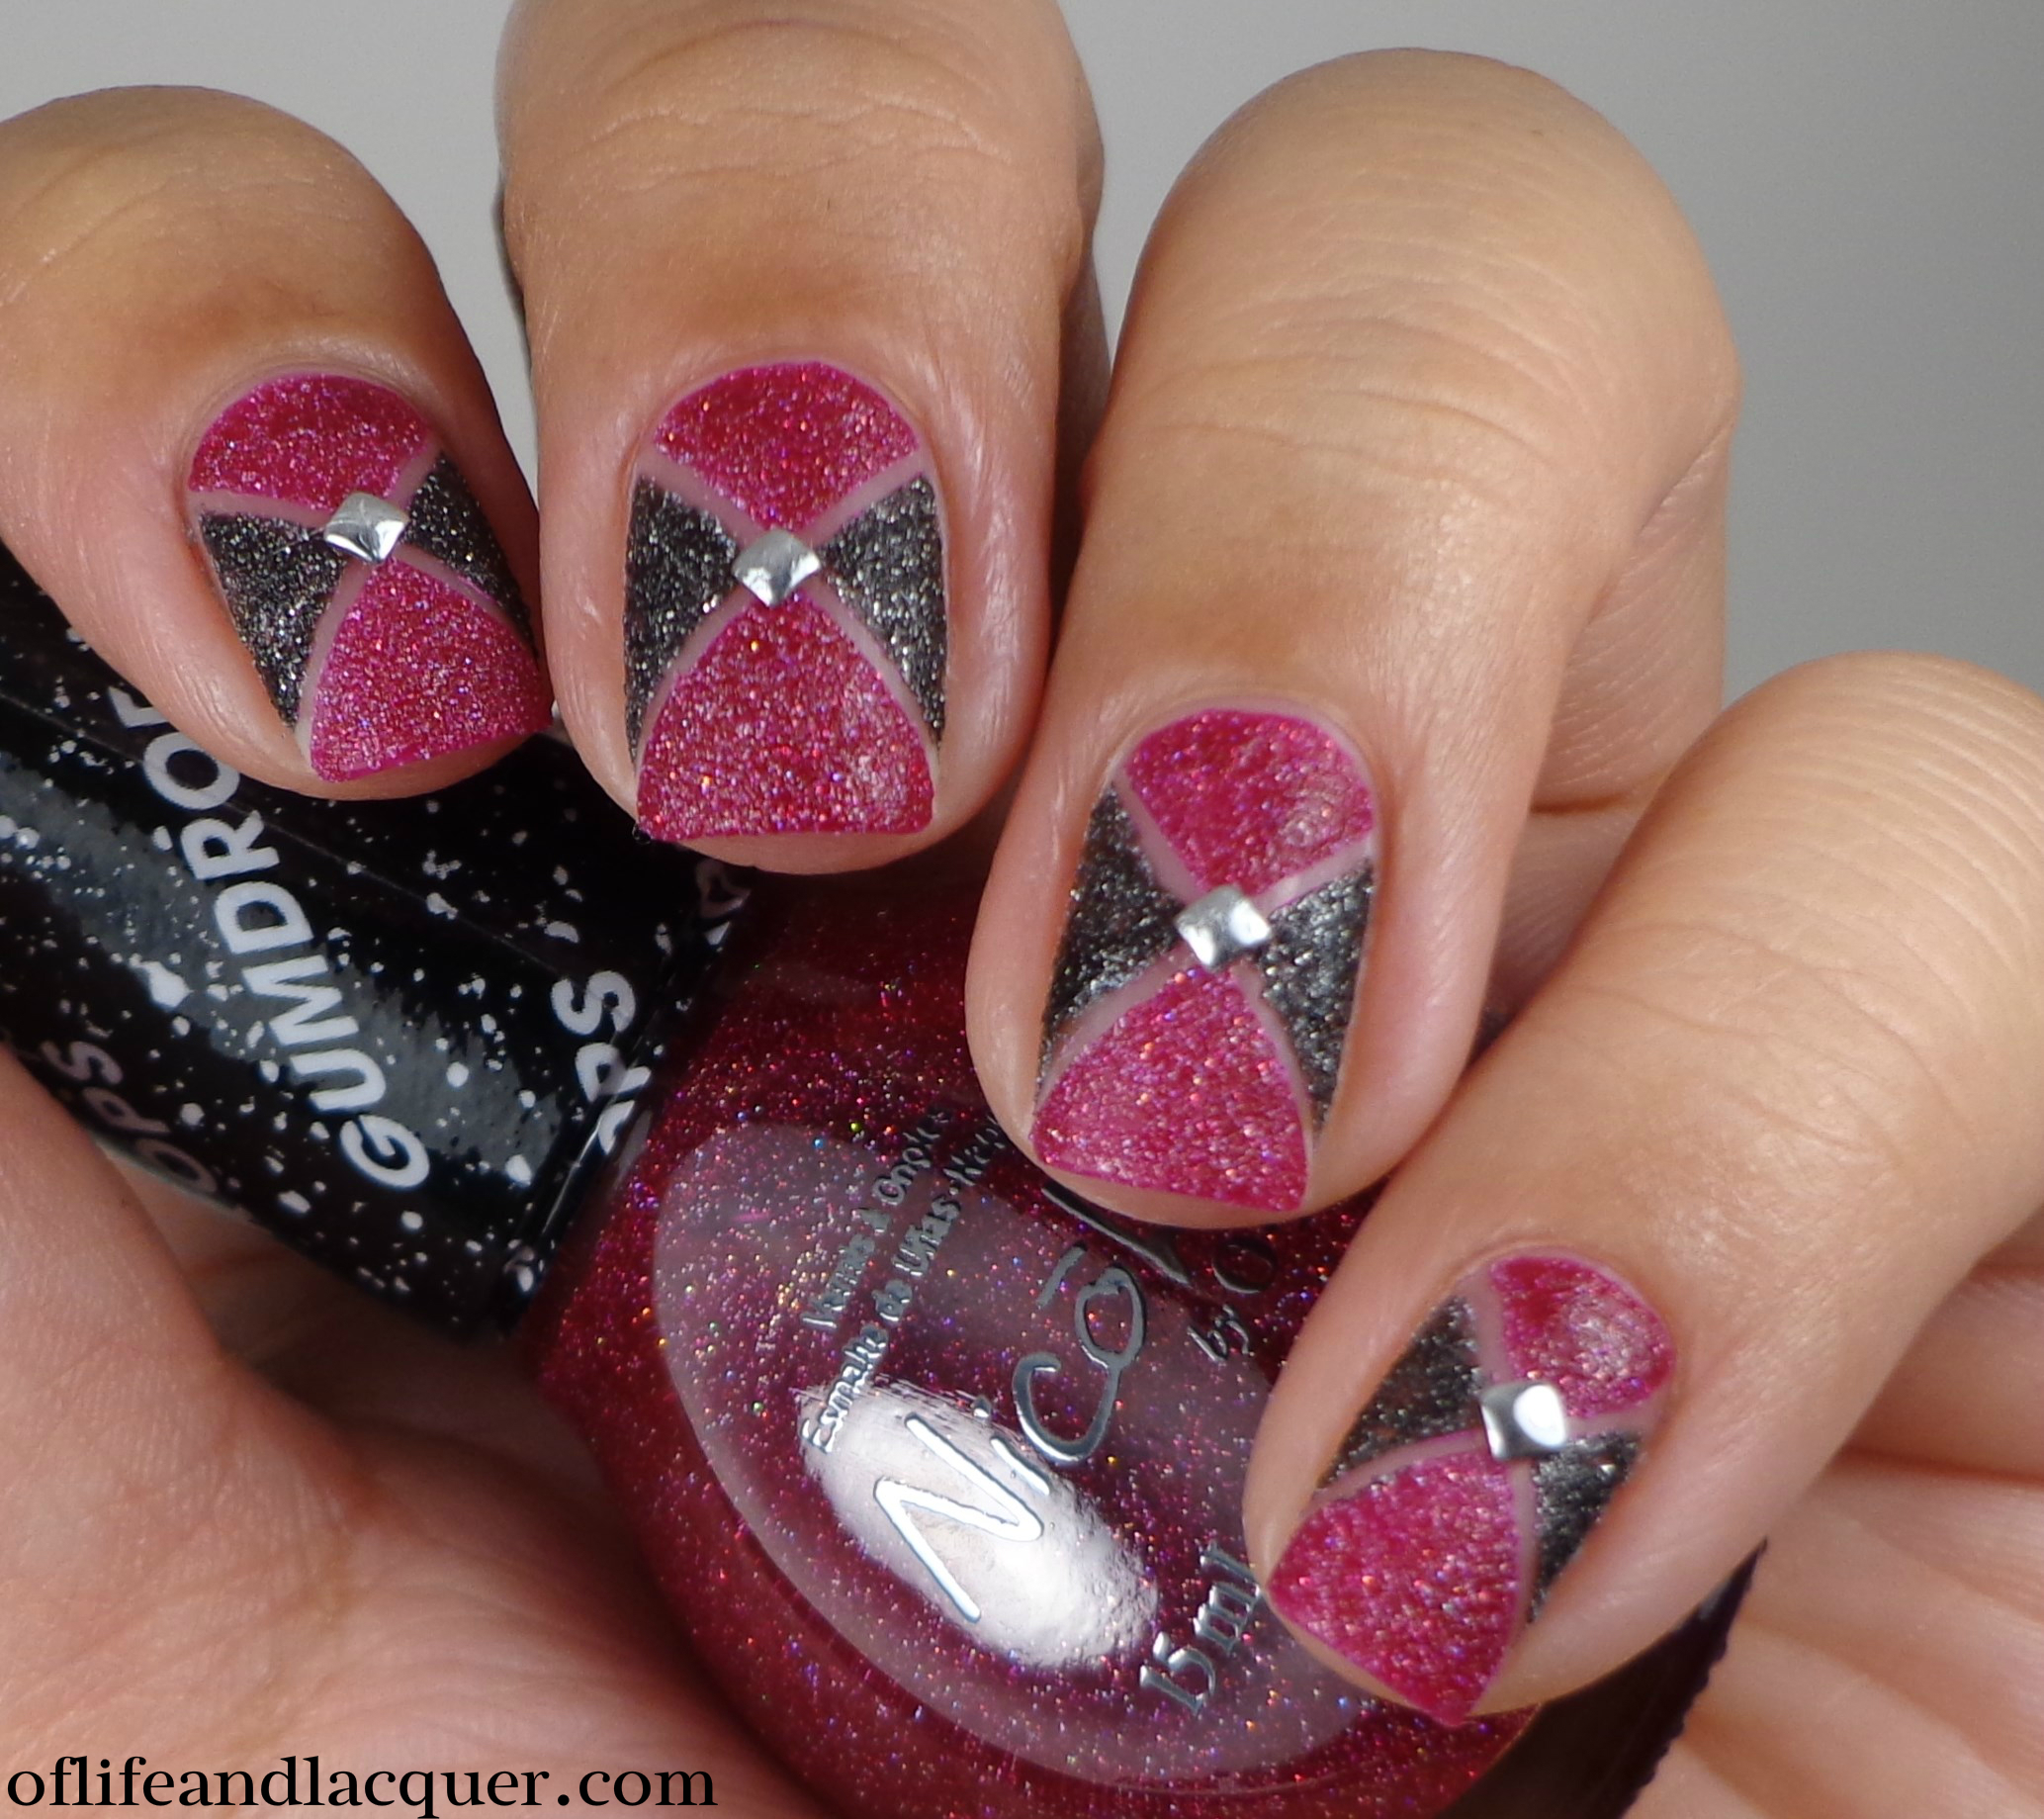
 For this design, I used Nicole by Opi My Cherry Amour and A-nice Treat and some stripping tape. All I did was to apply the tape in a criss-cross pattern and then carefully filled in the areas with the two polishes. Lastly I applied a silver stud in the middle because I felt that really finished off the look. I really like how this turned out! I’m getting more excited about doing more than just swatching so I hope that you guys like this.
So what are you up to today? I have work tomorrow so I’m getting ready for that…after being off/sick for the last 5 days, it’s going to be rough! My little nephew is coming over tonight so I’m excited to see him. On Monday he had his 2 month check up and he also got some vaccines. Here’s a recent picture of him:
 He’s being very scratchy lately so you can see the little nicks on his nose and cheek. Isn’t he freaking adorable?? Anyway, I hope you’re doing well today, and I’ll catch up with you later.