I know hat I’ve said that I am going to try to incorporate more nail art into my posts, but it’s so hard when you’re a nail art dunce like me. I can paint my nails with my eyes closed, but when it comes to even the simplest of nail art techniques, I have to practice and practice and then practice some more. While I have seen drip marble nails all over the interwebs, I have never actually attempted the technique myself. When I started seeing Tiffany from Polish and Paws do some gorgeous drip marble manis, I decided to give it a try. Let me show you how my first attempt turned out.

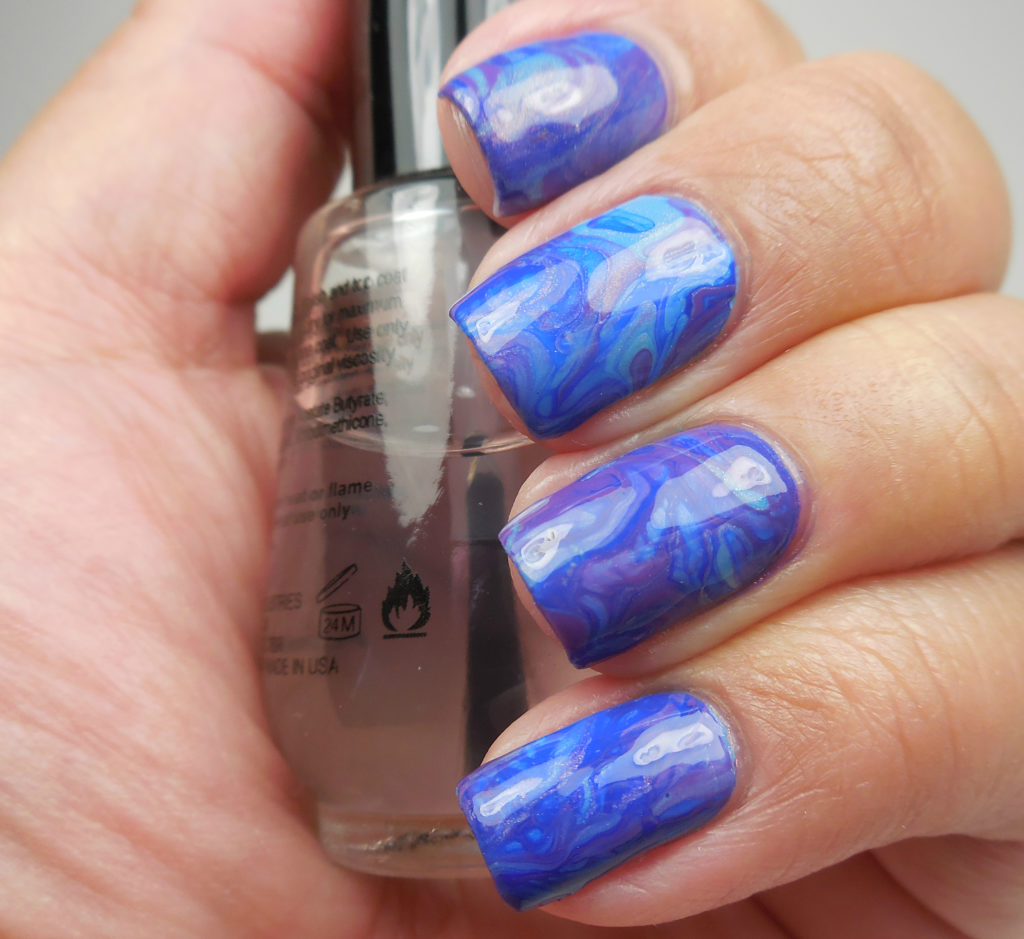
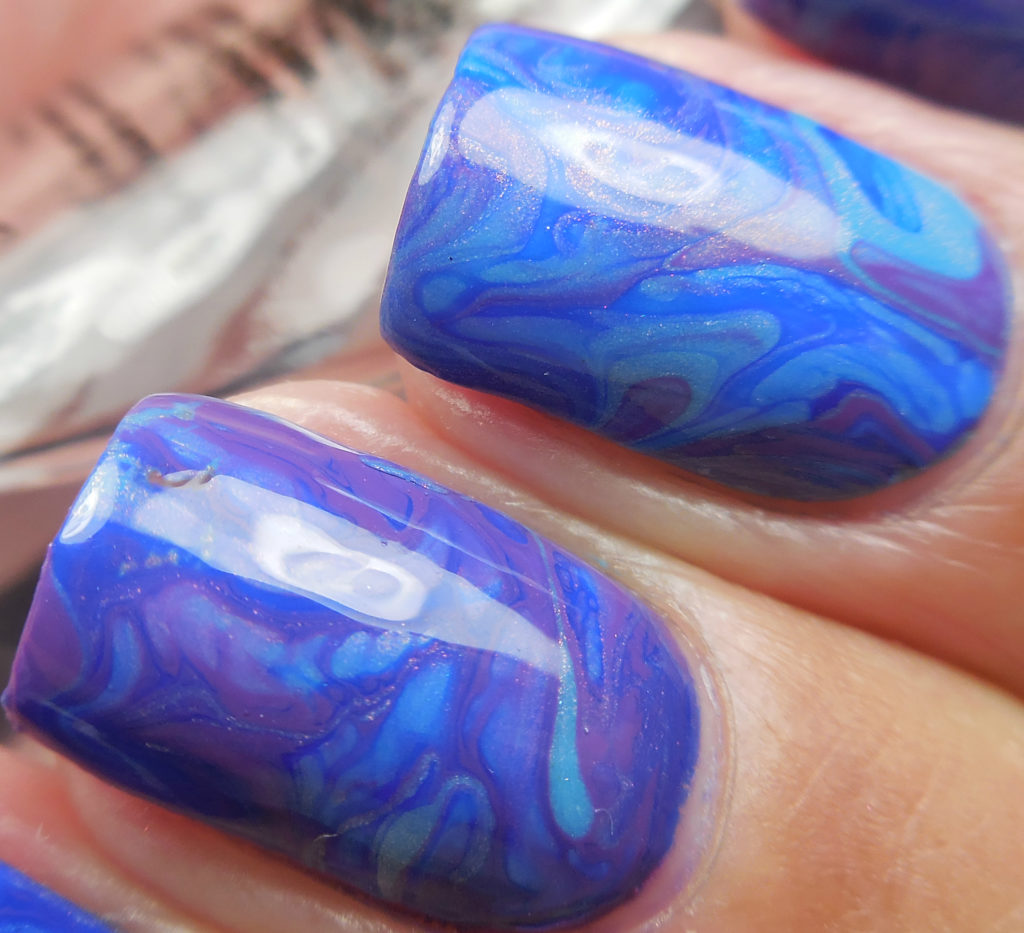
I have to be honest: I struggled a lot with this. I must have tried 30 different polishes of different colors and finishes. I was never quite satisfied with how they looked until I tried it with these three polishes. All three polishes are from KBShimmer and they are: Low and Be Bold, Peach For The Sky and Pansy-monium. I think that the hardest/most time consuming part of doing drip marble nails is actually getting them on your nails. I let the decals dry almost a day before attempting to pull them up and placing them on my nails. If you are interested in seeing the actual process, there are tons of tutorials on youtube. The first one that I watched was by Simple Little Pleasures, and I also watched the one that Tiffany linked on her blog by Painted Fingertips. While I do like how this looks, it’s a lot of work. I might do this for an accent nail, but not maybe for a whole mani especially because I change my nail polish so often. That’s the biggest downside to blogging and swatching: we don’t have time to wear the nail art we create for long. Let me know what you think of this mani in the comments below. Thanks so much for stopping by today, and I will talk to you soon!
Be my polish friend! Follow me!
I adore how this came out! I think that’s why I started swatching a huge batch of polishes at once, so I could actually wear nail art for more than a day. And tbh, it’s something that’s helped my blogging game too.
Jessica recently posted..Polish ‘M This Game is Rigged! nail polish swatch + review
Yeah, it is so sad to not be able to wear something for long after you have spent so much time on it.
Well I think it’s bloody gorgeous!!!
acidicice recently posted..Tinder – First Impressions
Thank you so much!
I love drip marbles, but I agree…applying them is not so fun.
Nichole recently posted..Vapid Lacquer My Little Vapicorn Collection | Part Two: Thermals
I really hope that it gets easier because I plan to keep trying.
These turned out great! I love drip marbles. I’ve only done one so far.
Leslie recently posted..Unicorn Magic by Pretty Beautiful Unlimited
I will definitely keep trying with different polish colors and finishes.
This turned out fabulous! The application gets easier the more you do it. I can do apply now in about the same time as a straight mani. You did great!
PolishandPaws recently posted..Nail Art ~ Drip Marble and Butterflies
Thank you so much, Tiffany! I had to try it after seeing all your beautiful manis.
That is so beautiful!!! You’ve almost inspired me to get off my duff and try some nail art. I love the colors you chose too!
Thank you so much, Jacky! I hope you get a chance to try it out.
I too am yet to try this technique. I’m really liking how yours can’t out ♡
Thanks Tracey. I hope you try it out.
I would never have known you struggled! This is gorgeous. I totally feel you on nail art – I never get a chance to wear it long enough to make it worthwhile for every day.
Polished Hippy recently posted..Octopus Party Nail Lacquer March 2018 Releases Swatches and Review Part 1
Thank you! I’m happy it turned out well. So many times I spend hours on something and end up hating it.
That is AB-FAB! Love how it turned out, love the colors together.
I am very happy with the end result for sure. The colors work so well together.
That’s what stopping me. I feel like cutting them out and fitting to your nail is just so much work. I do smoosh manis instead
It is a huge PITA, but everyone keeps telling me that it gets easier so I will keep trying.
I think you did a beautiful job on your first try. I agree that applying them to your nails is the hardest part but it does get easier. I’ve started using the “cut out” template from bundle monster (the metal stencil type plates) and I trace the nail shape out, then cut. The decals tend to be a better size for me to work with that way.
Thanks so much, Katie! That cut out template thing is ingenious! I am going to look those up and buy them. I was even thinking of using the nail shape things from incoco as guides. I don’t mind the wait to let the design dry, but the cutting out and application is a beast. I’m glad to hear from almost everyone that it gets easier. I might just keep doing these!