I love matte nails but I hate matte nail polish…does that even make sense? I’ve always had a love/hate relationship with matte nail polish because I love the way it looks, but I hate how clumpy and uneven most matte nail polishes end up looking. So what is the solution? A matte top coat, of course! Over the years I have tried TONS of matte top coats and today I am going to share with you the latest one that I have tried. The Sally Hansen Miracle Gel Matte Top Coat gave my other matte top coats a run for their money. Let’s take a look at it in action. Continue reading “Sally Hansen Miracle Gel Matte Top Coat”
Tag: Matte Top Coat

The Lacquer Ring – Baby Blue
Oh boy…how do I explain a month-long absence? Well, I am not going to try to–at least not in this post. I can tell you that I have tons of swatches that I will be getting up in the next couple of weeks. I know that I still haven’t picked a winner for my last giveaway so thank you all for your patience–I will pick one this weekend, I promise! Anyway, I am posting today with my gals from The Lacquer Ring and today is Lesley’s choice: Baby Blue. I really wasn’t expecting Lesley to choose such a delicate color but I’m glad that she did because it gave me a chance to pull out one of my favorite light blues in the whole wide world.
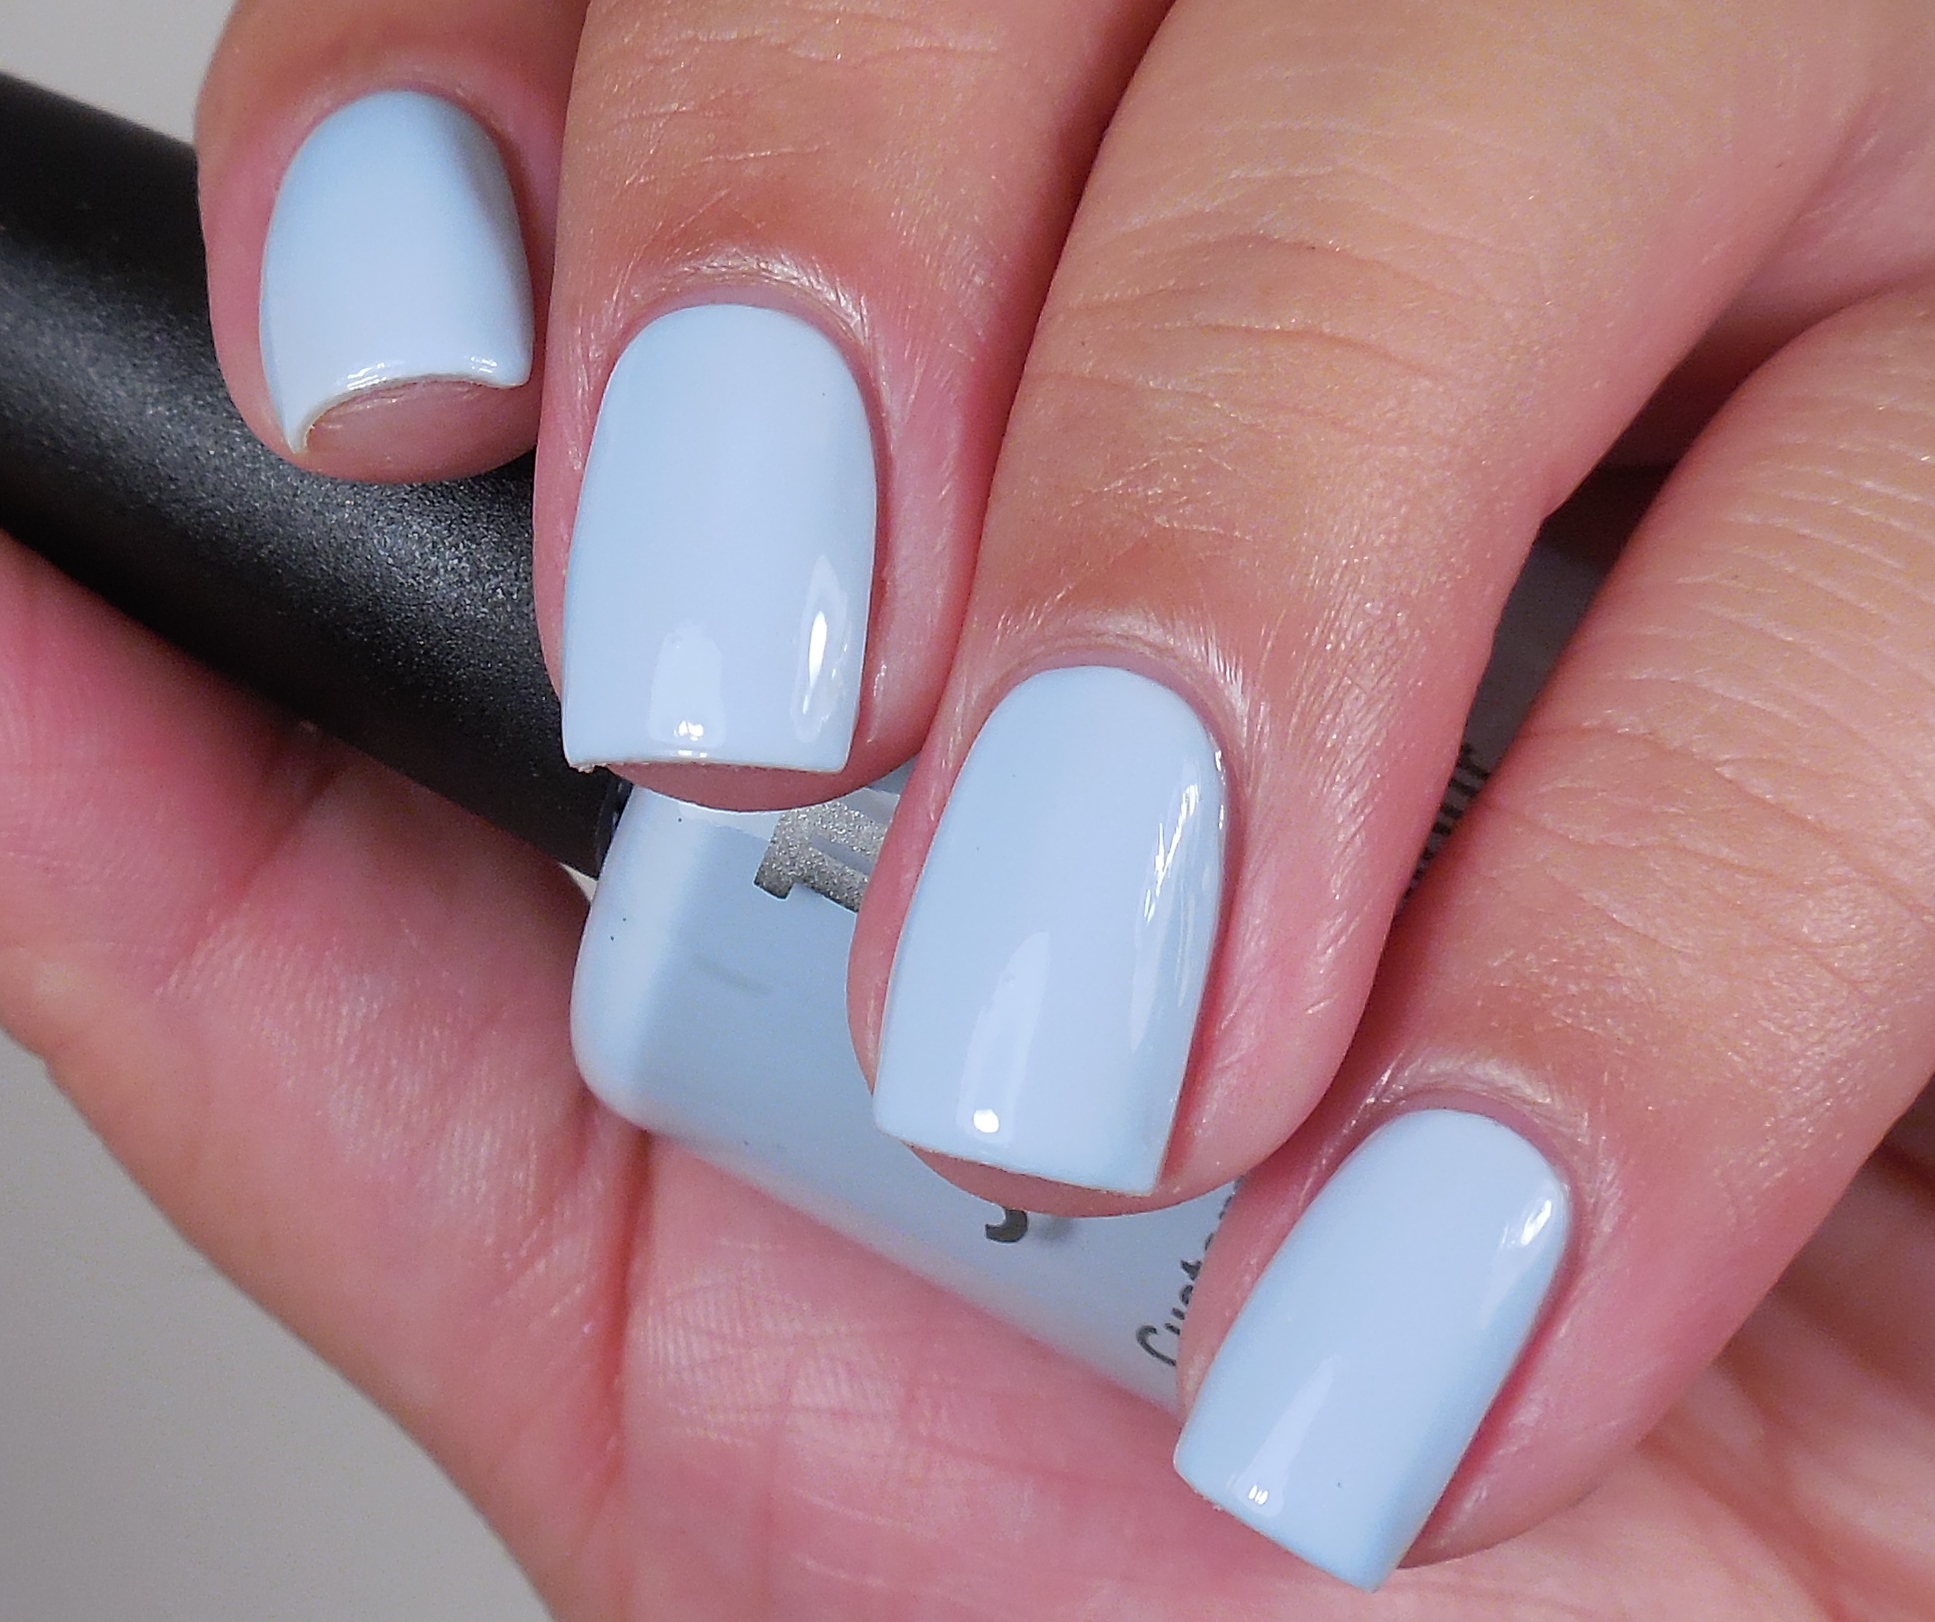
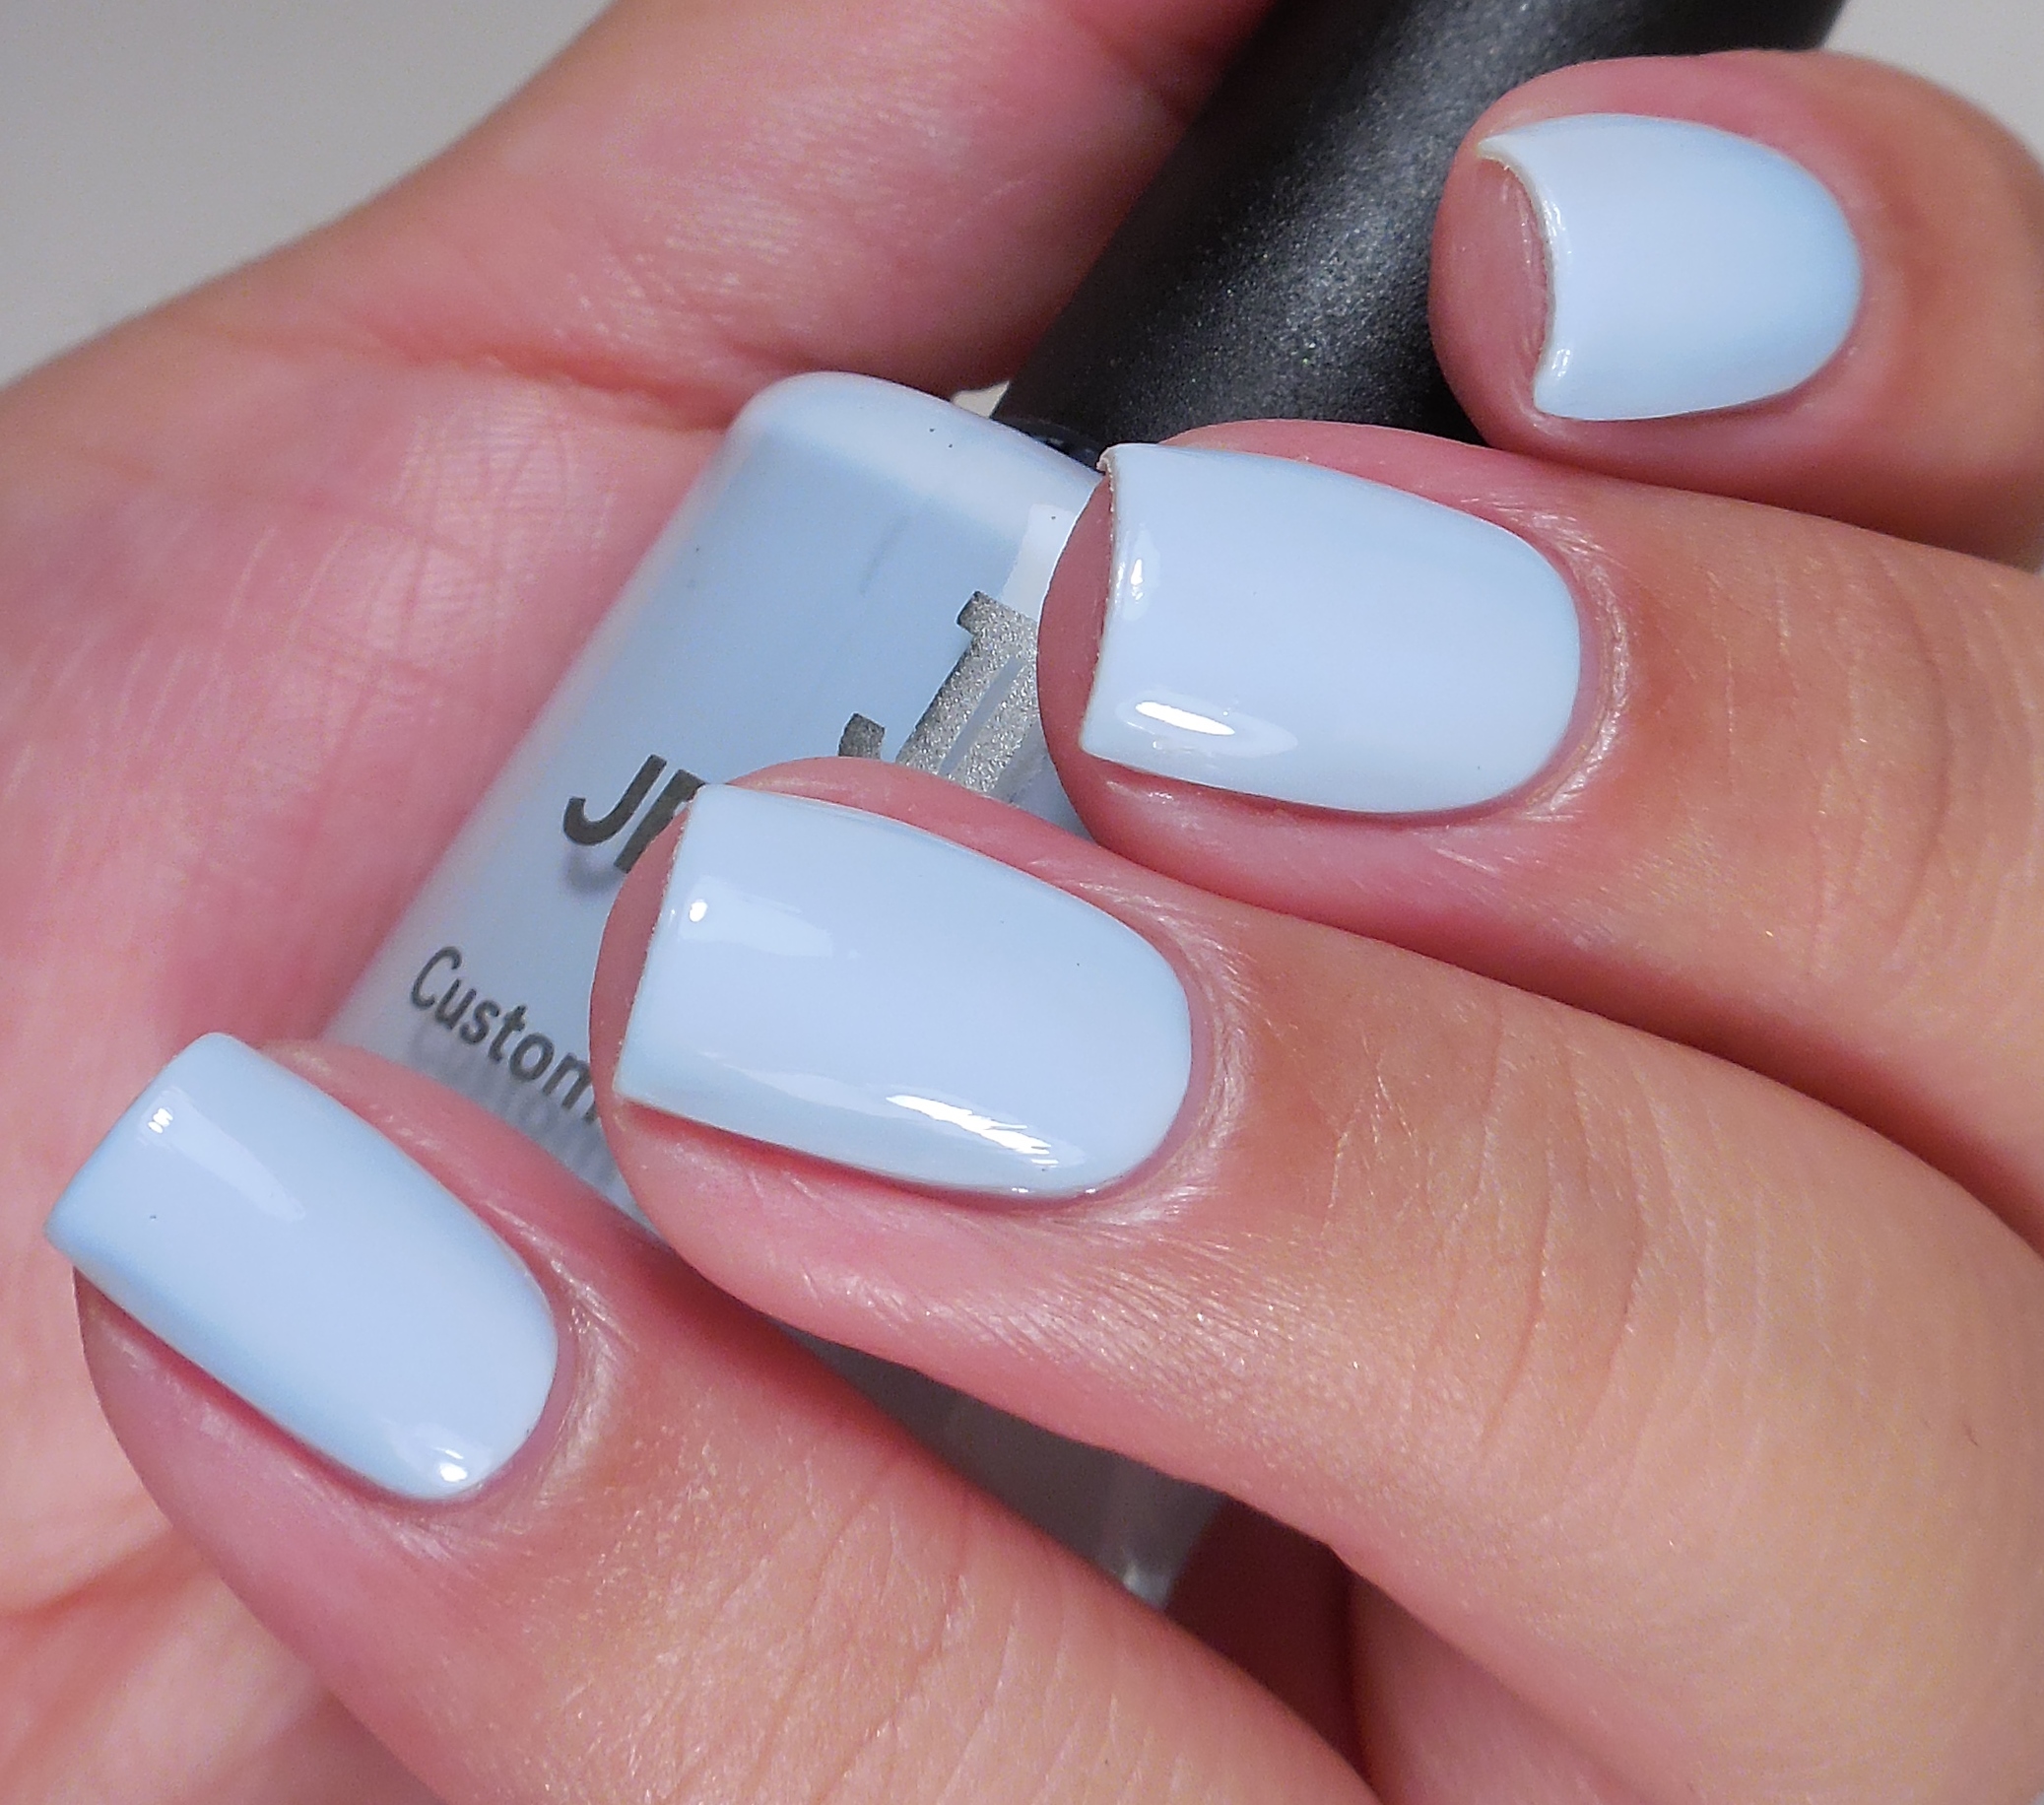 This is Jessica Barely Blueberry from the amazing Gelato Mio! Collection. I applied 3 thin coats for full opacity–isn’t it pretty?!
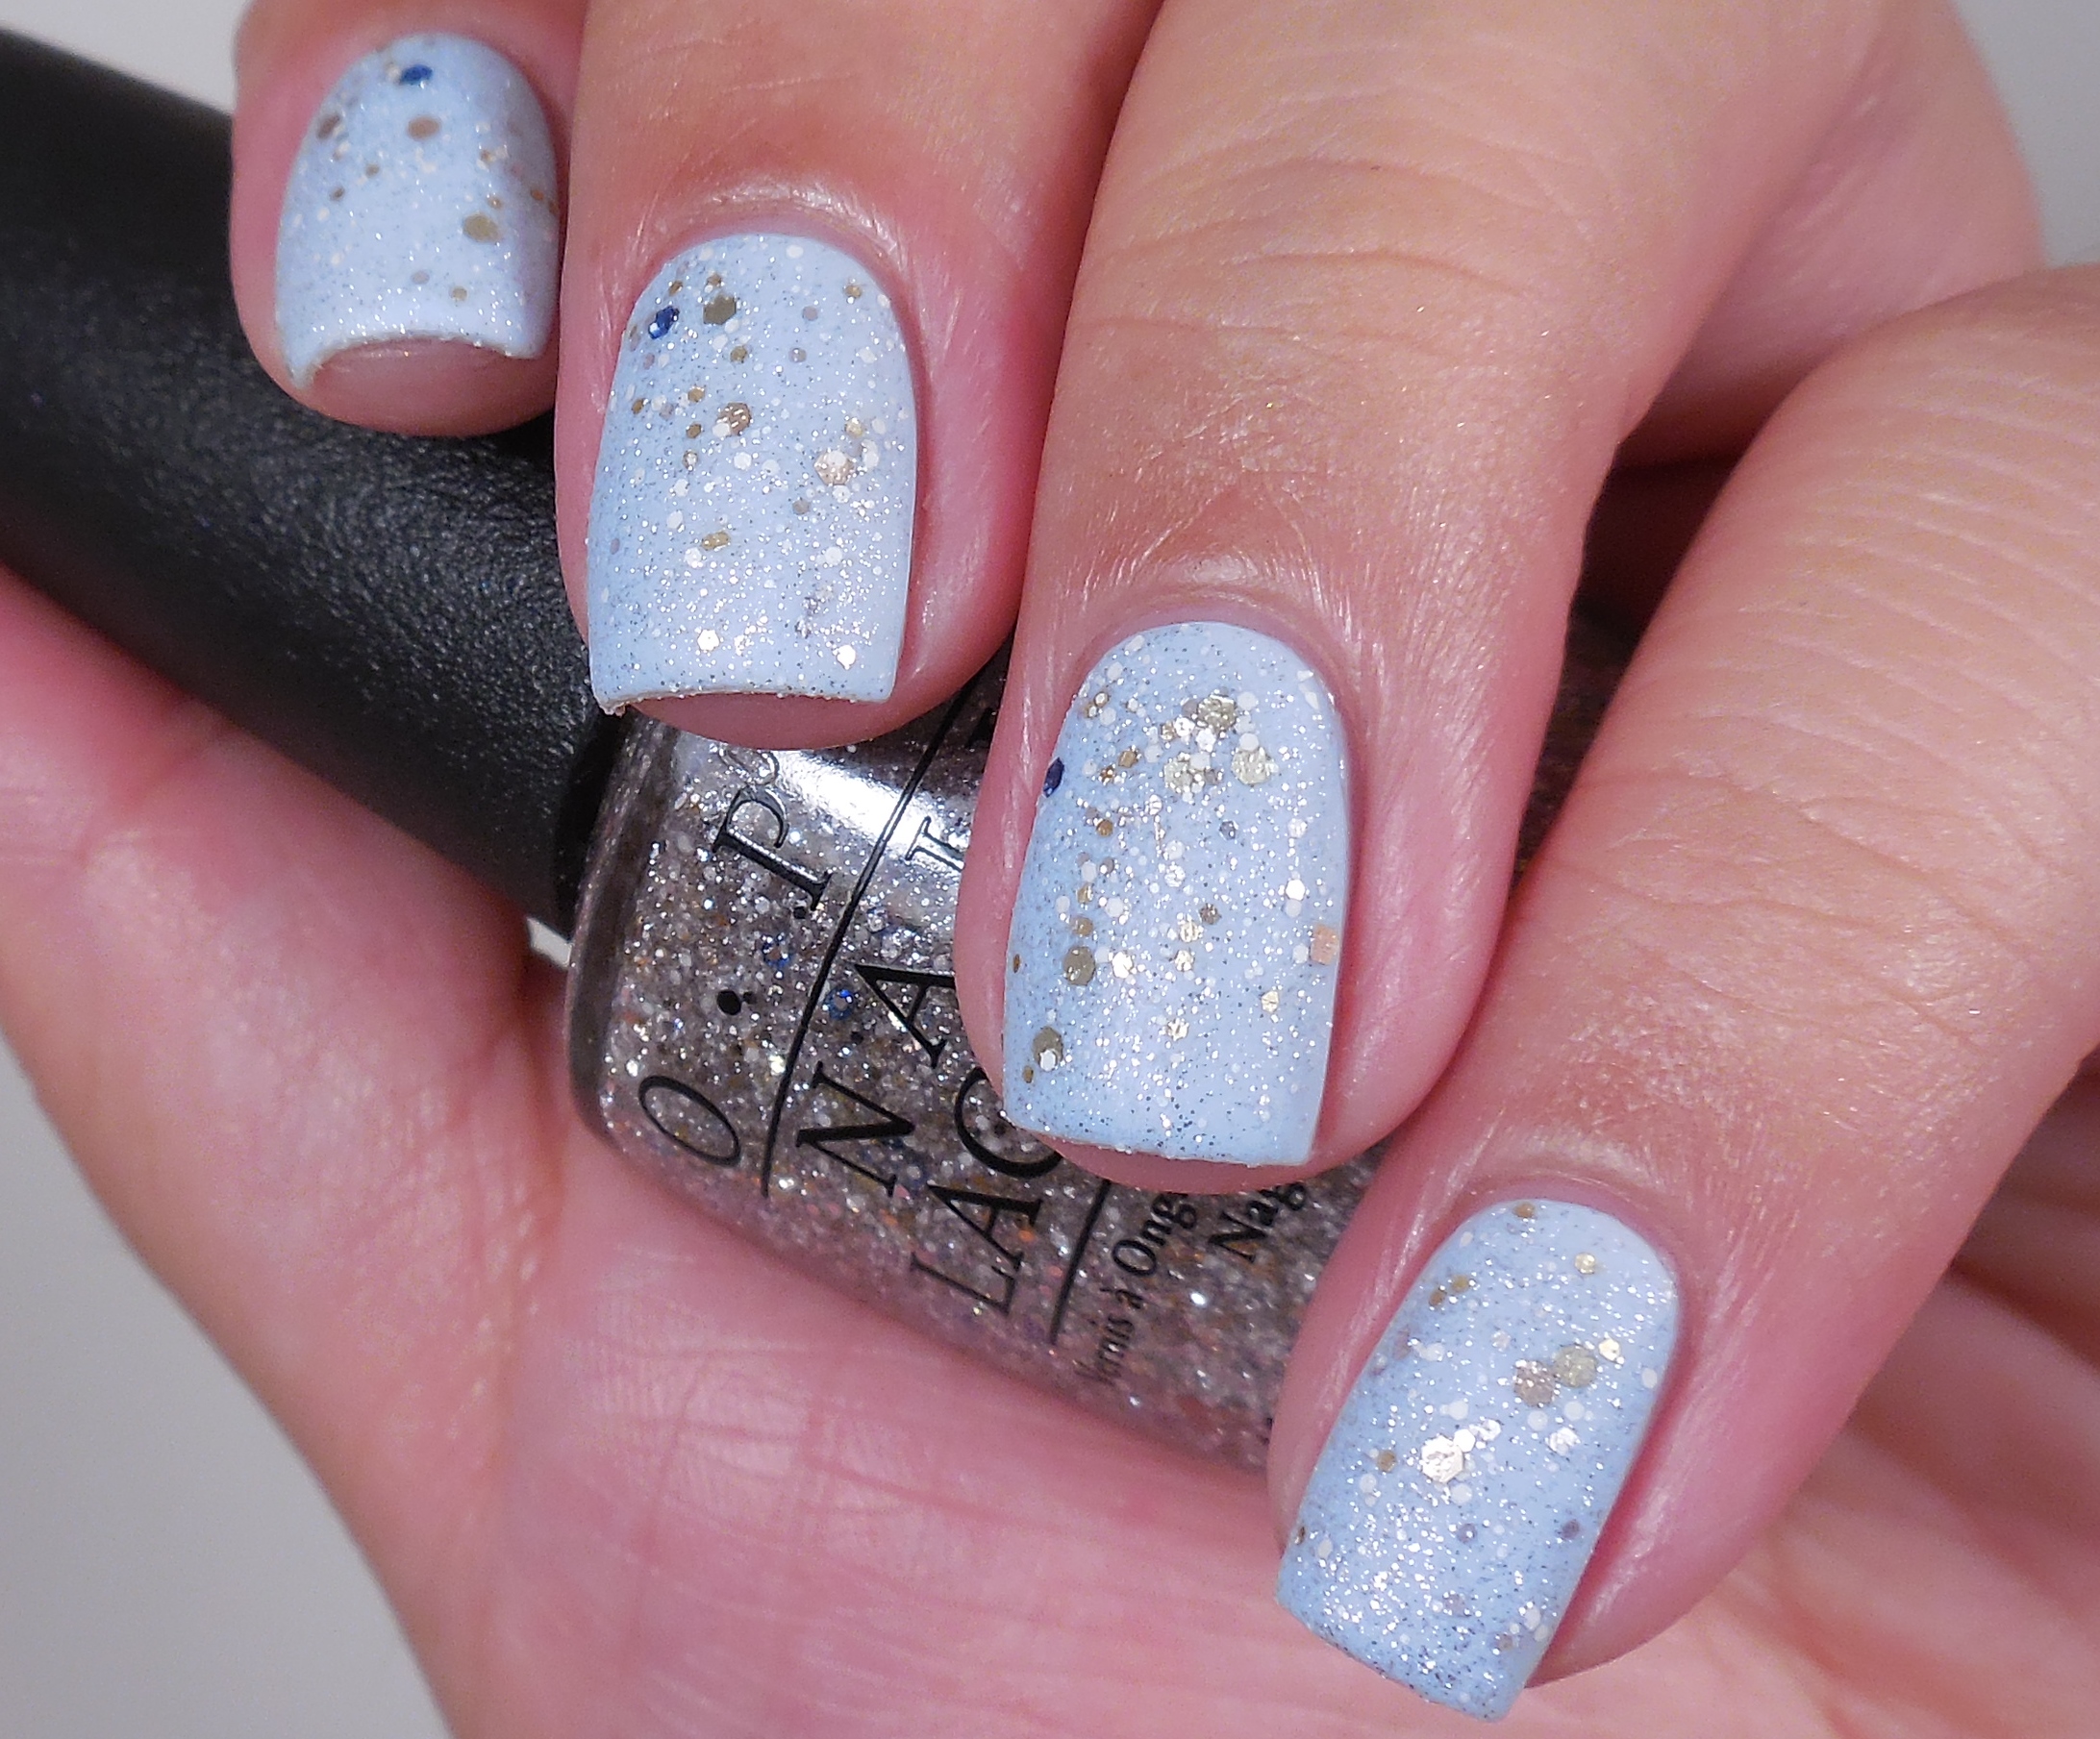
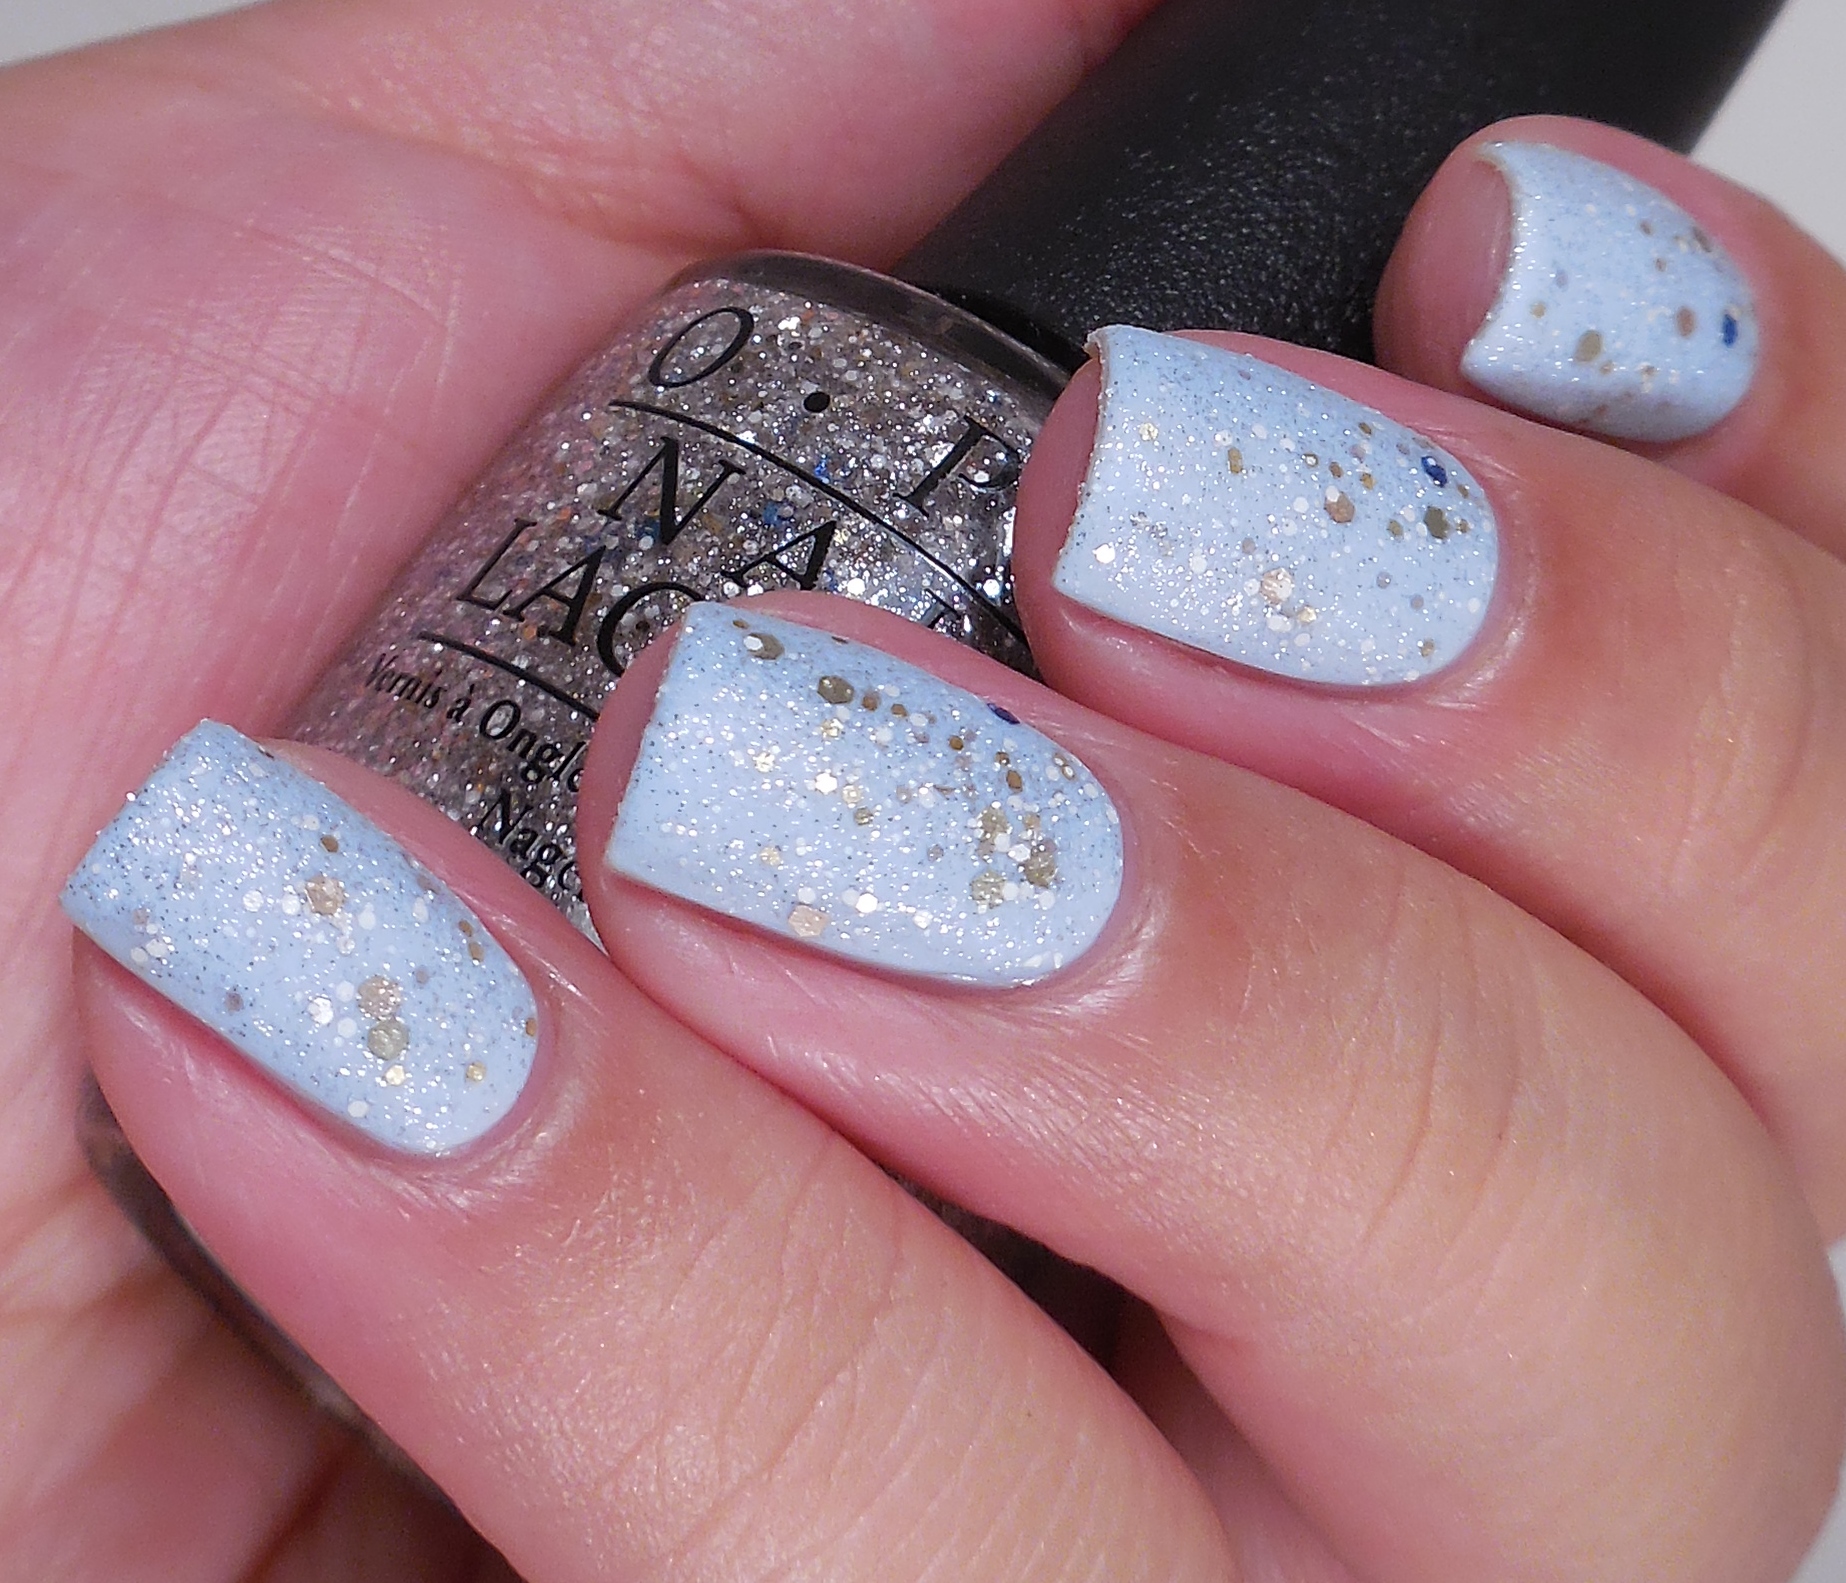 I didn’t want to just show you a blue swatch so I added a thick coat of OPI Muppets World Tour (press sample) and ended up matttifying it all with a coat of OPI Matte Top Coat (press sample). It kind of looks icy…it reminds me of a snow cone for some reason. Is that weird?
It feels good to be posting today. I would have gotten my post up sooner but I had no electricity for over a day. Some asshole who was high on something crashed his car into a utility pole. It took SoCal Edison forever to fix it and they shut down my whole street. Fun times. It was weird not having any power but I ended up not caring THAT much and just read with my flashlight until I fell asleep. I’m really looking forward to my weekend so I’m happy it’s almost Friday!!! Yay! Do you have anything fun planned for the weekend? Anyway, thanks so much for the visit, and I will talk to you soon.
 Loading InLinkz ...
Dermelect Above It
Have you heard of Dermelect? I’ve seen their polishes around on the internet but I never paid much attention because they are $12-$14 for a .4oz bottle which is kinda pricey, and I’m a big cheapskate for the most part. However, a couple of weeks ago I was loading up on essentials at Ulta, and I happened to see a bunch of these polishes in their clearance section for under $0.50!!! Whuuuuut???? At first, I grabbed everything in site because how could I not, but once the euphoria wore off a bit I put things back and only purchased three because I had to leave some for the rest of you, right? See how considerate I am? Besides, I didn’t know what to expect from the brand and maybe I would hate the polish or the brush. When you hate the polish, it doesn’t matter how cheap it is–it’s still a waste. Let me show you the first color I picked up.
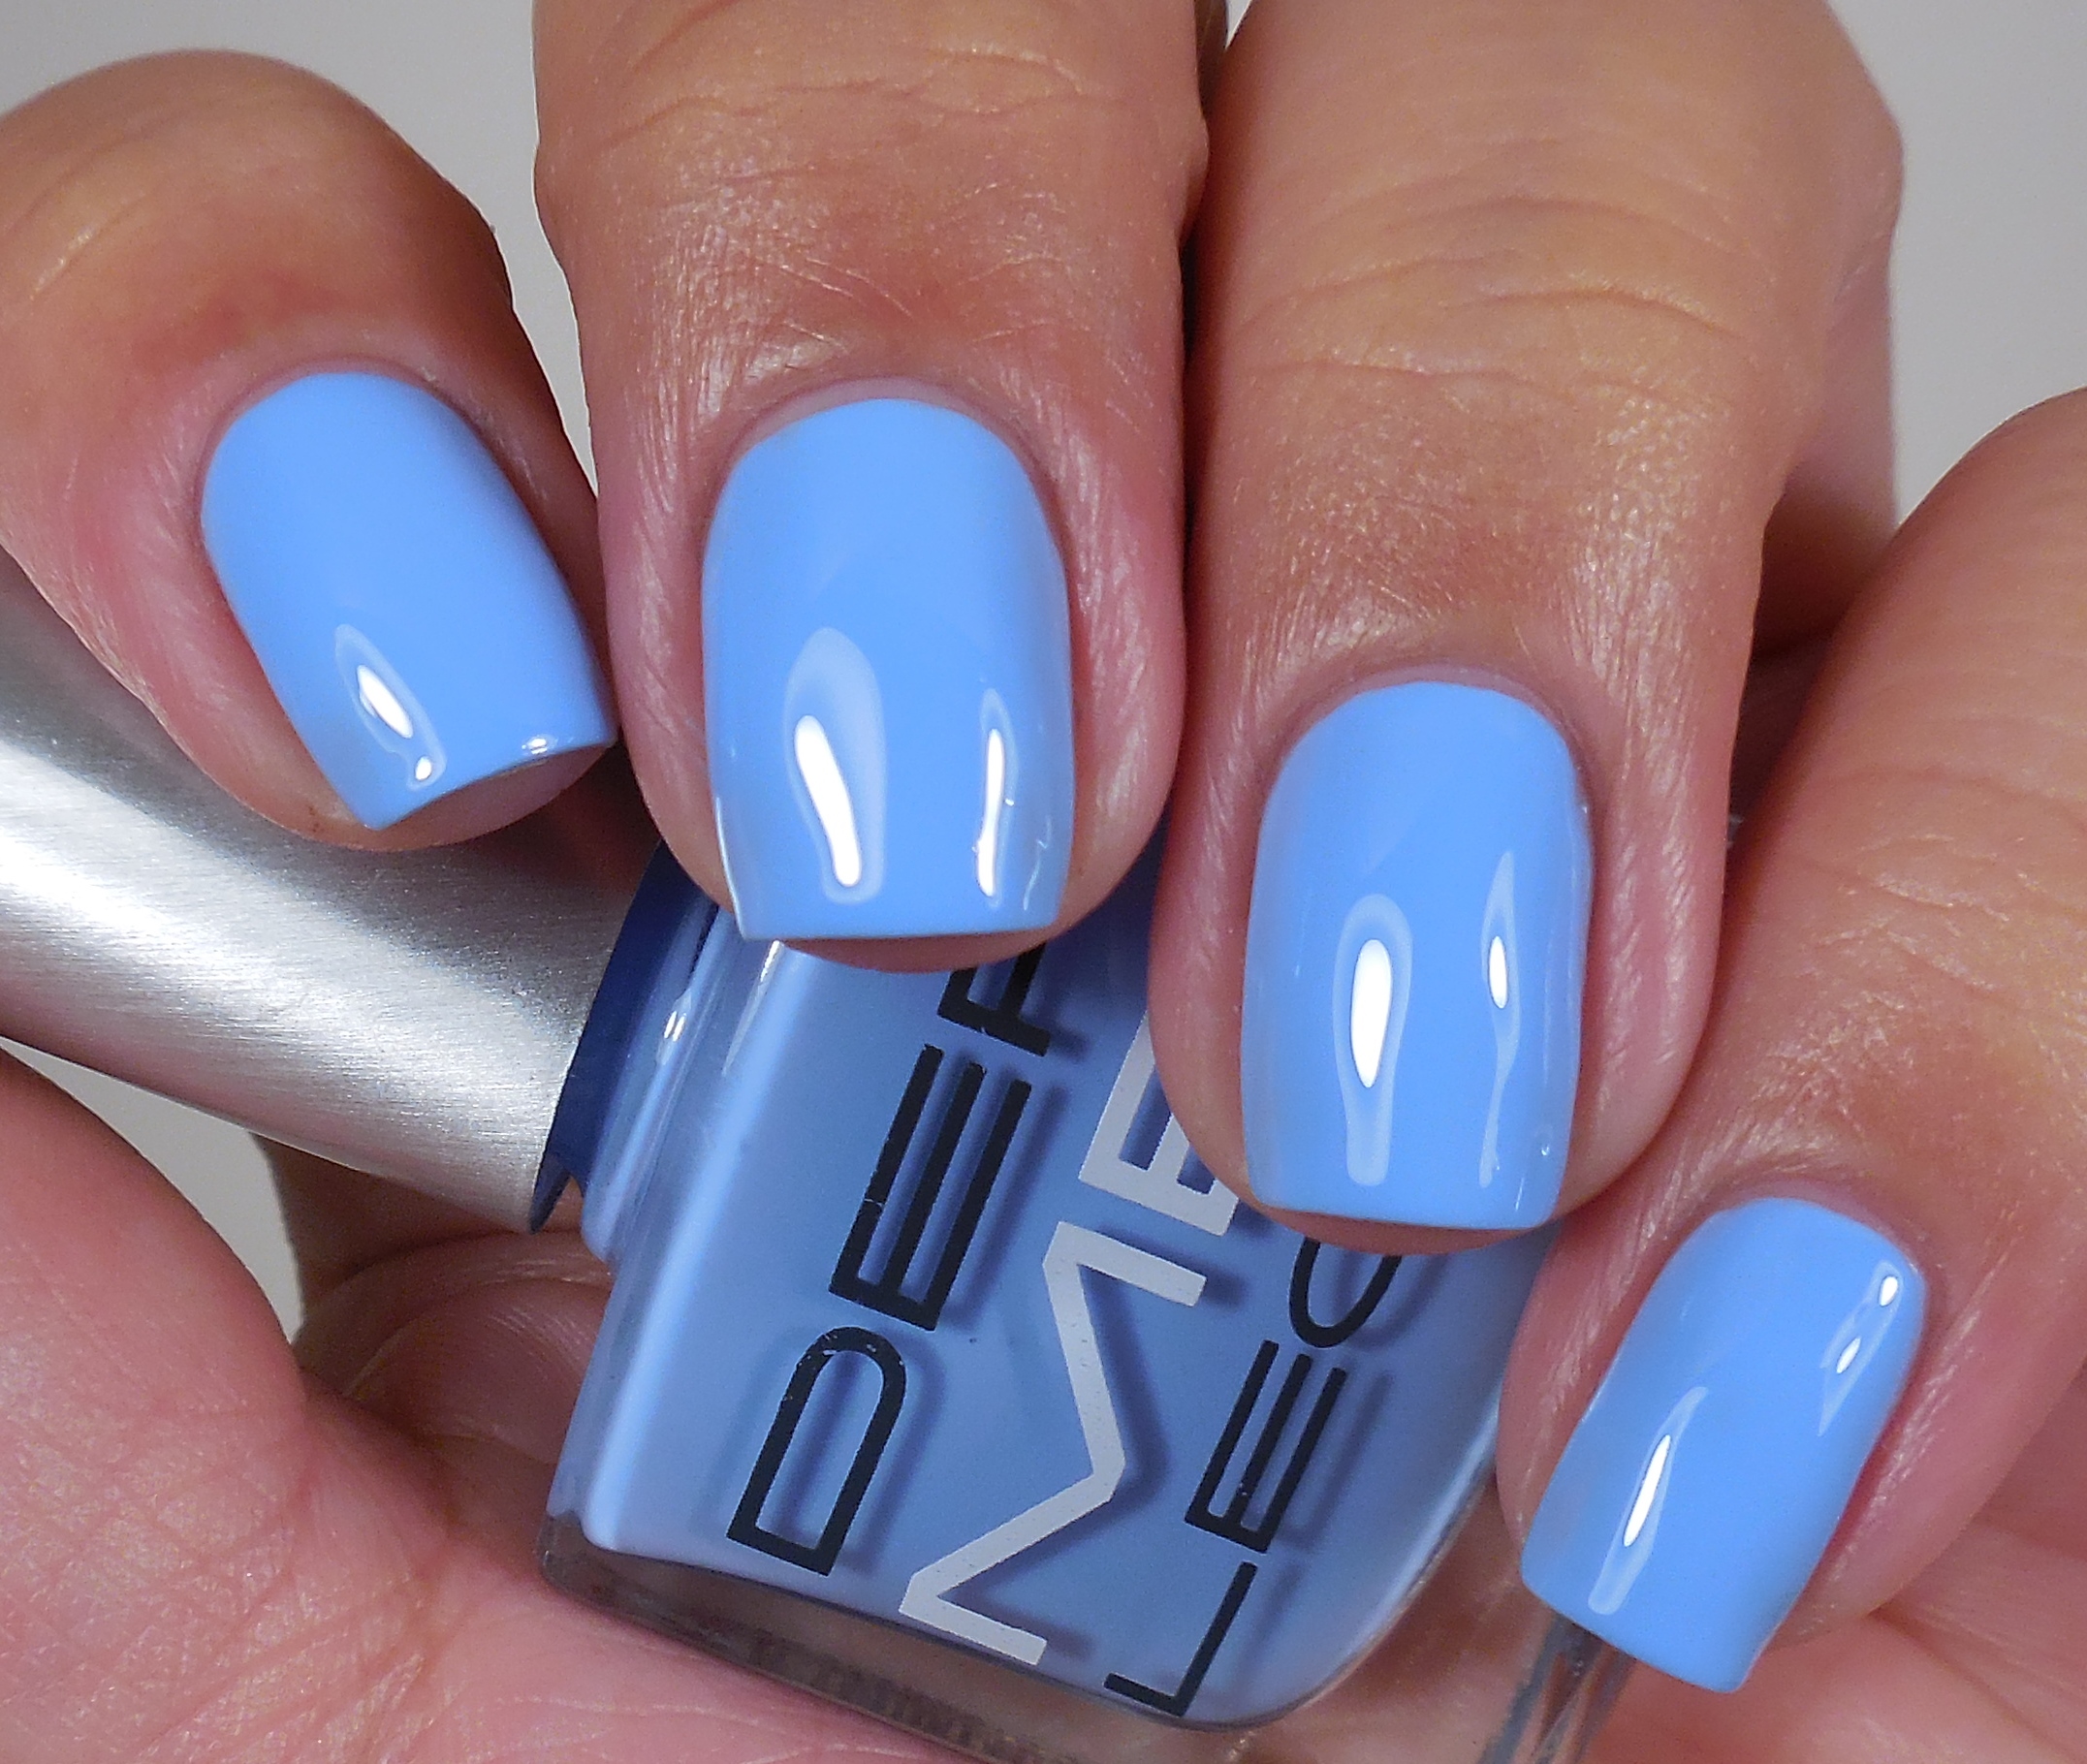
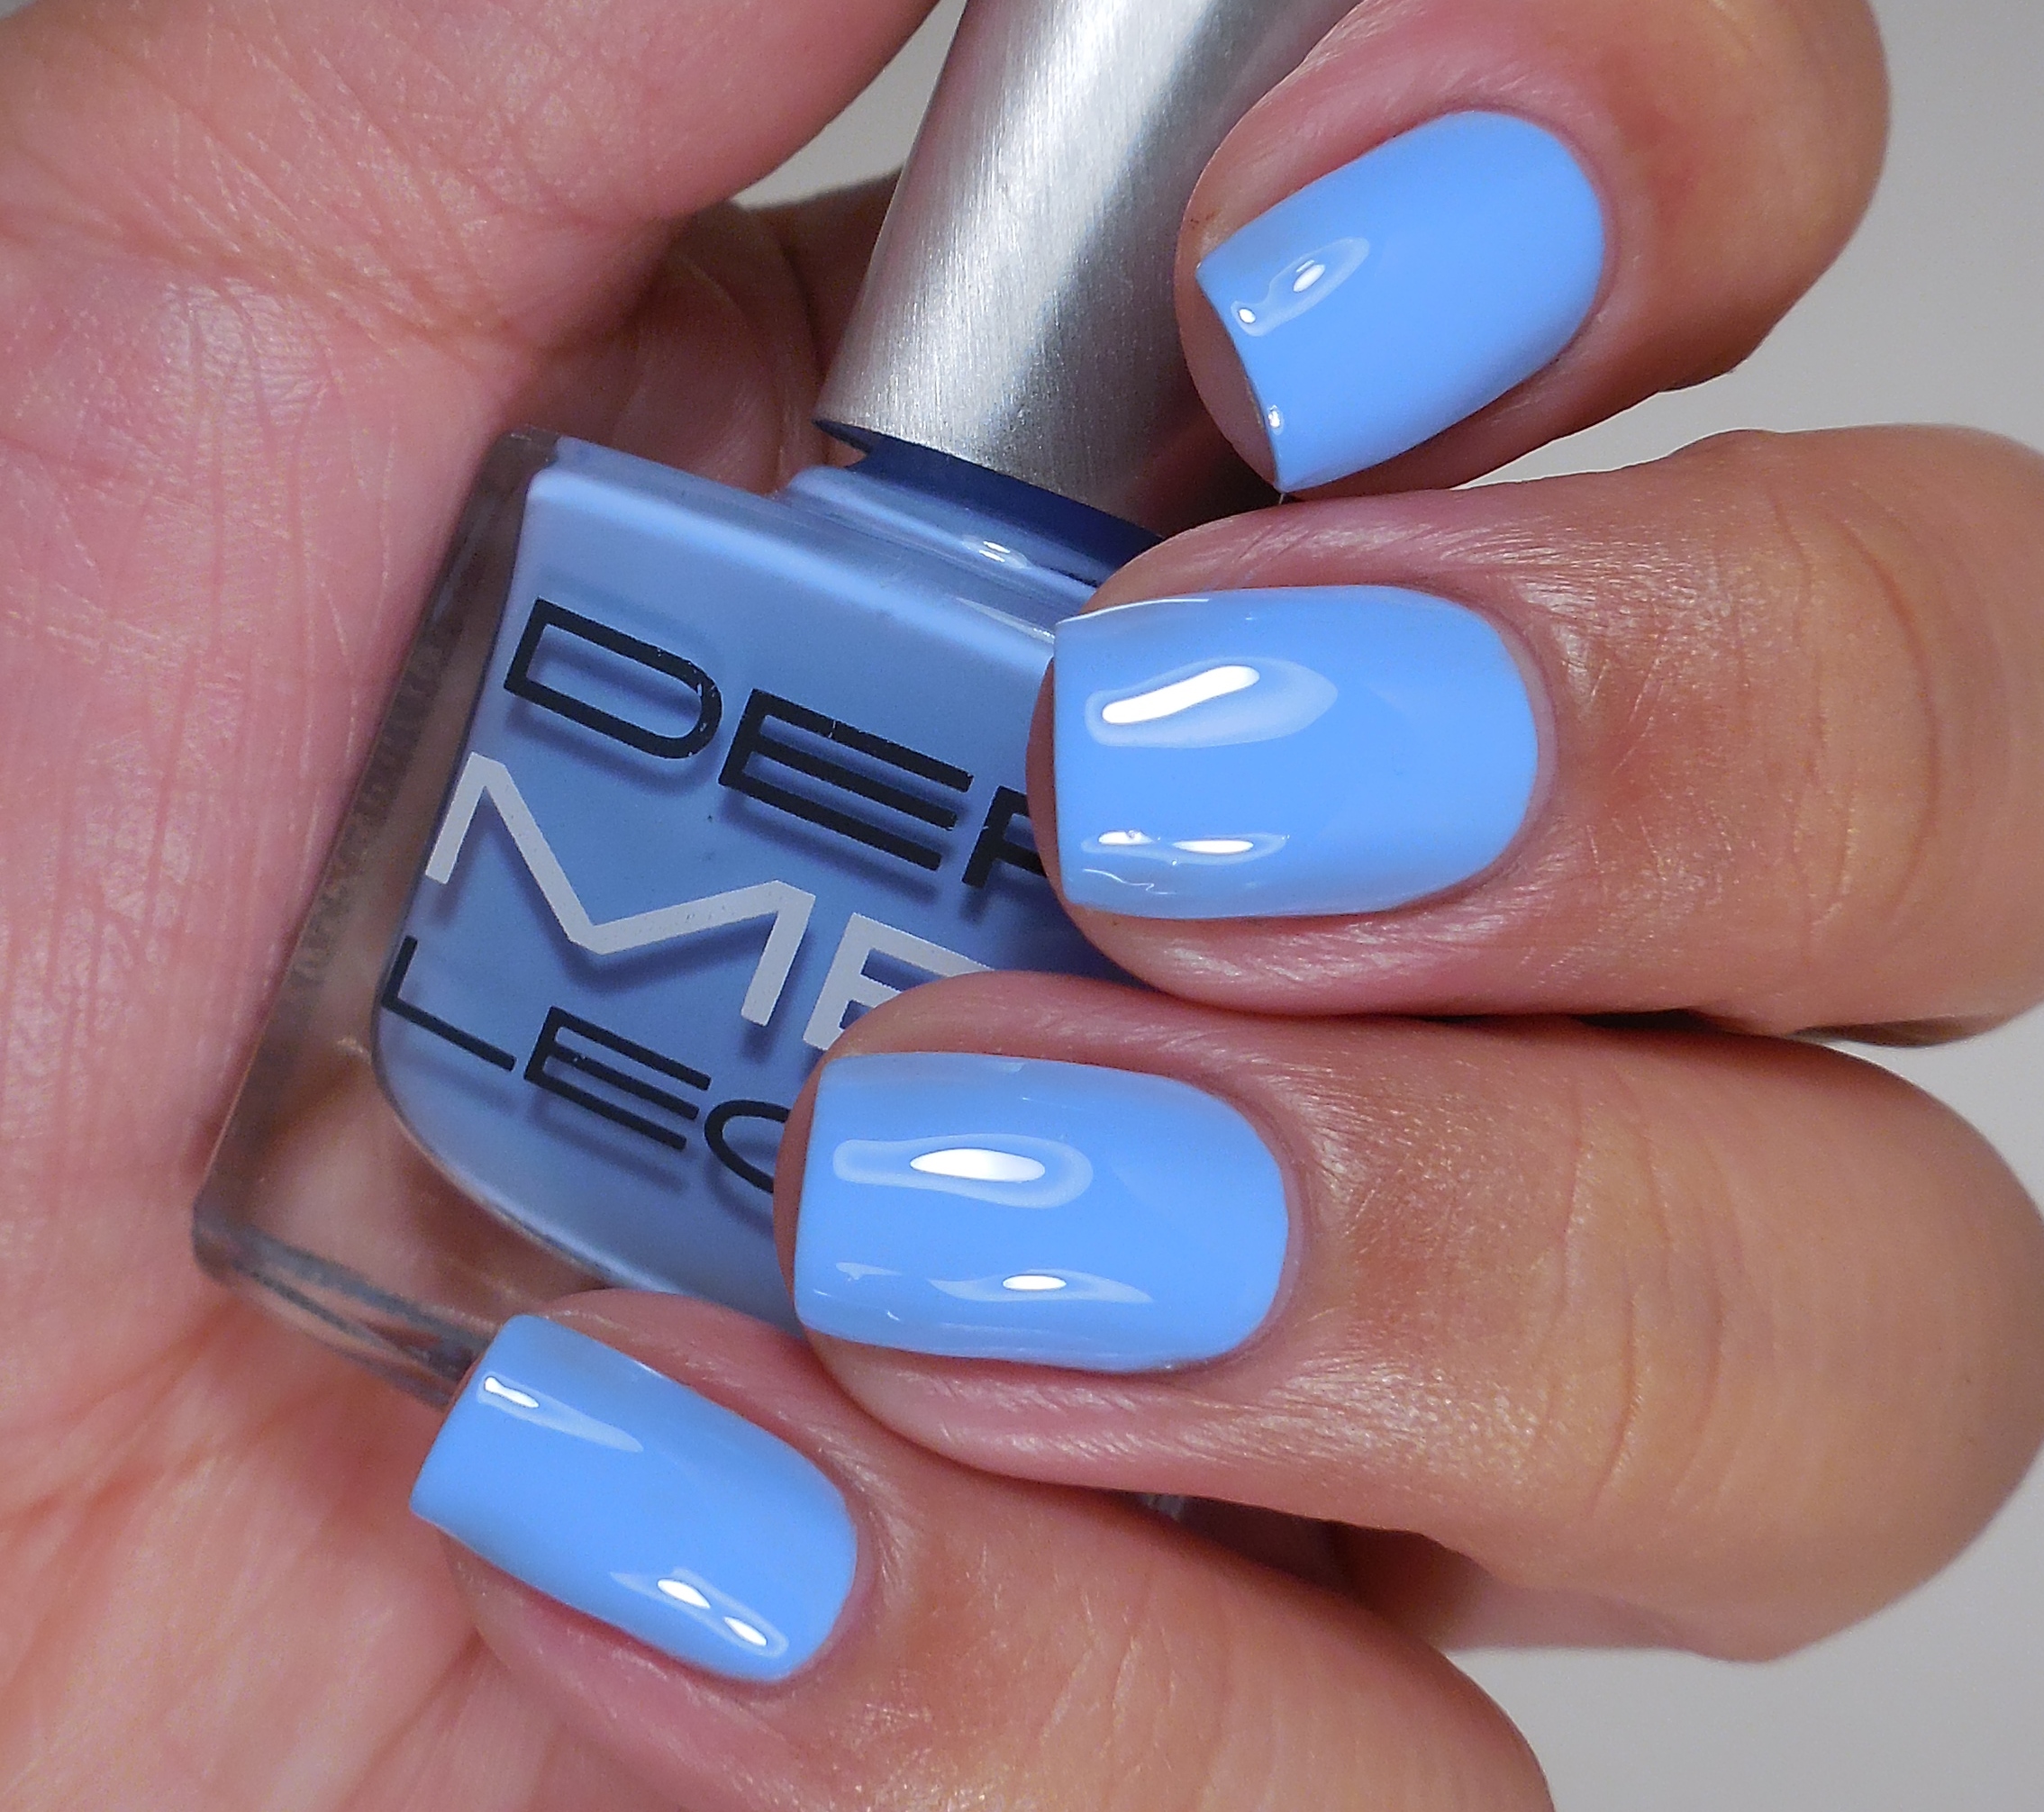 Dermelect Above It is a beautiful sky blue. The formula seemed a little watery, but magically it was perfectly opaque with two coats. I also really liked the brush even though it’s thinner that what I usually like. Overall, I think the quality of the polish is very good. Would I pay full price for it? Nope.
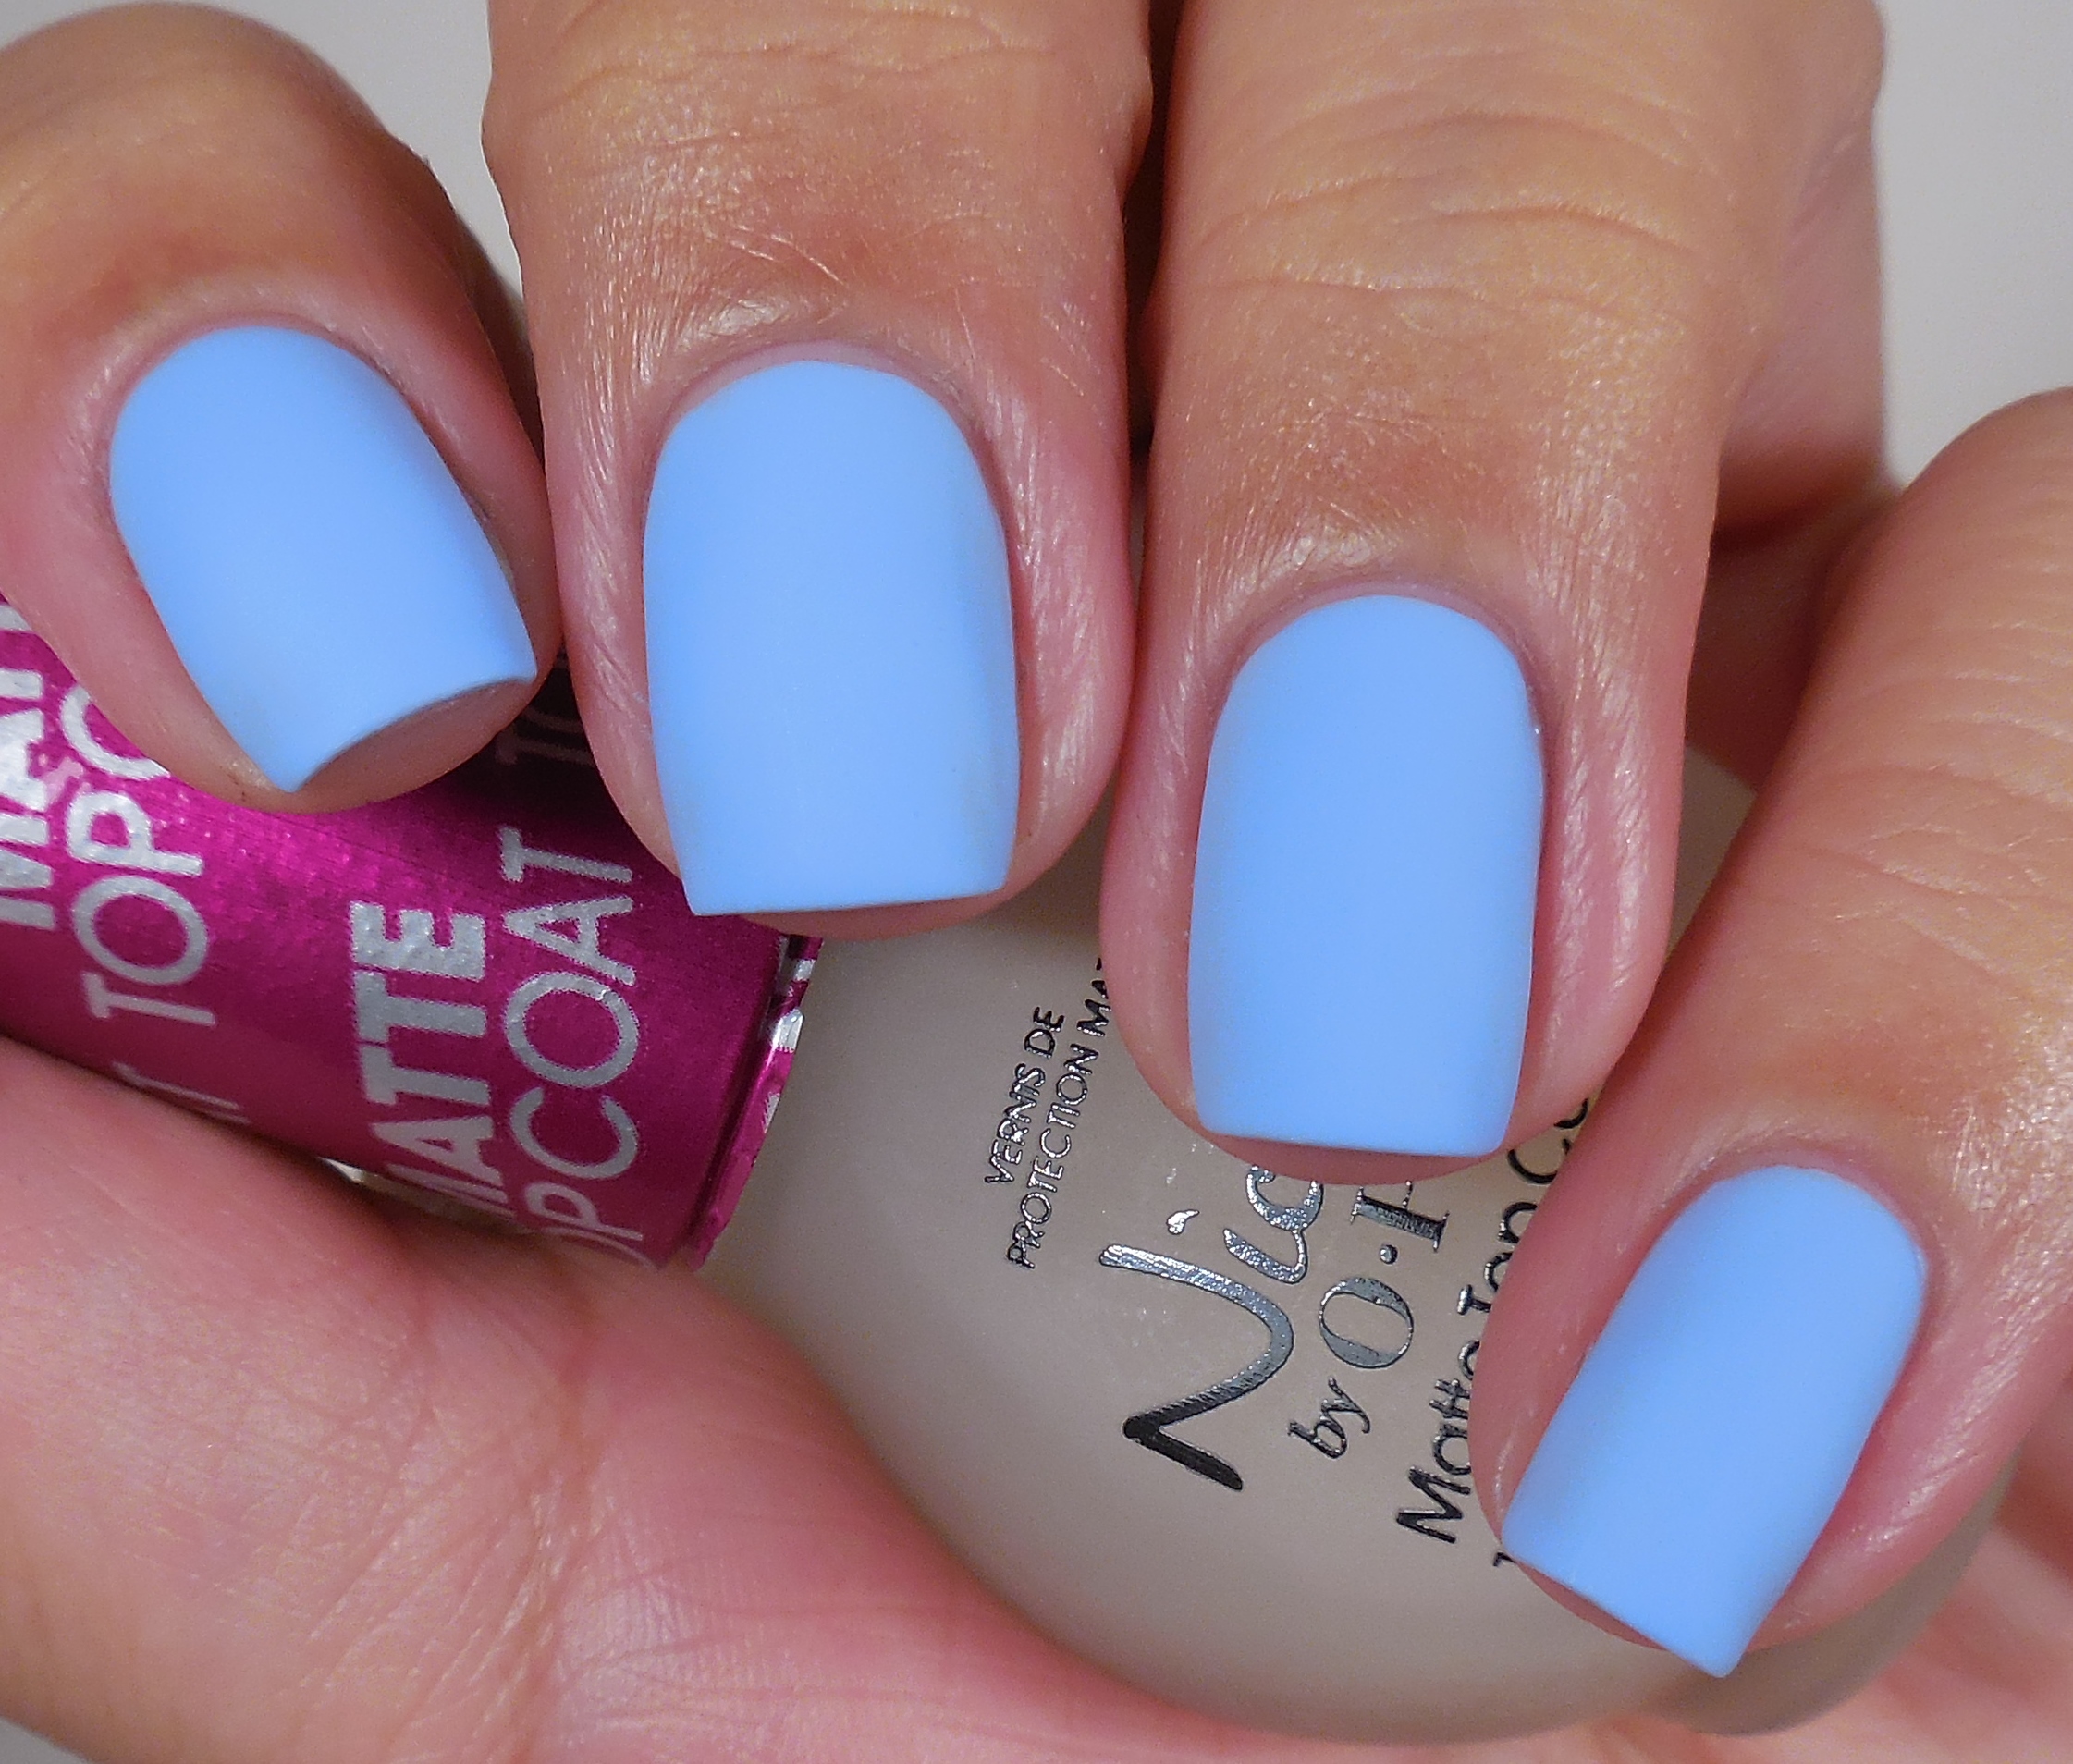
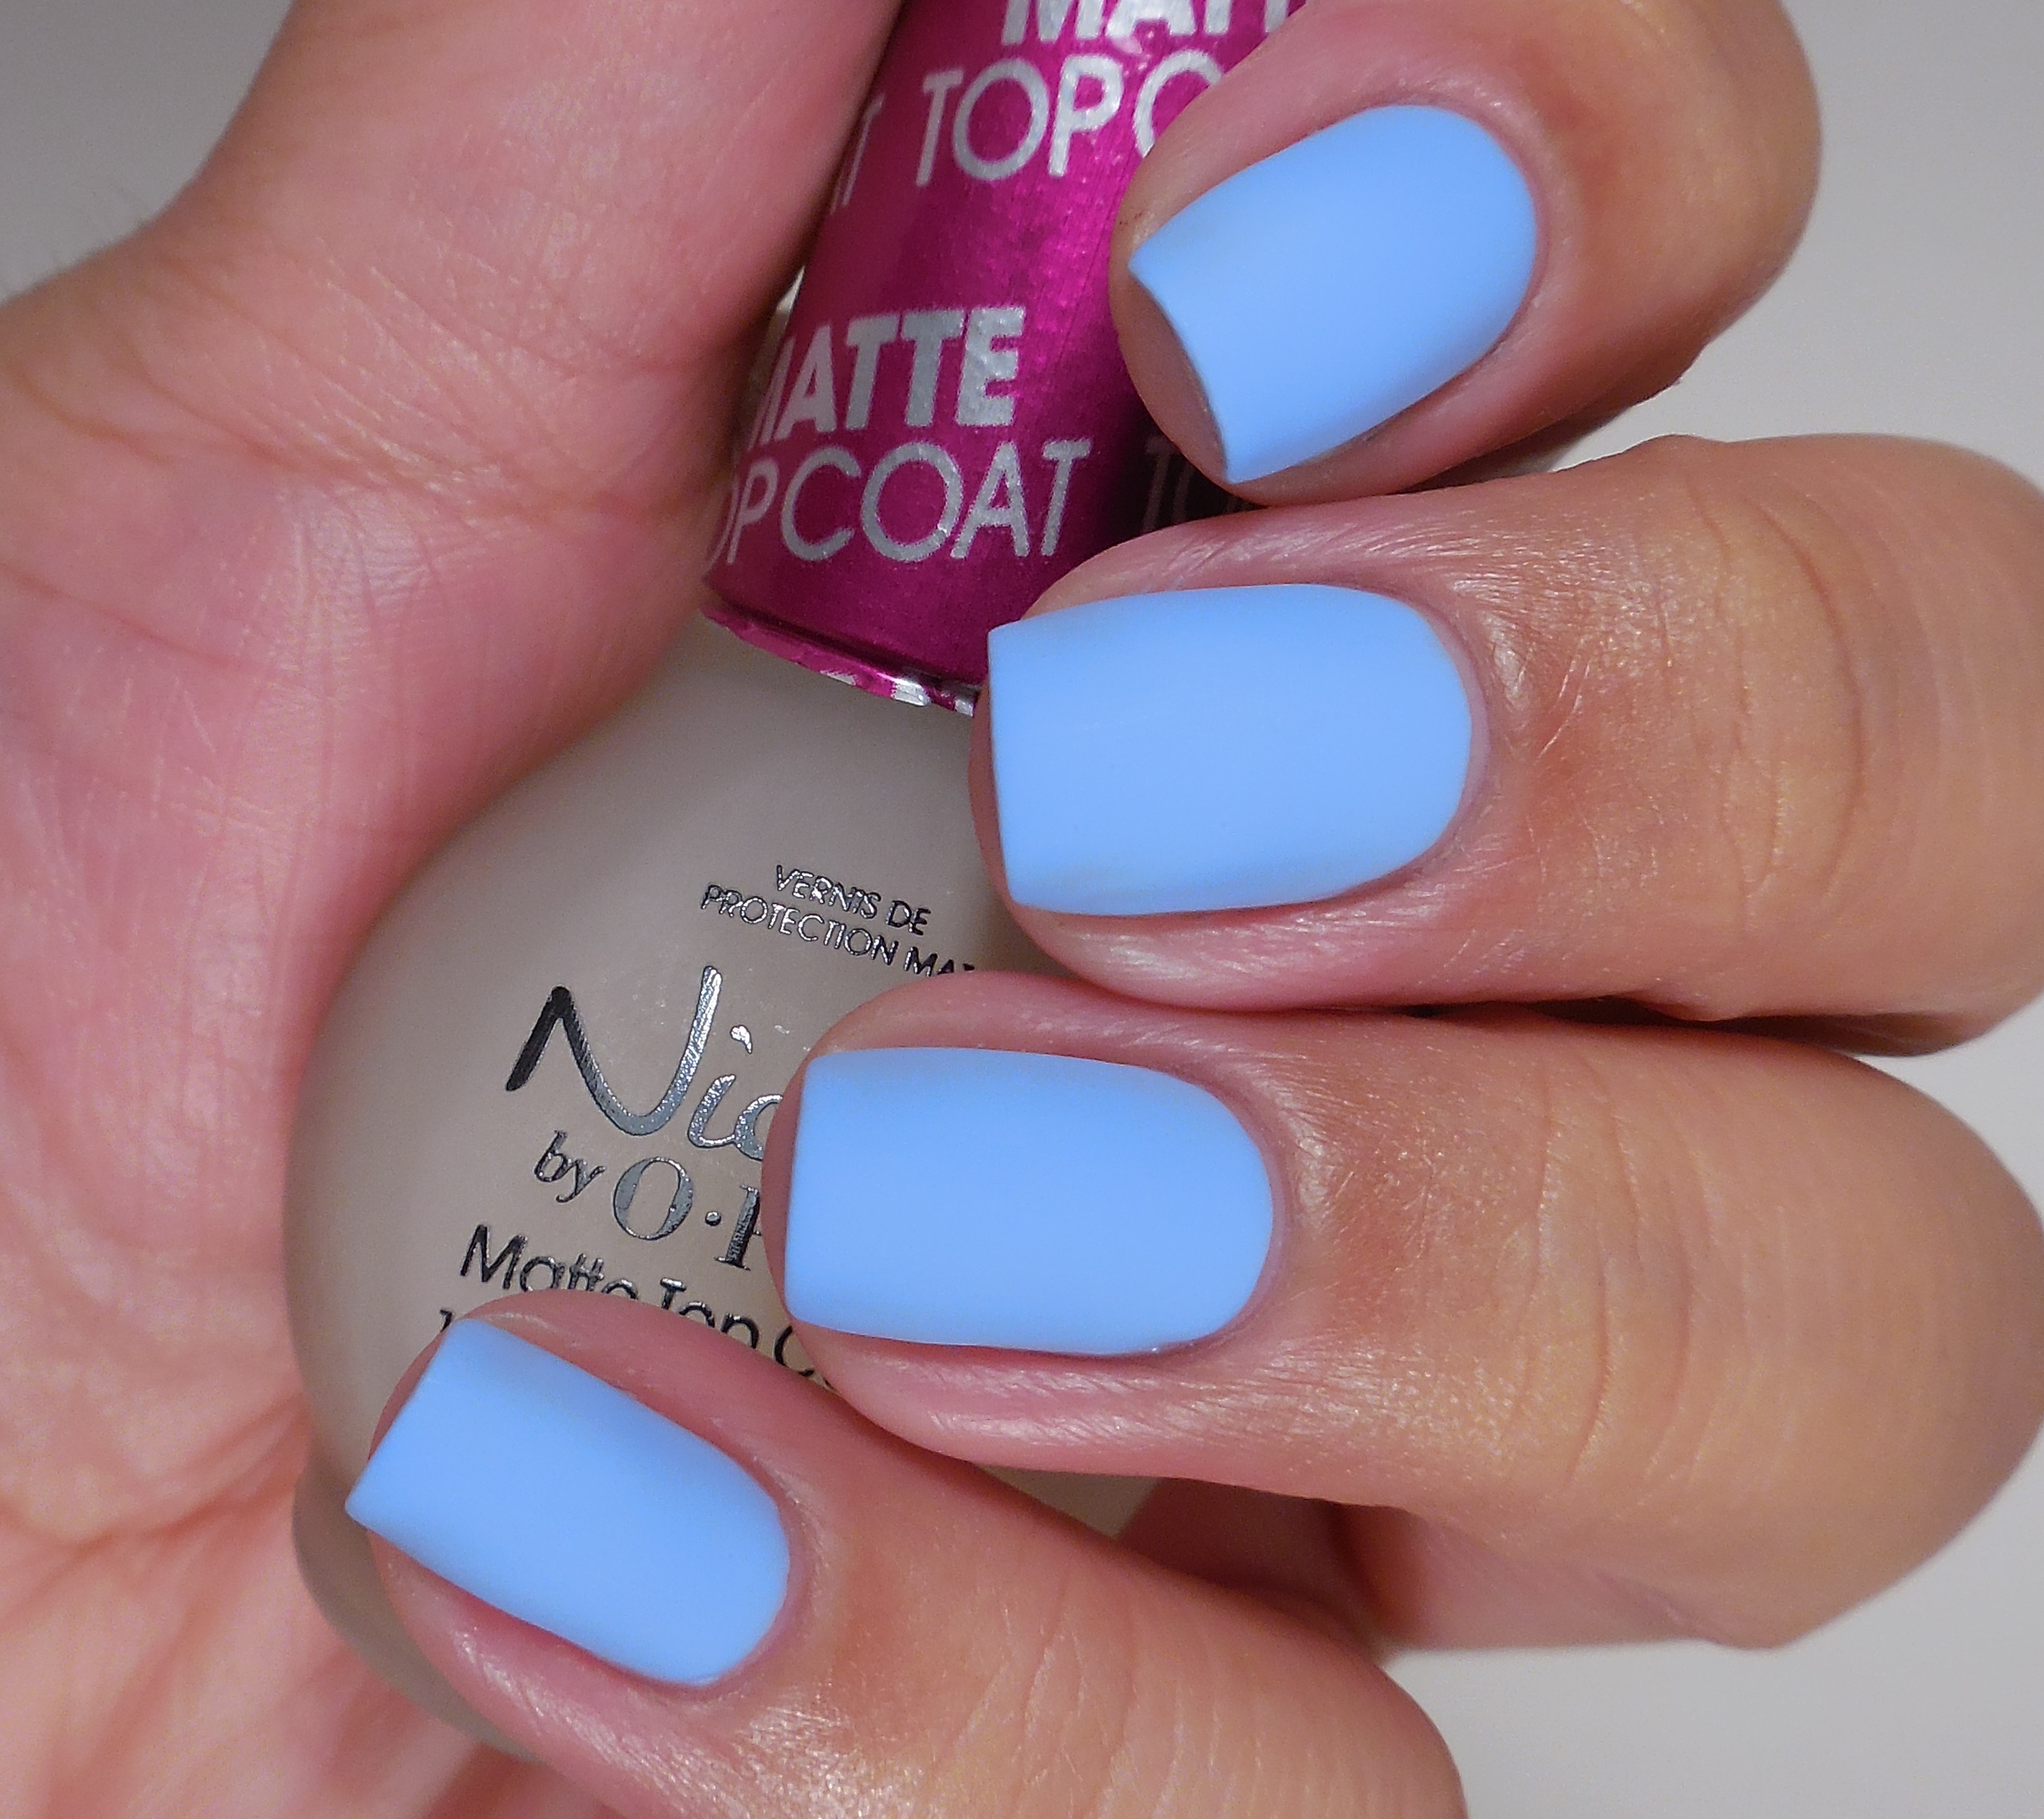 And just for shits and giggles, I decided to mattify the polish with my Nicole by OPI Matte Top Coat (press sample) and dangnabit it looks amazing.
So what do you think of this polish? Have you tried anything from this brand? I’m pleasantly surprised and hope that I can purchase more on clearance in the future. Moving on to more serious things: today is Ash Wednesday which signifies the beginning of Lent. I have decided to go on a polish no-buy during this time which I know will be very difficult for me considering the sheer amount of Spring collections that are coming out now, but I think it will be good for me. There are a lot of things that I could give up, but nothing will be as hard as giving up purchasing new polishes. Wish me luck!
Have you entered my giveaway? Click the image below to enter!
The Lacquer Ring – Splatter
I need to tone it down a little today because I’m almost roid raging over a freaking nail. So here I am all happy with being able to use my swatching hand again, and I was all showing off my new nail shape and all…and BAM! My pink nail split lengthwise. How does that even happen? I’ve never had that happen before so I was like…WTF nail? I managed to file it down enough to where the split ended, but now I’m just waiting for the next nail catastrophe. Oh, and I also have a nail starting to peel/break on my non-swatching hand. Of course this happens when I have about 30 polishes to swatch because the universe hates me. Let me get off this rant for now so I can actually show you what I’m supposed to be talking about today: The Lacquer Ring! Yep, we are at it again with a new prompt which was chosen by Amanda. She chose splatter nails, and of course I had to take the easiest way out because, at Sweet Brown says, Ain’t nobody got time fo dat!
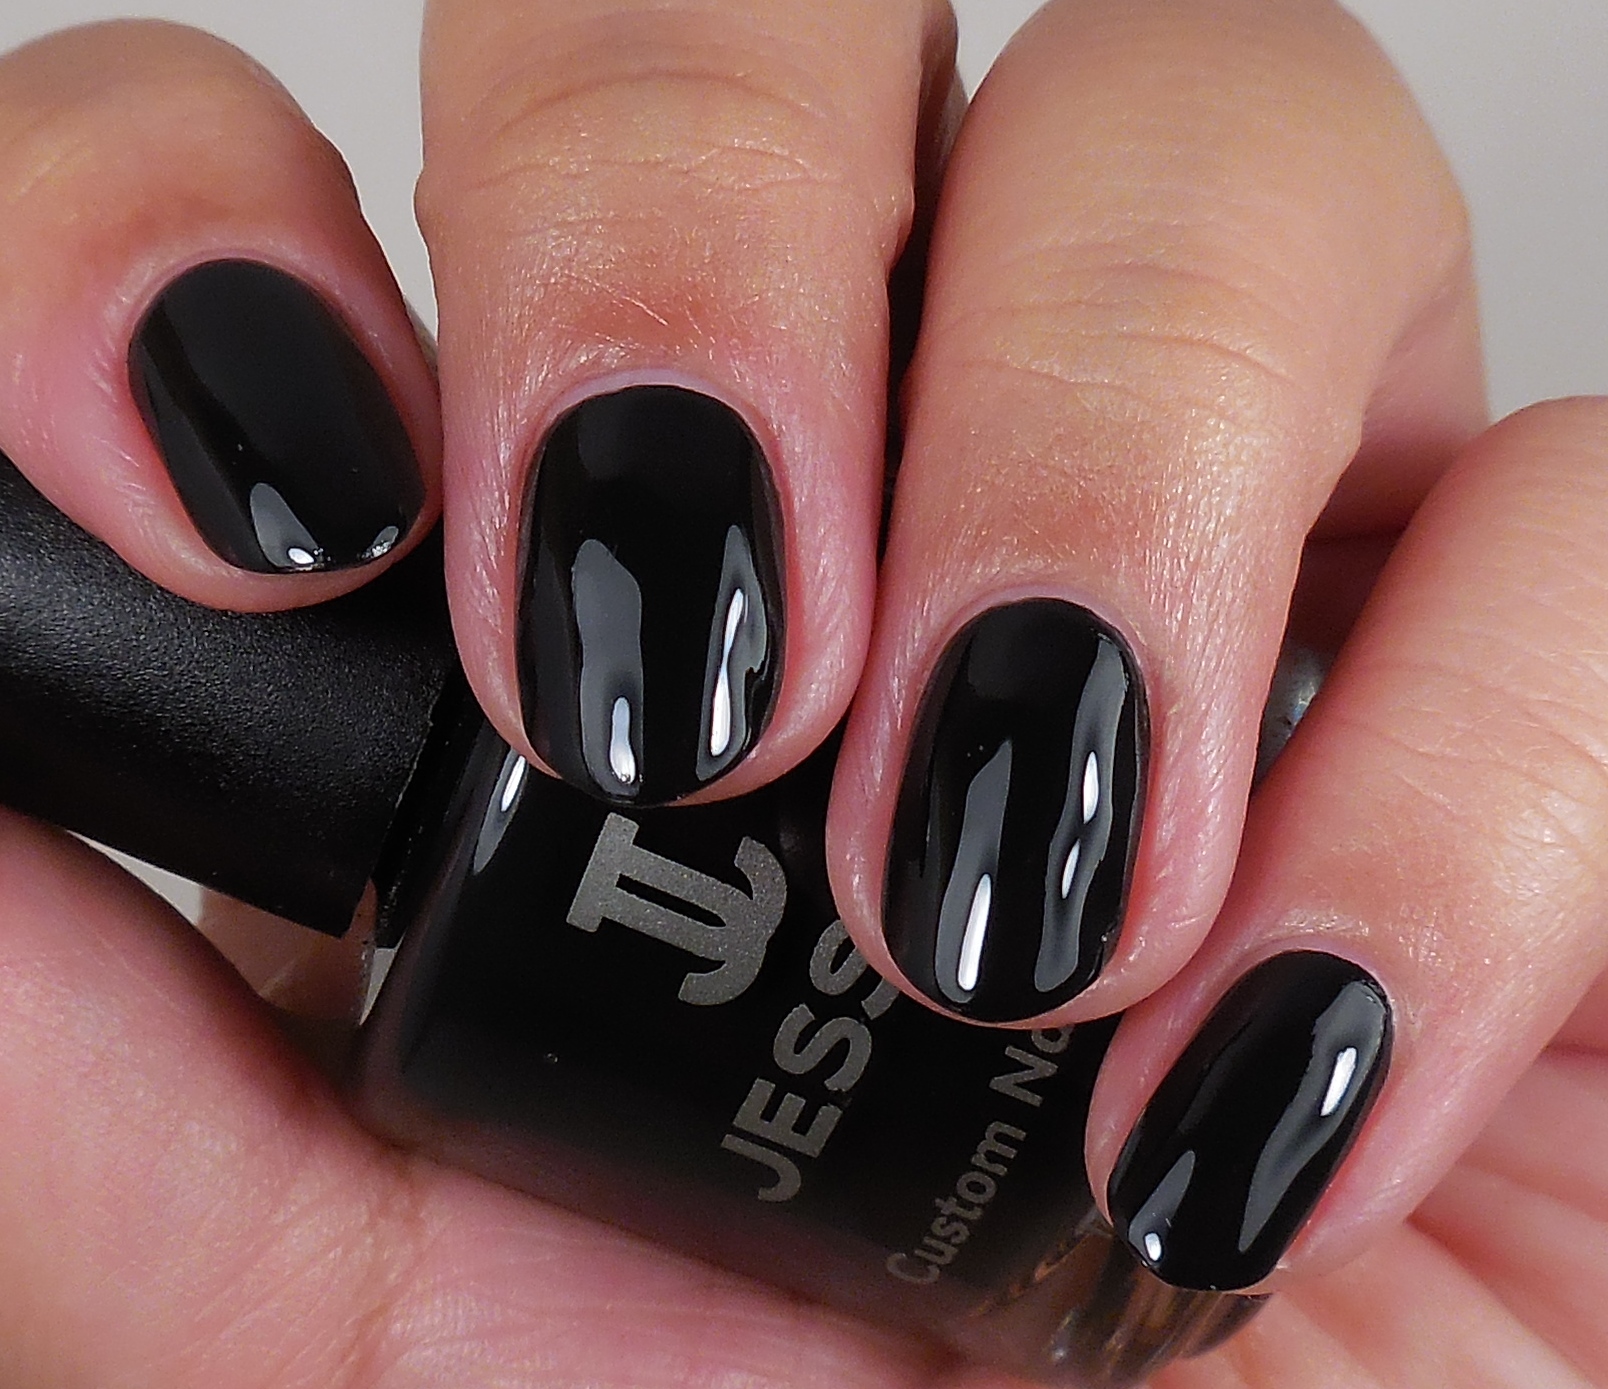
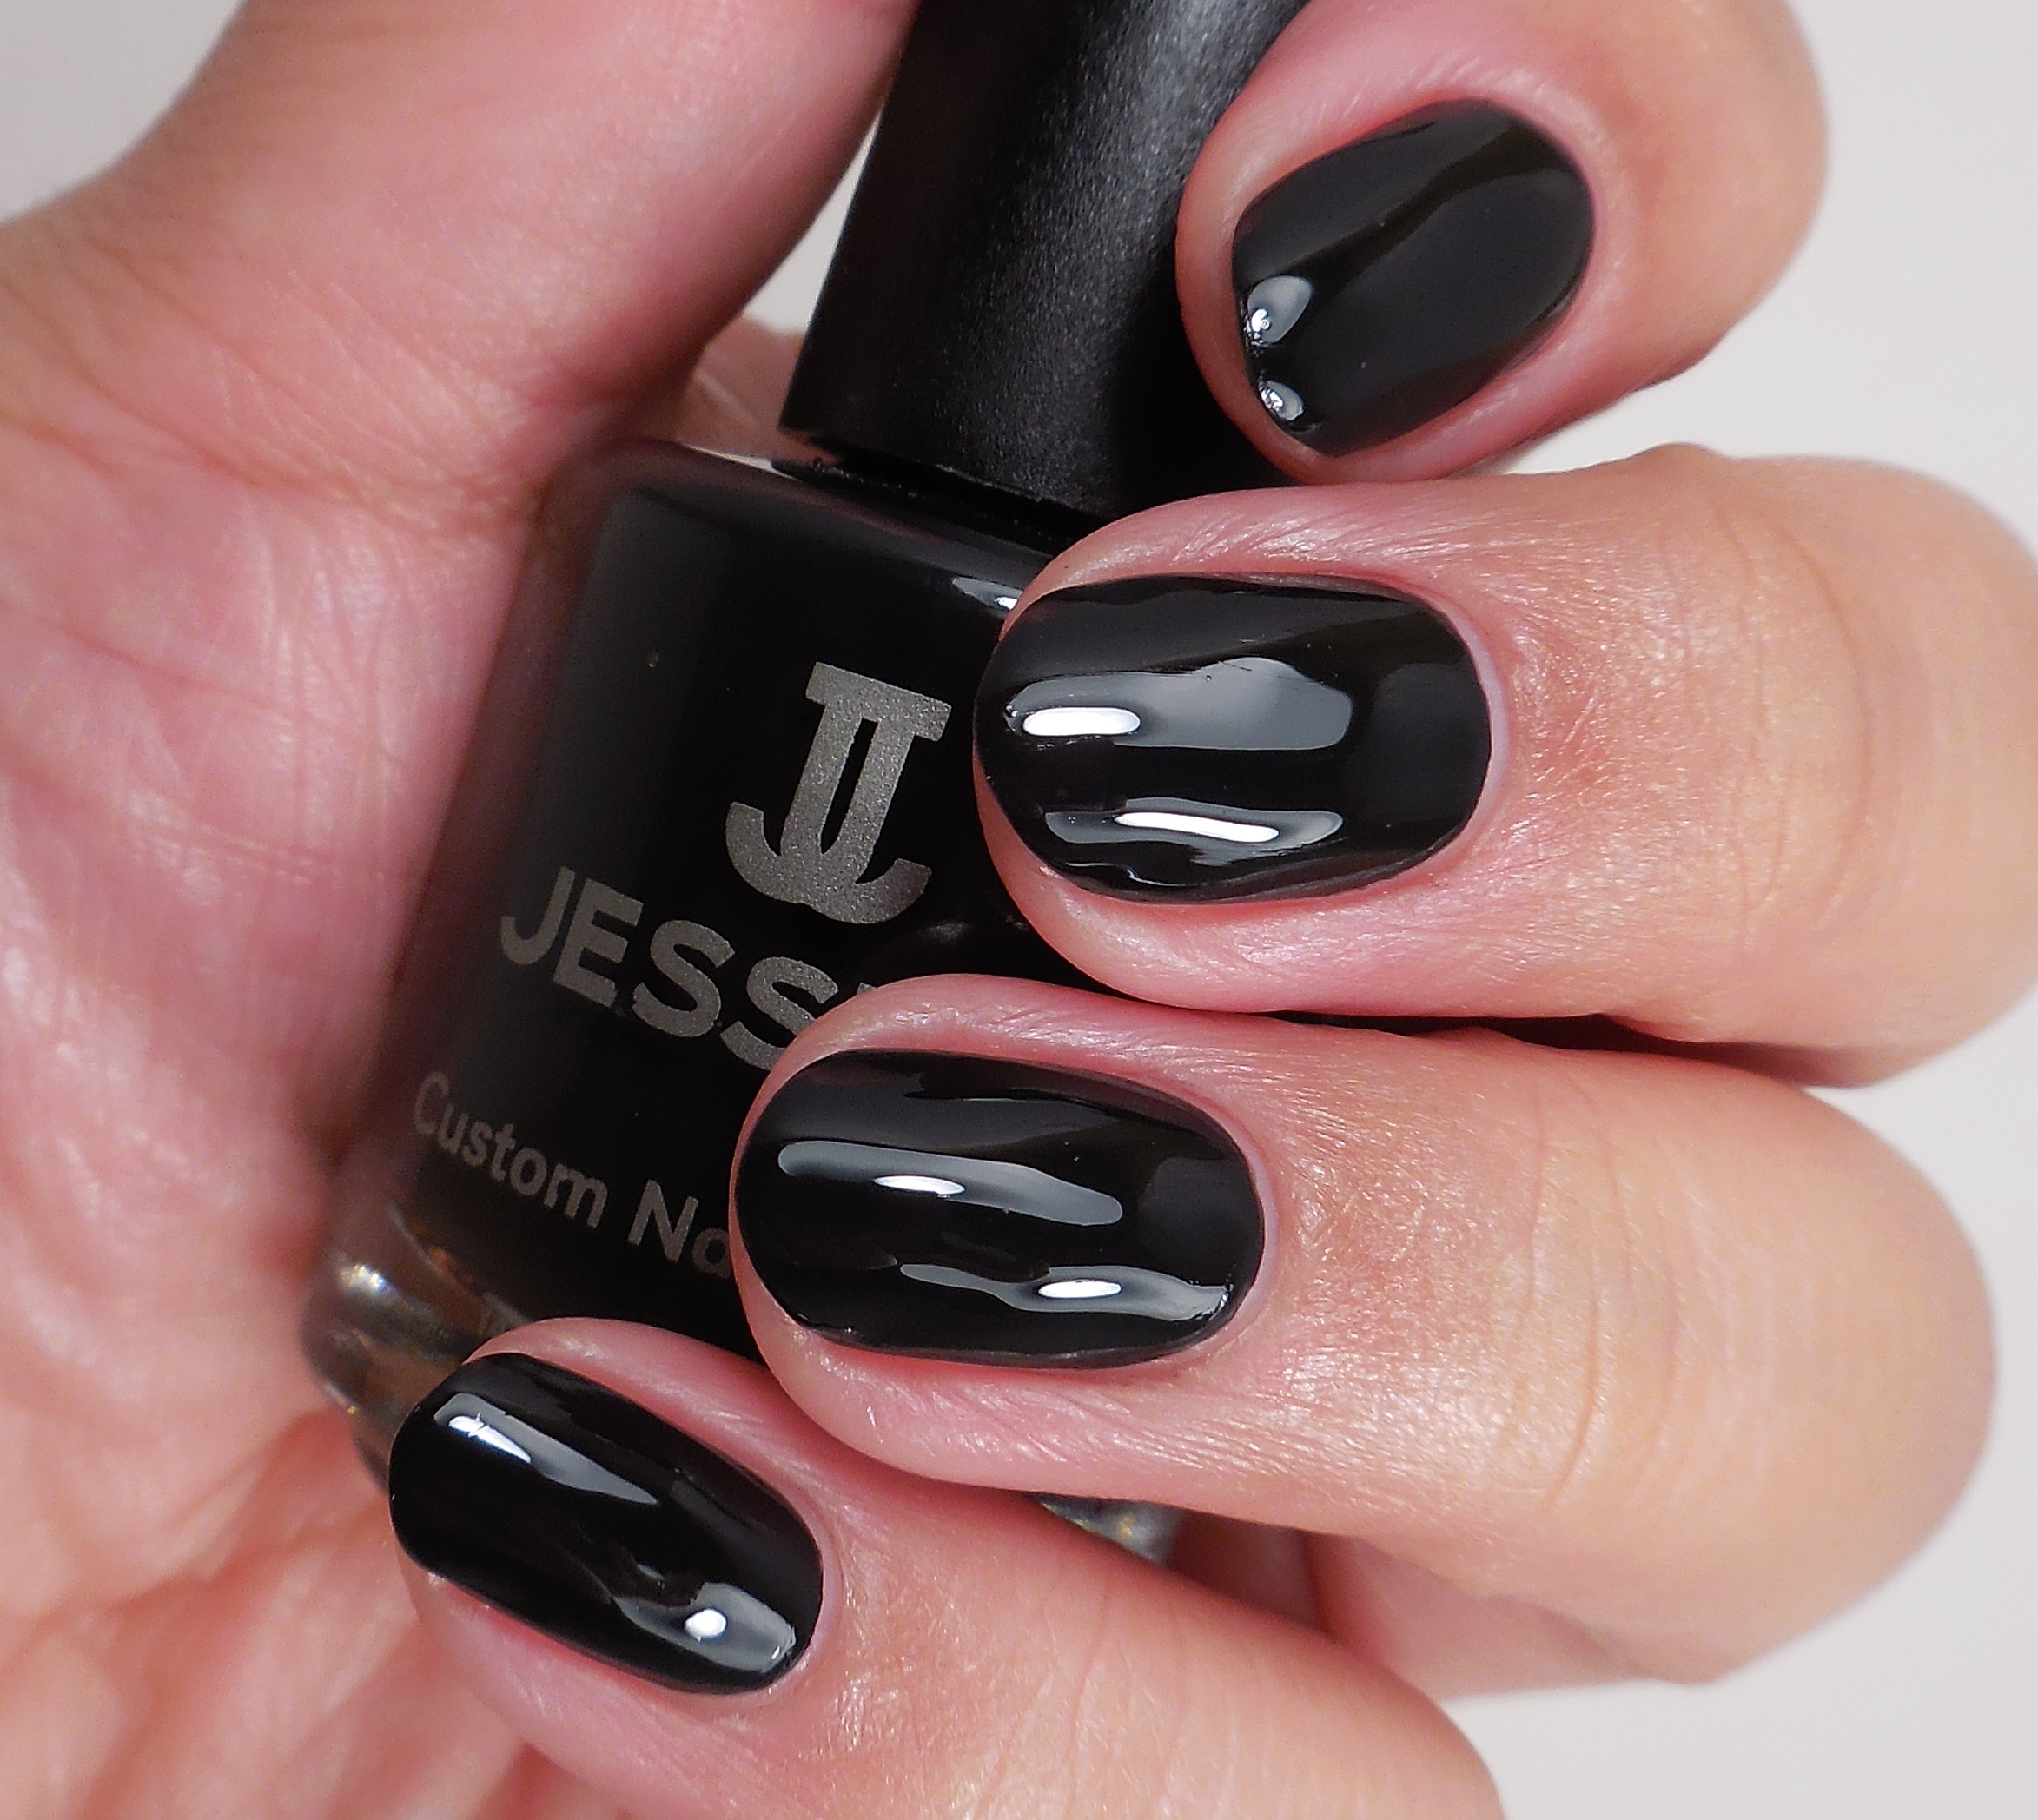 I started off with a simple black base using Jessica Velvets & Pearls (press sample) which is a pretty standard black creme. It has a great formula so no complaints here.
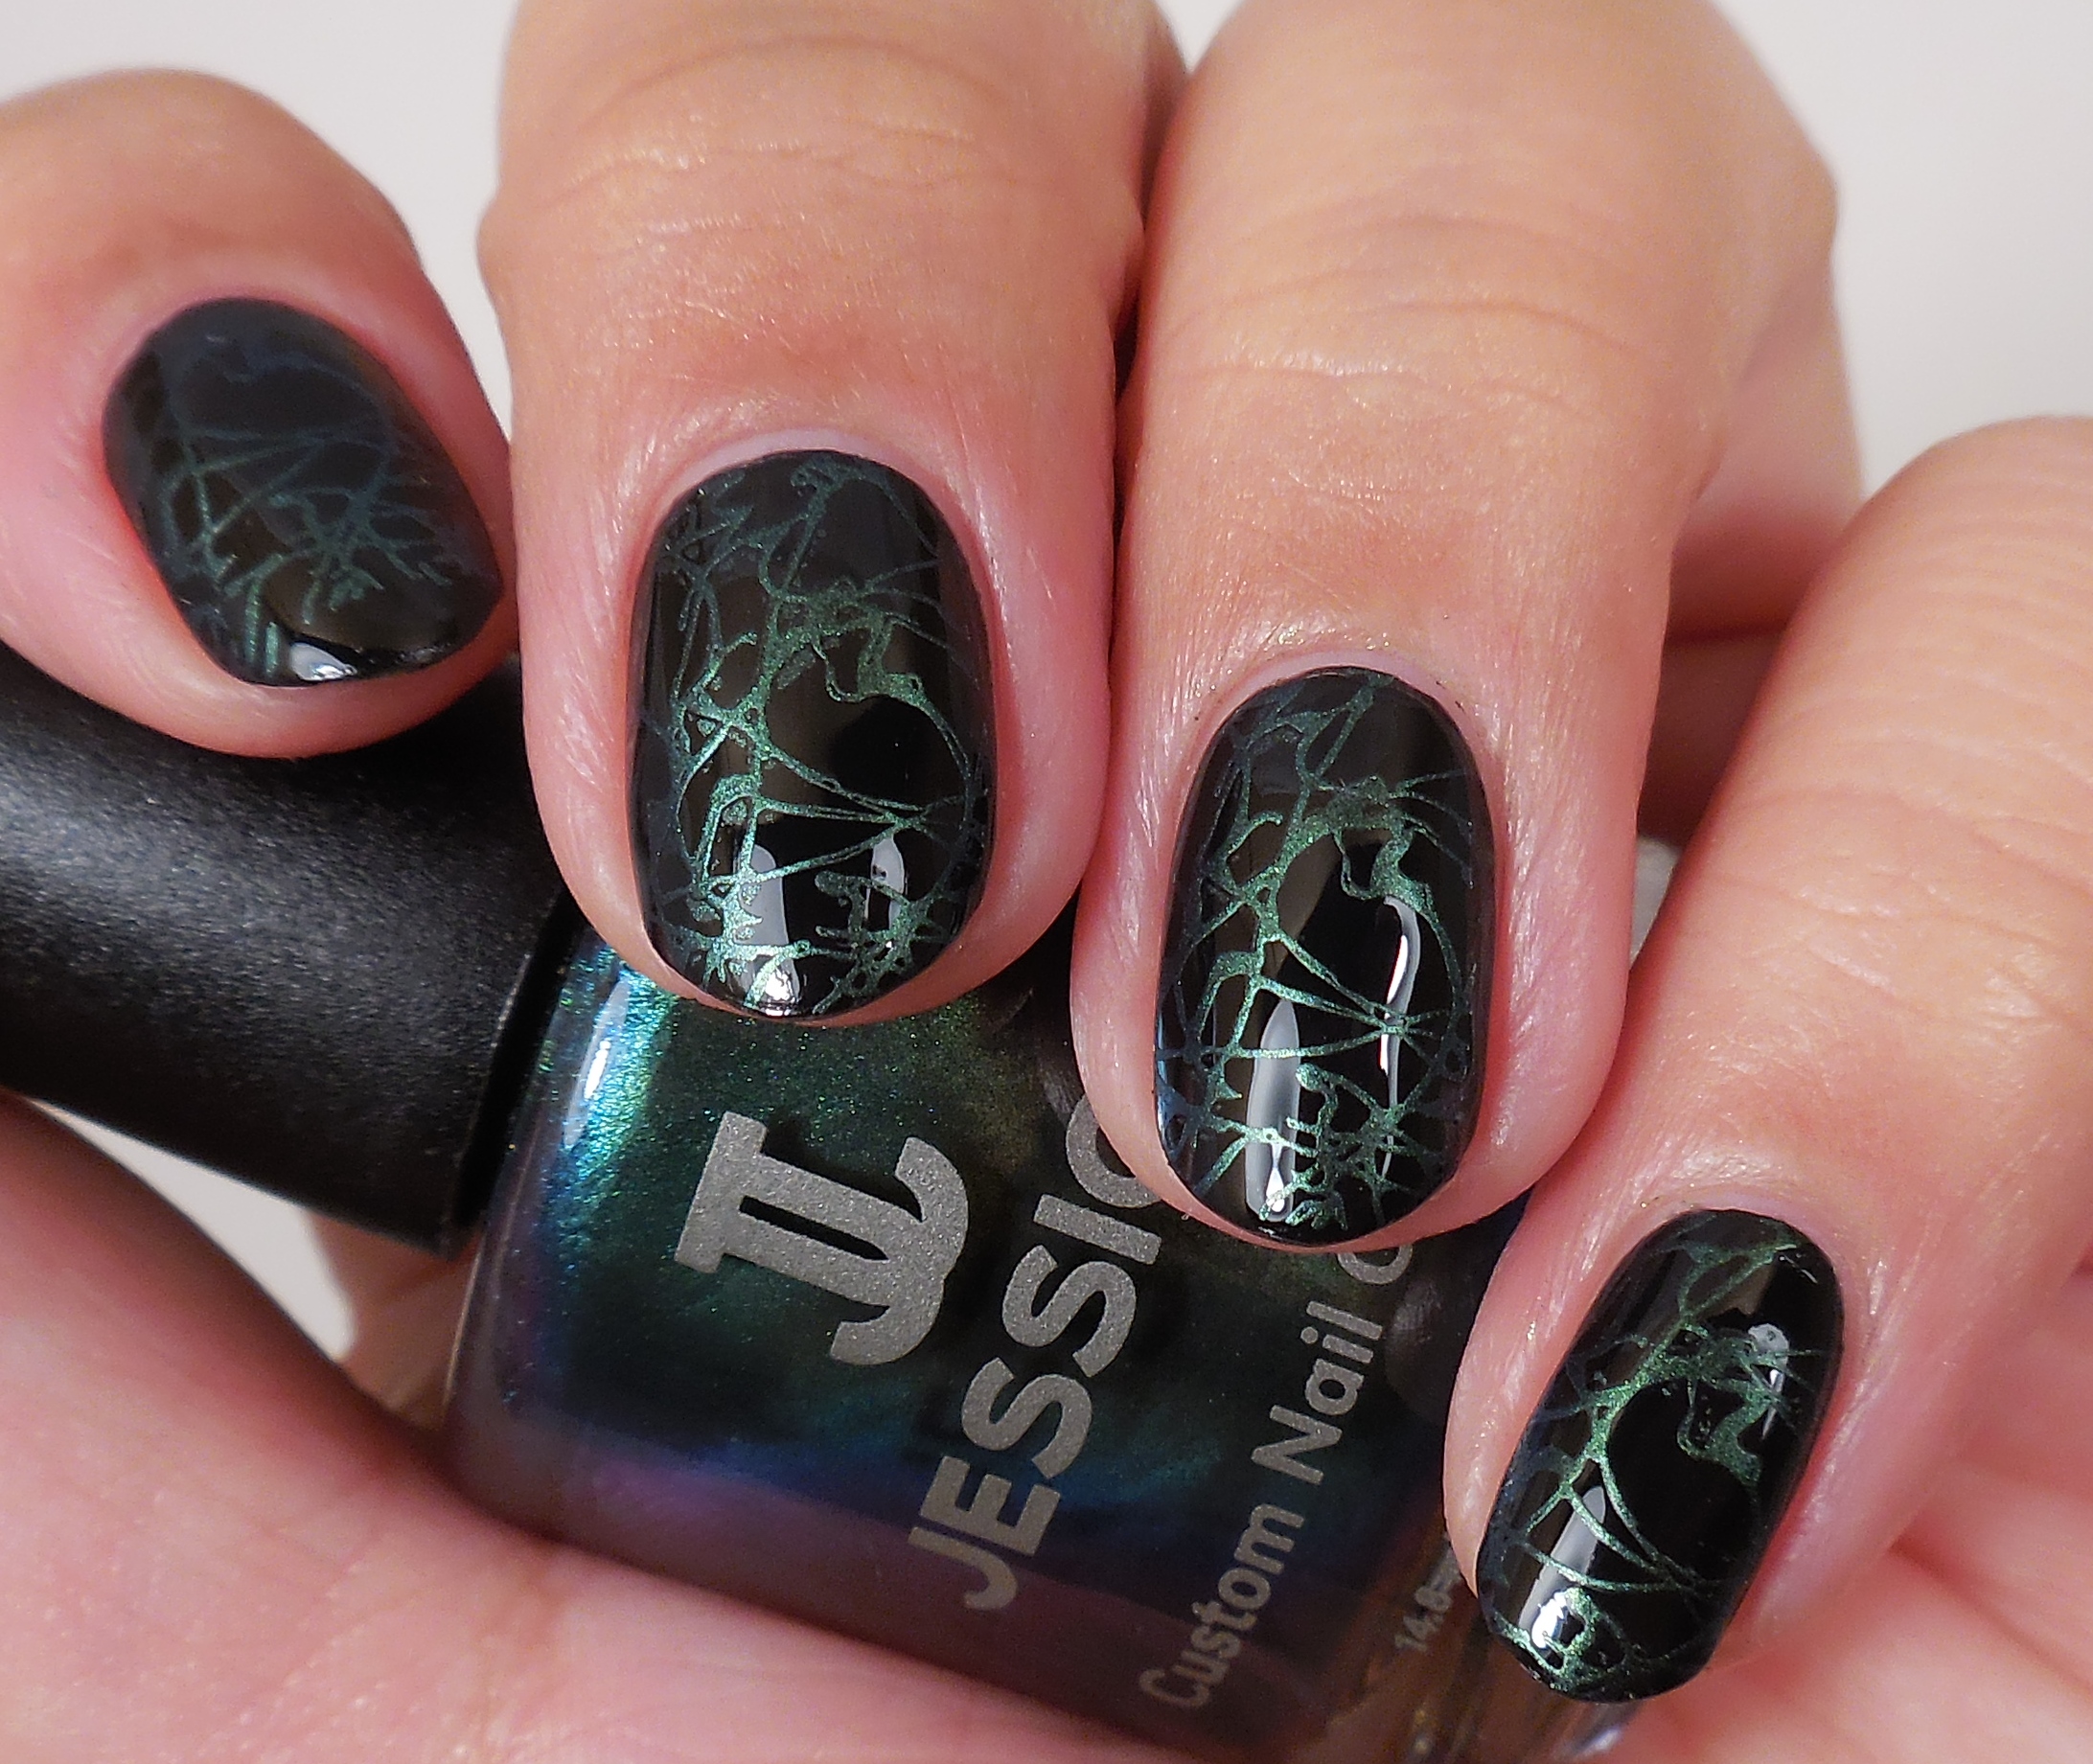
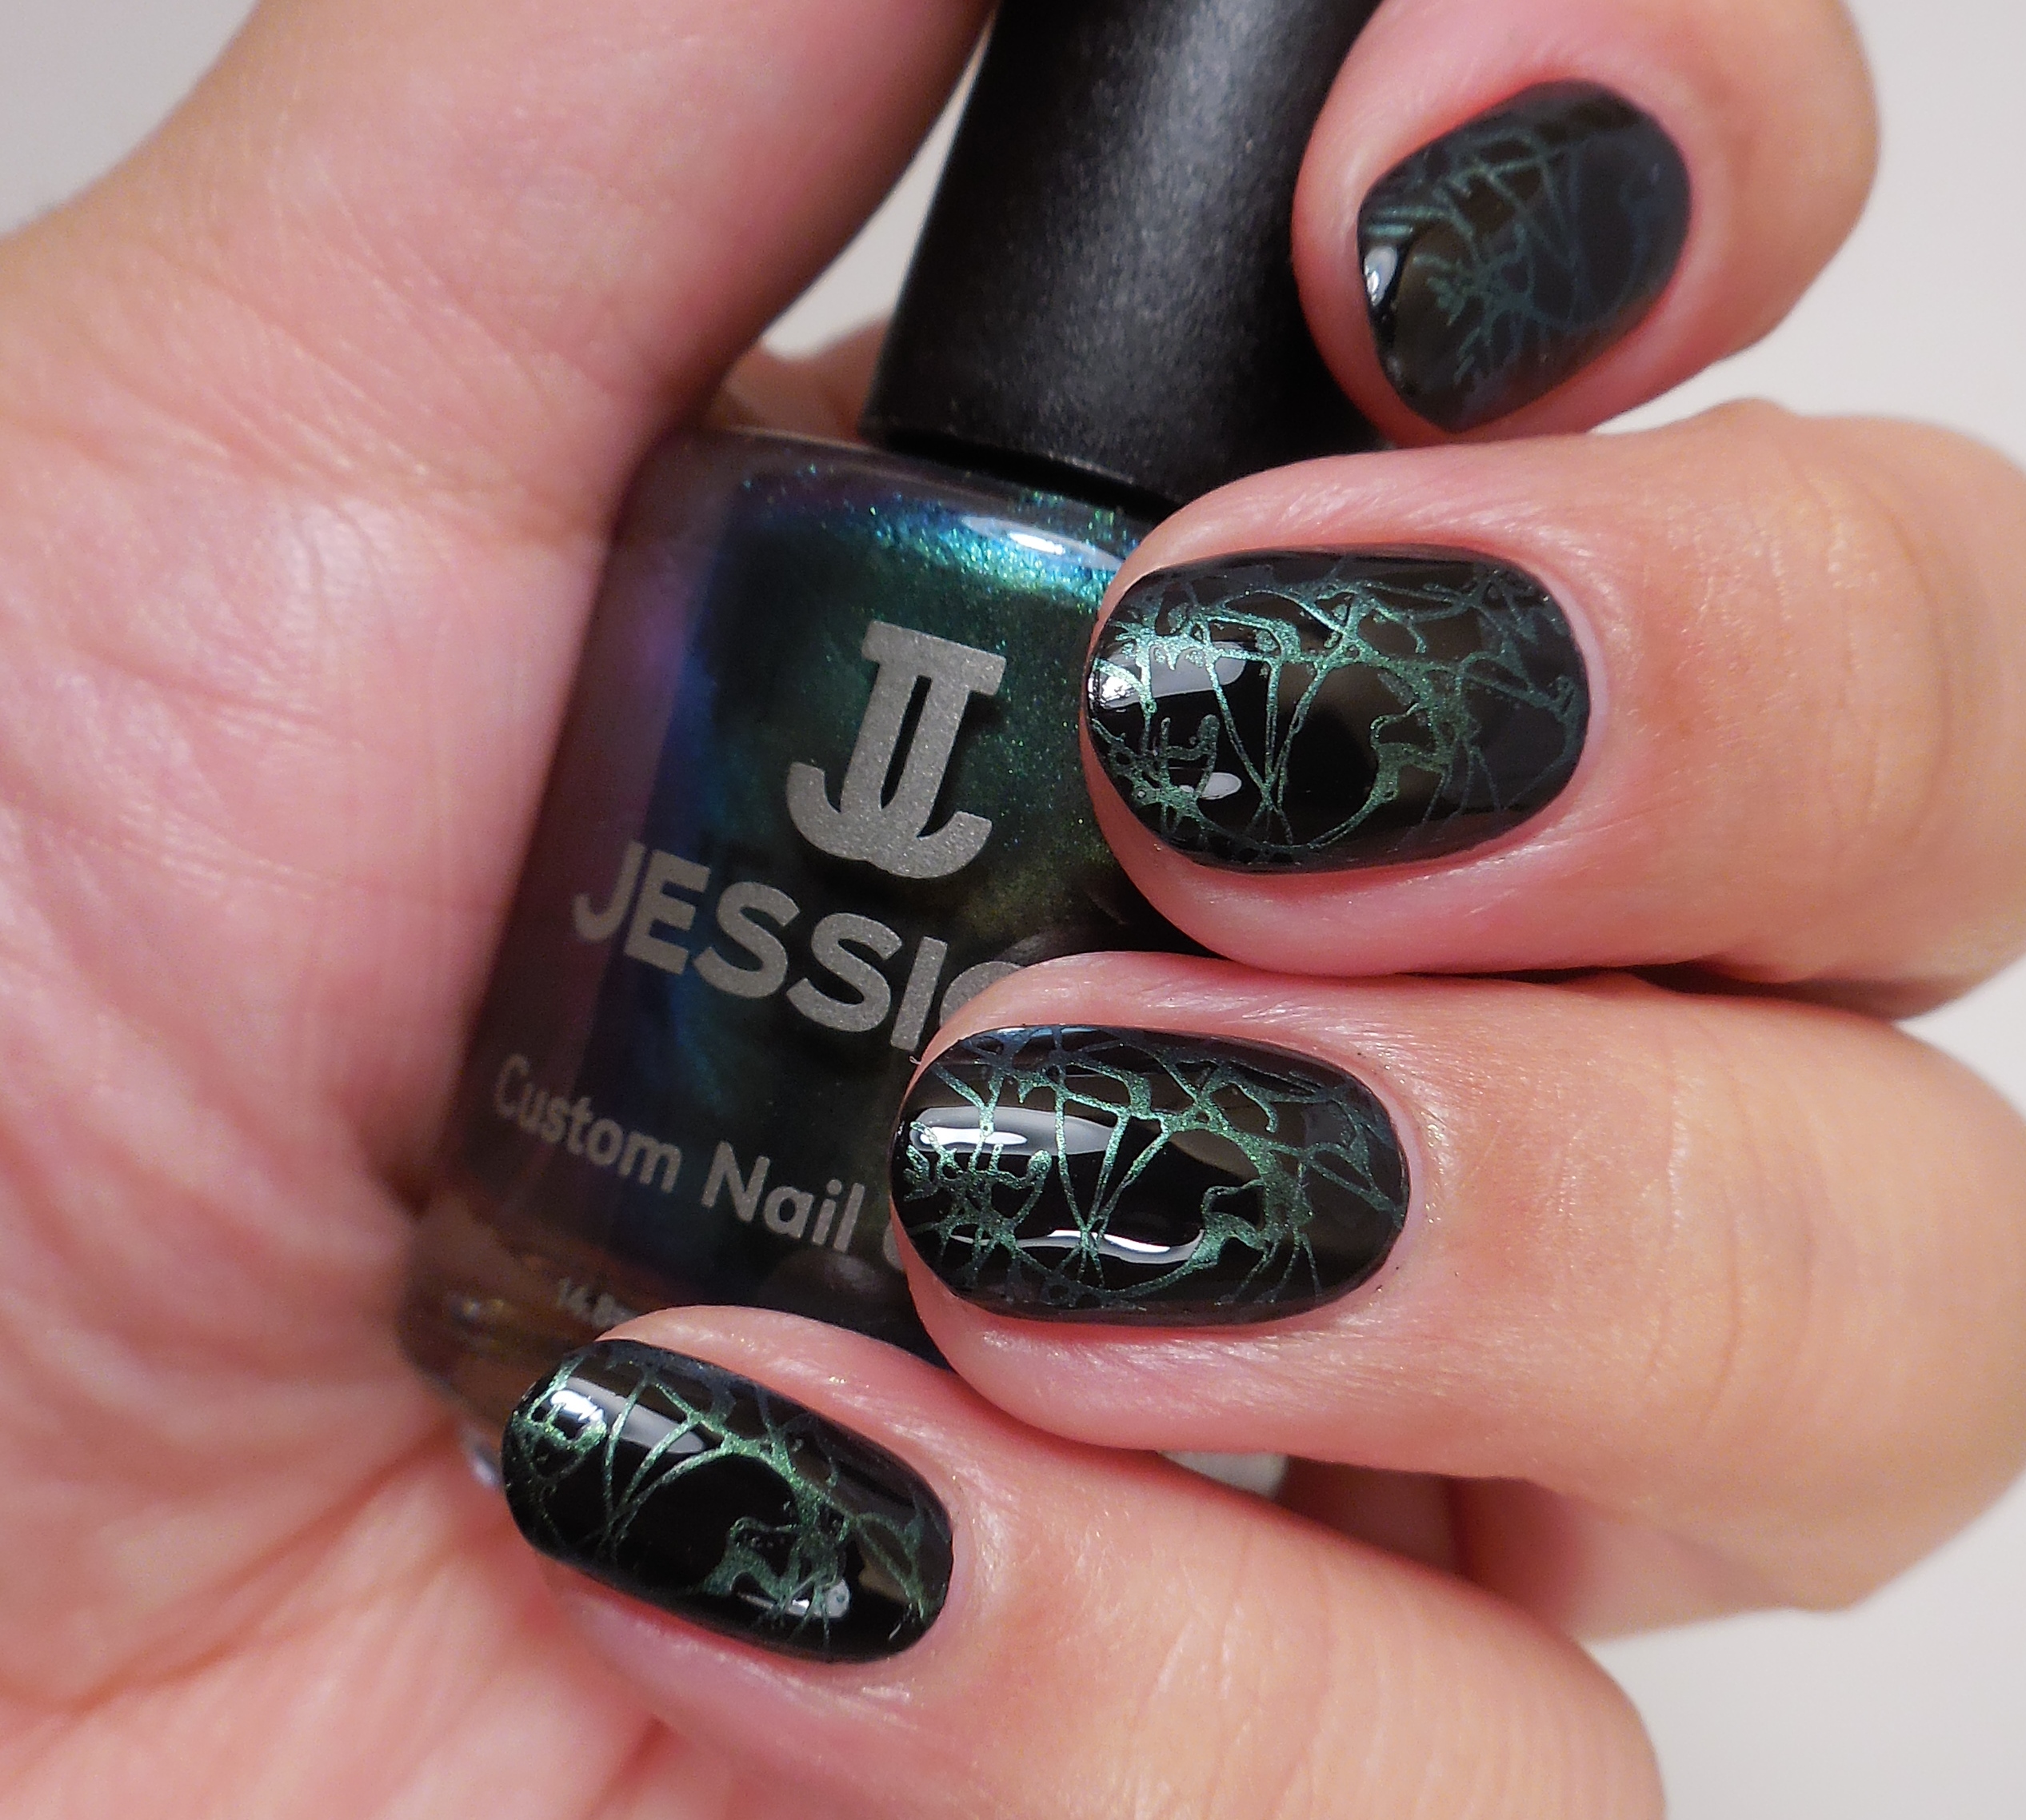 I then used Jessica Standing Ovation (press sample) to stamp this splatter image from Konad Plate M70. I thought the contrast would be better, but I kind of like how this looks. I should have left well enough alone but nooooooooooooo…
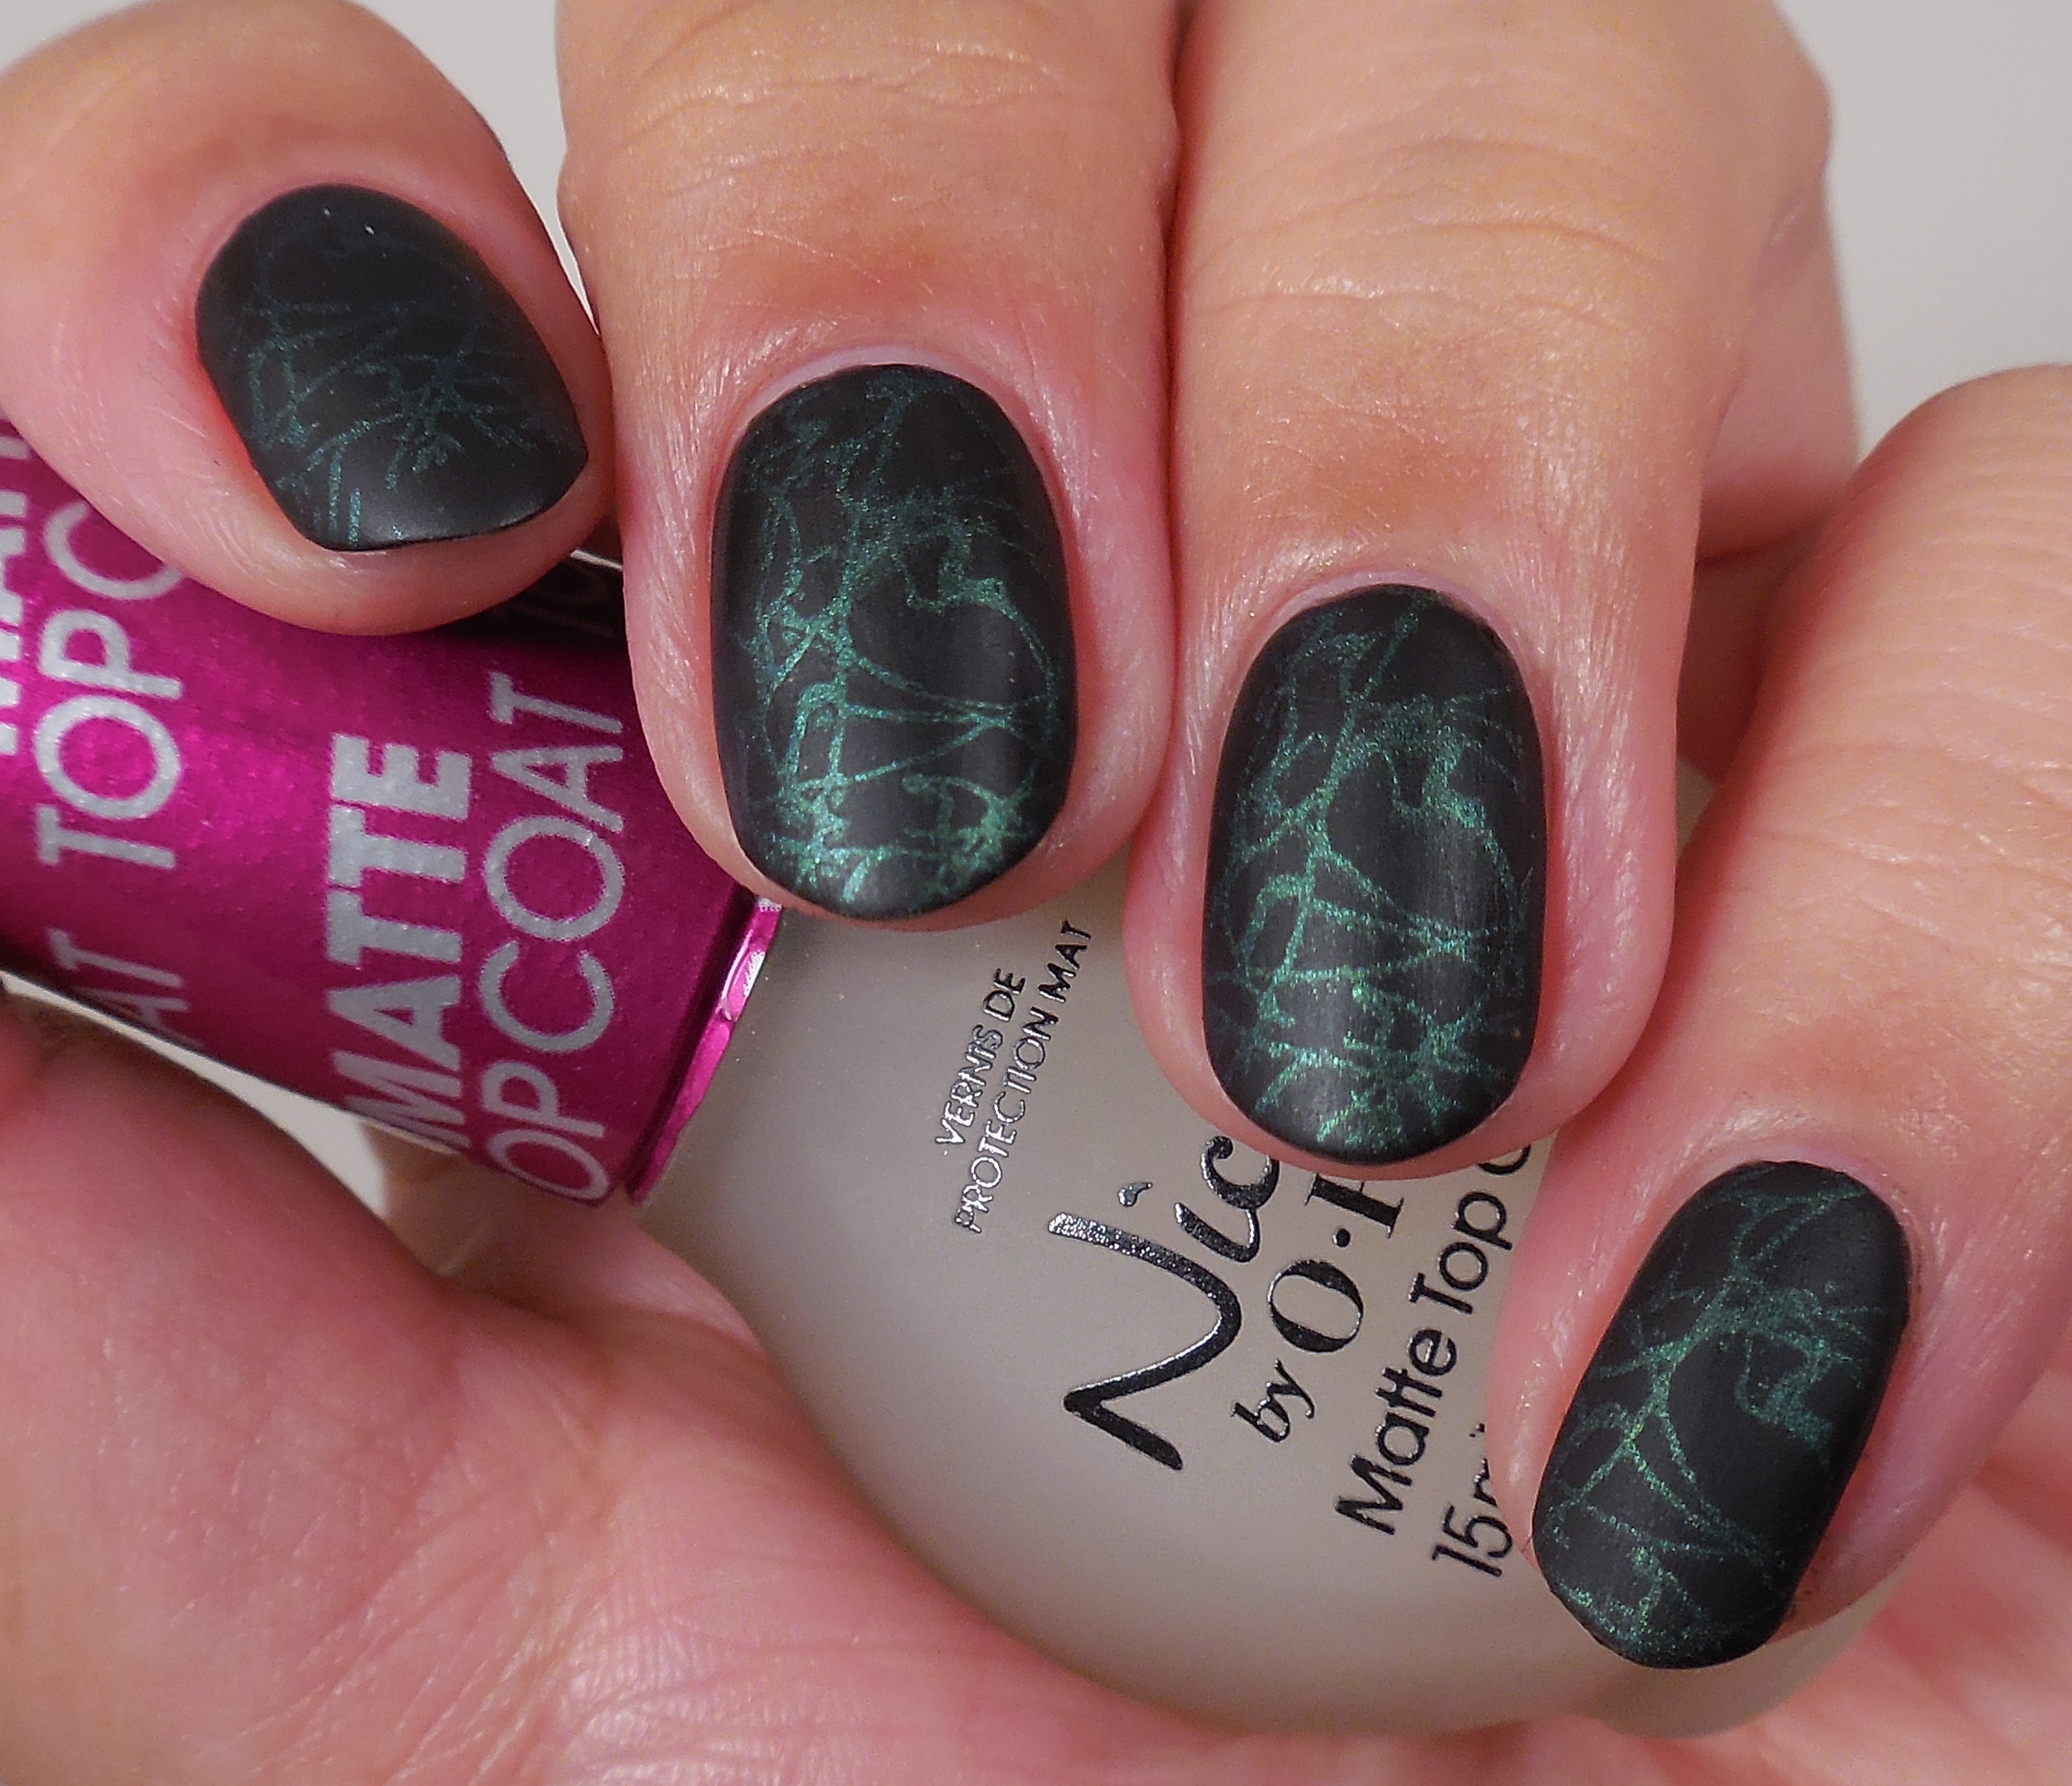
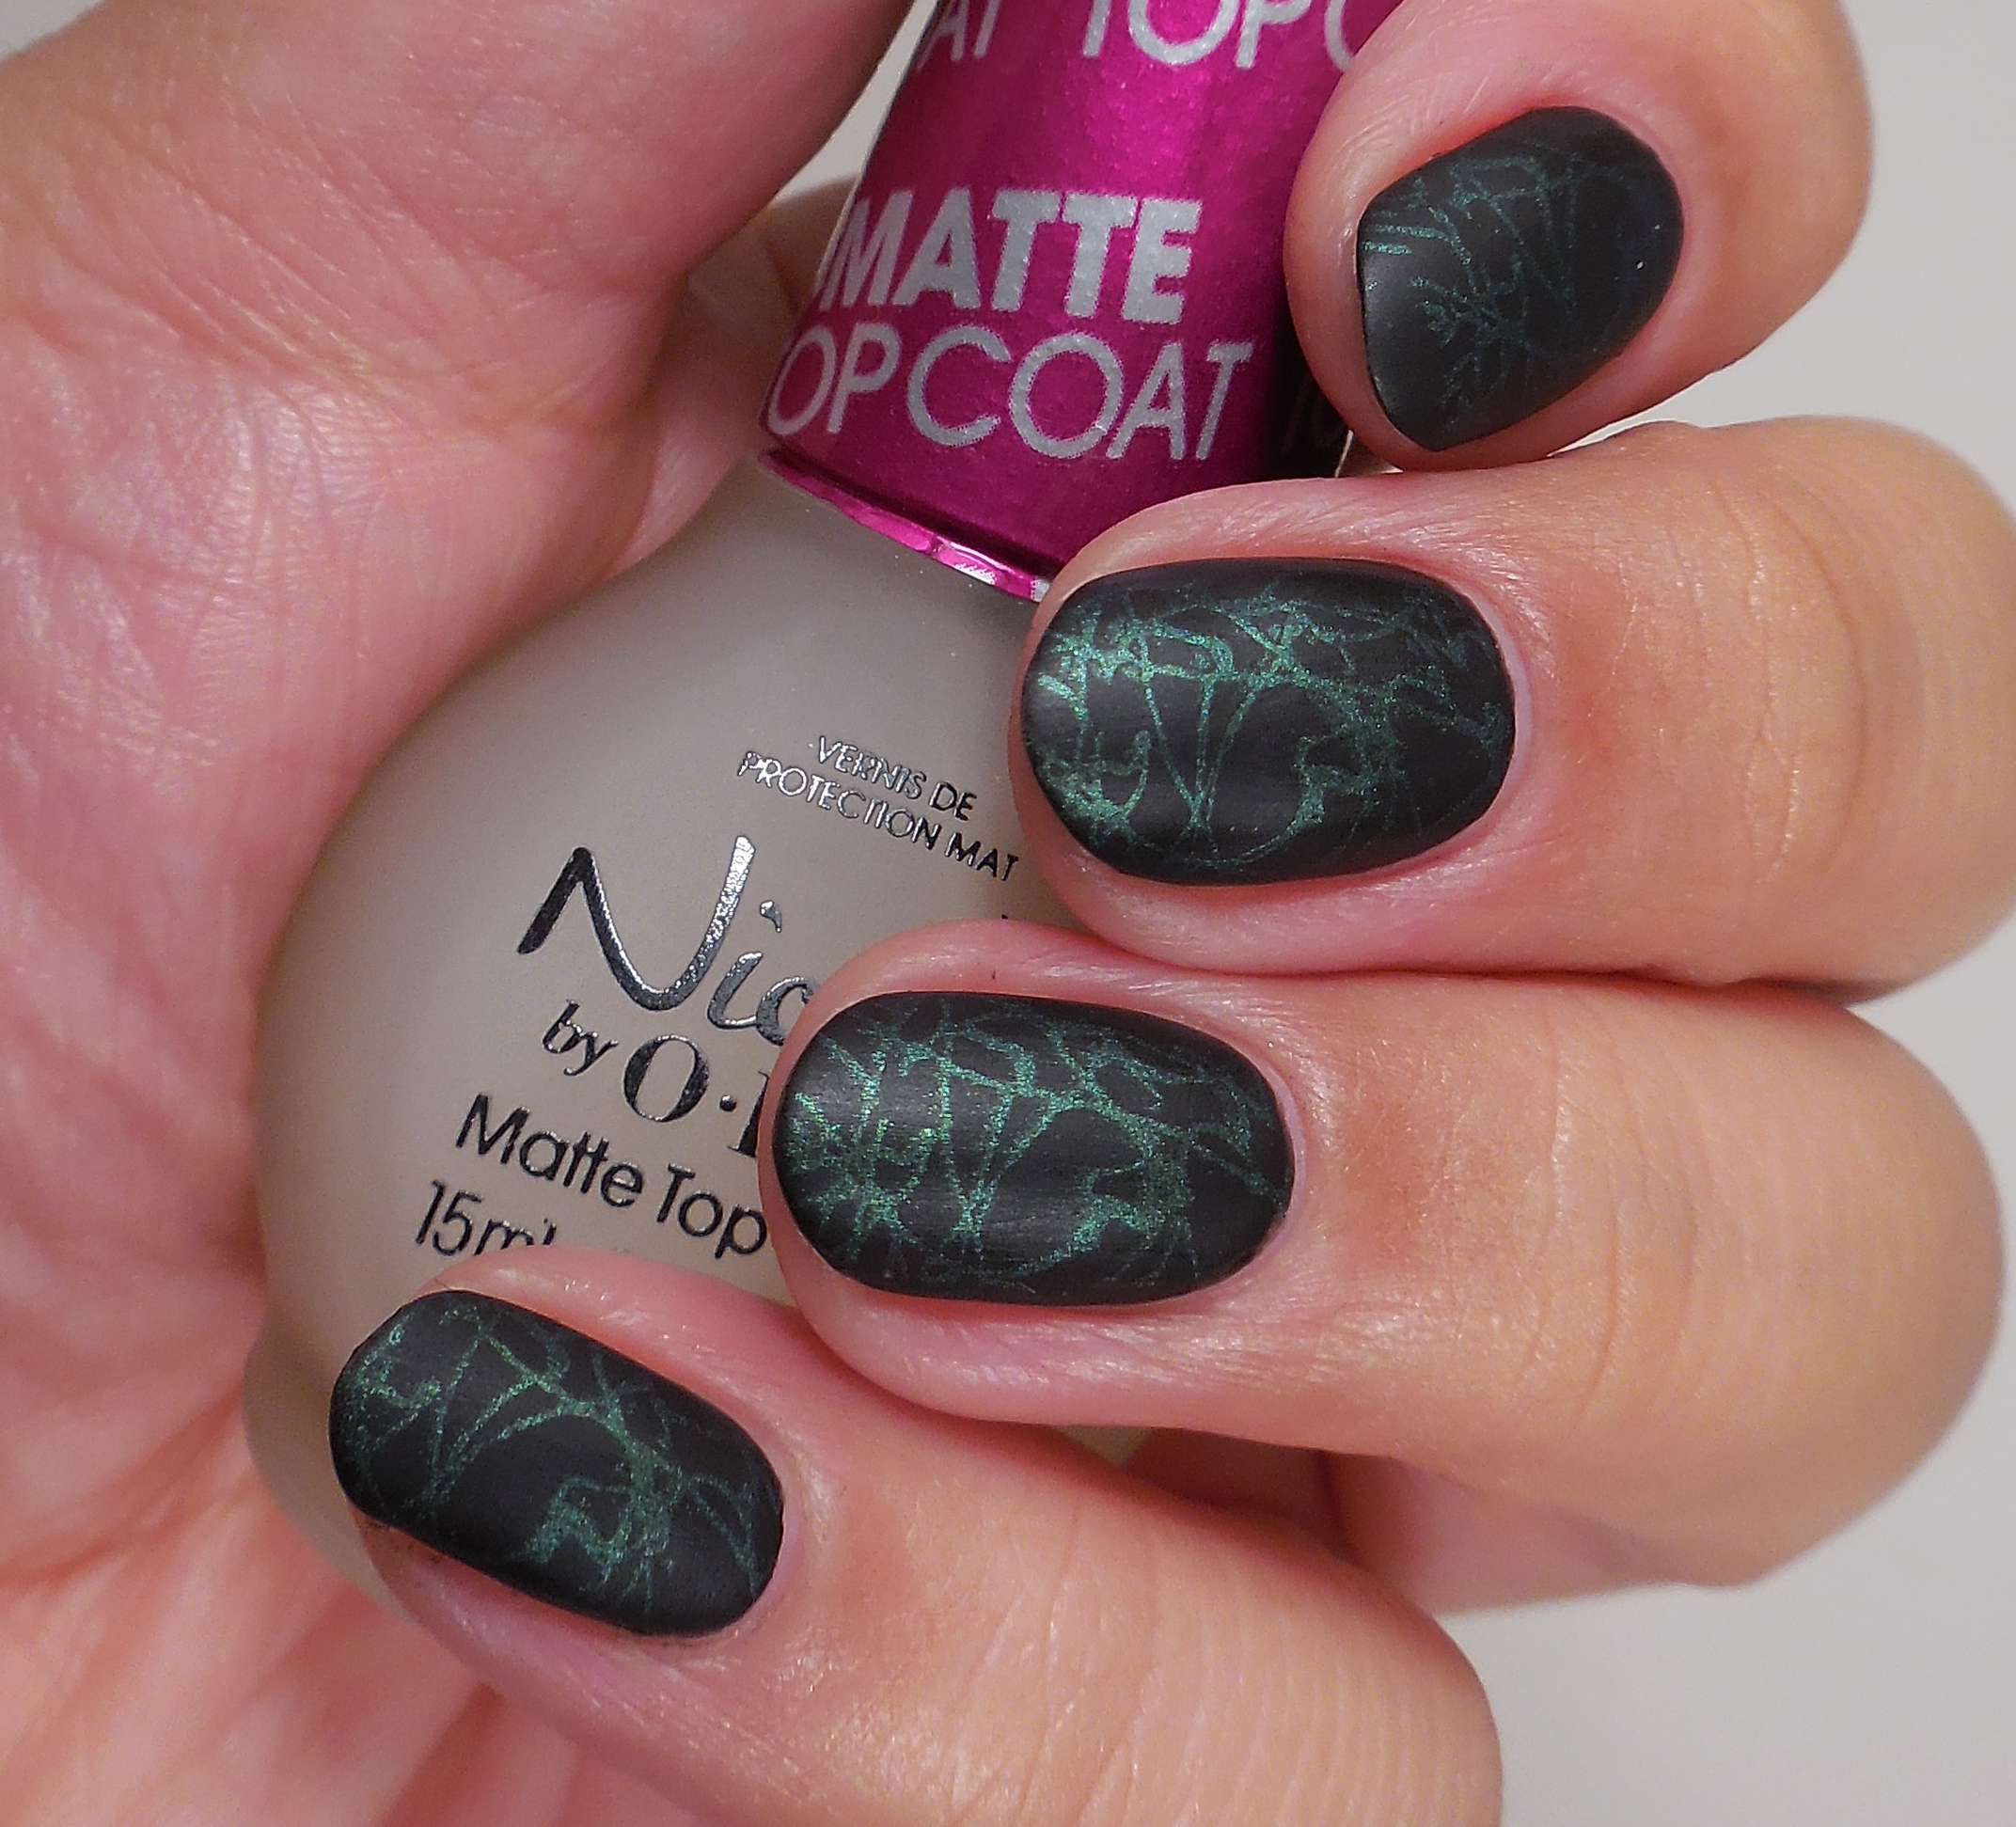 I then used my Nicole by OPI Matte Top Coat (press sample) to mattify the whole mani and basically ruined it. I do not like how this looks matte. I should have used a different stamping color to make it stand out more when I mattified it.
Welp, I’m sorry I brought you this craptacular mani today. I just gave up. I had a long day and just didn’t have it in me to do anything different after this fail. Hopefully I’ll do better next month. Womp womp. Check out the links below to see what the other ladies from The Lacquer Ring came up with–it sure can’t get worse than this. Thanks for stopping by today, and I will talk to you soon!
Loading InLinkz ...
Inspired By: Rainbow Doodles
I’m currently enjoying the last day of my 4 day weekend so I hear the impending womp womp music in my head for tomorrow morning. I’m really enjoying the idea of keeping up these “Inspired By” posts because I hope it will push me to do more creative things. Last time I did the rose and chevrons mani that I really liked, so I hope that you like what I have for you today. For today’s post, I picked this fun rainbow doodle from Amy’s pinterest post and we set out to create our own interpretation of it.
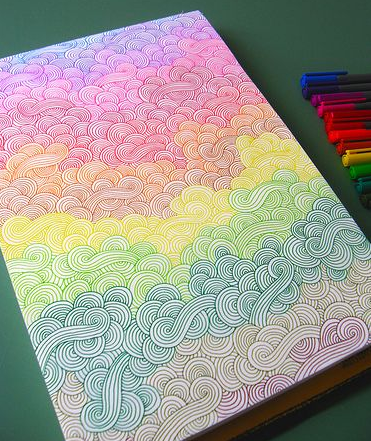 Does this look like snakes to you? Like rainbow snakes….or maybe rainbow spaghetti?
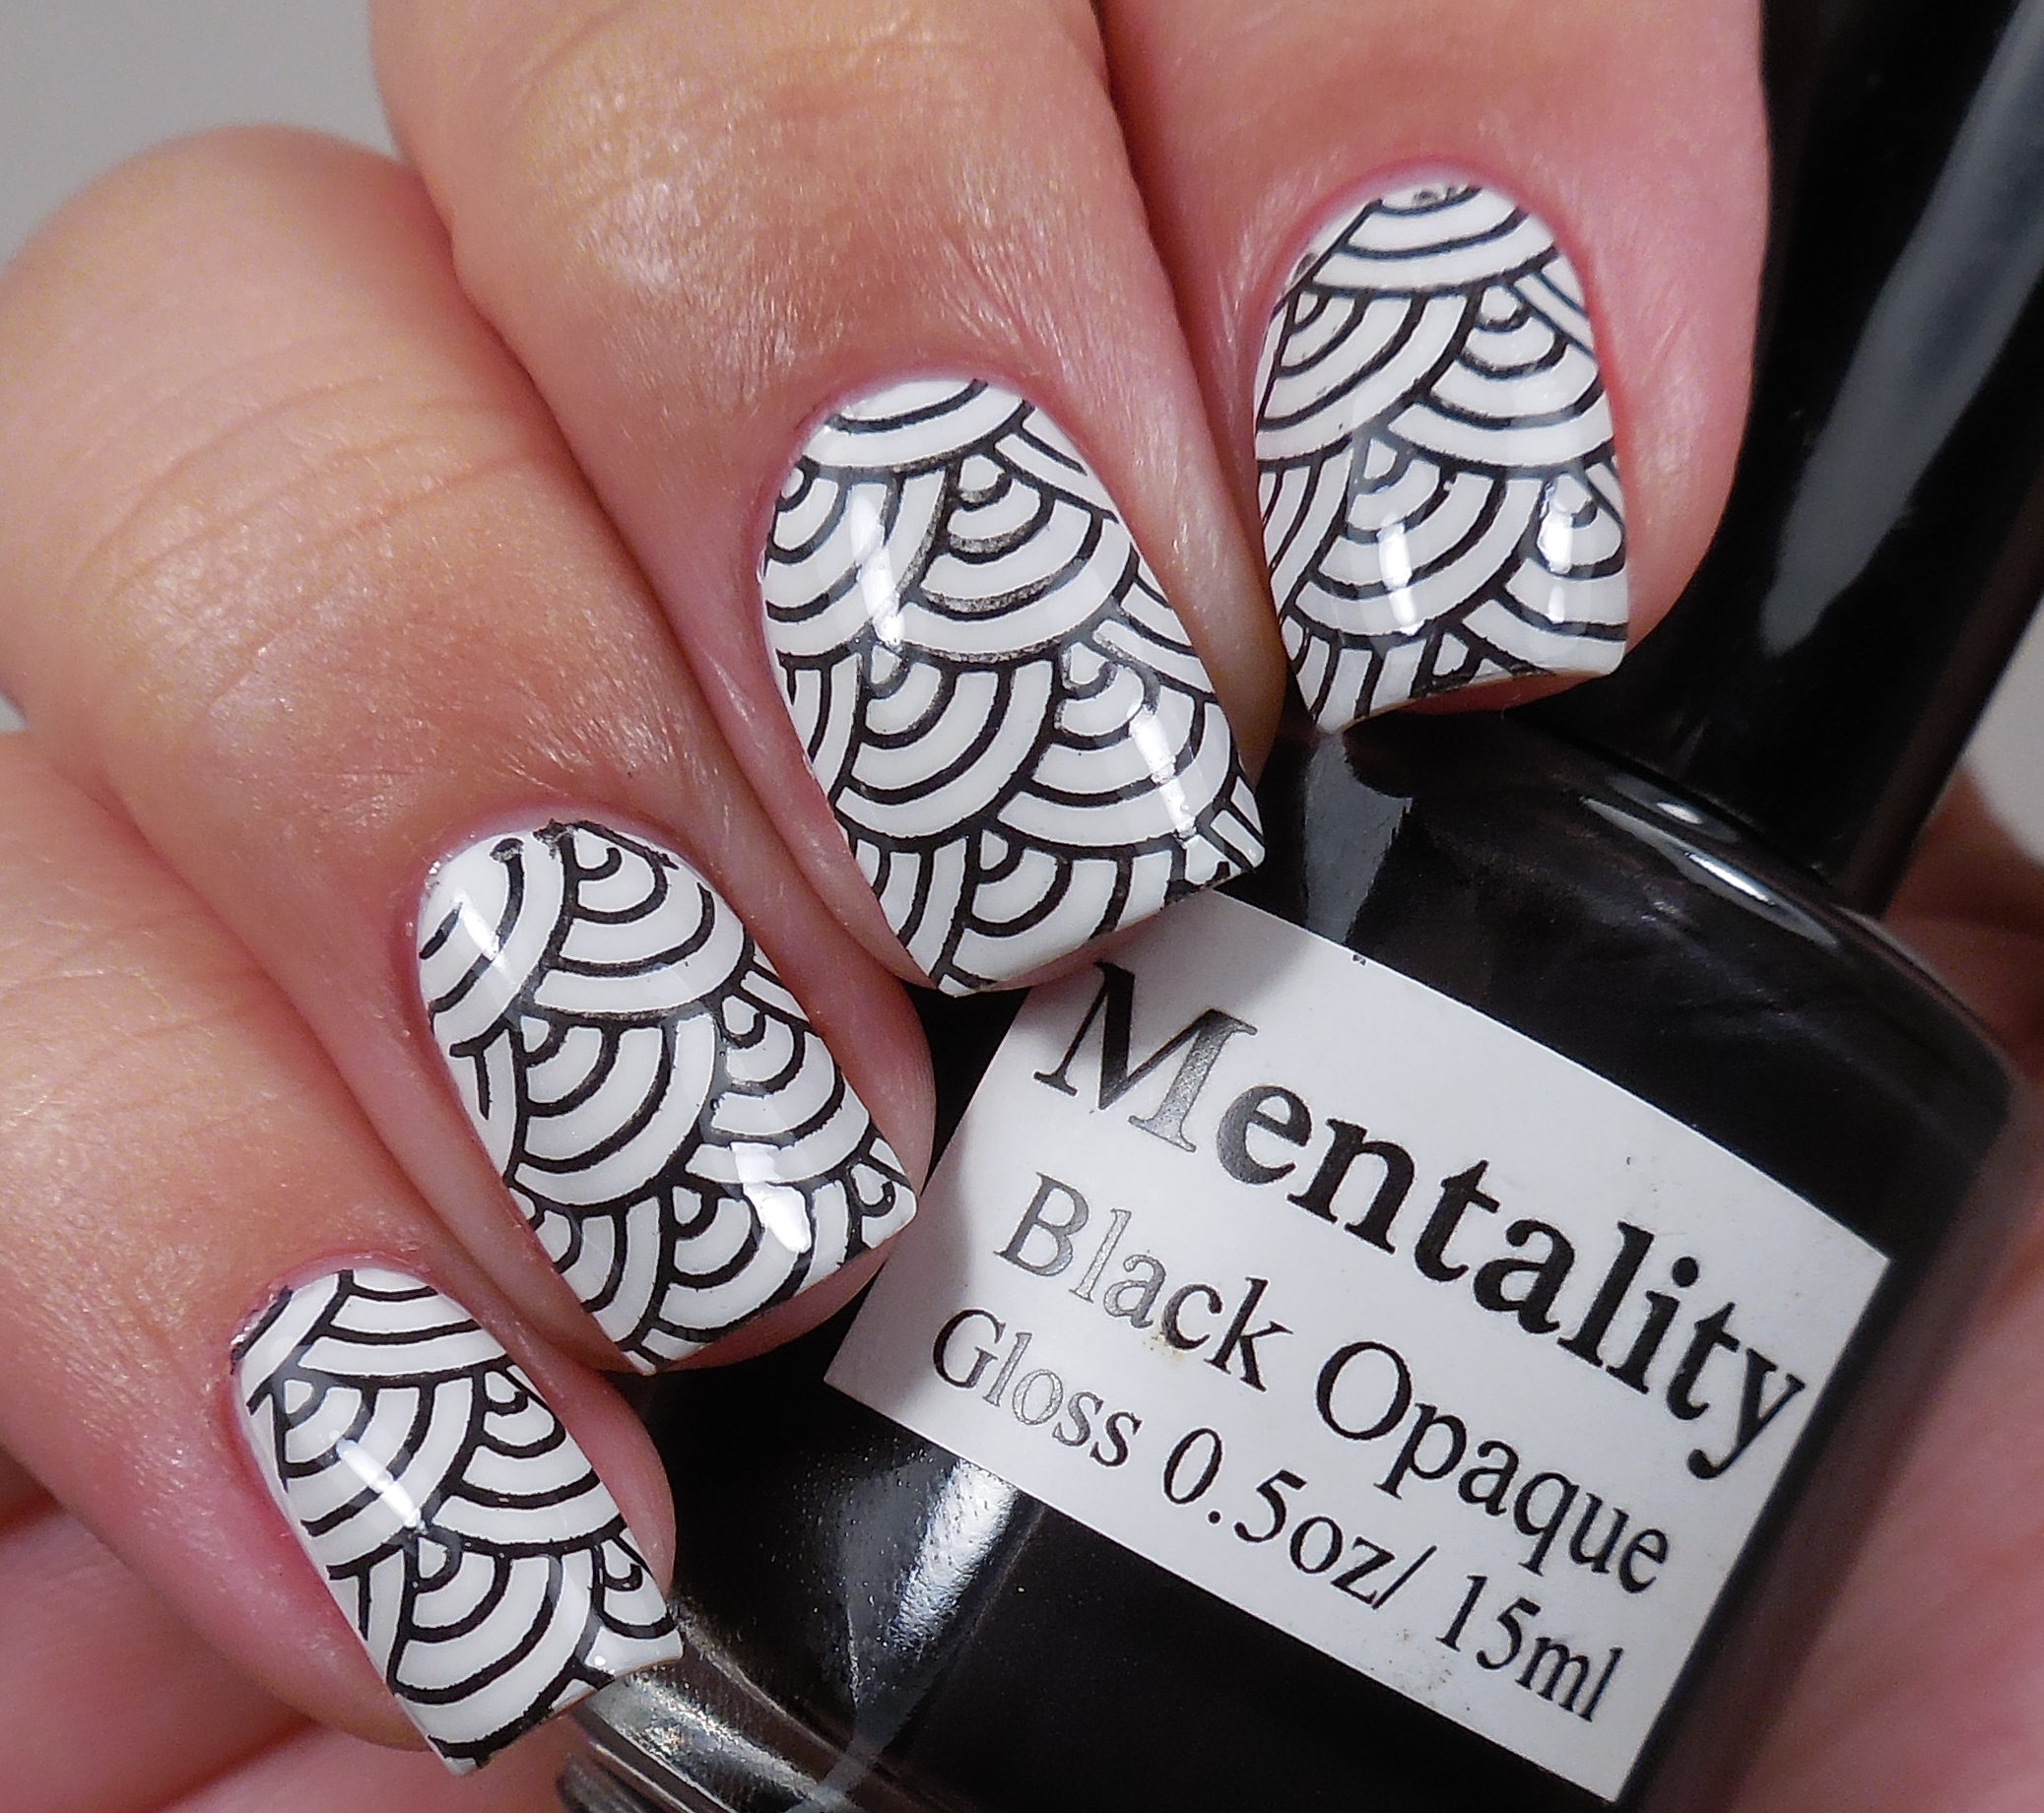
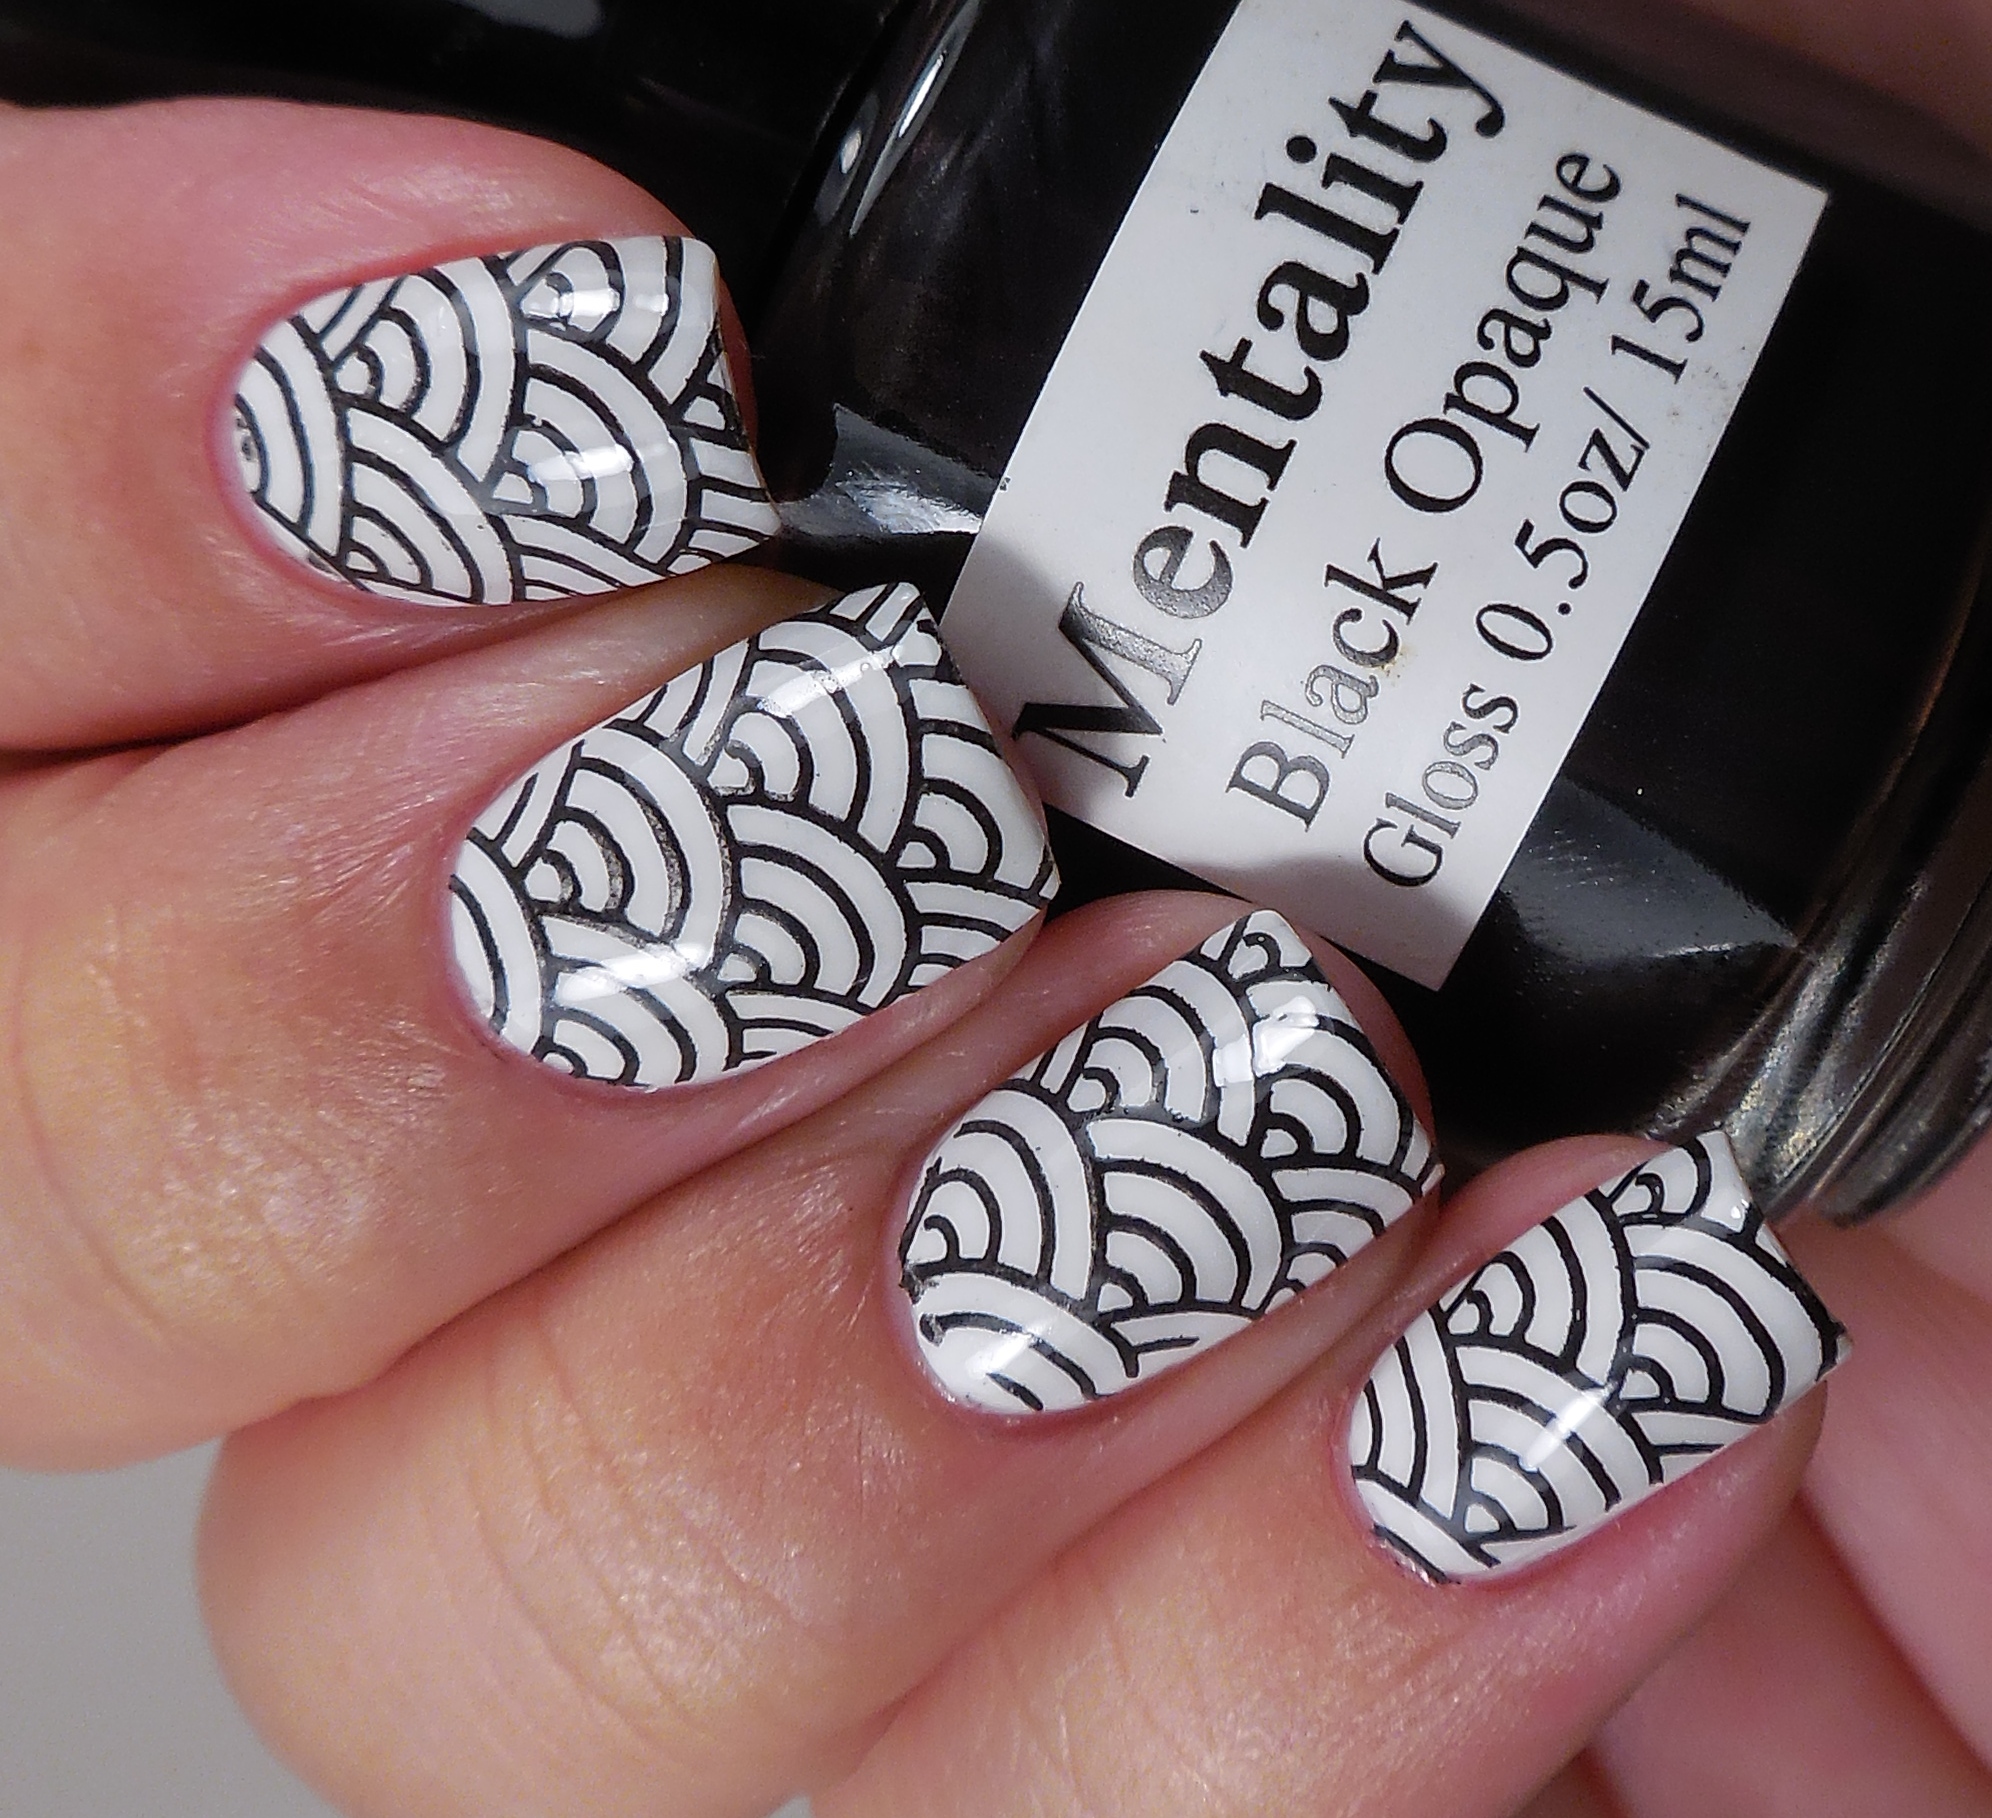 To start with, I used this arch design from MoYou London Pro Collection – 02 (press sample) and stamped with Mentality Opaque Black stamping polish. I think that this has replaced my love for my Konad Black stamping polish for a few reasons: 1) It’s cheap 2) It stamps very well and very opaque 3) It does not stain like the Konad!!!!! For my white base, I used my favorite white polish in the whole wide world: Jessica Sharktooth (press sample).
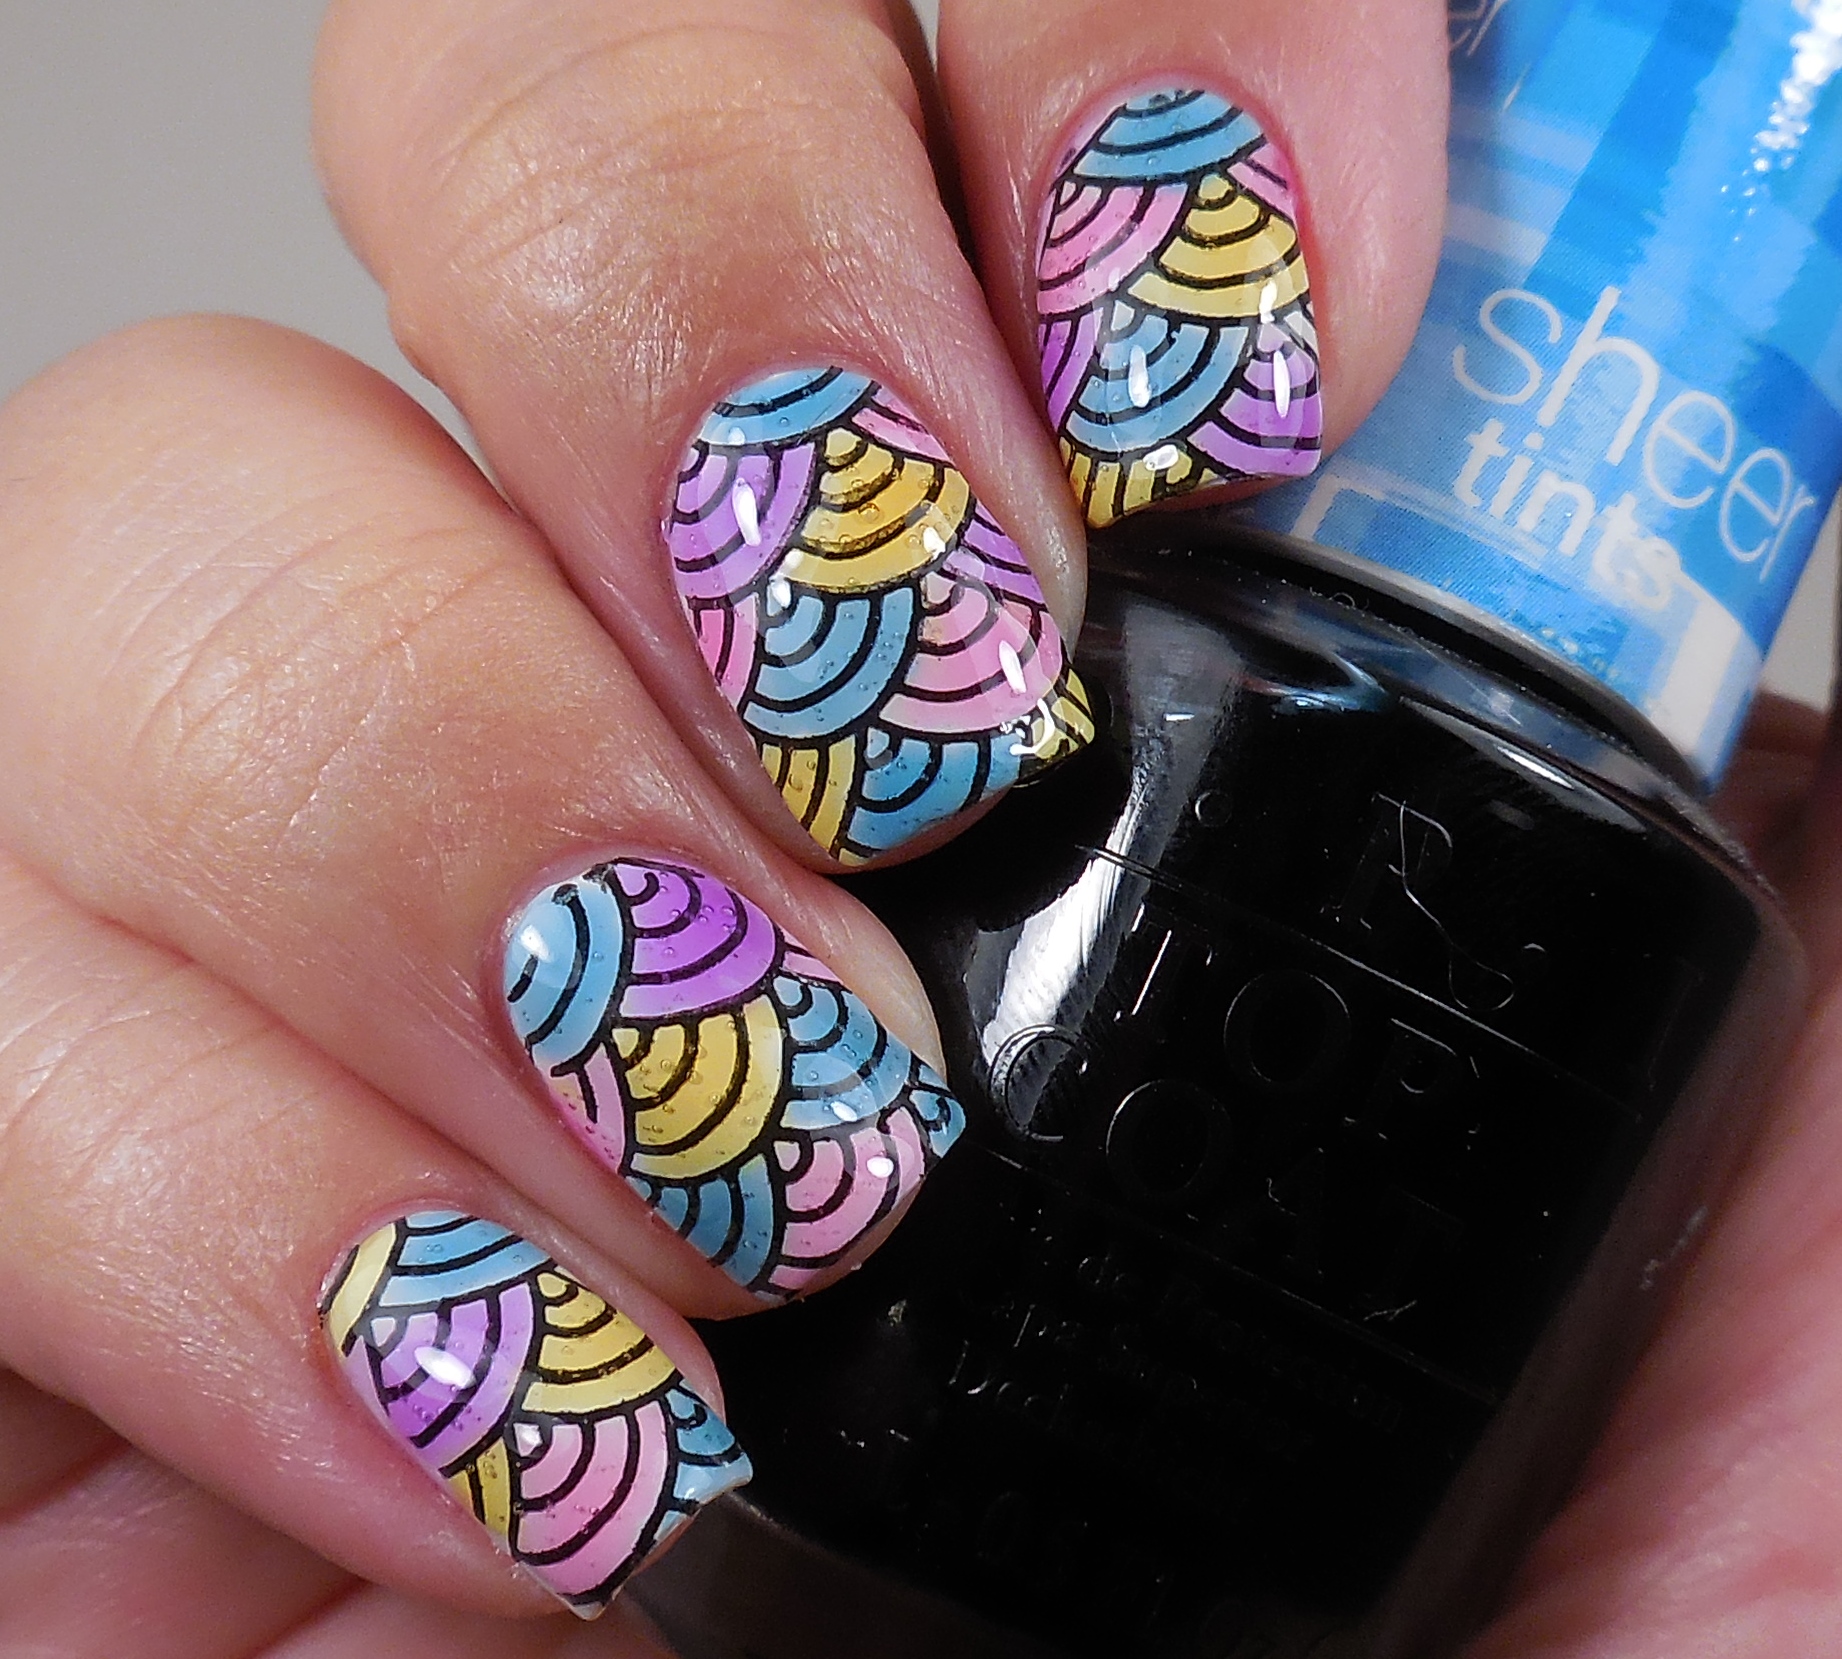
 Ok, so I’m super irritated with all the bubbling going on in this mani. I used all 4 OPI Sheer Tints (press sample) to fill in the design, but because they are so thick and gummy, it’s really hard to manipulate them. Since I applied them a little thick, bubbling was inevitable. Despite the bubbling, I still find the overall effect really fun.

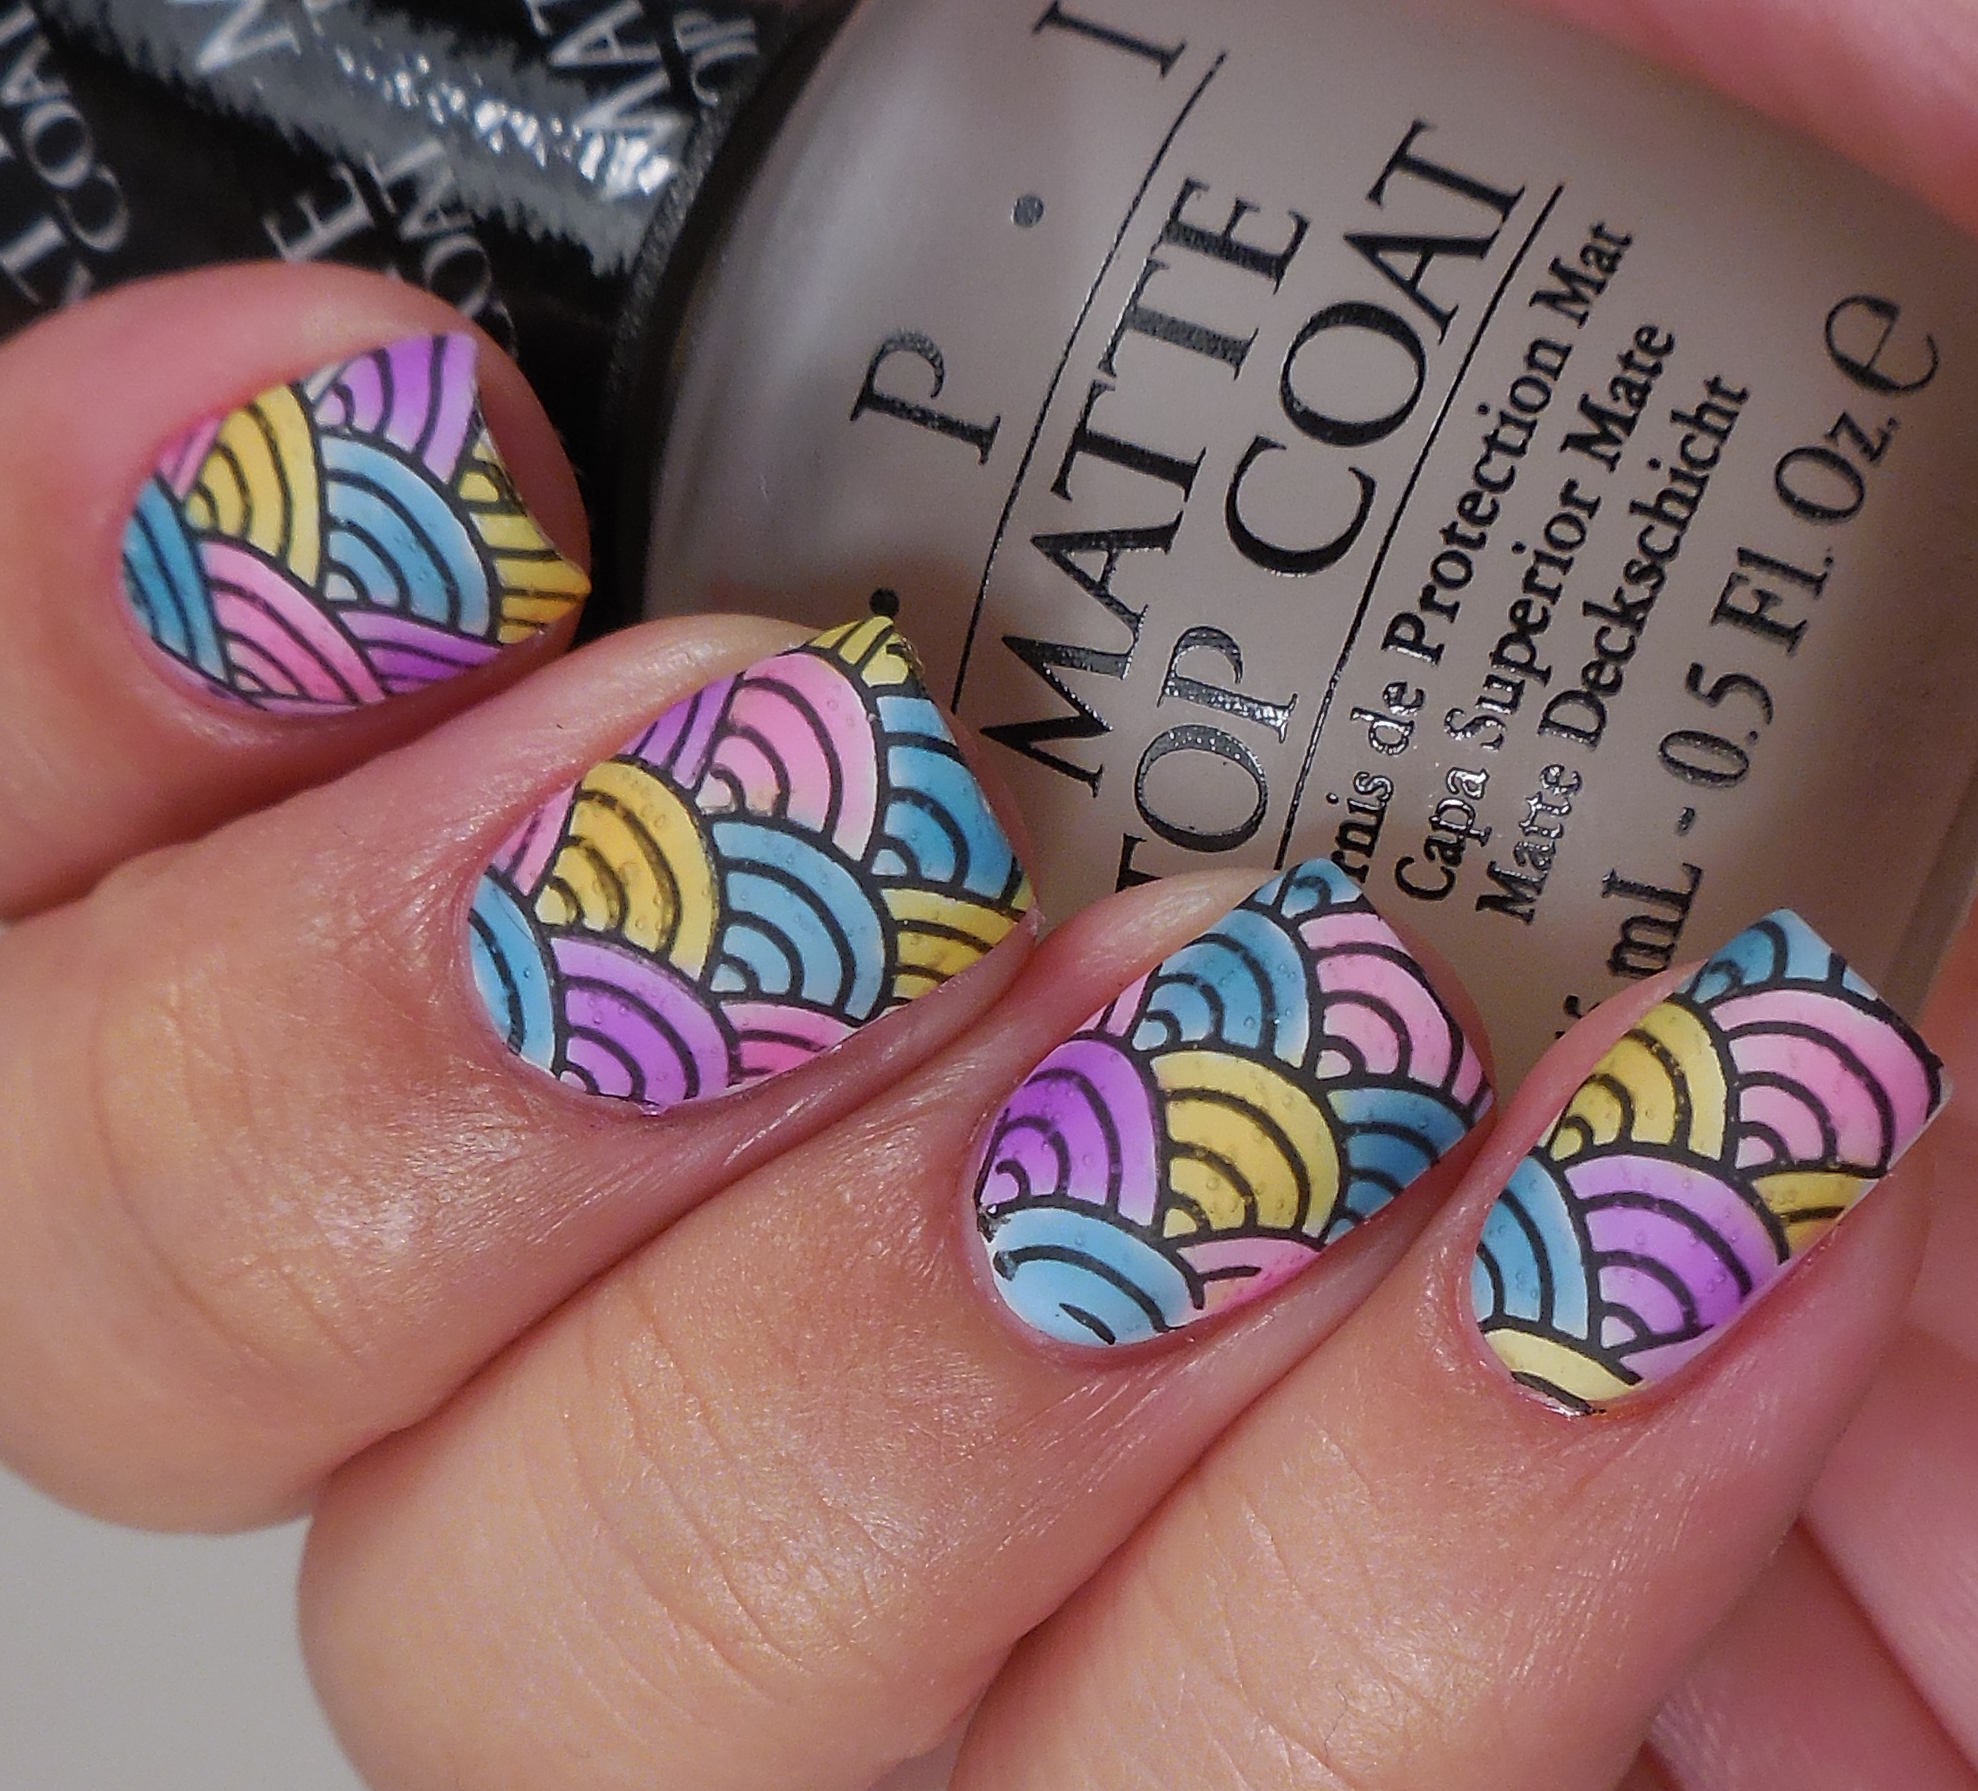
Lastly, I mattified the whole thing with my favorite Matte Top Coat from OPI (press sample). I think that the matte top coat hides the bubbles a bit so I’m all for that. I’ve had this matte top coat for a while, and it has not gotten gunky or weird at all.
So what do you think about this mani? Minus the bubbles, I really like how this turned out. Make sure that you check out the other manis below to see how the other ladies interpreted the design inspiration. Thank you for stopping by today, and I will talk to you soon!
Loading InLinkz ...
The Lacquer Ring – Unicorns Unite!
I almost didn’t get this post done, which would have been unfortunate because this is the inaugural post of…
 What is this Lacquer Ring I speak of? Well, it’s a group of crazy polish chicks who spend way too much time emailing each other all day long about polish, life, woes and more polish. While we haven’t all technically met in person (except for me and Lesley and Amy and Frosso), we are pretty good friends and hope that we can all meet one day. Unfortunately, the universe will end that day because that much awesomeness is not allowed all in one place. While you may already know the ladies who make up The Lacquer Ring, let me introduce them all:
Amanda from Mae’s Beauty
Amy from The Fancy Side
Frosso from Lacquer Me Silly
Jessica from Once Upon A Polish
Lesley from IG @MisfitLesley
Nicole from Polish Me, Please!
Siobhan from For The Love Of Nail Art
Now that you know who will be participating in The Lacquer Ring, let me tell you that we will be posting twice a month and each month, one of us will be determining the two challenges for the rest of the group. For our very first post, we will all be using a special polish that Nicole got as a gift for all of us: Candy Lacquer Unicorn Bubbles. Let me show you what I did with this awesome glitter topper!
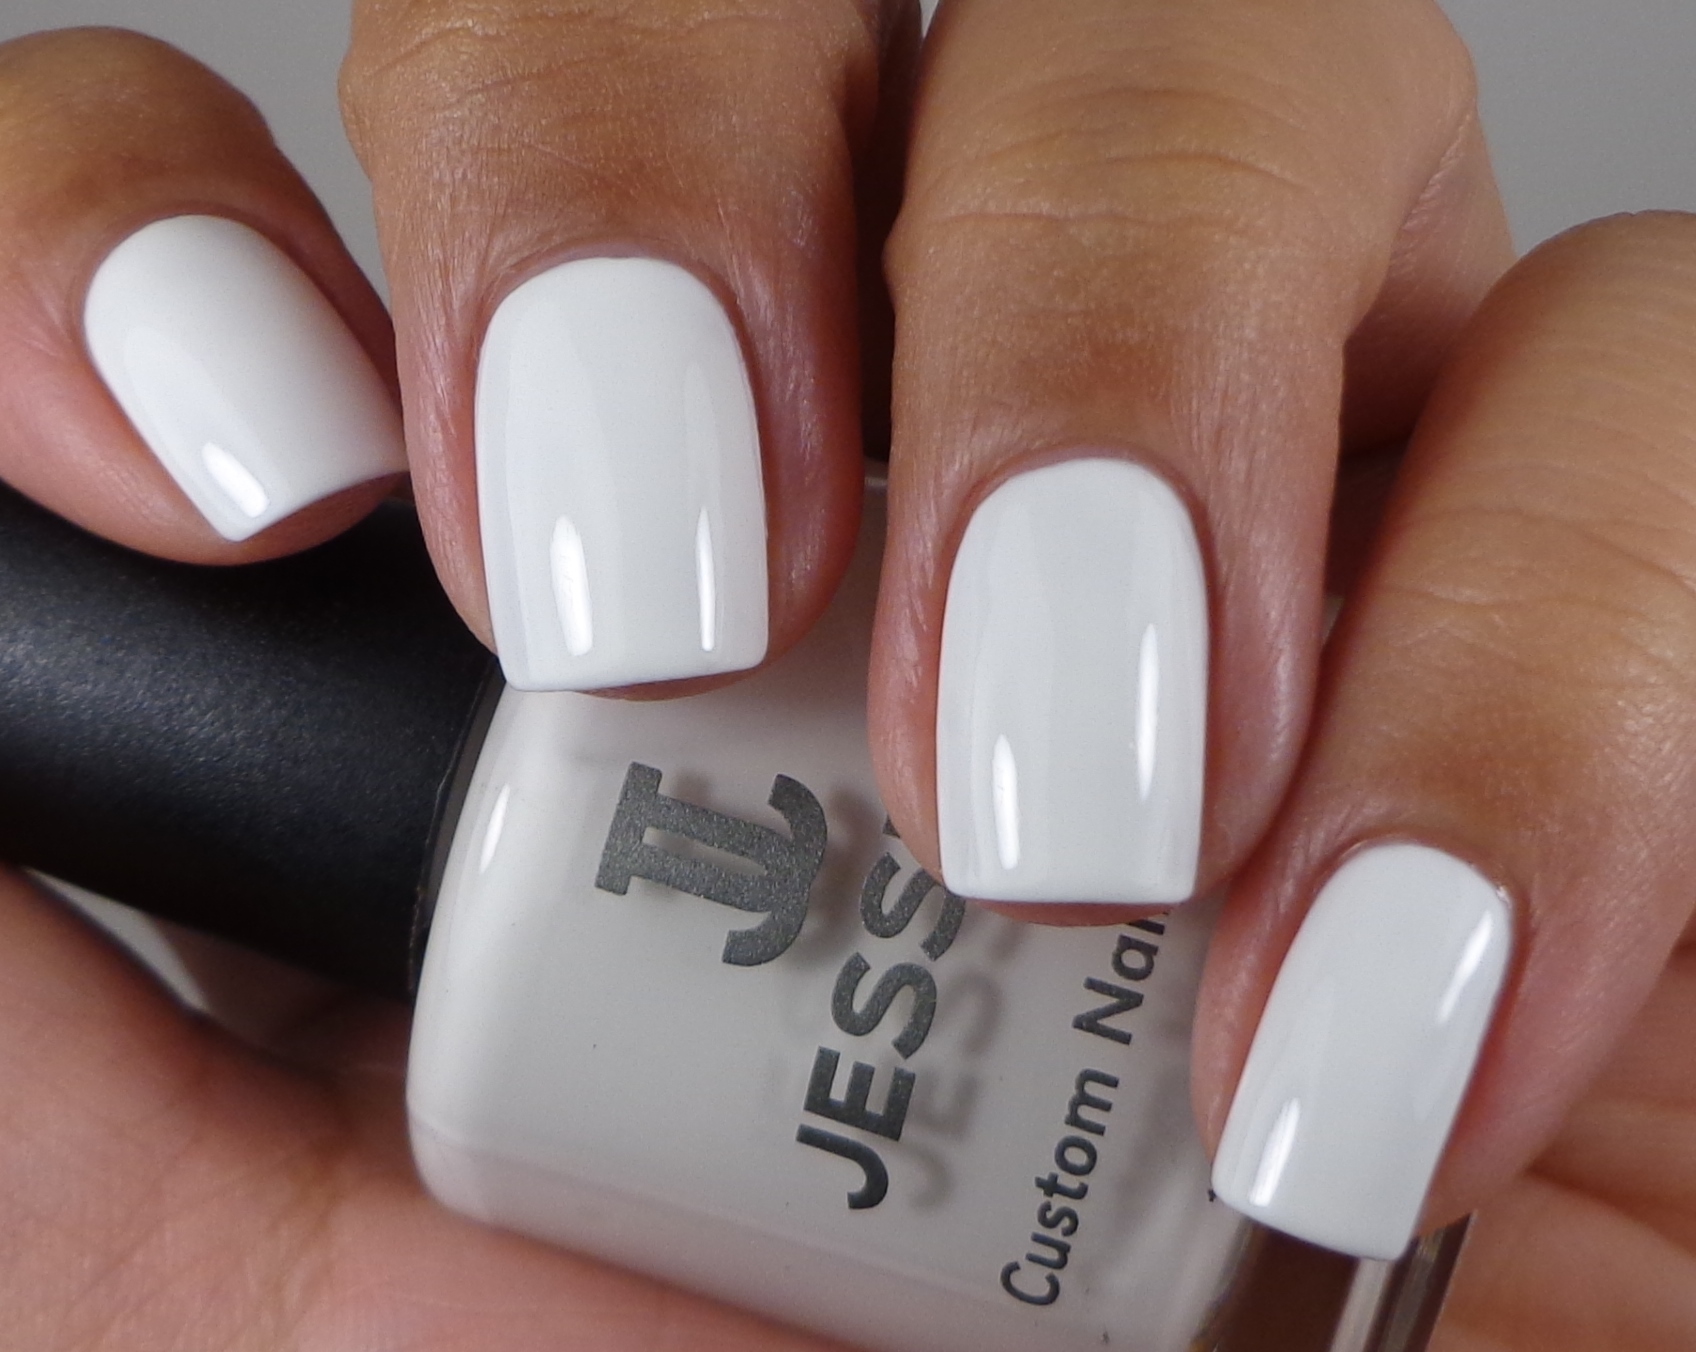 I started with two creamy and delicious coats of Jessica Sharktooth (press sample). I’ve mentioned how much I love this polish many times because it is an amazing white polish.
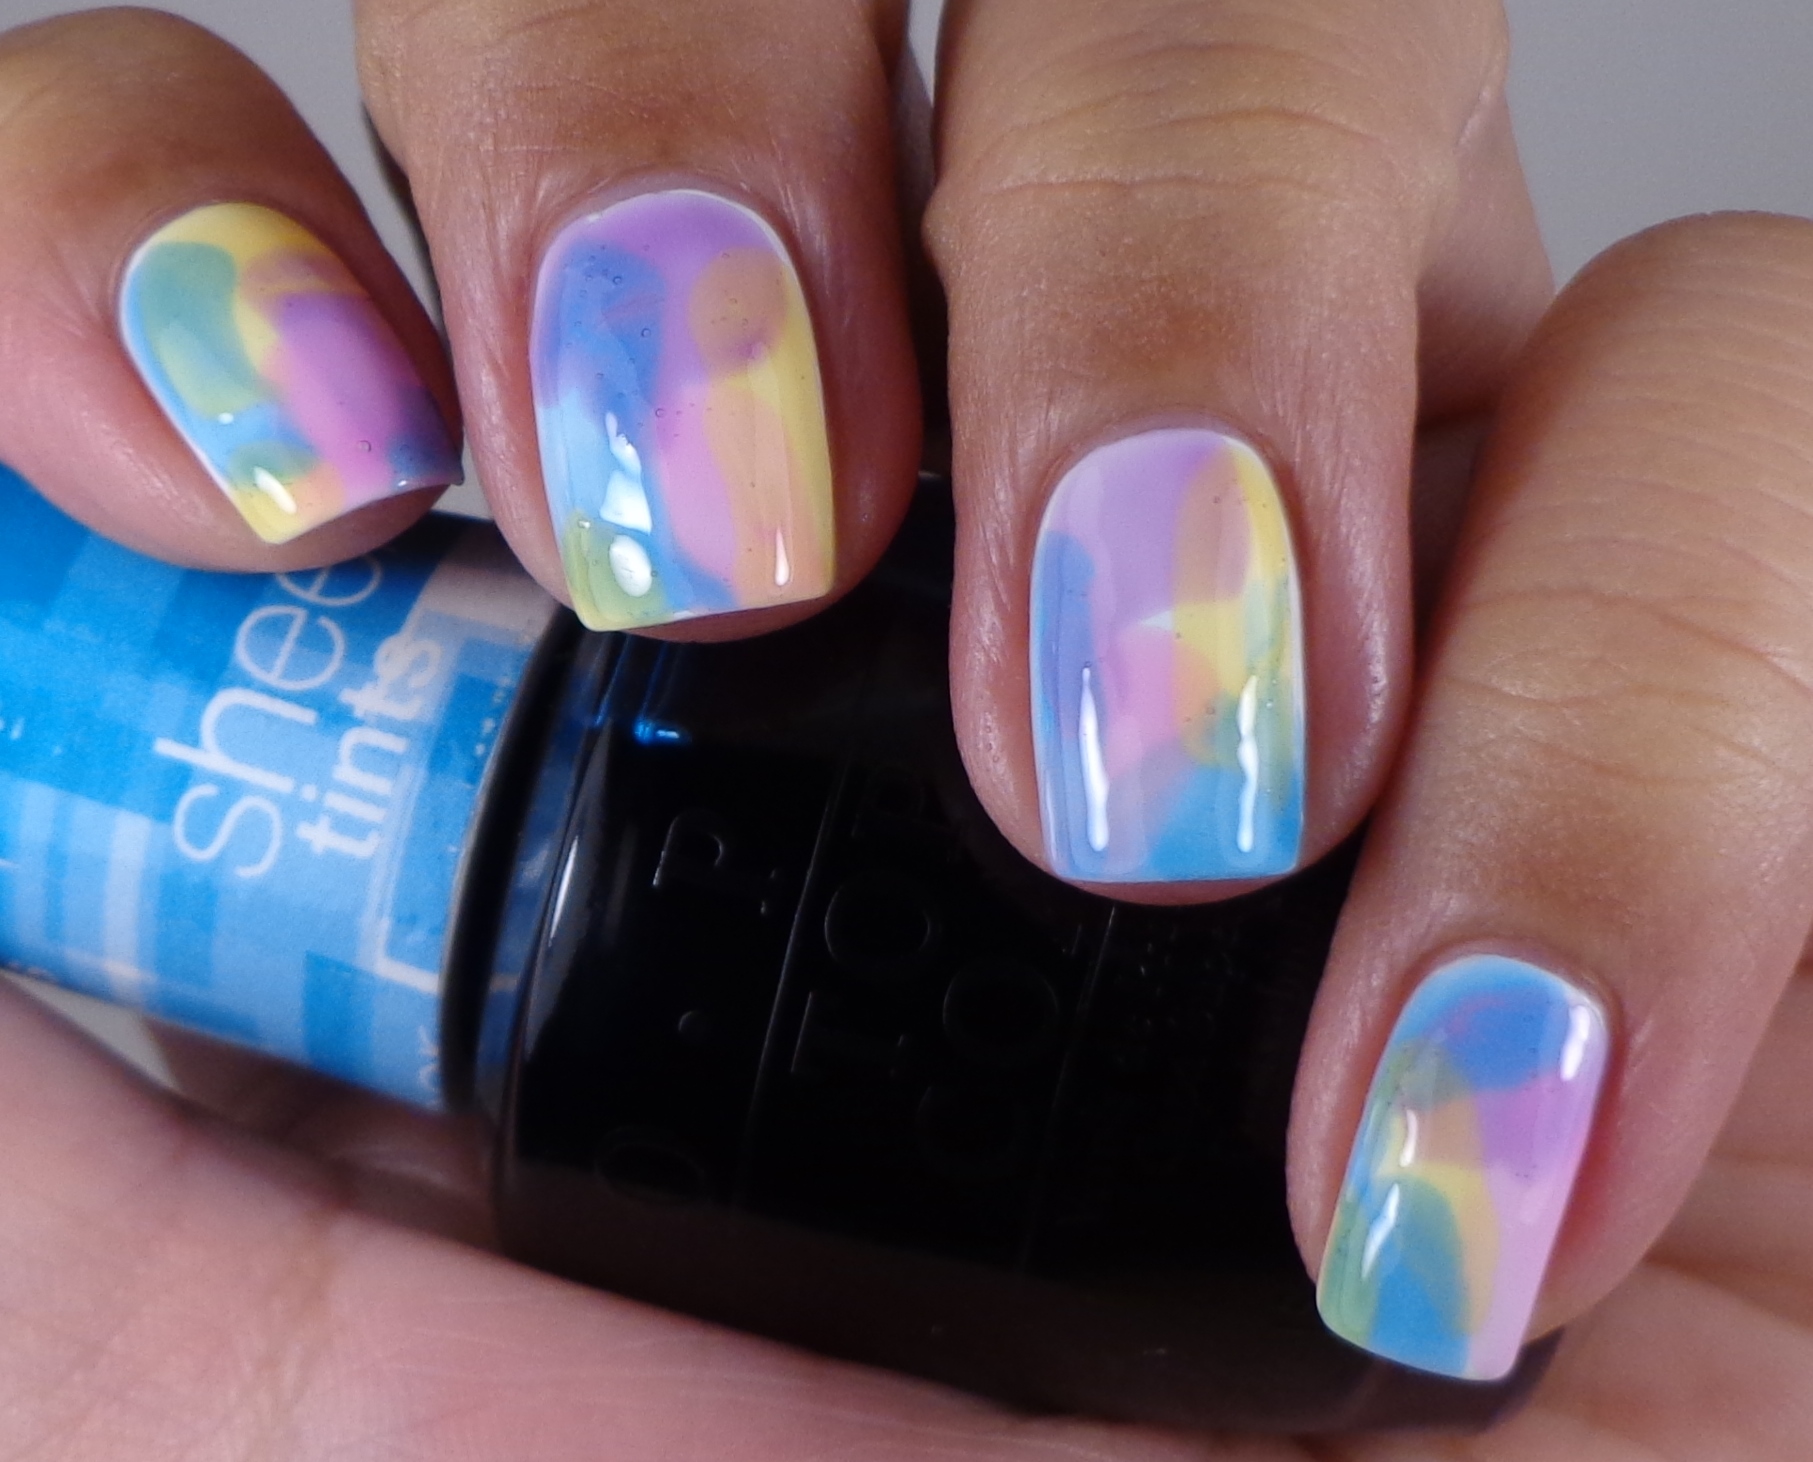
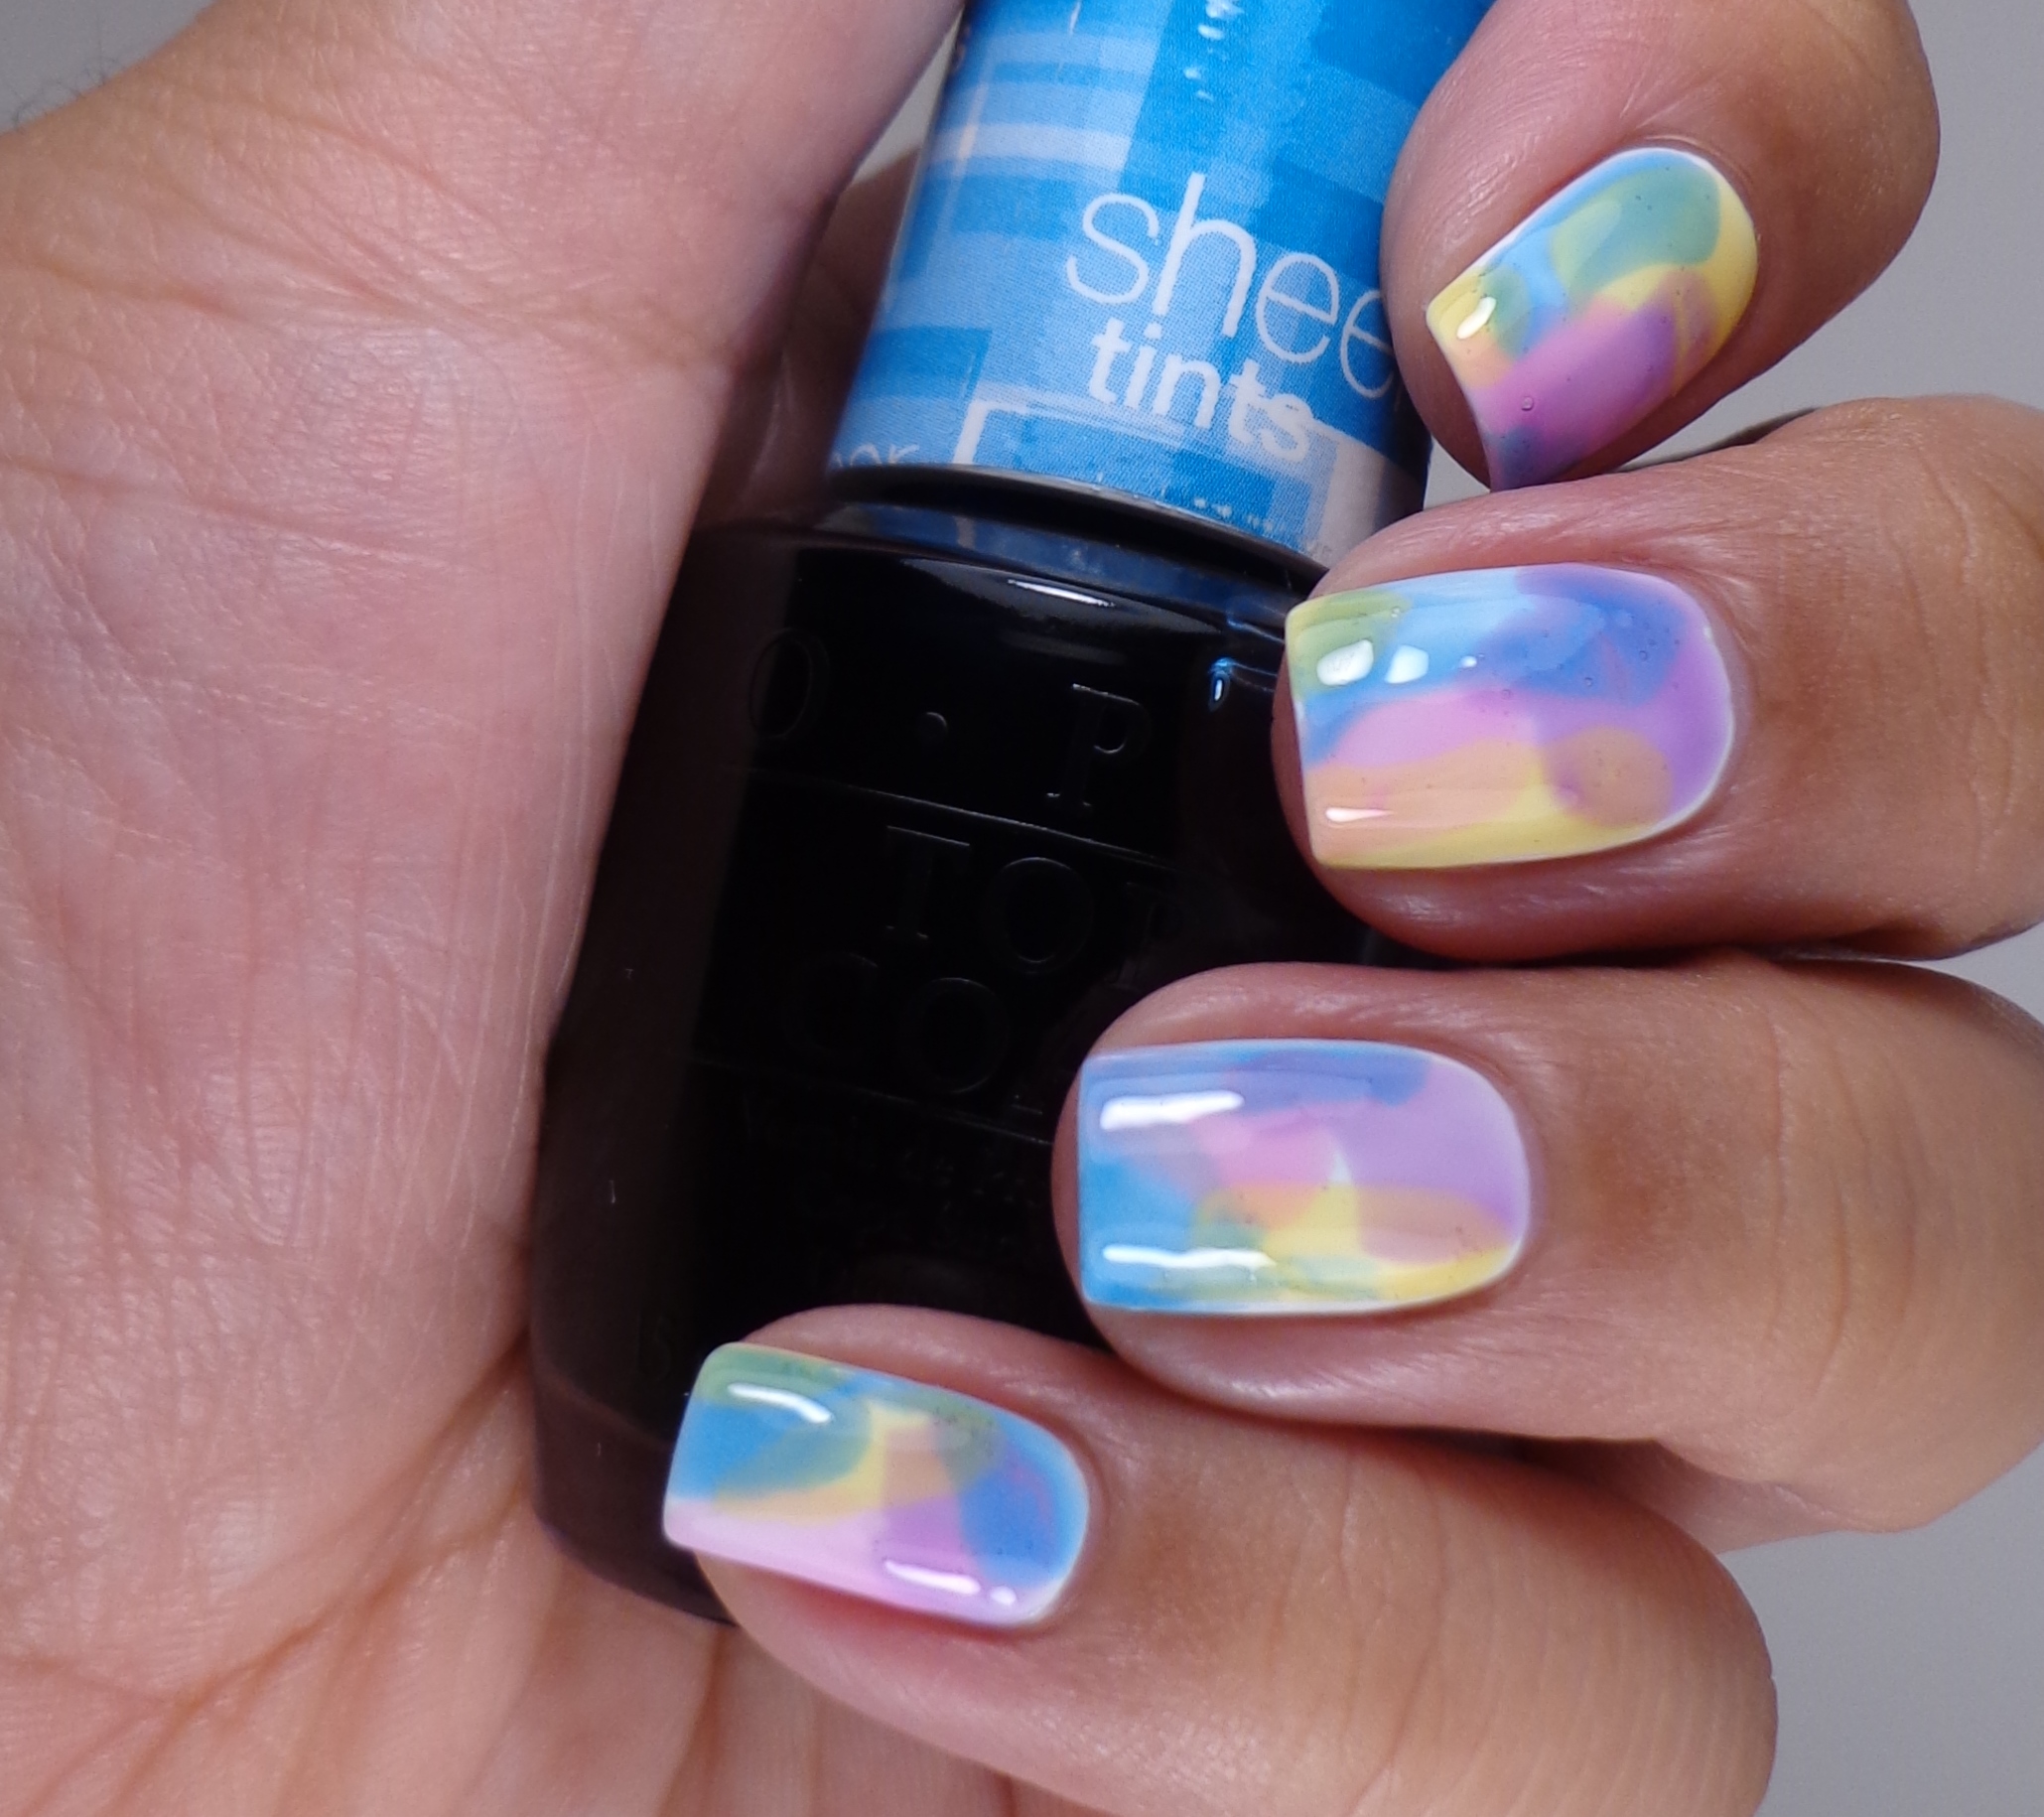 I then used my OPI Sheer Tints (press sample) to create this watercolor design. Ever since I saw The Polish-Aholic’s post about this, I knew I had to do it. You can read more about it here. I should have used thinner coats of the Sheer Tints because I got some bubbling, but I decided to let it go since I was planning to put on a glitter topper anyway.
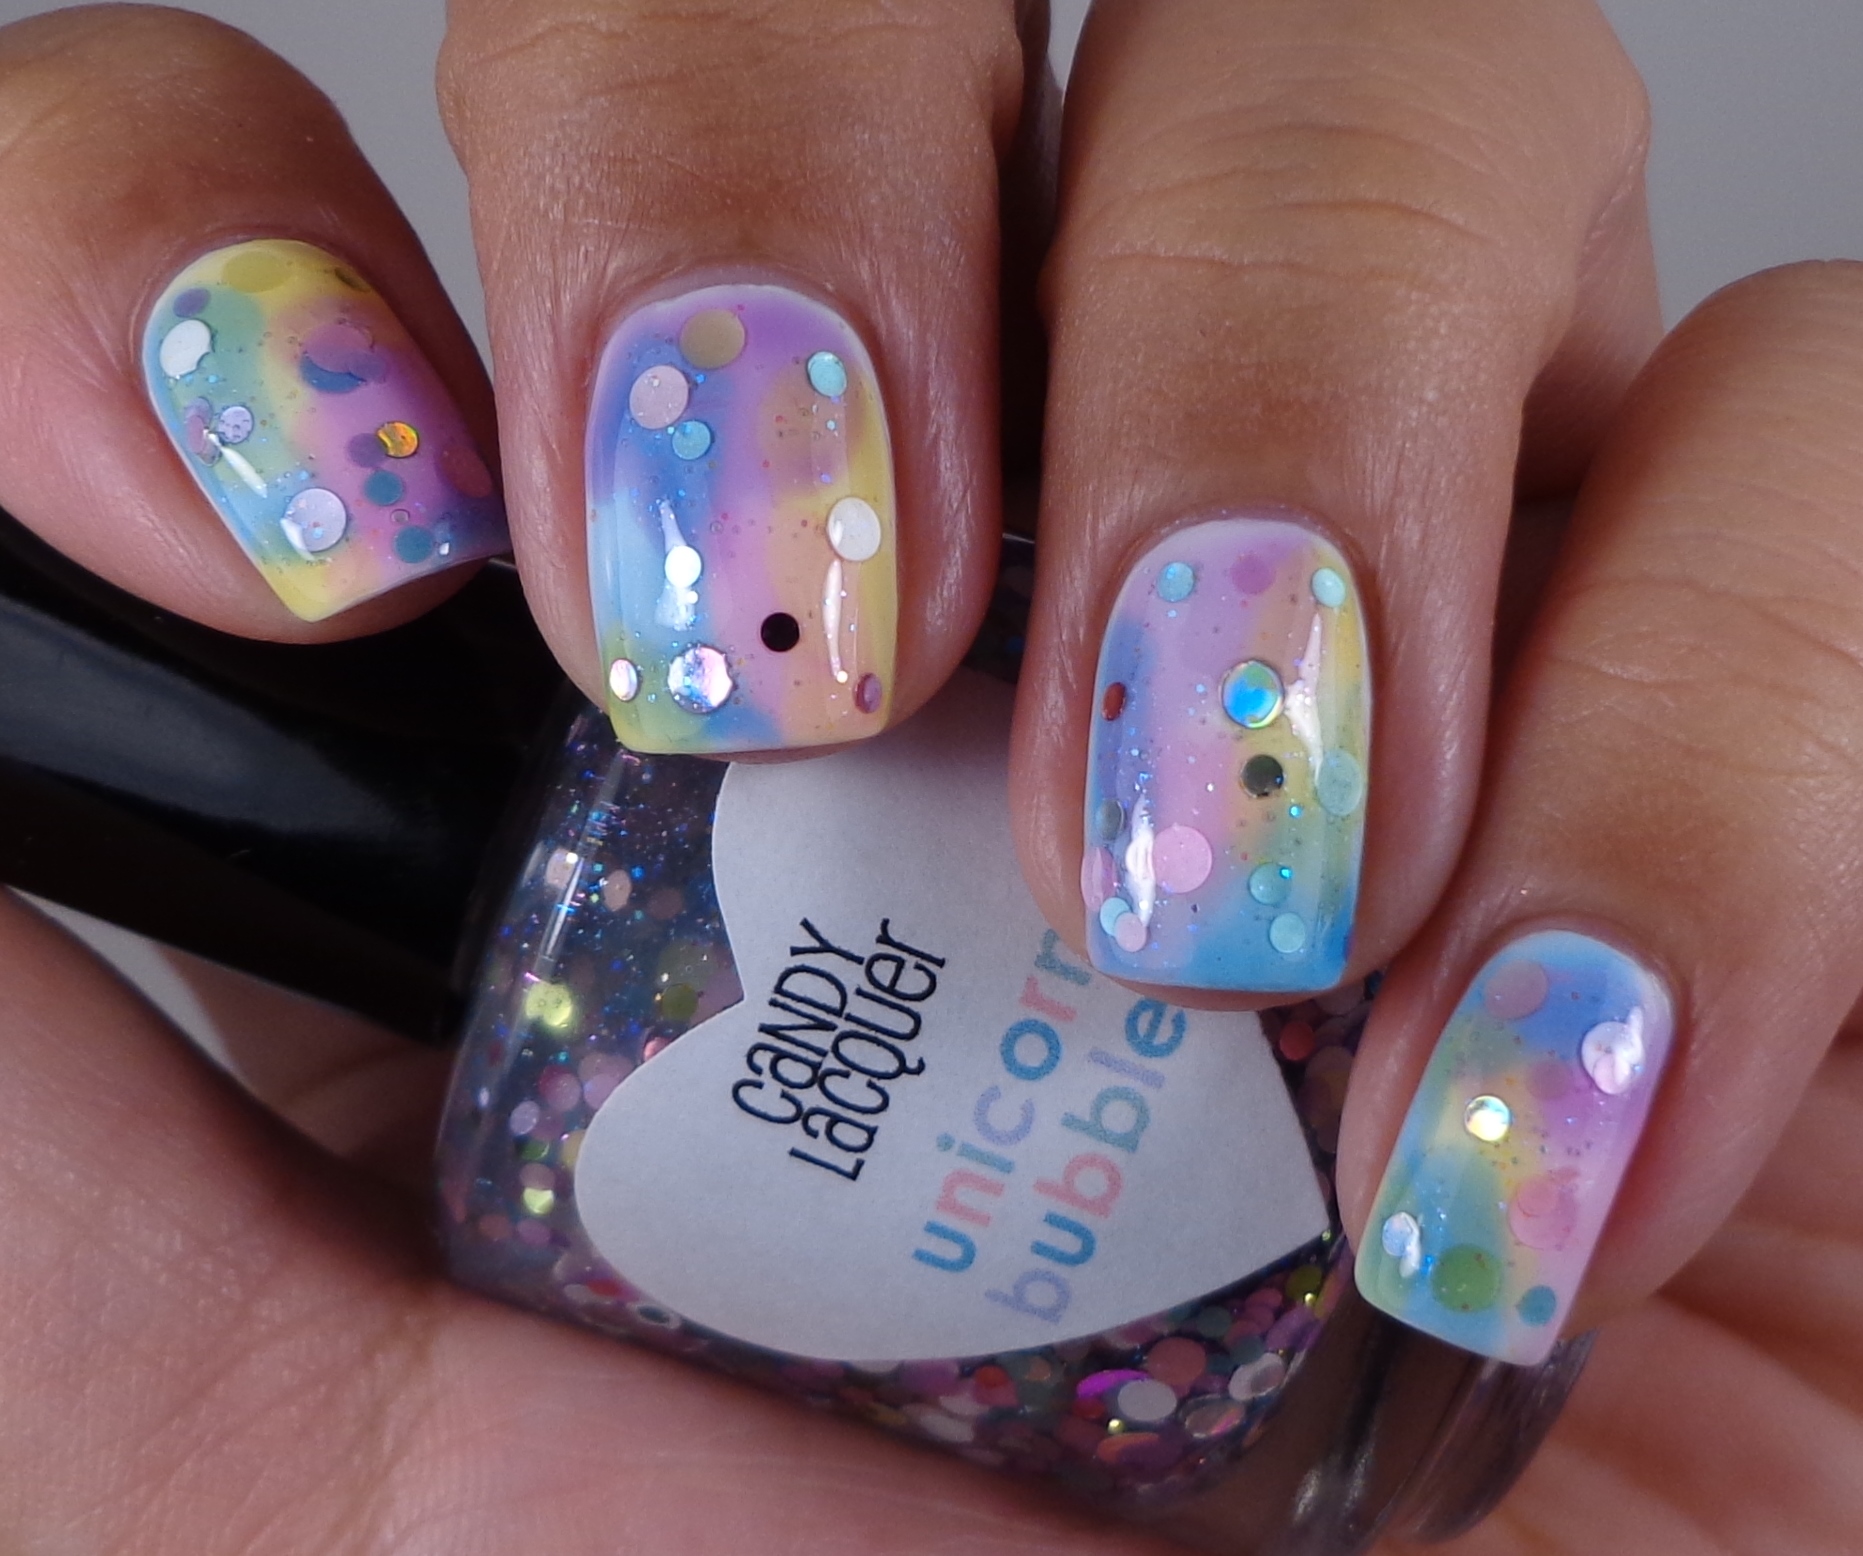
 This is my very first Candy Lacquer, and I was quite happy with it. I love circle glitter so this is right up my alley. Like most glitter toppers, using the dabbing method will give you the best results. I ended up fishing the glitter out with a dotting tool because I was getting a lot of bubbling from the thick base. Although the base is clear, it does have some holographic micro glitter that kicks it up a notch.
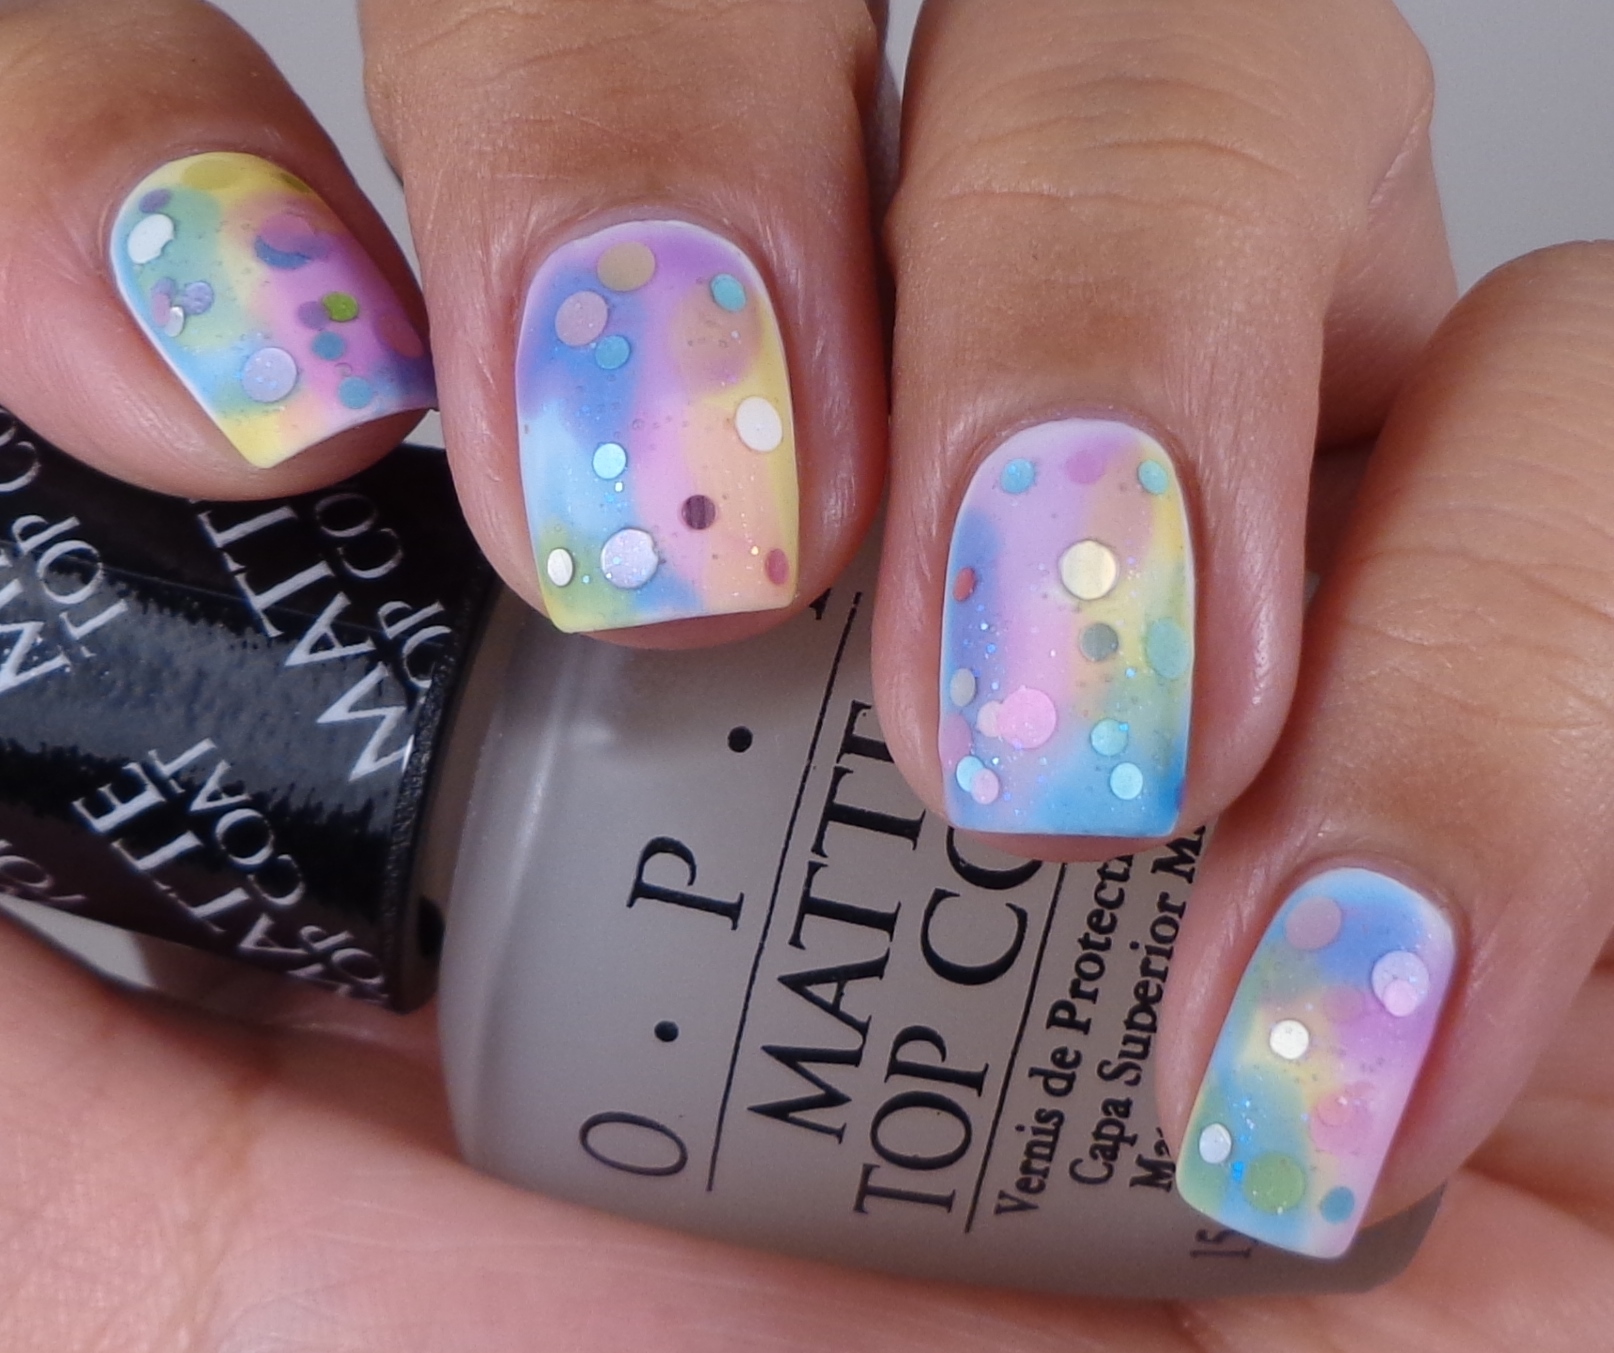
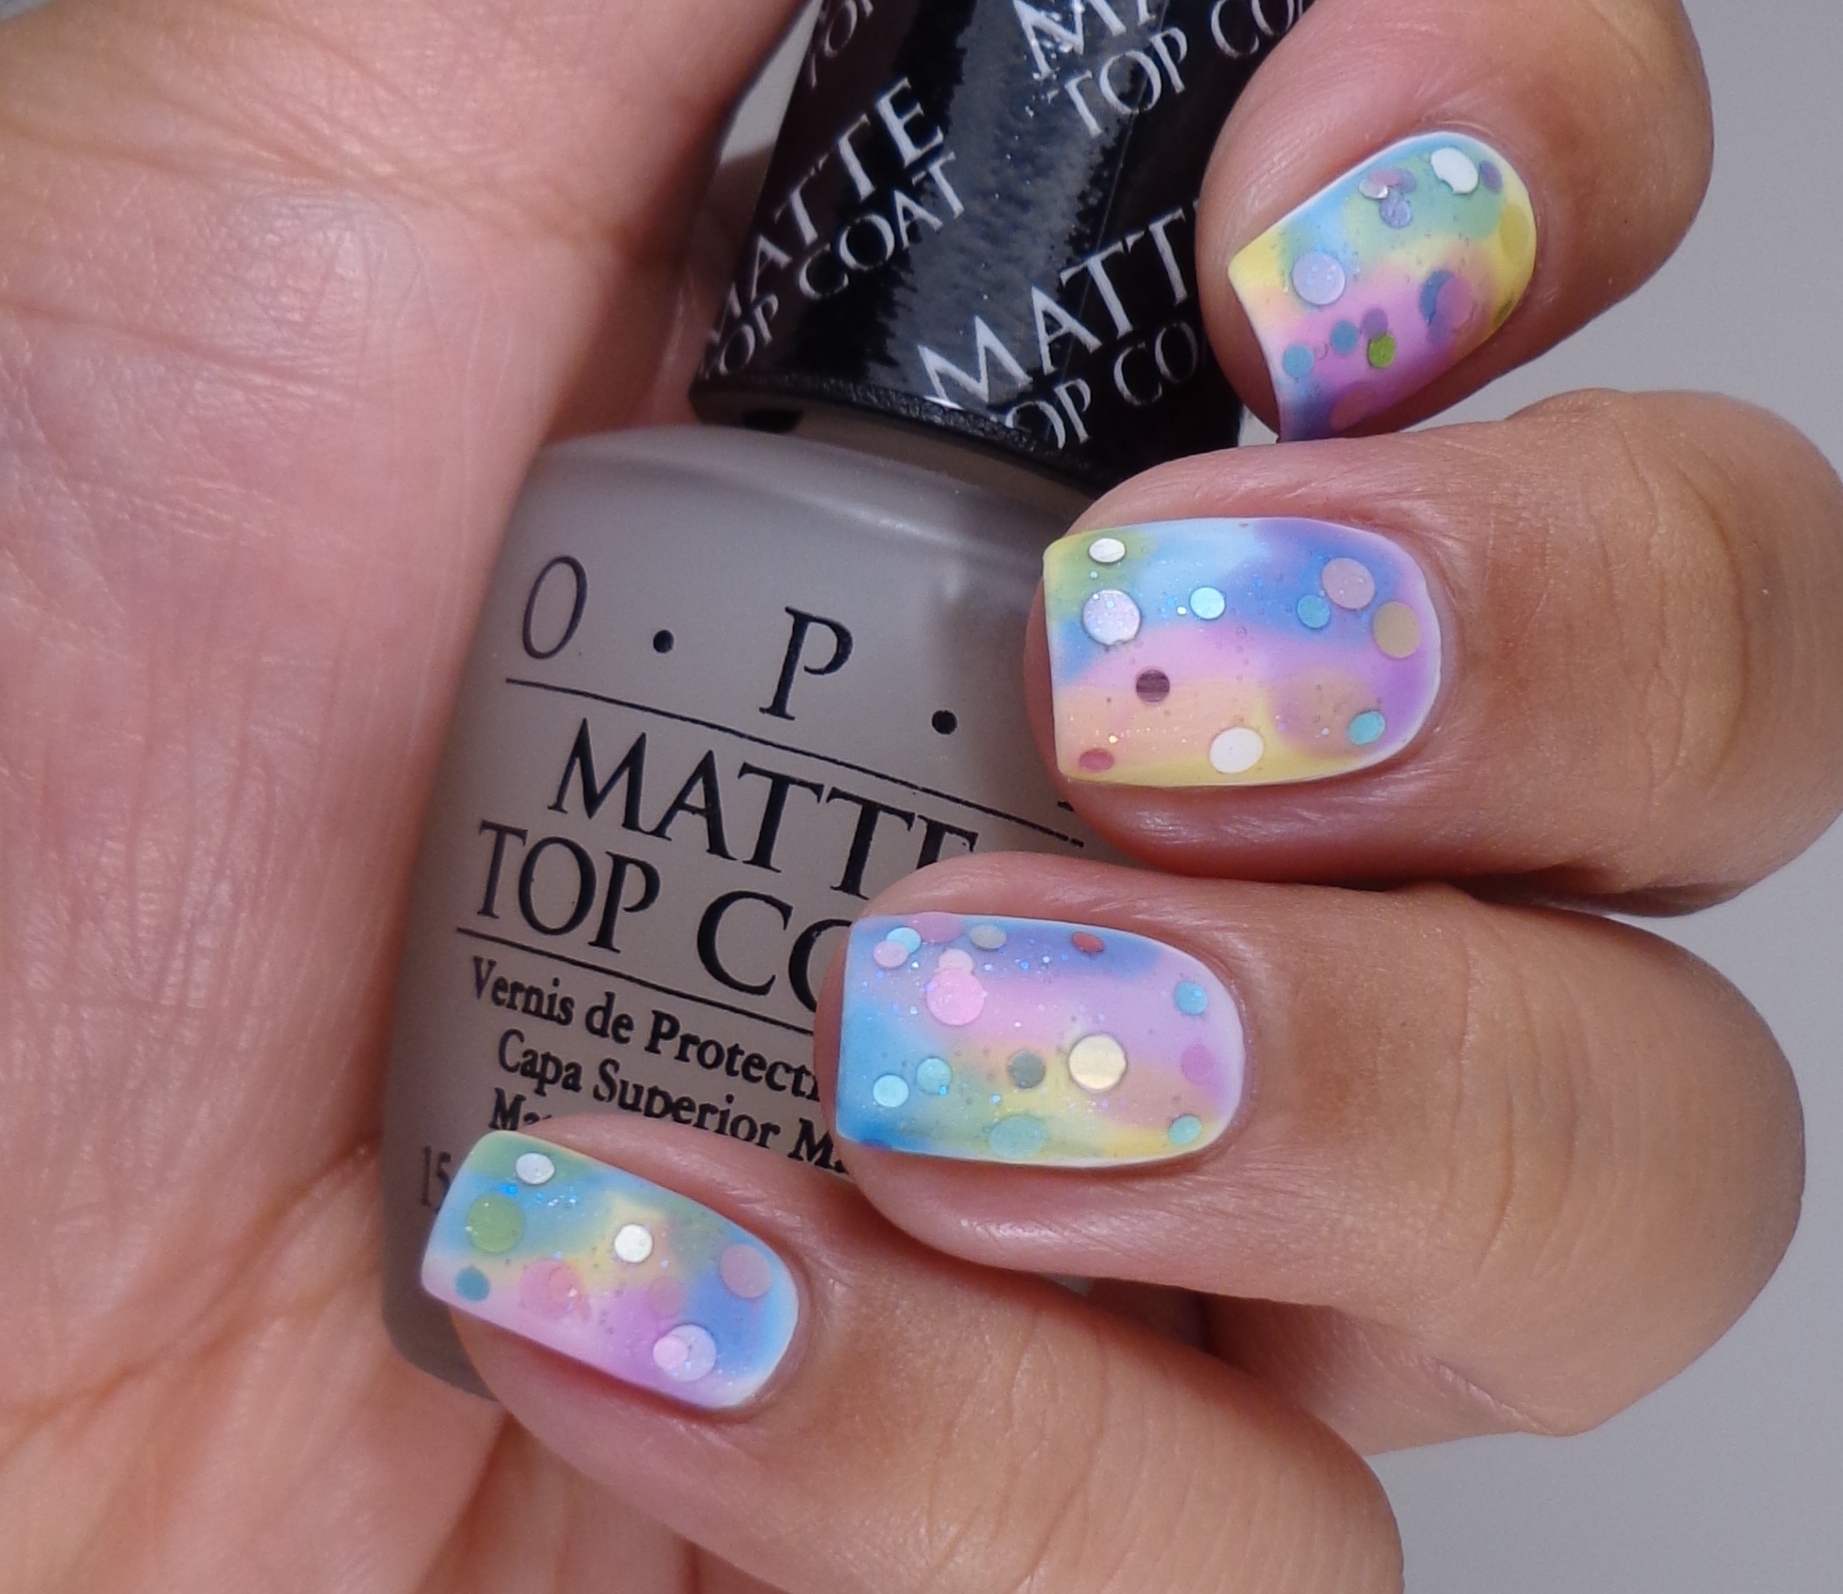 Lately I have been obsessed with making everything matte, so I pulled out my OPI Matte Top Coat (press sample) and mattified my whole mani. I don’t know how you feel about the end result, but I absolutely love it. OPI’s Matte Top Coat has become my favorite amongst many others so I highly recommend it.
Currently I’m working through a lot of unpleasant stuff so excuse me if I’m not around as much. I had mentioned that I may not post as regularly for the time being, but I couldn’t miss out on the first post of The Lacquer Ring. Thank you so much for continuing to stop by despite my irregular posting. We were not very organized for our first post, so they will be trickling in as everyone gets a chance to publish. Some are already up, so make sure that you check them out below. Thank you so much for stopping by today, and I hope that you will join us for the next The Lacquer Ring post.
Loading InLinkz ...
Morgan Taylor New School Nude
![]()
How was your Sunday? I didn’t do anything exciting, but I did stop by my brother’s house to visit my little Peanut. He is so freaking adorable! I hadn’t seen him all week because my sister in law’s sister is visiting and she is babysitting him. I’m not a big Easter person but if you are, I hope you had a nice day with your friends and loved ones. I also wasn’t in the mood to do some cutesy Easter mani so I used a gorgeous nude that I bought a couple of weeks ago: Morgan Taylor New School Nude.

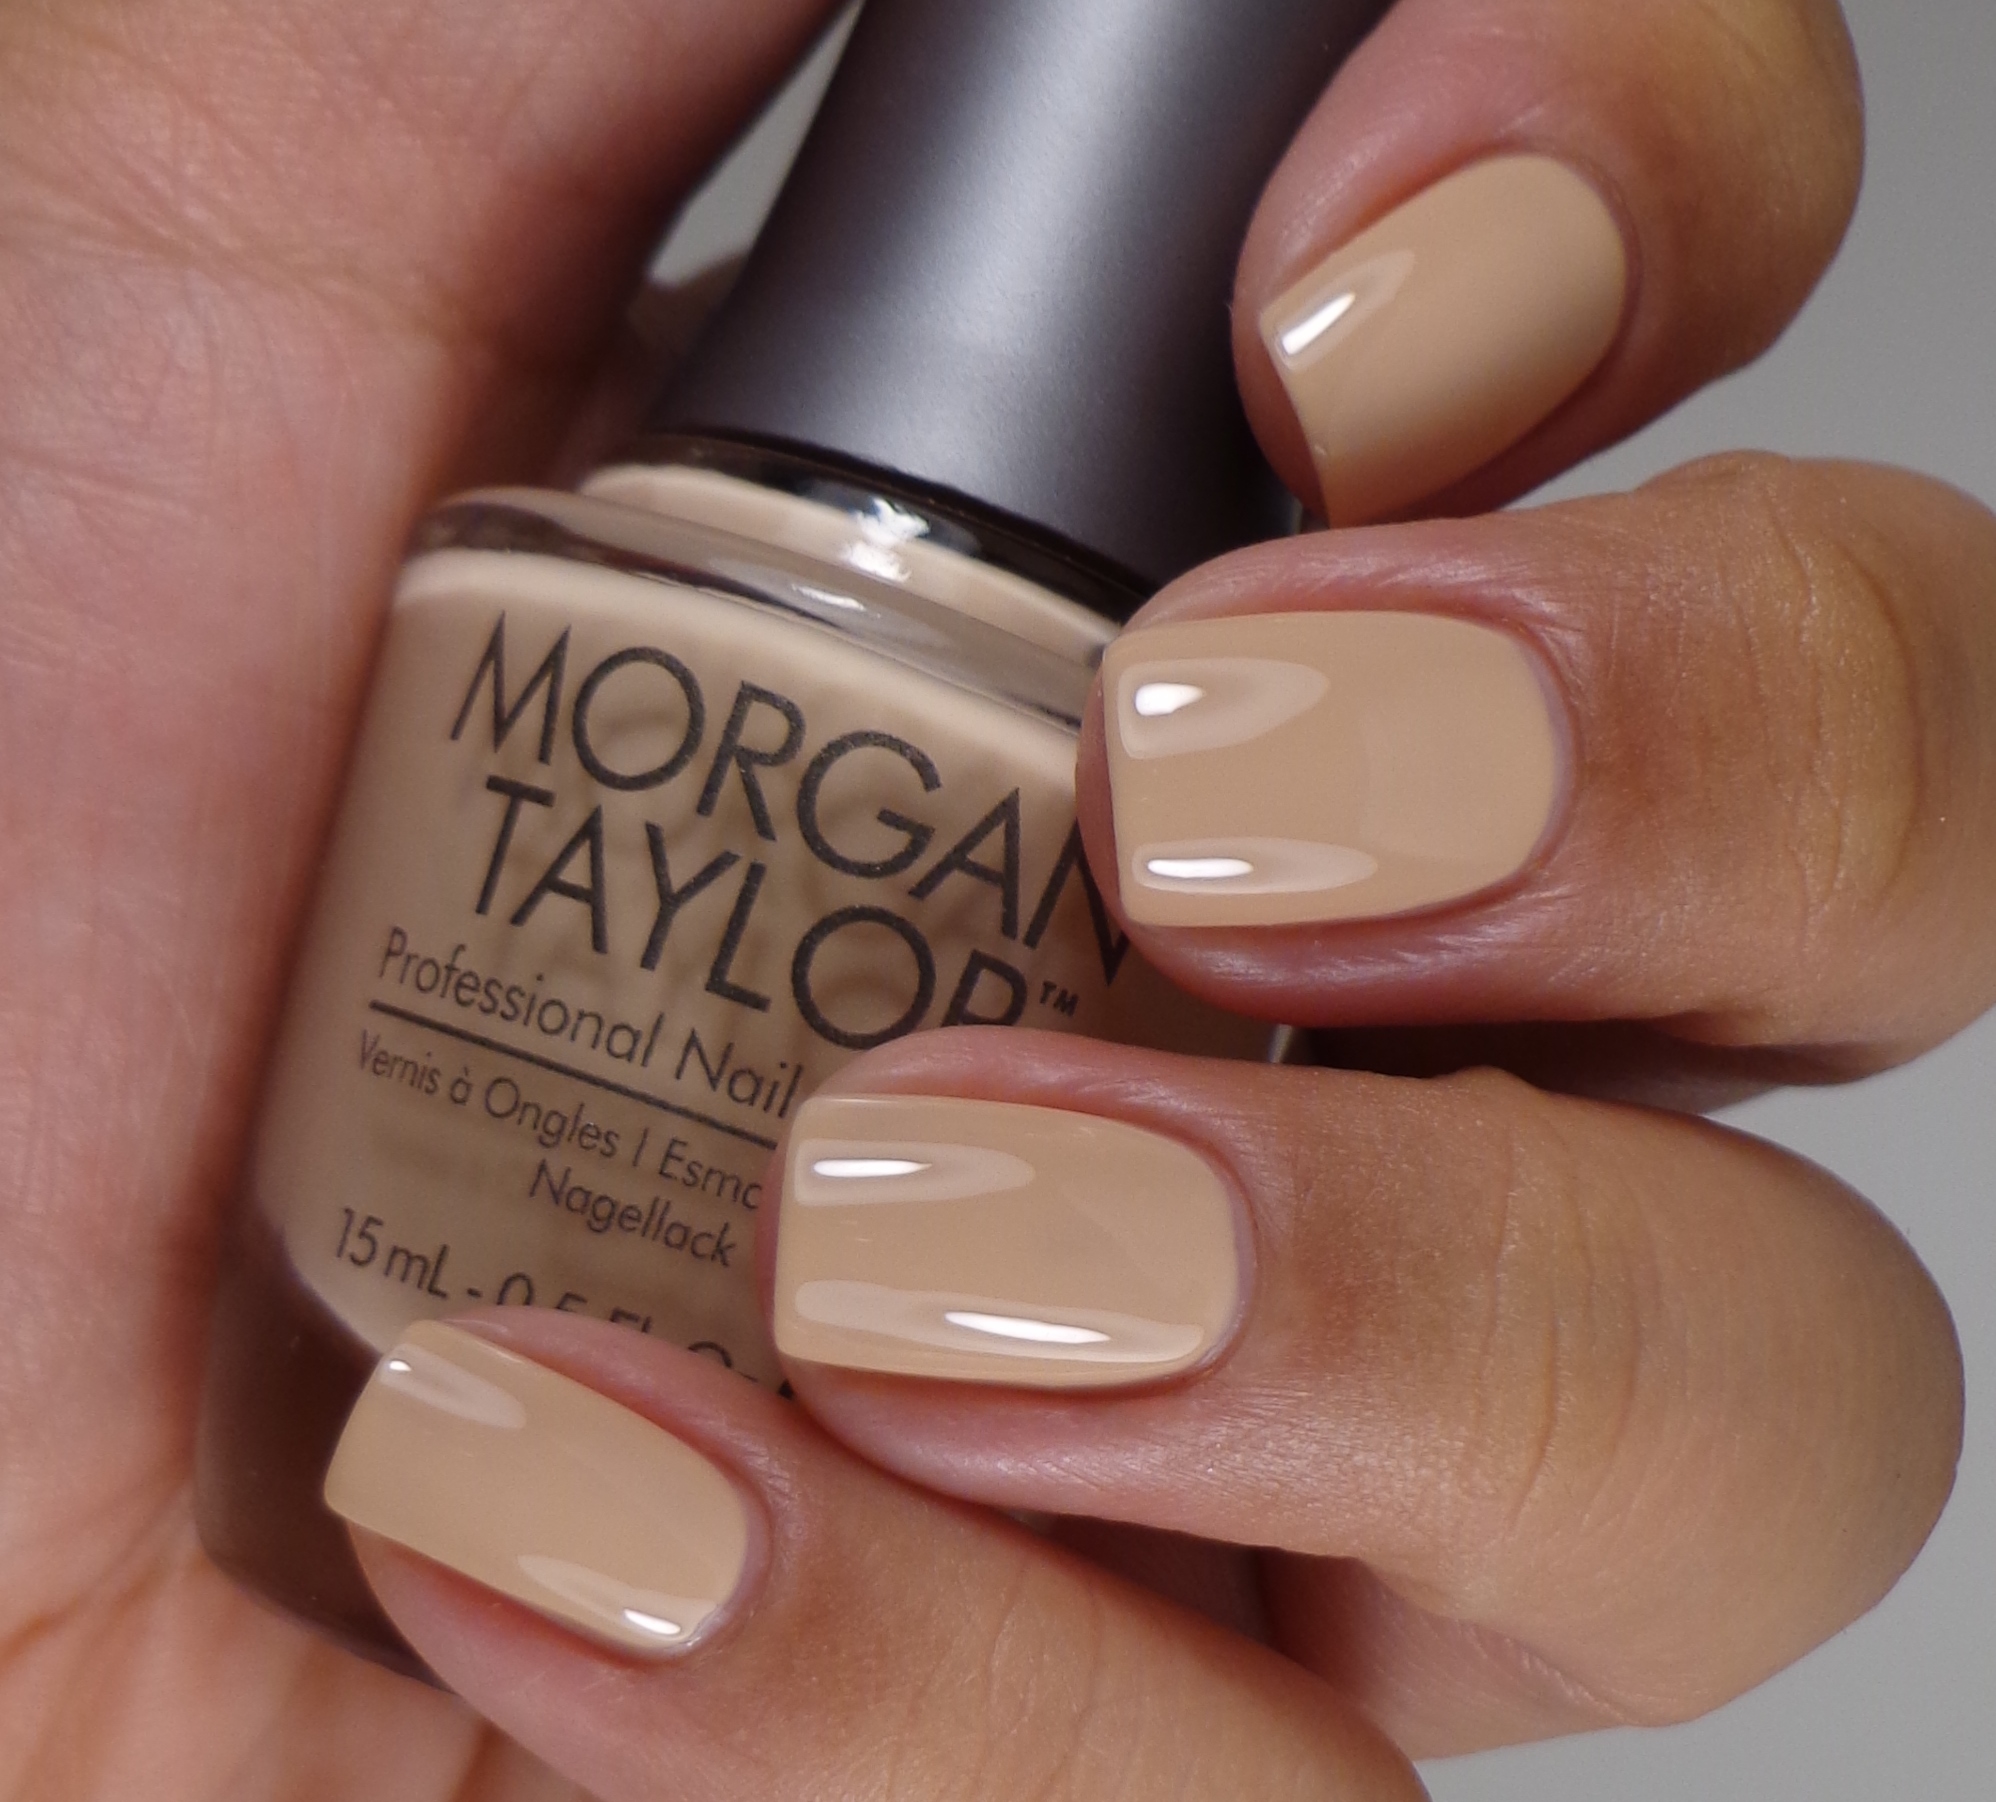 This is a gorgeous nude. It’s slightly beige and has a little bit of yellow in it. To be honest, I thought this was going to look hideous on me but I am quite liking it. If you haven’t used Morgan Taylor polishes before, this one is the usual creme perfection that I have come to expect from this brand. The polish was a tiny bit streaky so I ended up applying 3 coats, and it did not need top coat because it is beyond shiny on its own.
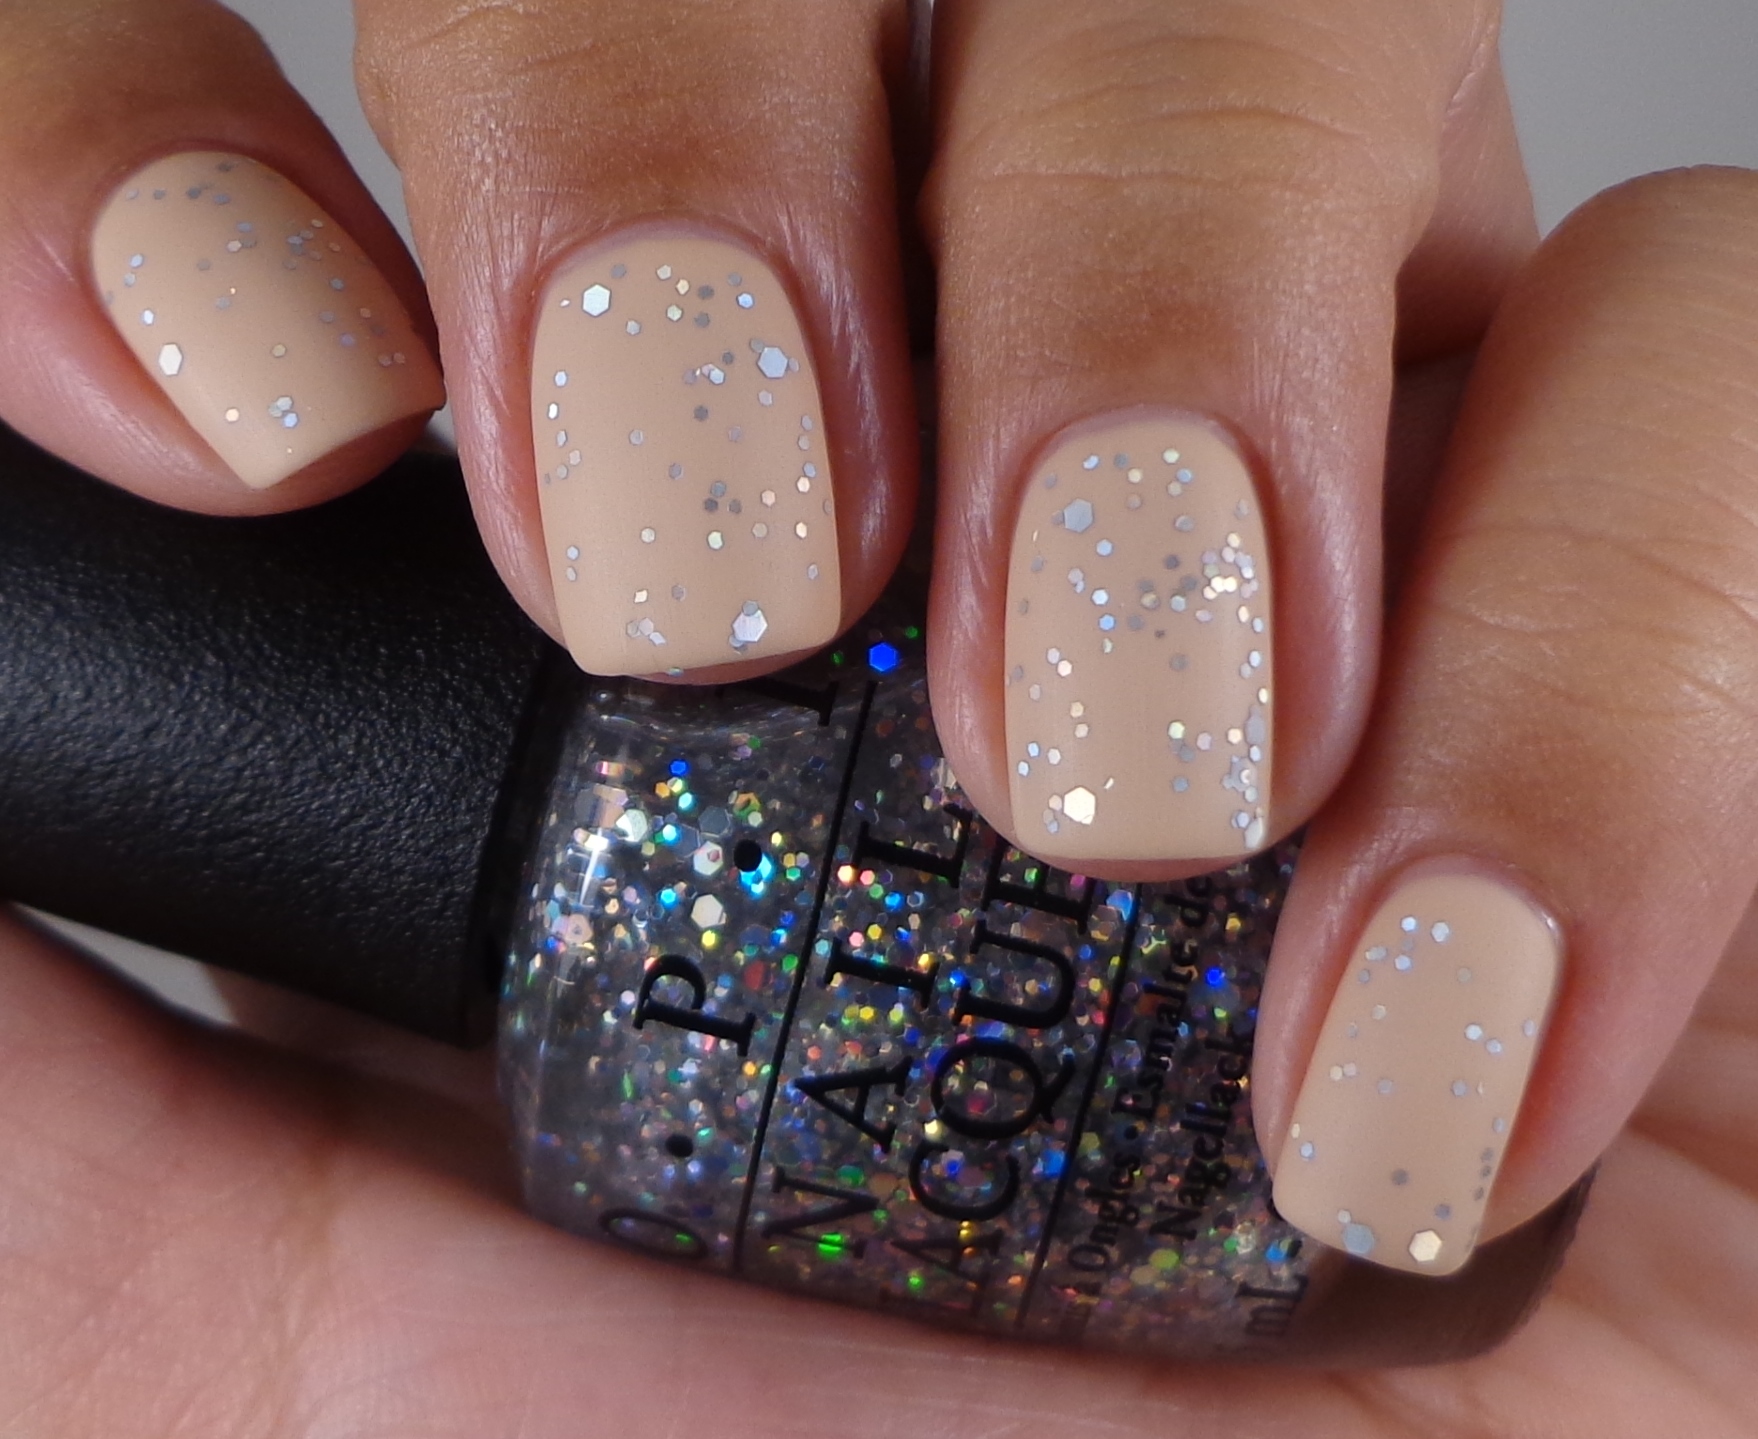
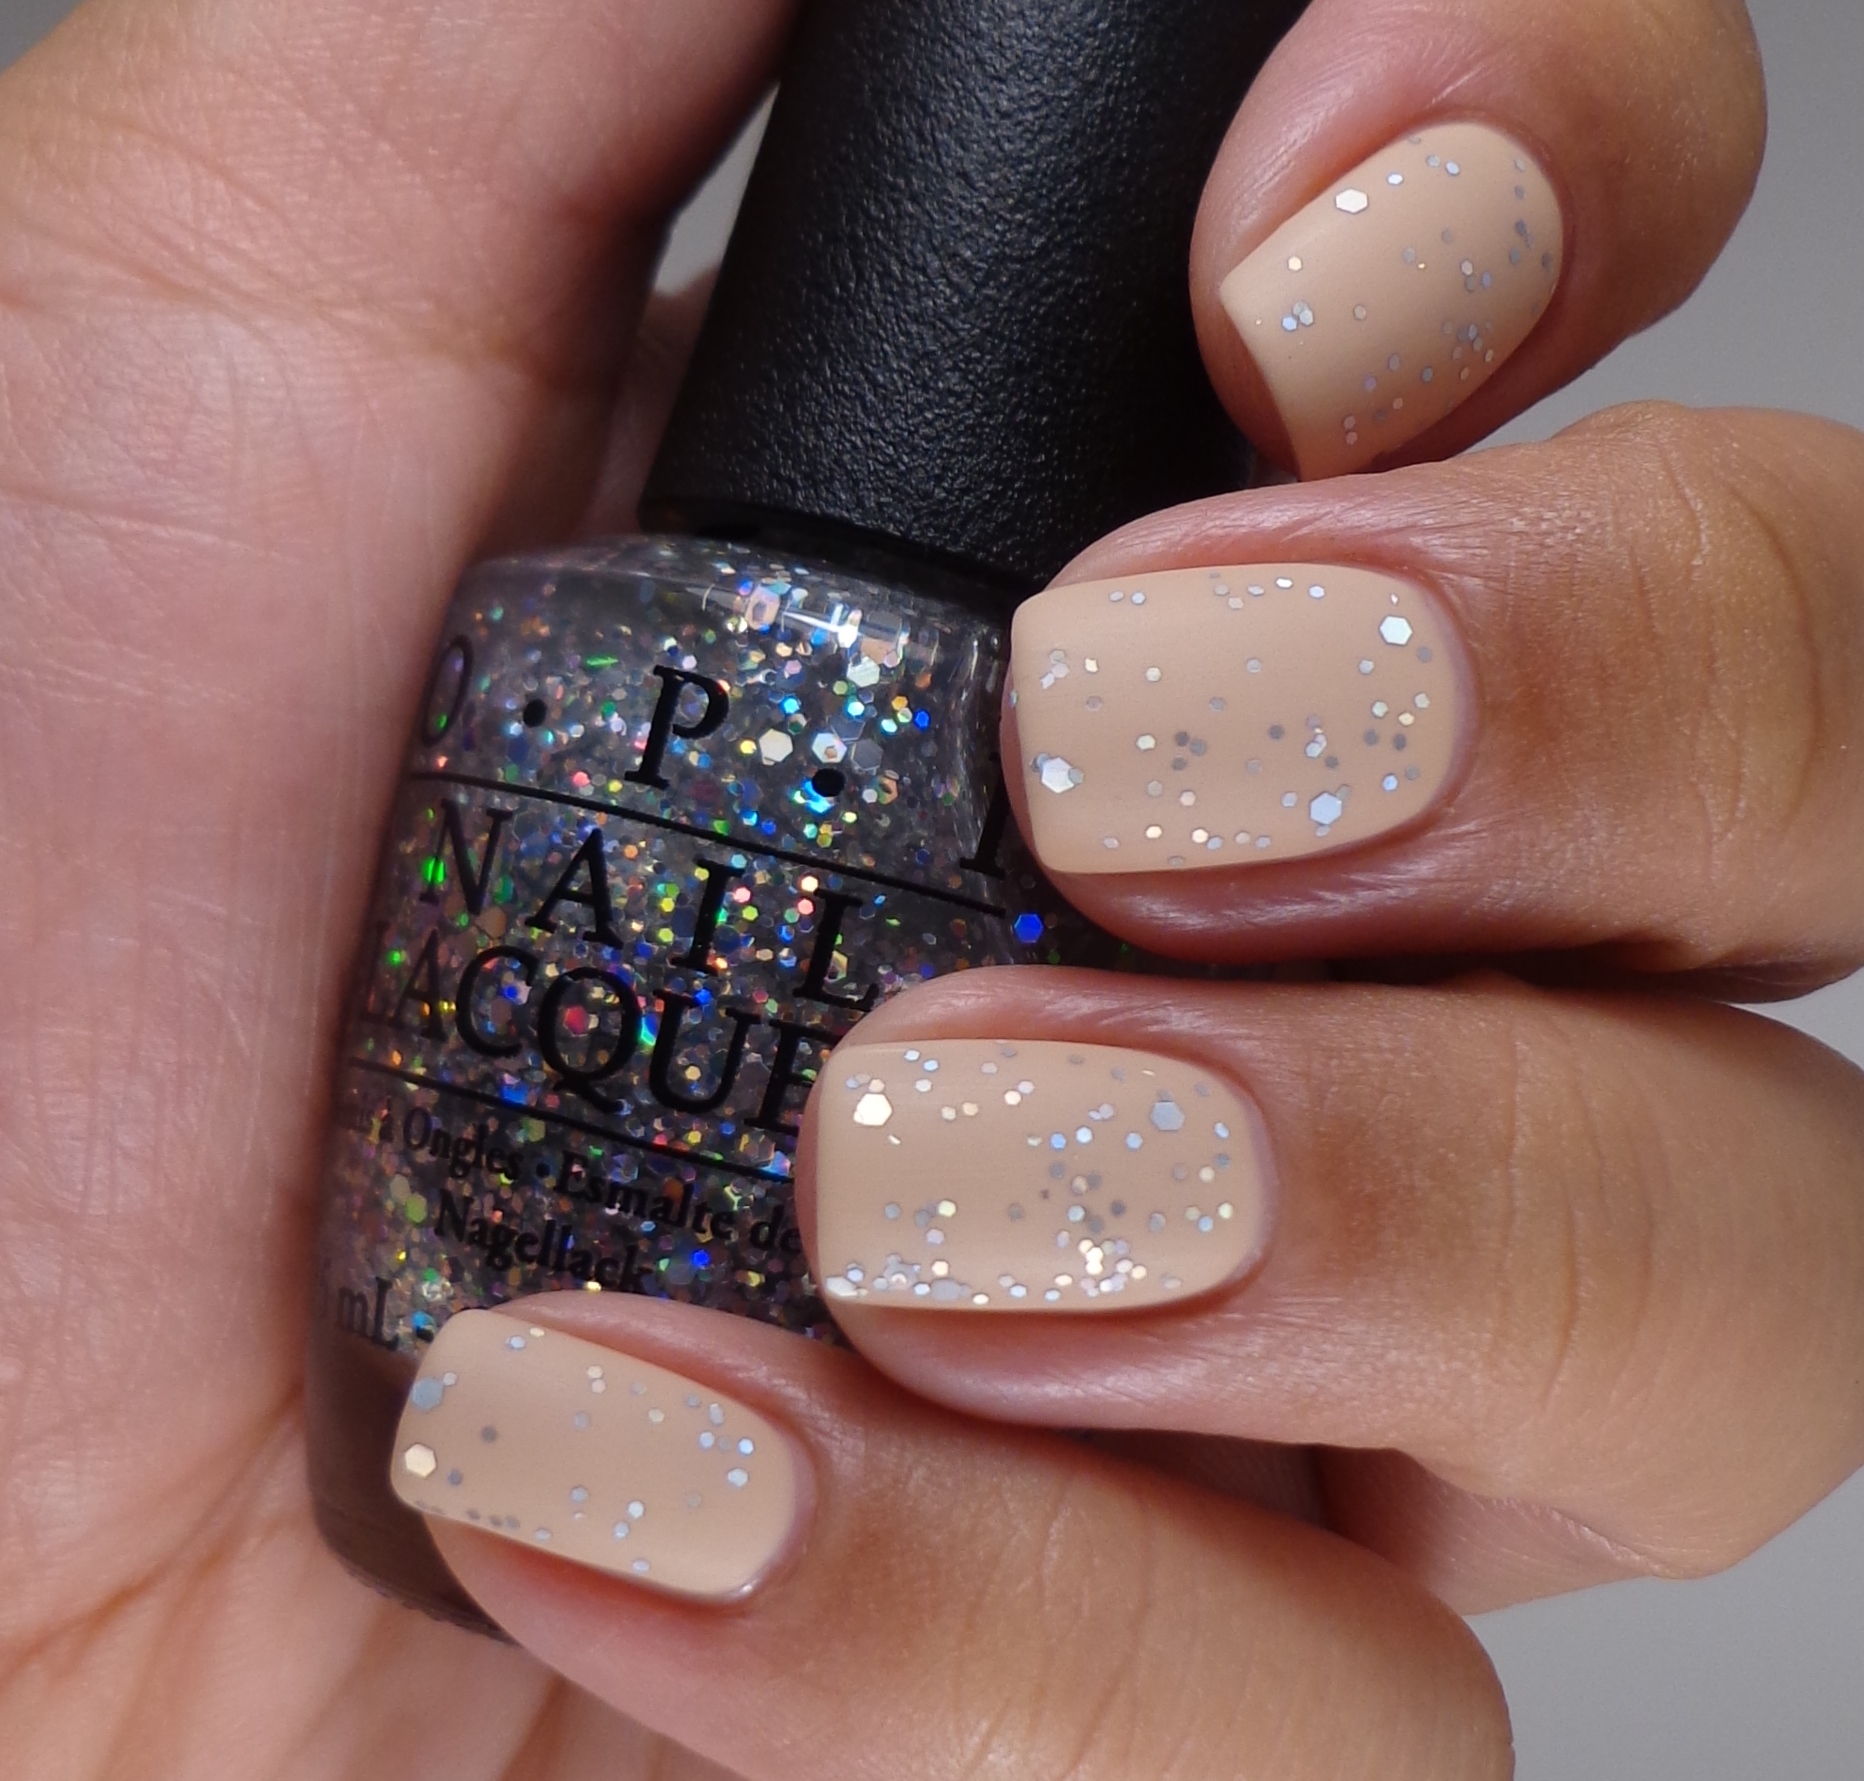 And just to make this a little more interesting, I applied a coat of OPI Snowflakes In The Air (press sample) and then used my OPI Matte Top Coat (press sample) to bring it all together. I’m quite happy with the way this turned out!
So I know that I mention work a lot and how much it stresses me out. I’m going to do my best to stop talking about work on here because my blog really is a sort of escape. At this point, I am physically sick from the stress so I know that something has to change. I hope that I don’t have to step away for the blog while I figure this out, but if my postings seem more sporadic, at least you will know why. Thanks so much for all the kind words and encouragement–they mean the world to me. I’ll talk to you soon…hopefully.
Clinique Really Rio
![]()
I really wish I wasn’t feeling SO DAMN lazy today because I need to run some errands but I am sitting here in sweatpants and a tank top and do not want to move my butt off the couch. I’m watching a bunch of documentaries on Netflix as well so I really don’t want to do anything else. At the same time, I am dreading the start of another work week and I could literally cry. My friend Daniel posted this quote on his Facebook today: “The secret of health for both mind and body is not to mourn for the past, worry about the future, or anticipate troubles, but to live in the present moment wisely and earnestly.” It’s largely attributed to Buddah but according to google, it’s based on his teachings but not a verbatim quotation. Anyway, the whole point of sharing that with you is that I seem to never really enjoy anything because I’m constantly thinking about unpleasant things. Instead of enjoying my weekend, I have this cloud looming over my head about how much I don’t want to go to work. How does that even make sense? I don’t just do this with work, but with pretty much everything else in my life. I need to chill the f out before I give myself another nervous breakdown. Woe is me…blah, blah, blah. Instead of dwelling on this, let us talk polish now, ok? So I had these swatches of Clinique Really Rio done and edited a while back, but they got lost in my many desktop folders. I remember being really excited when the Clinique polishes were first released but now I am just feeling lukewarm about them. Let me show you what I did with this polish.
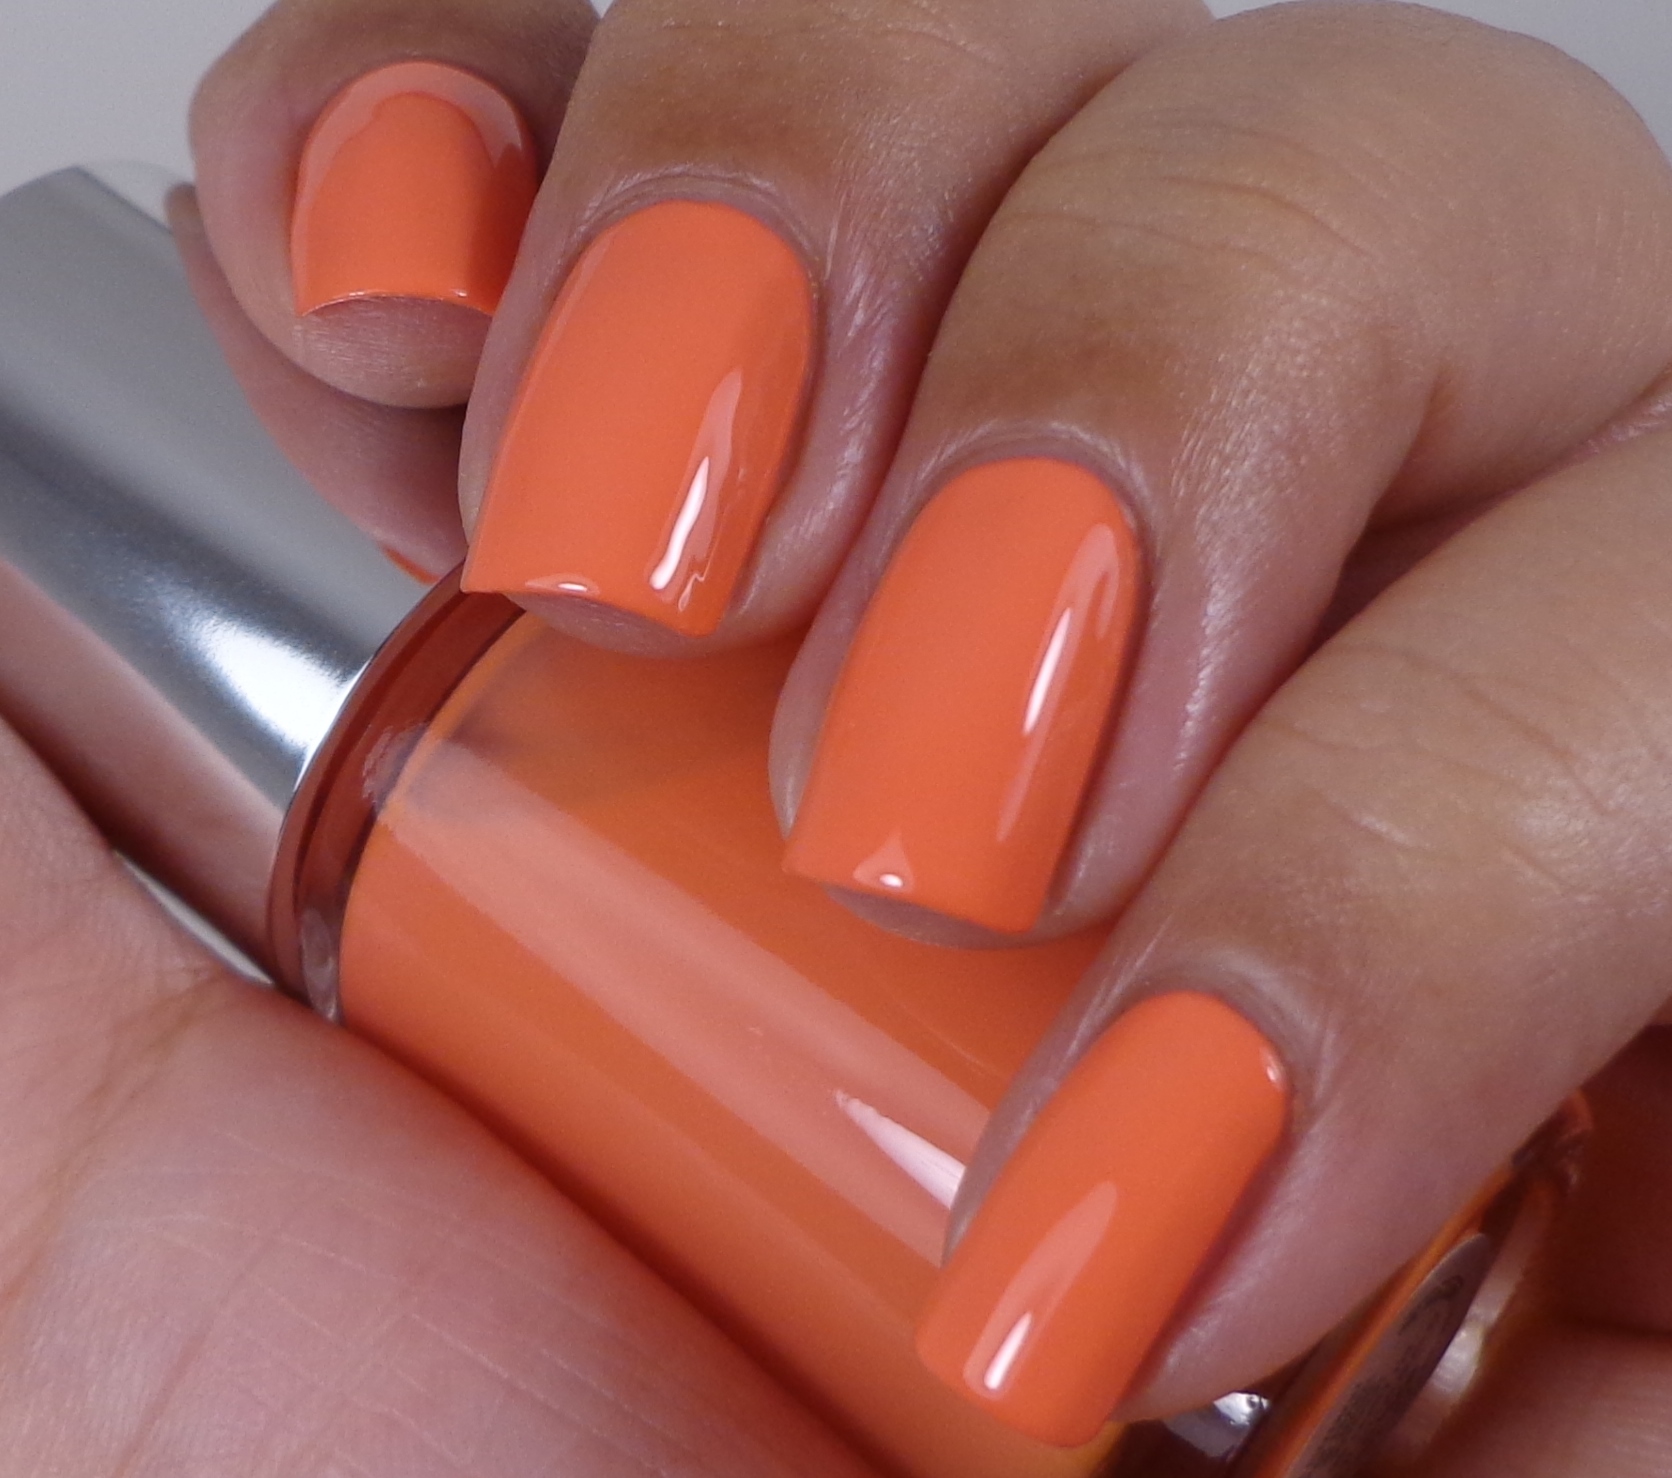
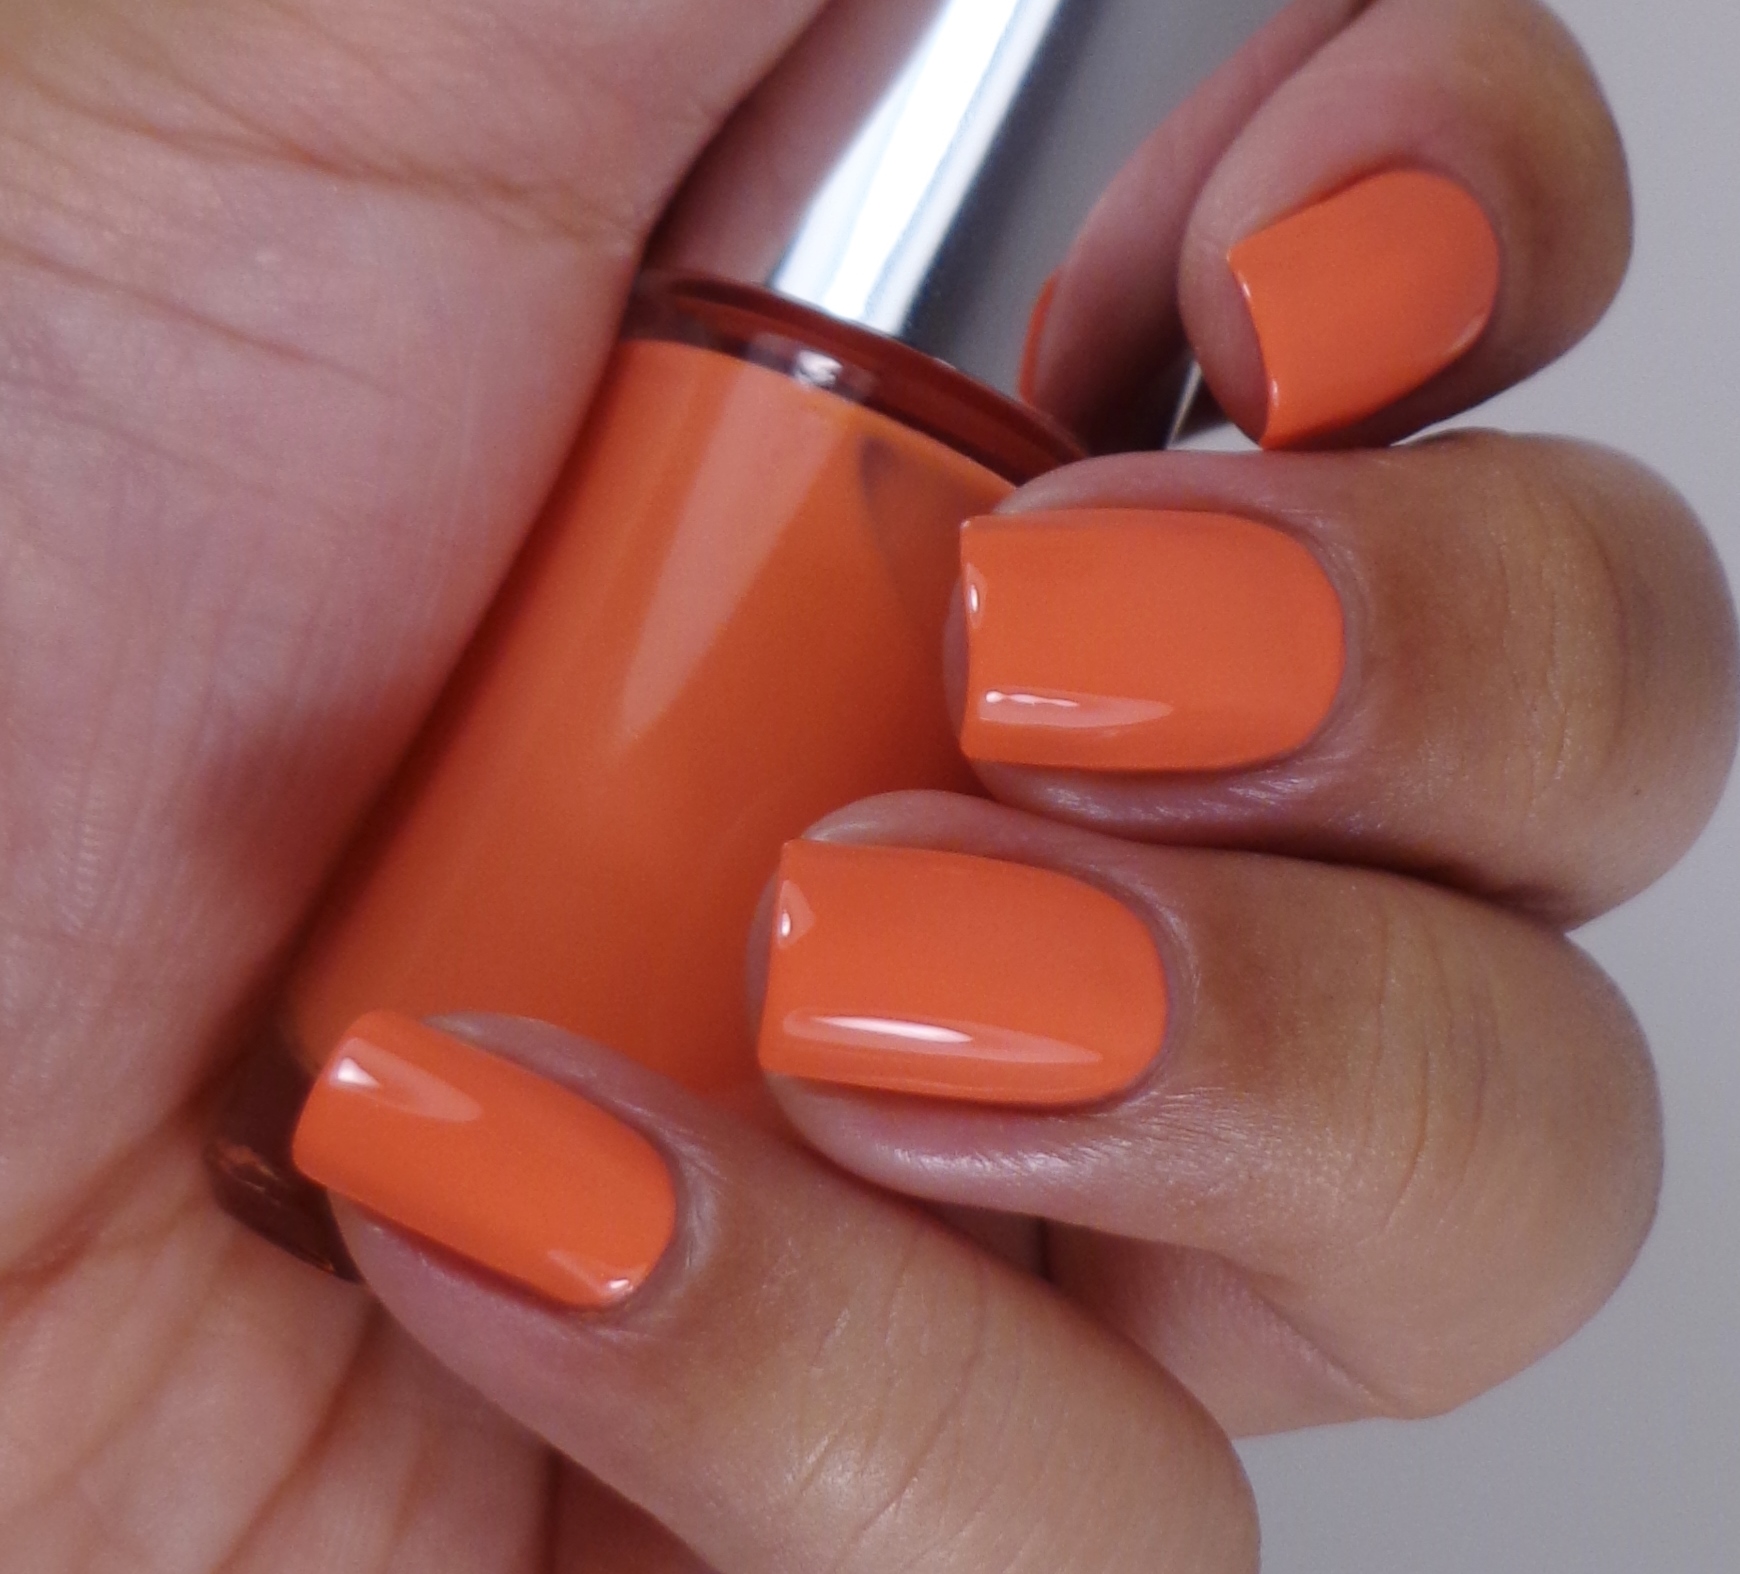 Clinique Really Rio is more of a coral leaning polish even though it looks fairly orange here. I can blame it on my lighting, but the color also freaked out my camera because it’s almost neon. Double whammy! The formula was nice and only needed two coats for full opacity.
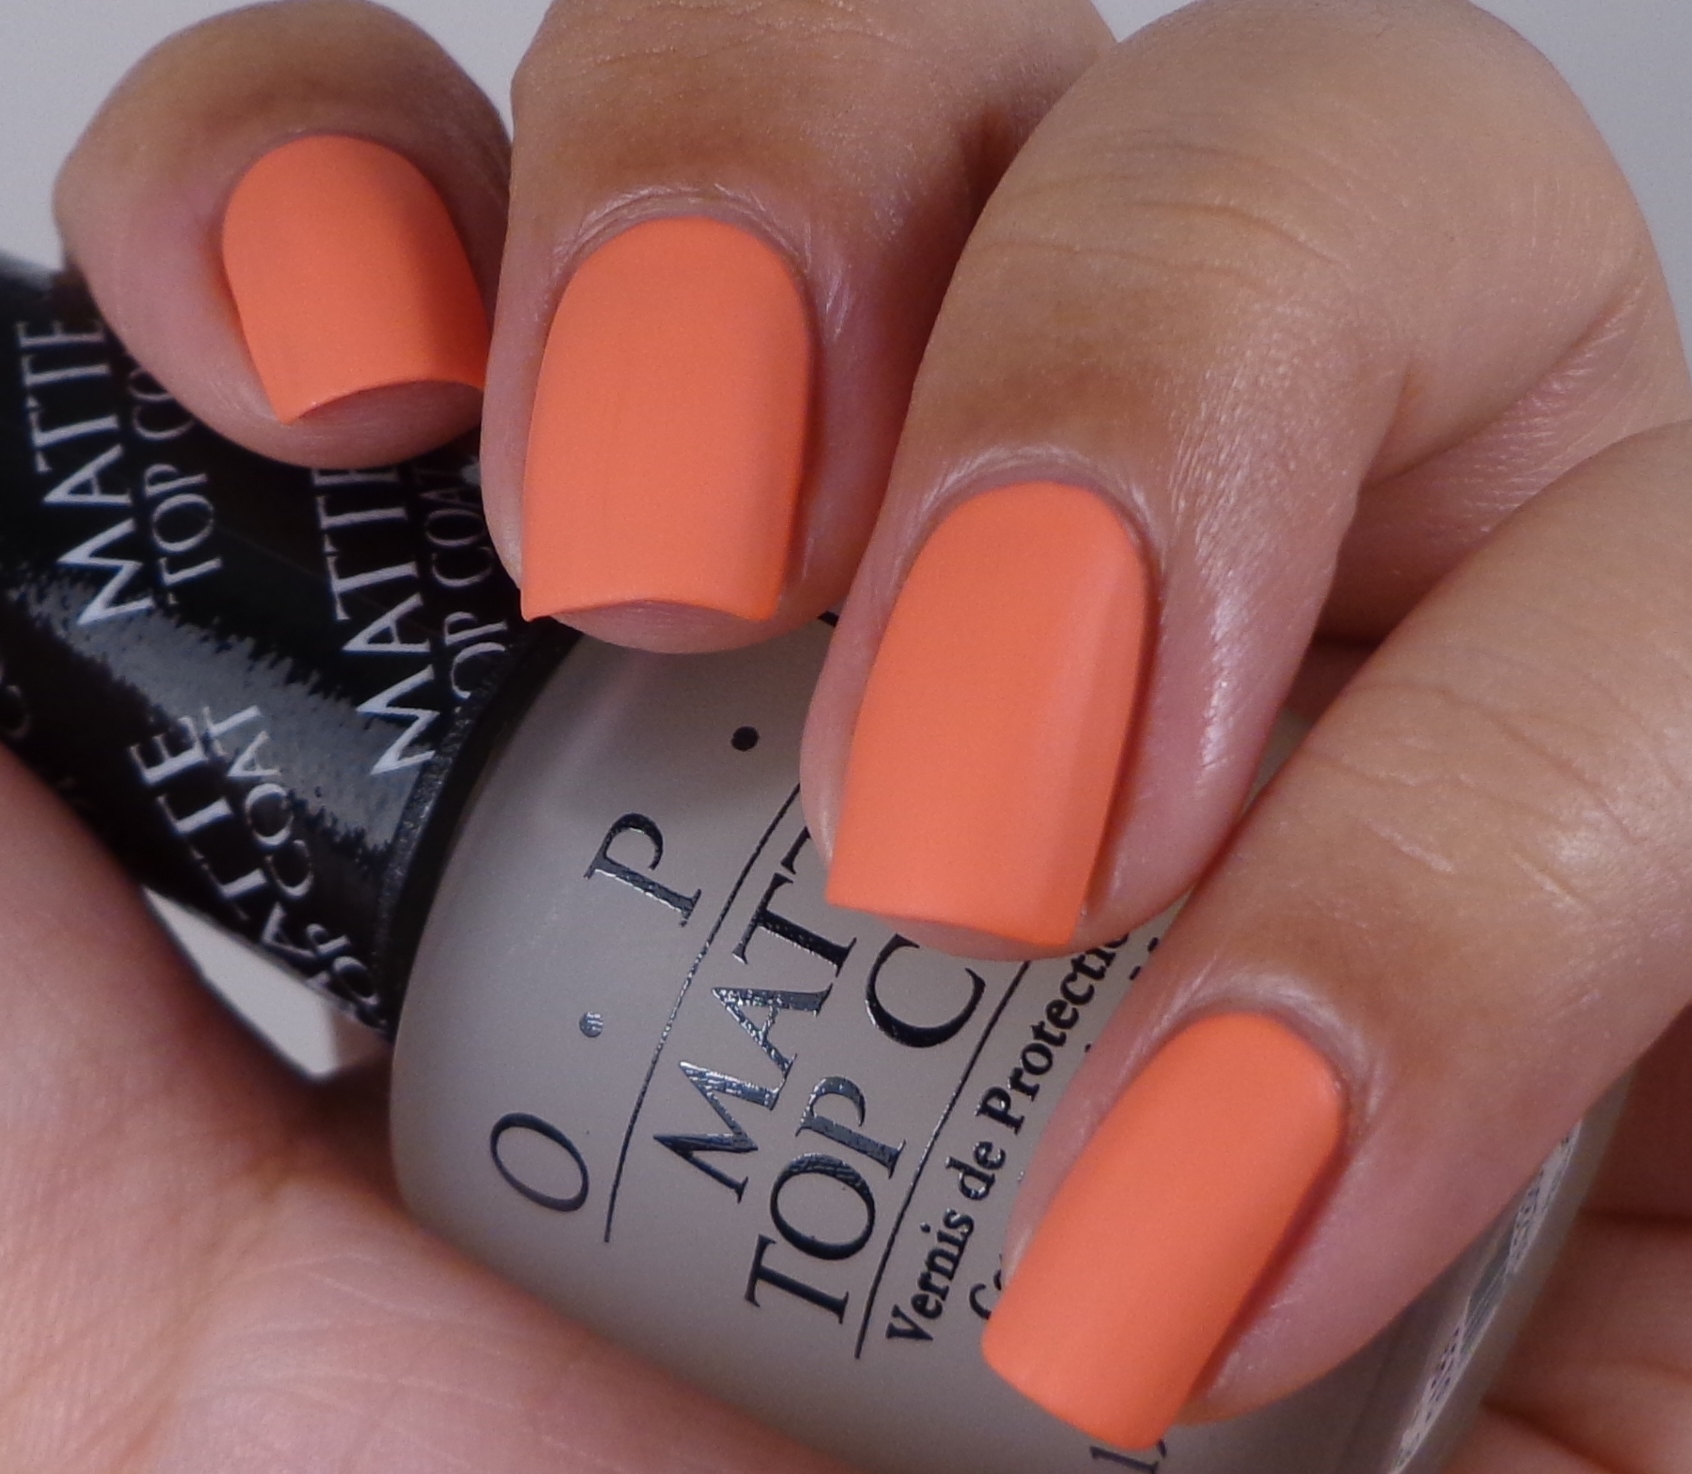
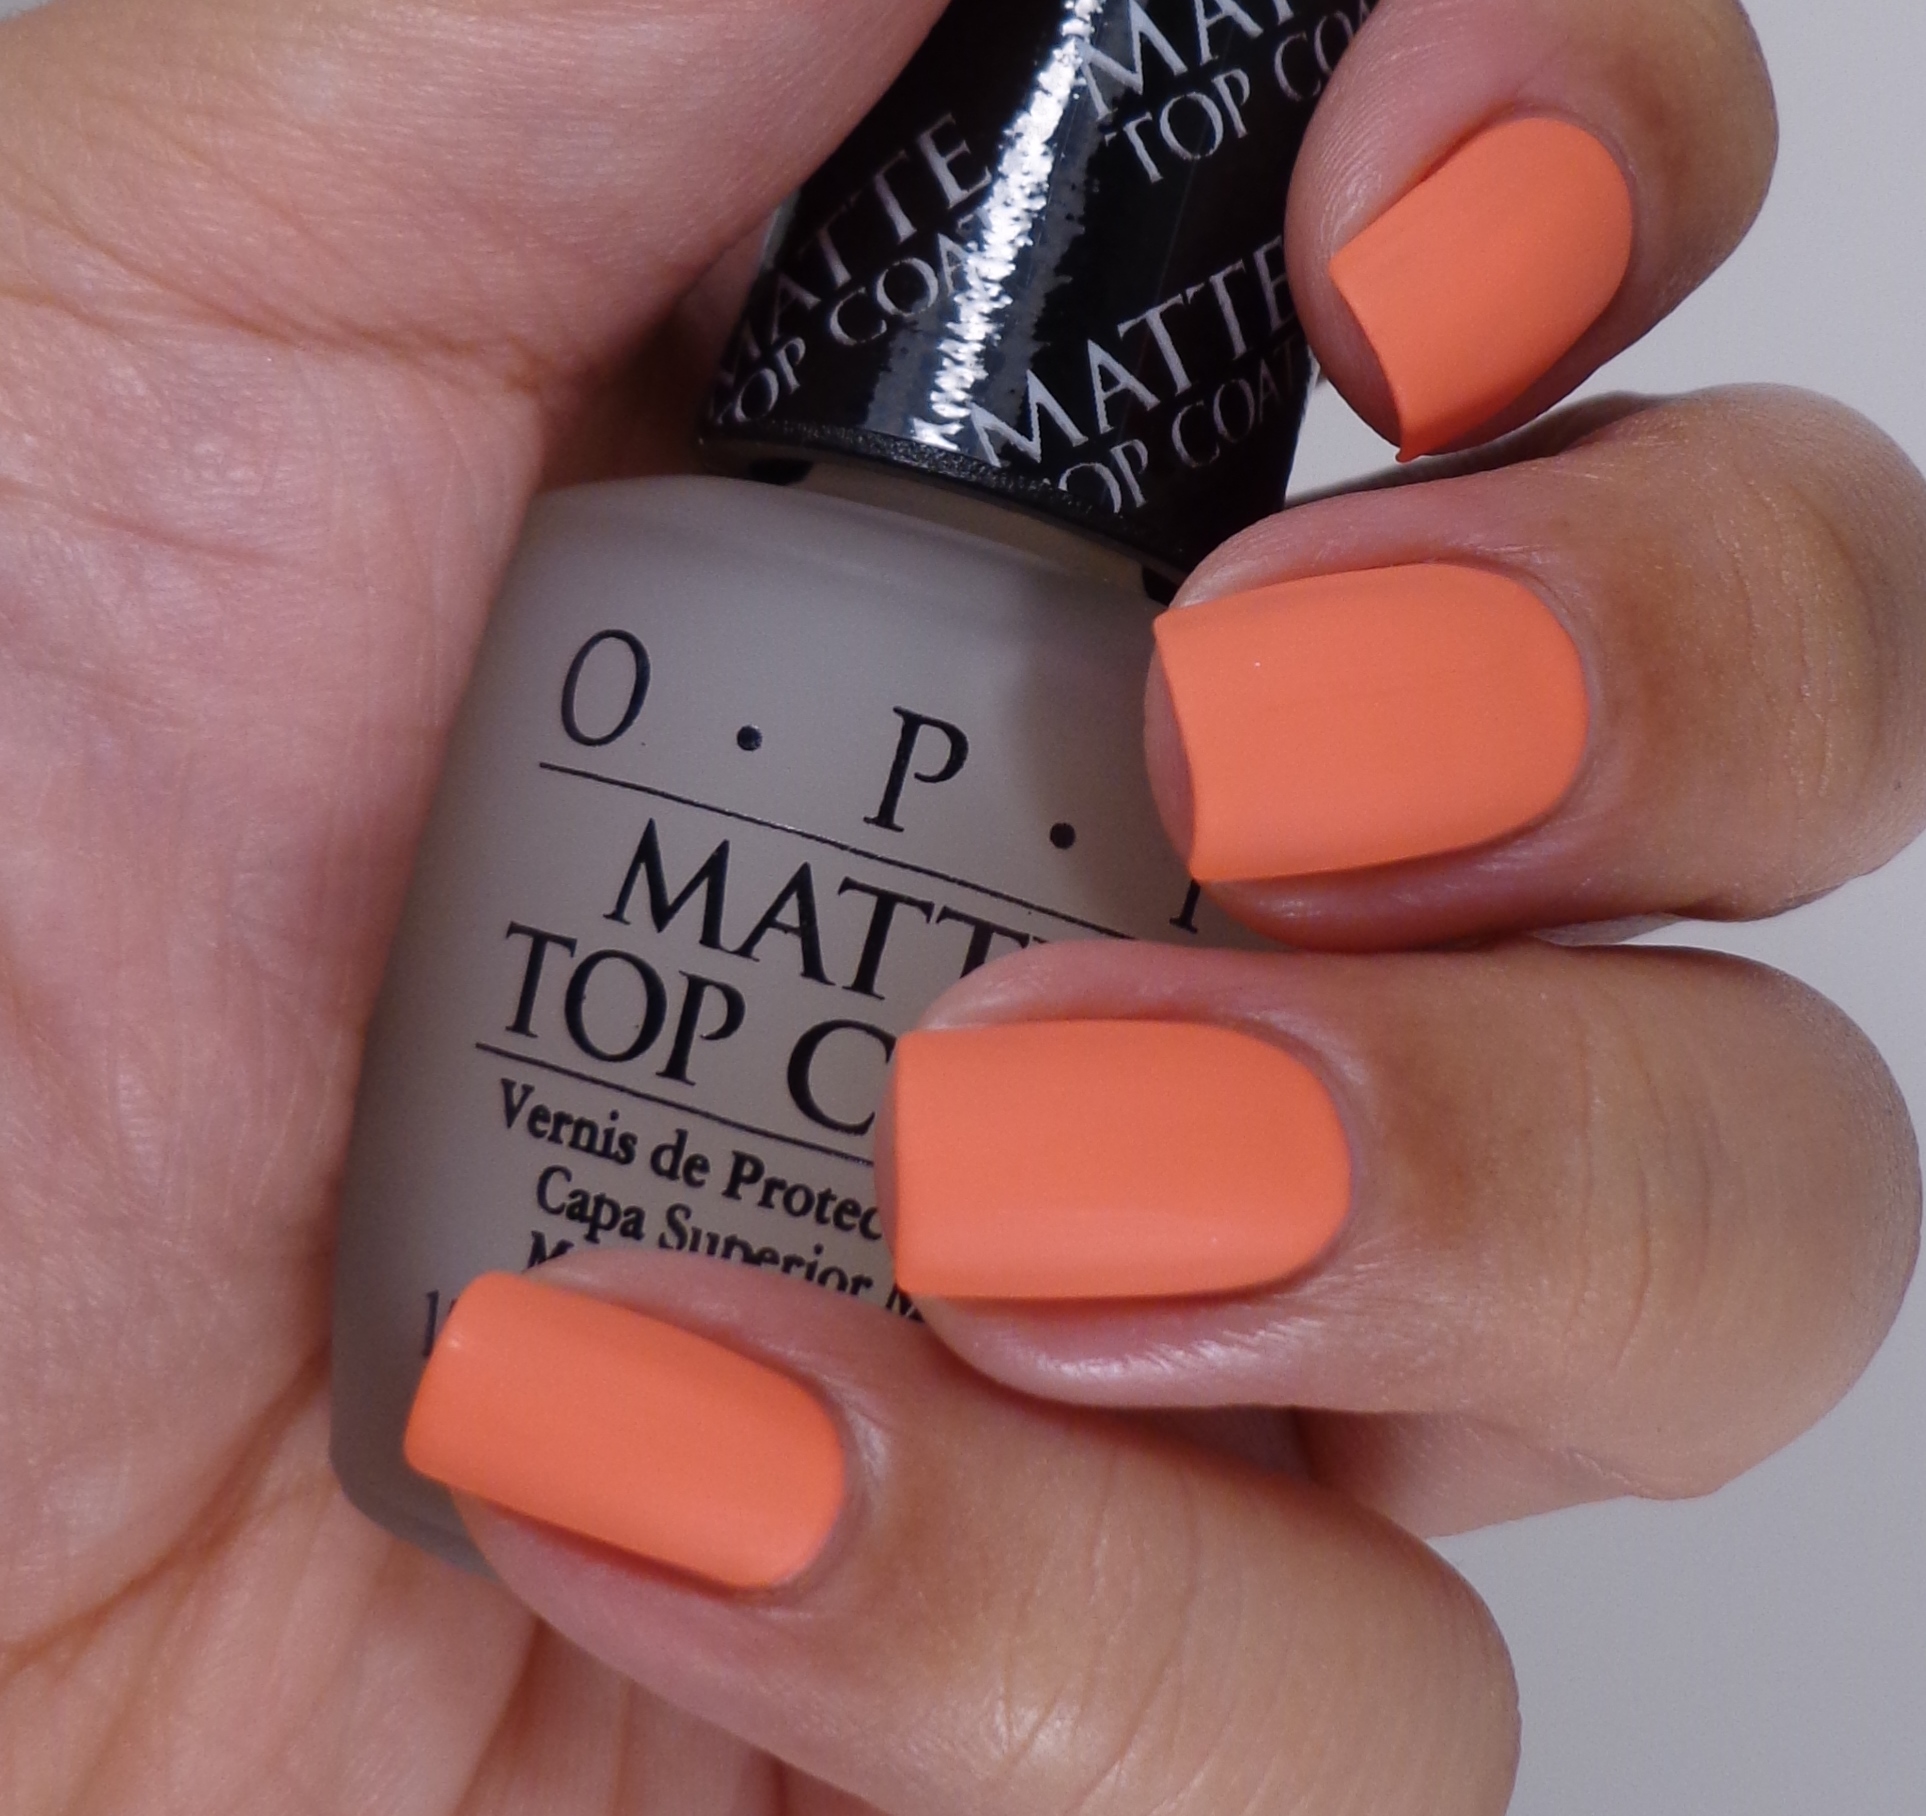
Then I figured I could play around with it by using the OPI Matte Top Coat (press sample), and I really love how this looks!!! I like matte finishes but not as much as shiny and glossy beauties. However, I much prefer this polish mattified.
And because I haven’t showed you any recent pictures of my little nephew, here he is:
 He just keeps getting cuter and cuter. I have a hard time getting him to smile when I take his picture because he is so interested in looking at the camera that he ignores any of my efforts to make him smile. He just melts my heart!!!
One last thought about the Clinique nail polishes: when I bought them, they were $16 and now I see that the prices have been lowered to $12.50. I guess this means that the polishes weren’t selling at the higher price point which I can totally understand. I bought two of them when they first came out just because of the novelty, but I was not planning to buy more because I found them way too pricey. I might be tempted to buy more now that they are priced a bit more reasonably but only if the color is unique. Have you tried any of these Clinique polishes? Let me know if you have any colors to recommend. Thanks so much for stopping by today, and I will talk to you soon.
P.S. Hey, have you checked out my blog sale recently? I’ve reduced my prices on many items, and I have also added tons of new polishes.

Stamping Saturdays #6
![]()
I’ve gotta be honest: I had a hell of a time coming up with today’s stamping manicure. Not only was I having some serious mani inspiration block, but my camera was giving me a lot of problems and wouldn’t focus. The only way I could get it to focus was to change my hand position which is why today you will see a different angle. Things just weren’t working out for me! When I started thinking about what I wanted to do, I remembered how much I love Butter London Wallis so that is where my mani started. Let’s take a look at this gorgeous polish.
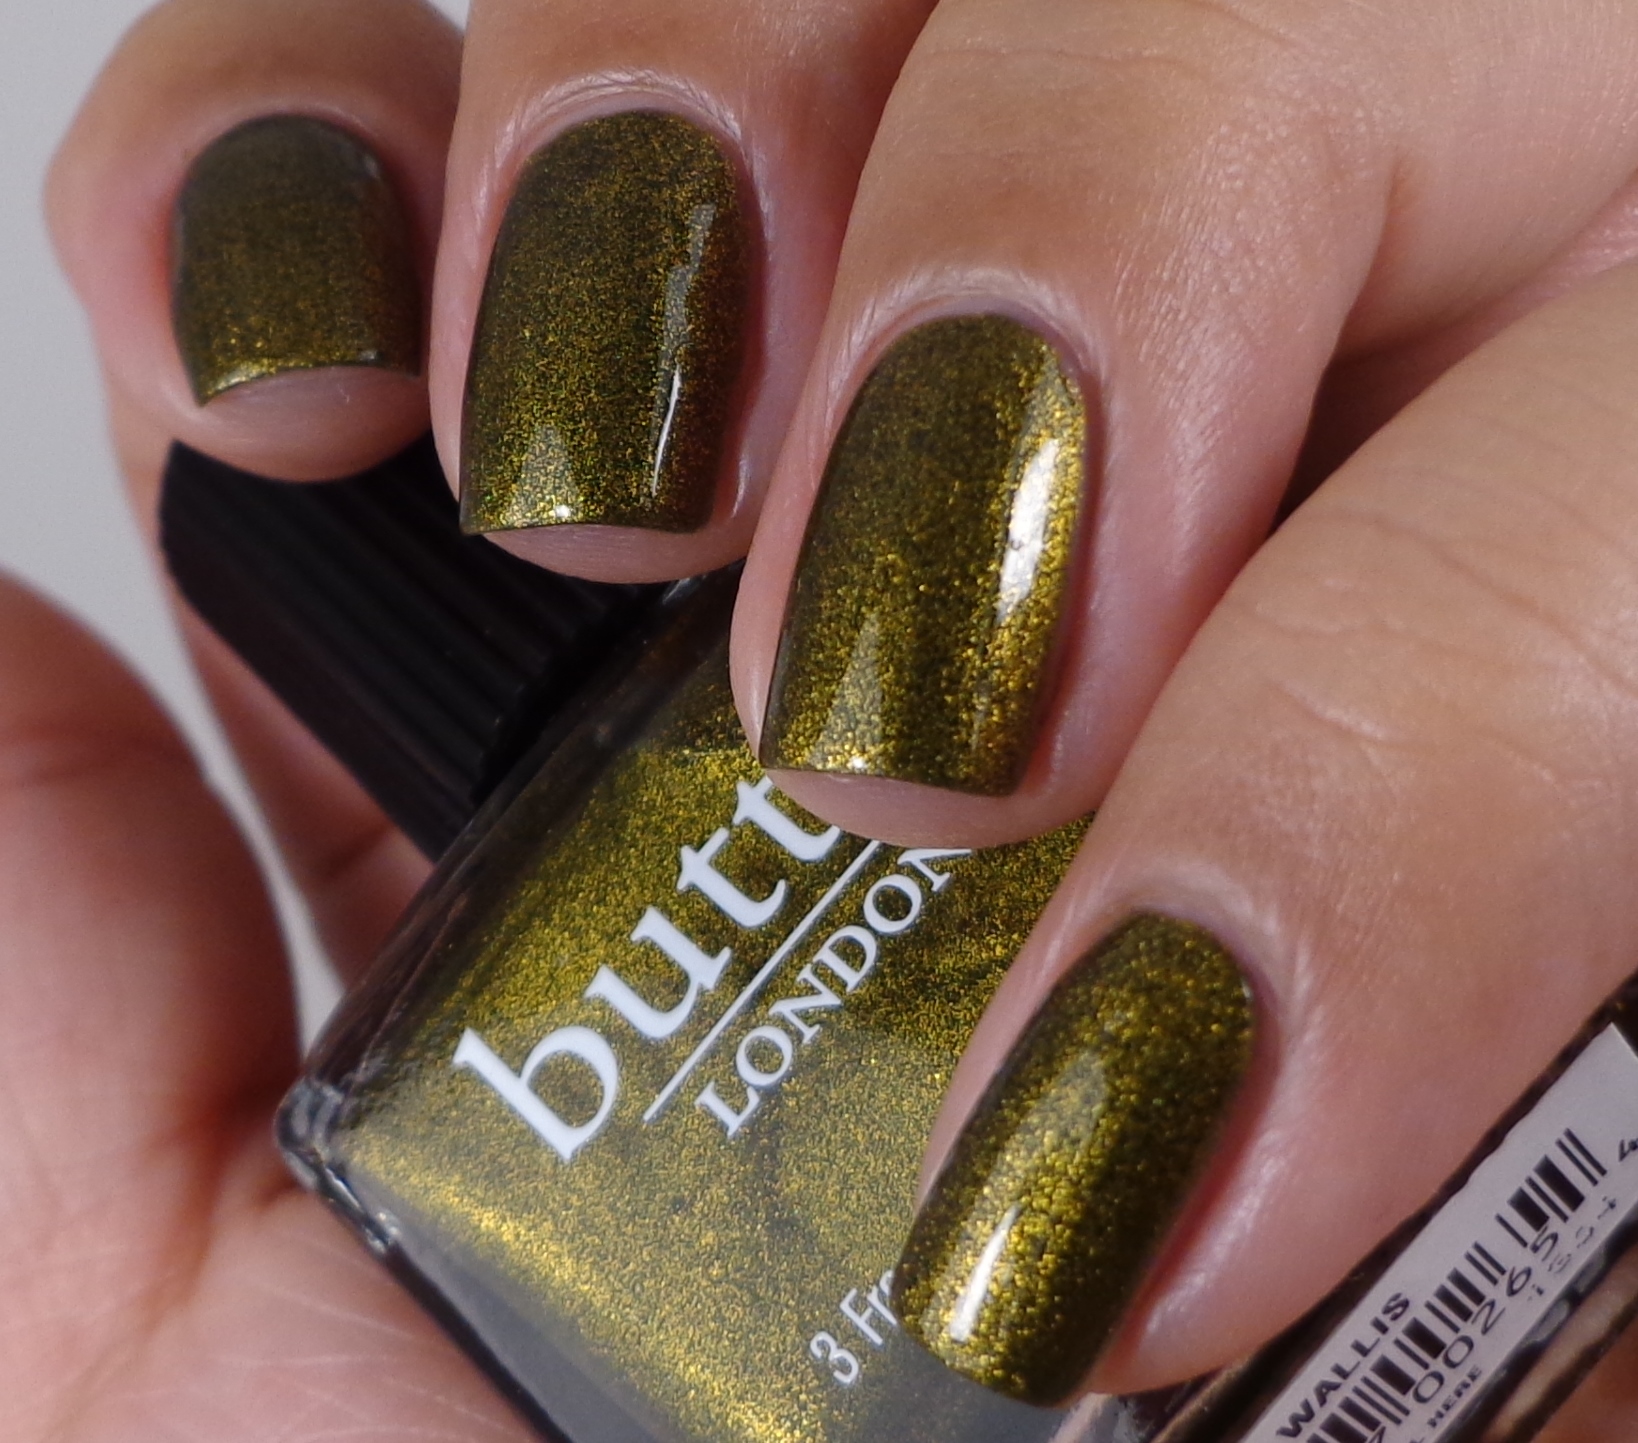 Butter London Wallis is like a perfect combination of gold and green and just looks incredibly rich. A metallic olive gold you say? Yep, perfect description. Here I top coated it with Seche to give it a nice shine.
 And here I applied a matte top coat over it. Doesn’t it look even more amazing?
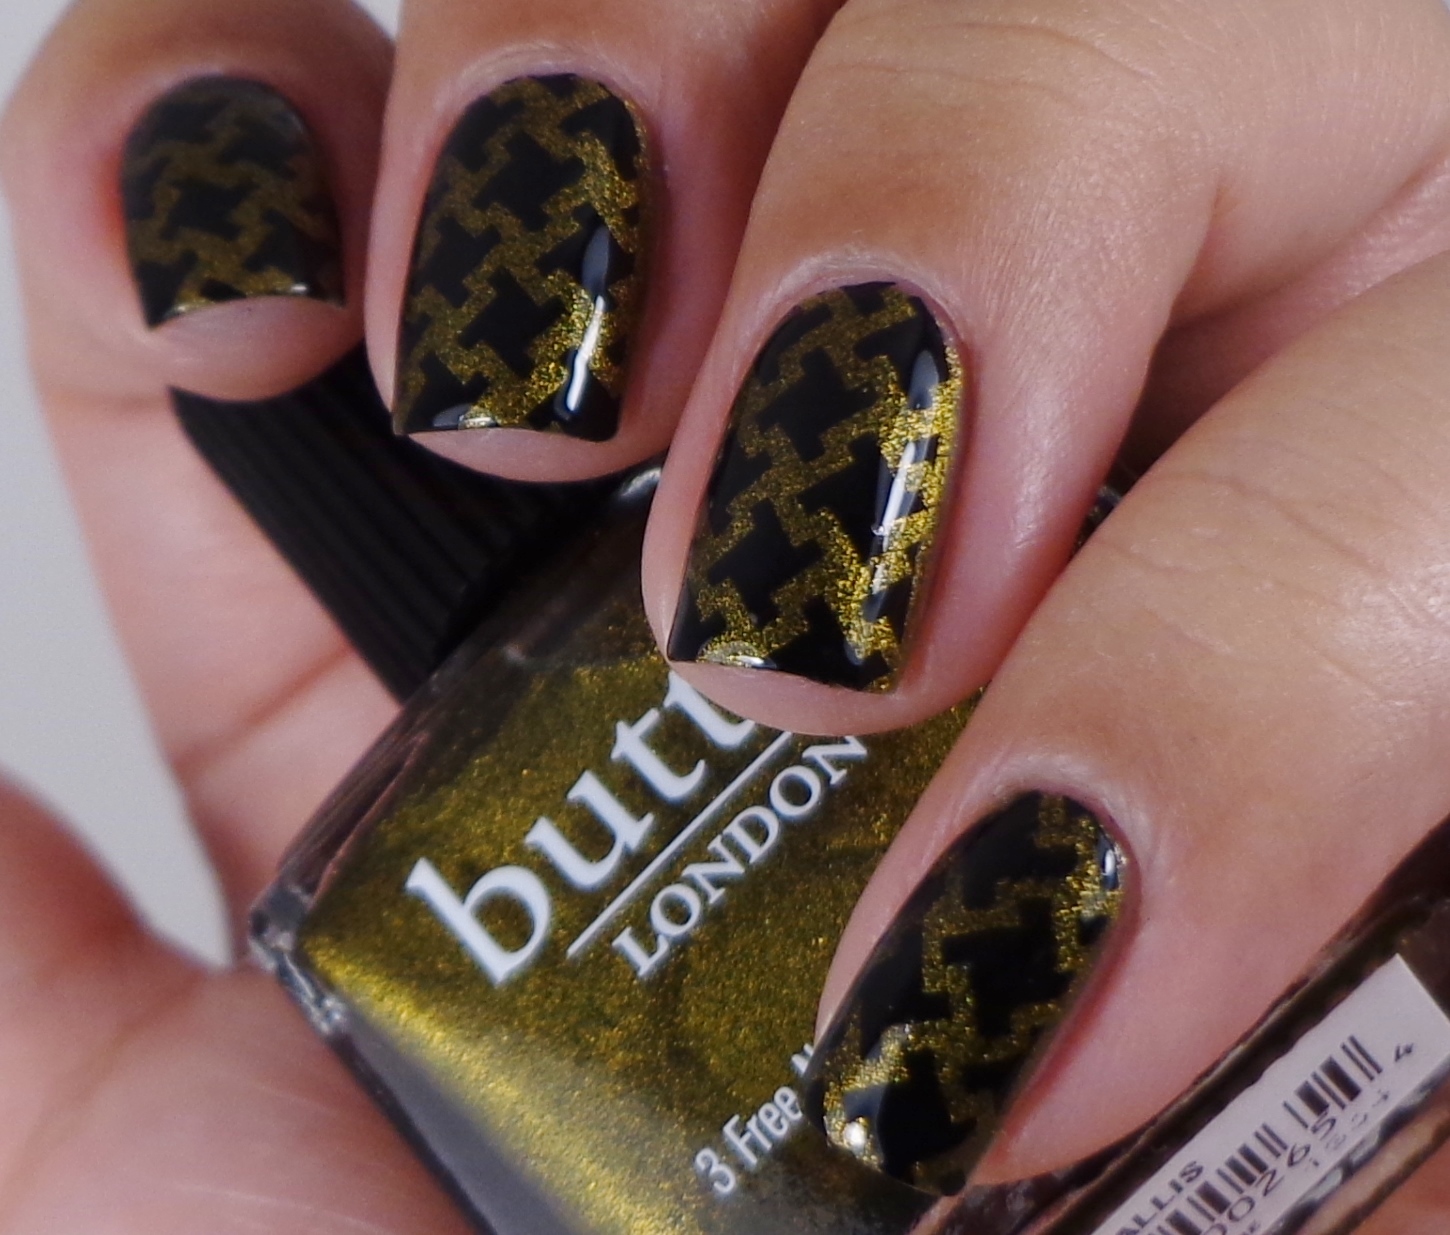 I the picked a design from Bundle Monster plate BM-319 and stamped it with my black special polish. I initially wanted to mattify the whole design, but it just didn’t look as great because there wasn’t that much of a contrast. I much prefer this as a shiny manicure.
So what do you think of this mani? I’ve gotten a lot of questions about stamping and what I use and how, so I was thinking about maybe doing some sort of tutorial? There are a lot of tutorials out there so I don’t want it to just be boring and/or redundant. Would you guys be interested in this? Don’t forget to check out the other Stamping Saturdays manis from the other participants. Thanks so much for the visit today, and I hope you enjoy your weekend.
Loading InLinkz ...
Kiko 383 Oil Blue
![]()
My allergies are killing me today. My nose is literally dripping like a leaky faucet and now it’s so raw that it hurts to even touch it. I don’t know why I decided to go to old and dusty places after work because this just aggravated my misery. I did manage to find some cool stuff so I guess not all is lost. I wasn’t going to post today but then I realized that I have posted every day this month and I wanted to keep the momentum going. The polish I have for you today is a bit of a chameleon so let’s take a look at Kiko 383 Oil Blue.
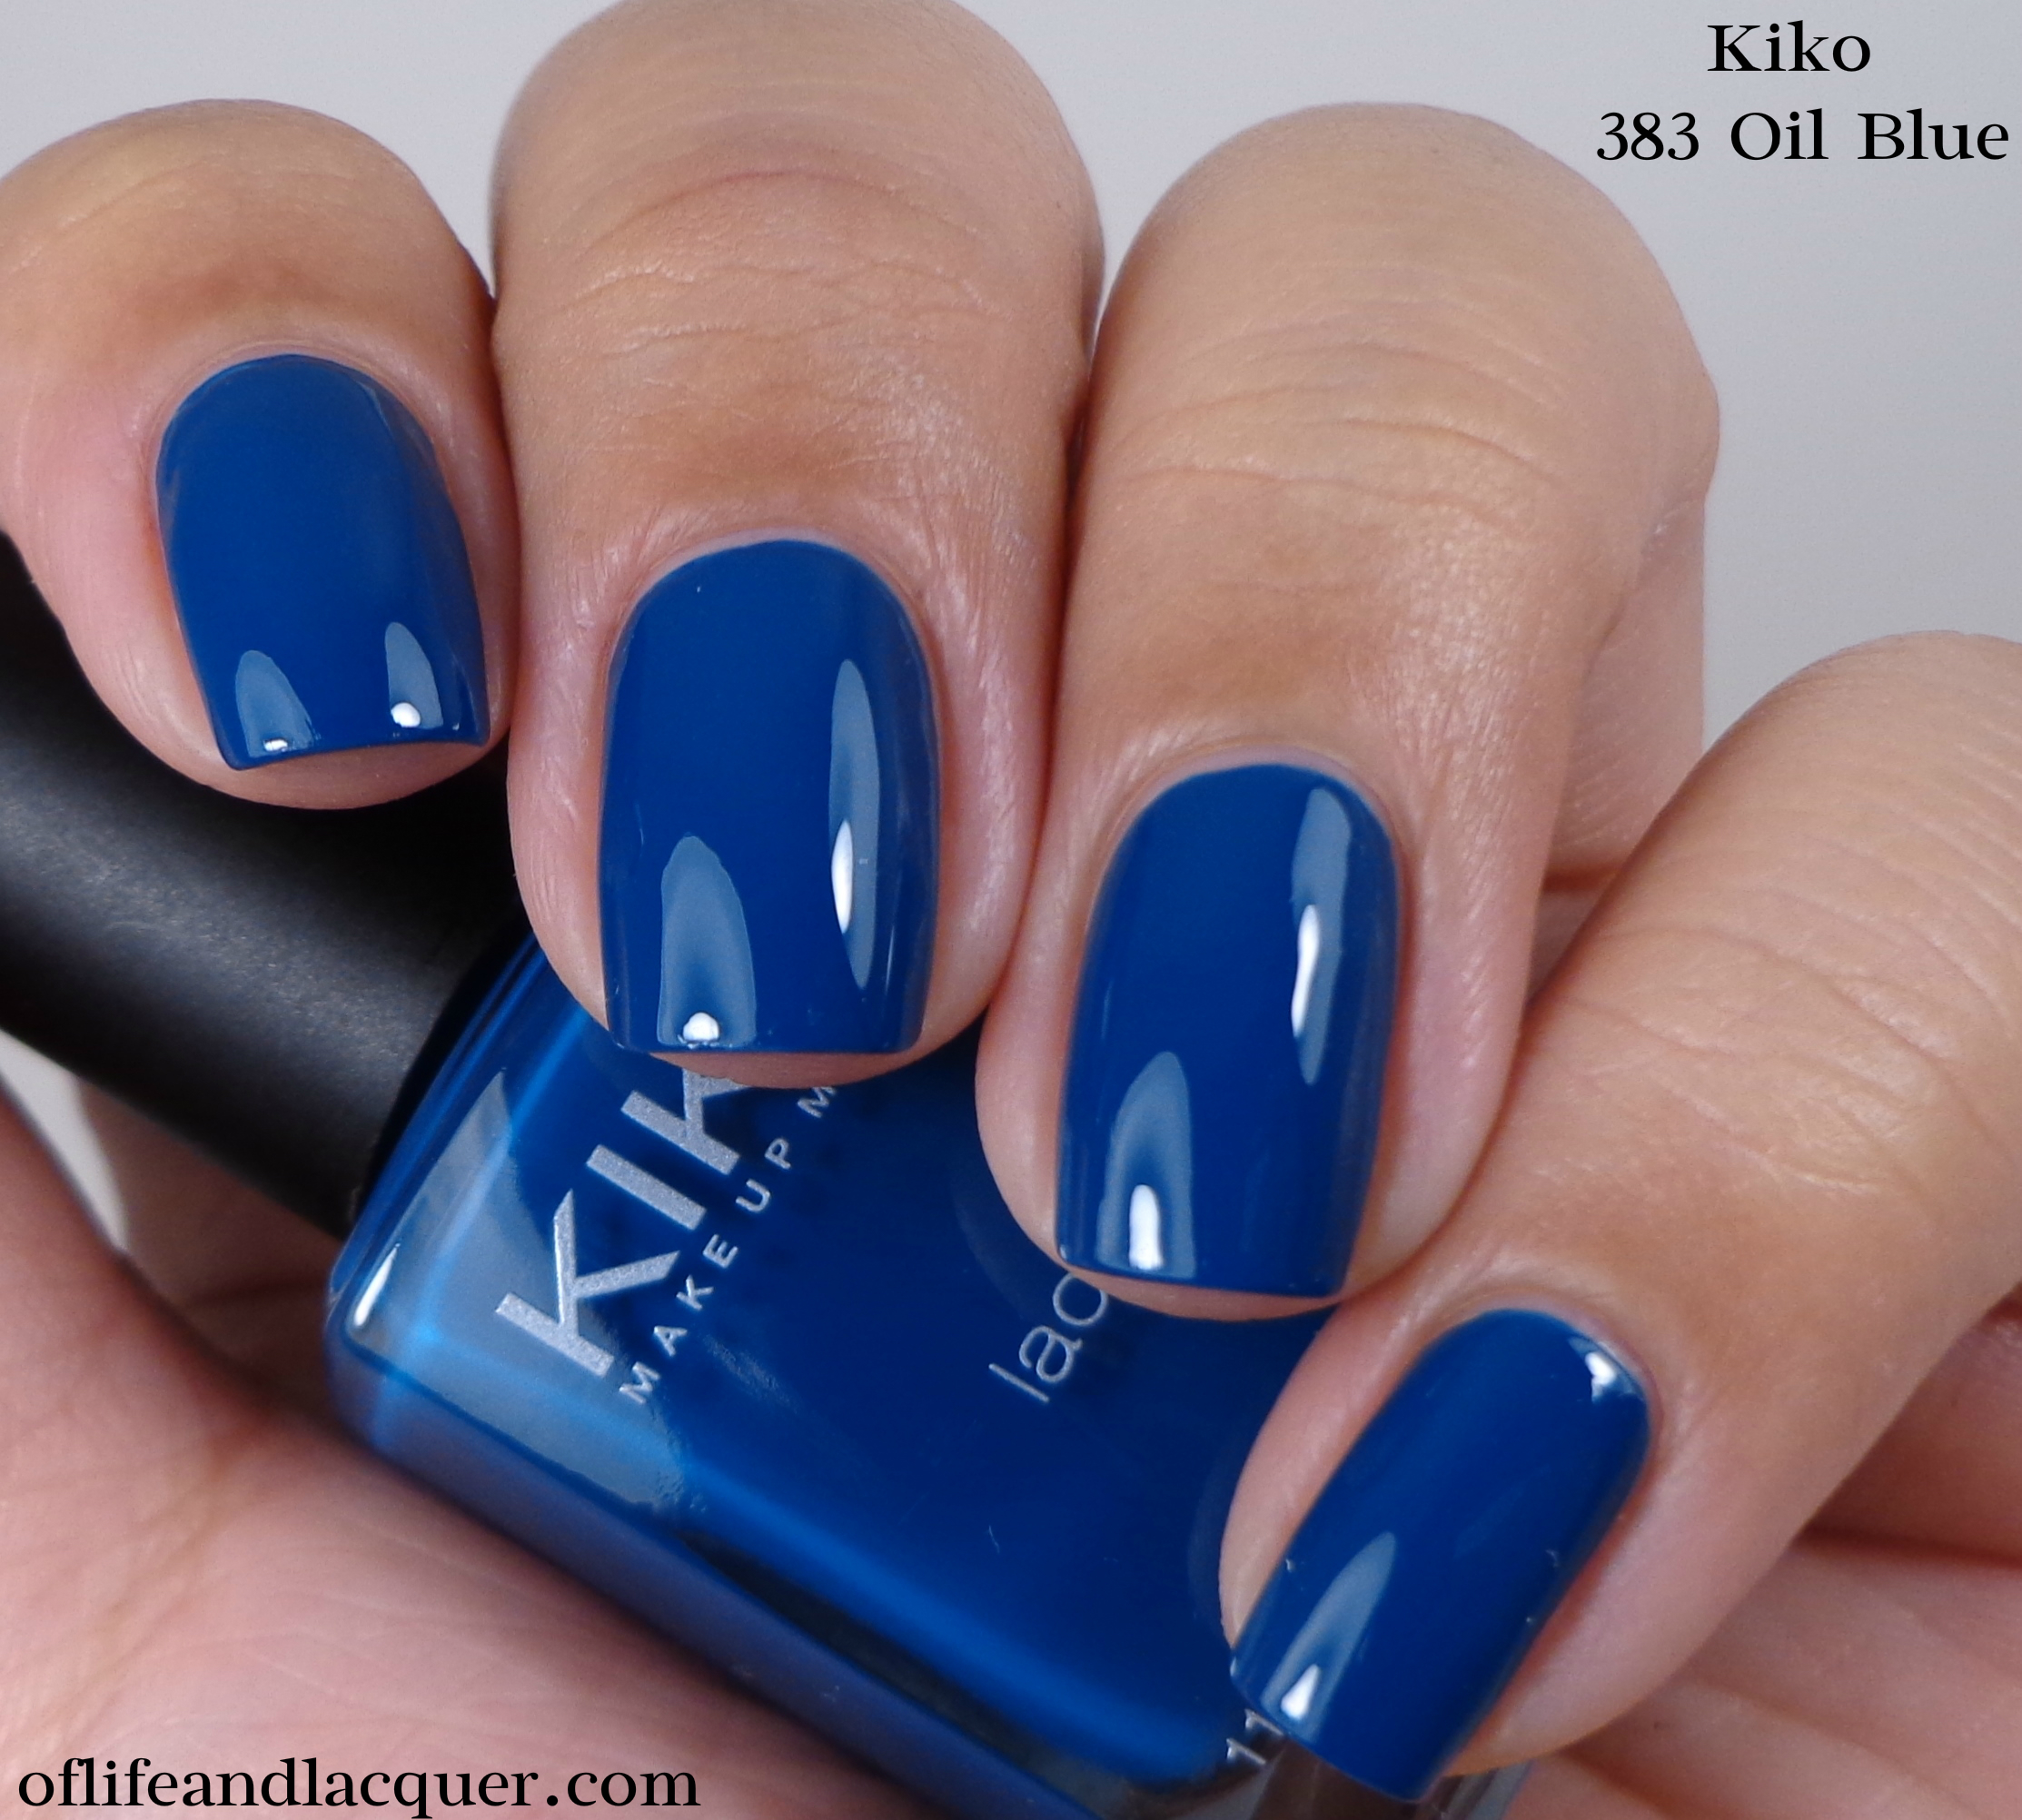
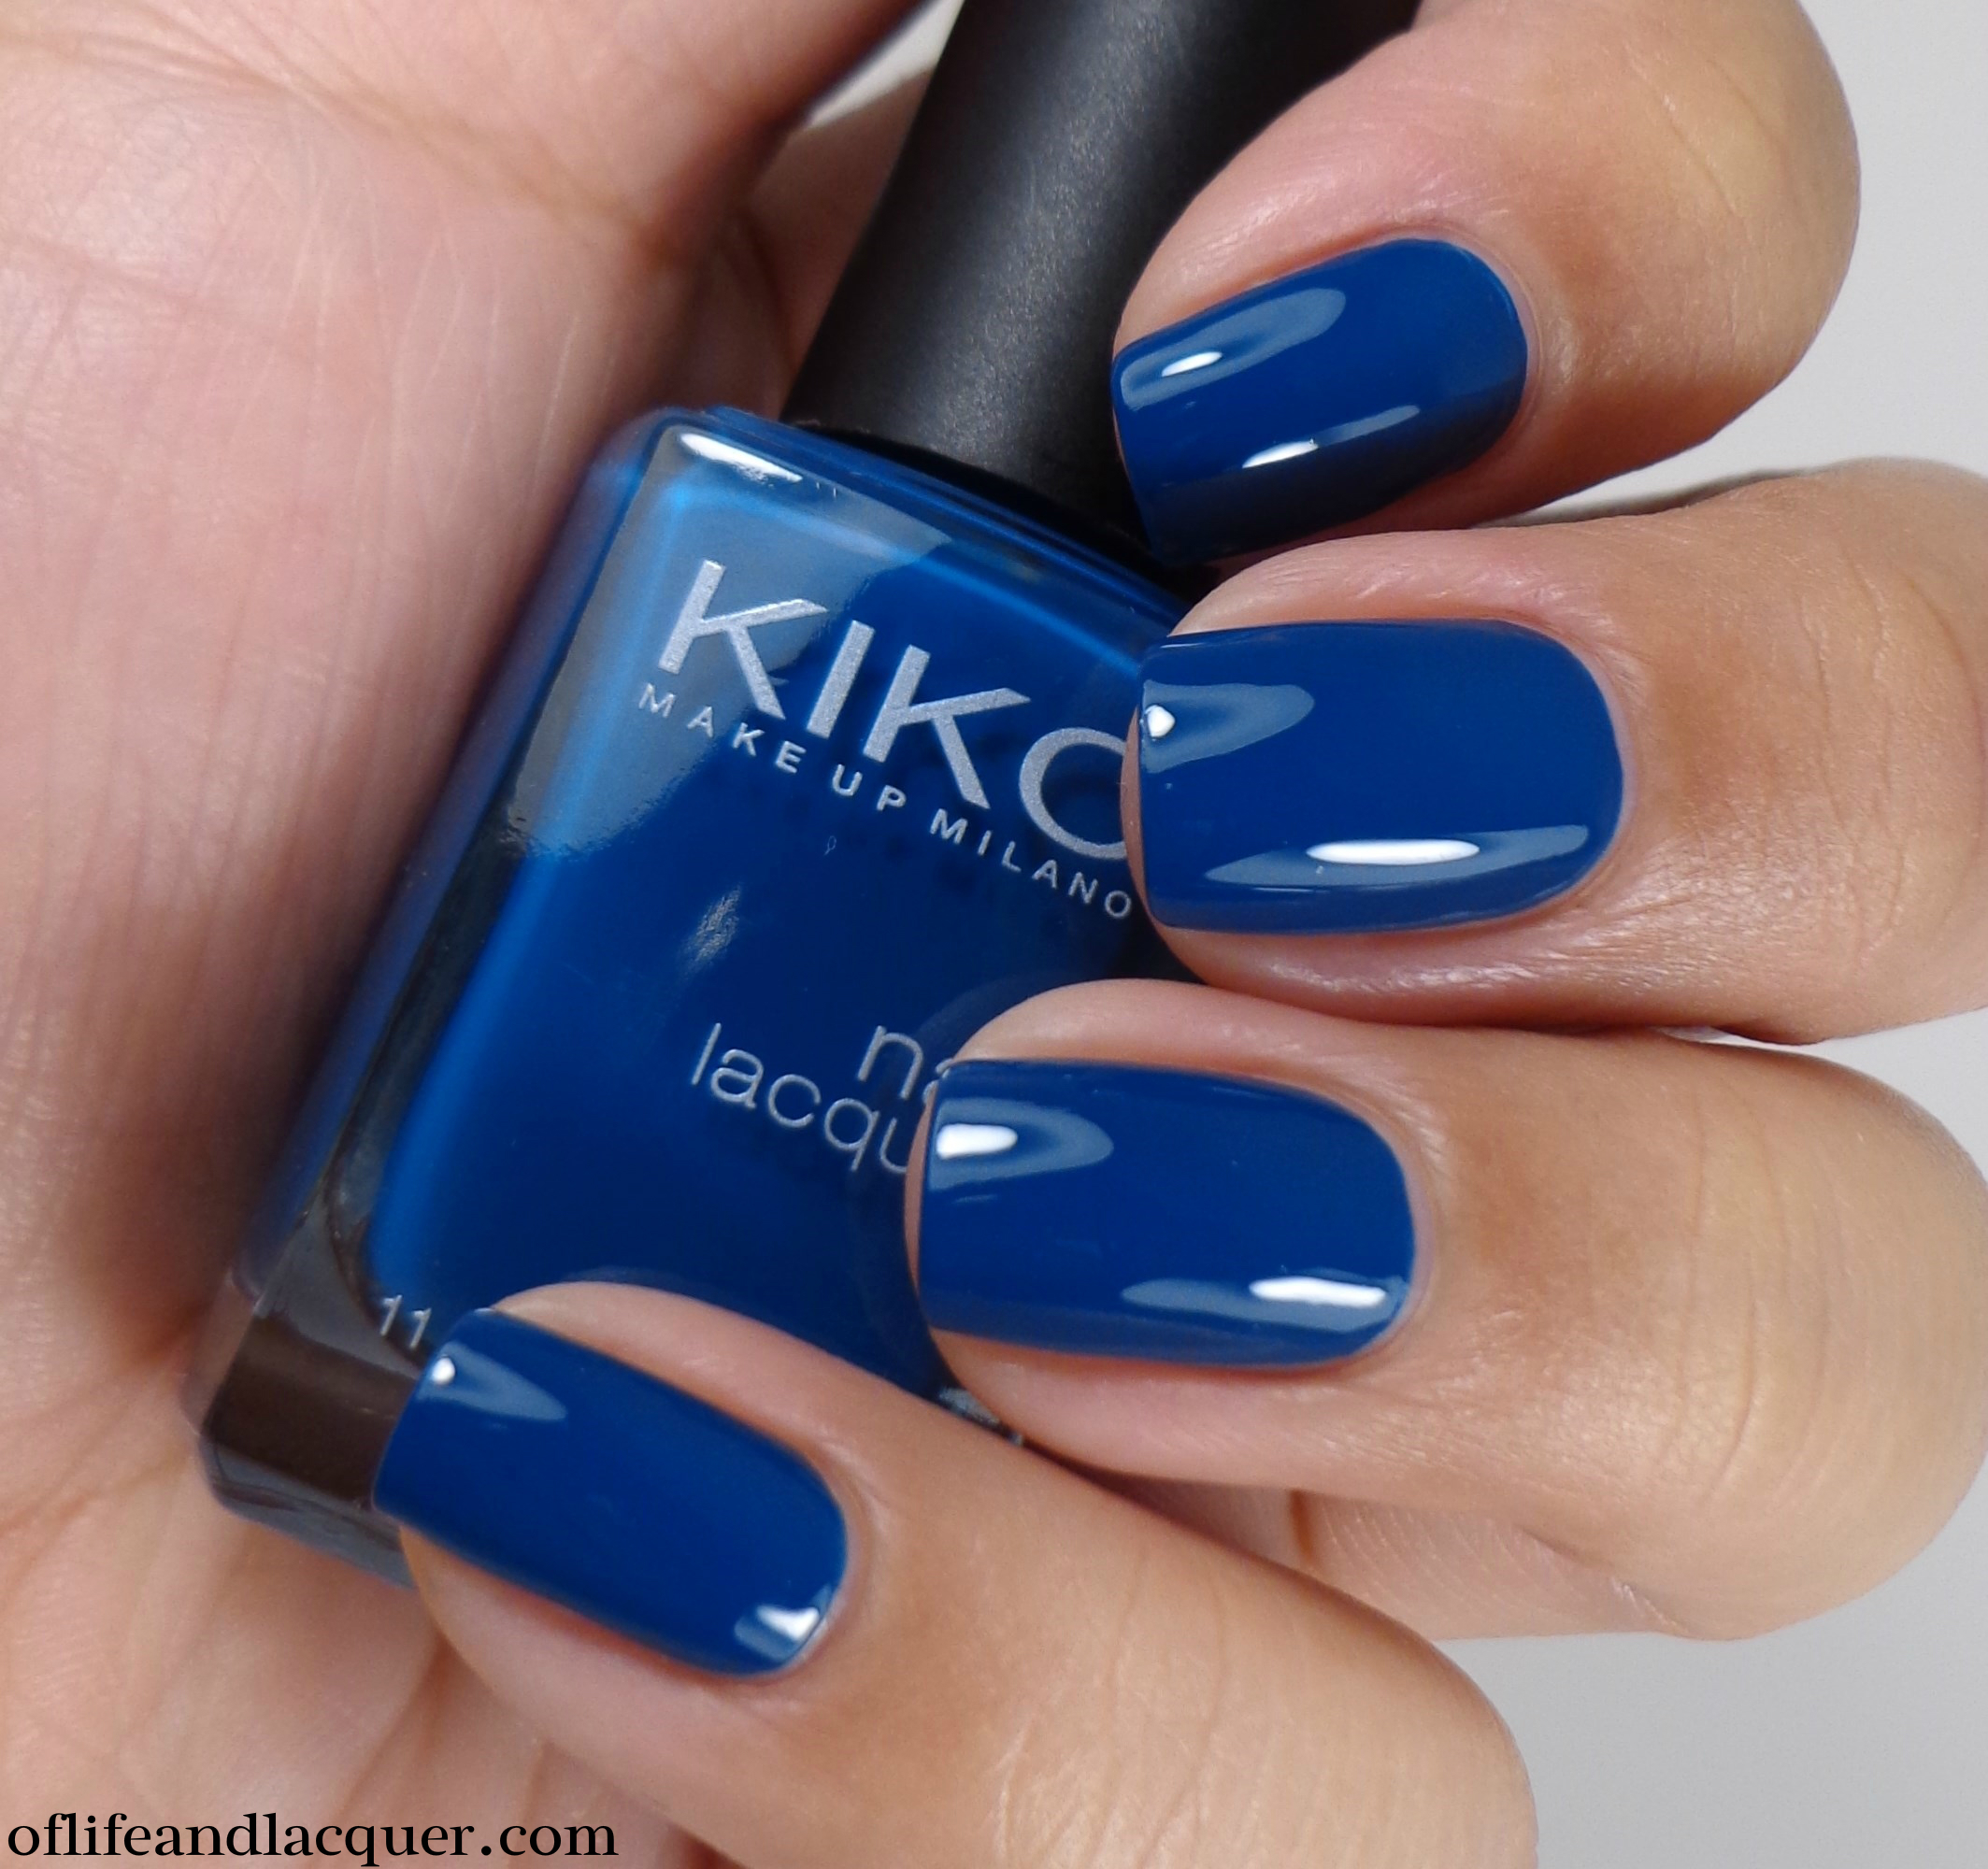 You know I love blues, so I love this. The one frustrating thing is that this polish just refuses to photograph accurately. In real life, this is like a dark smoky teal but here it just looks like a vibrant blue. Either way, it’s beautiful and the formula is everything I have come to except from Kiko: super buttery and very pigmented so this is opaque with two coats.
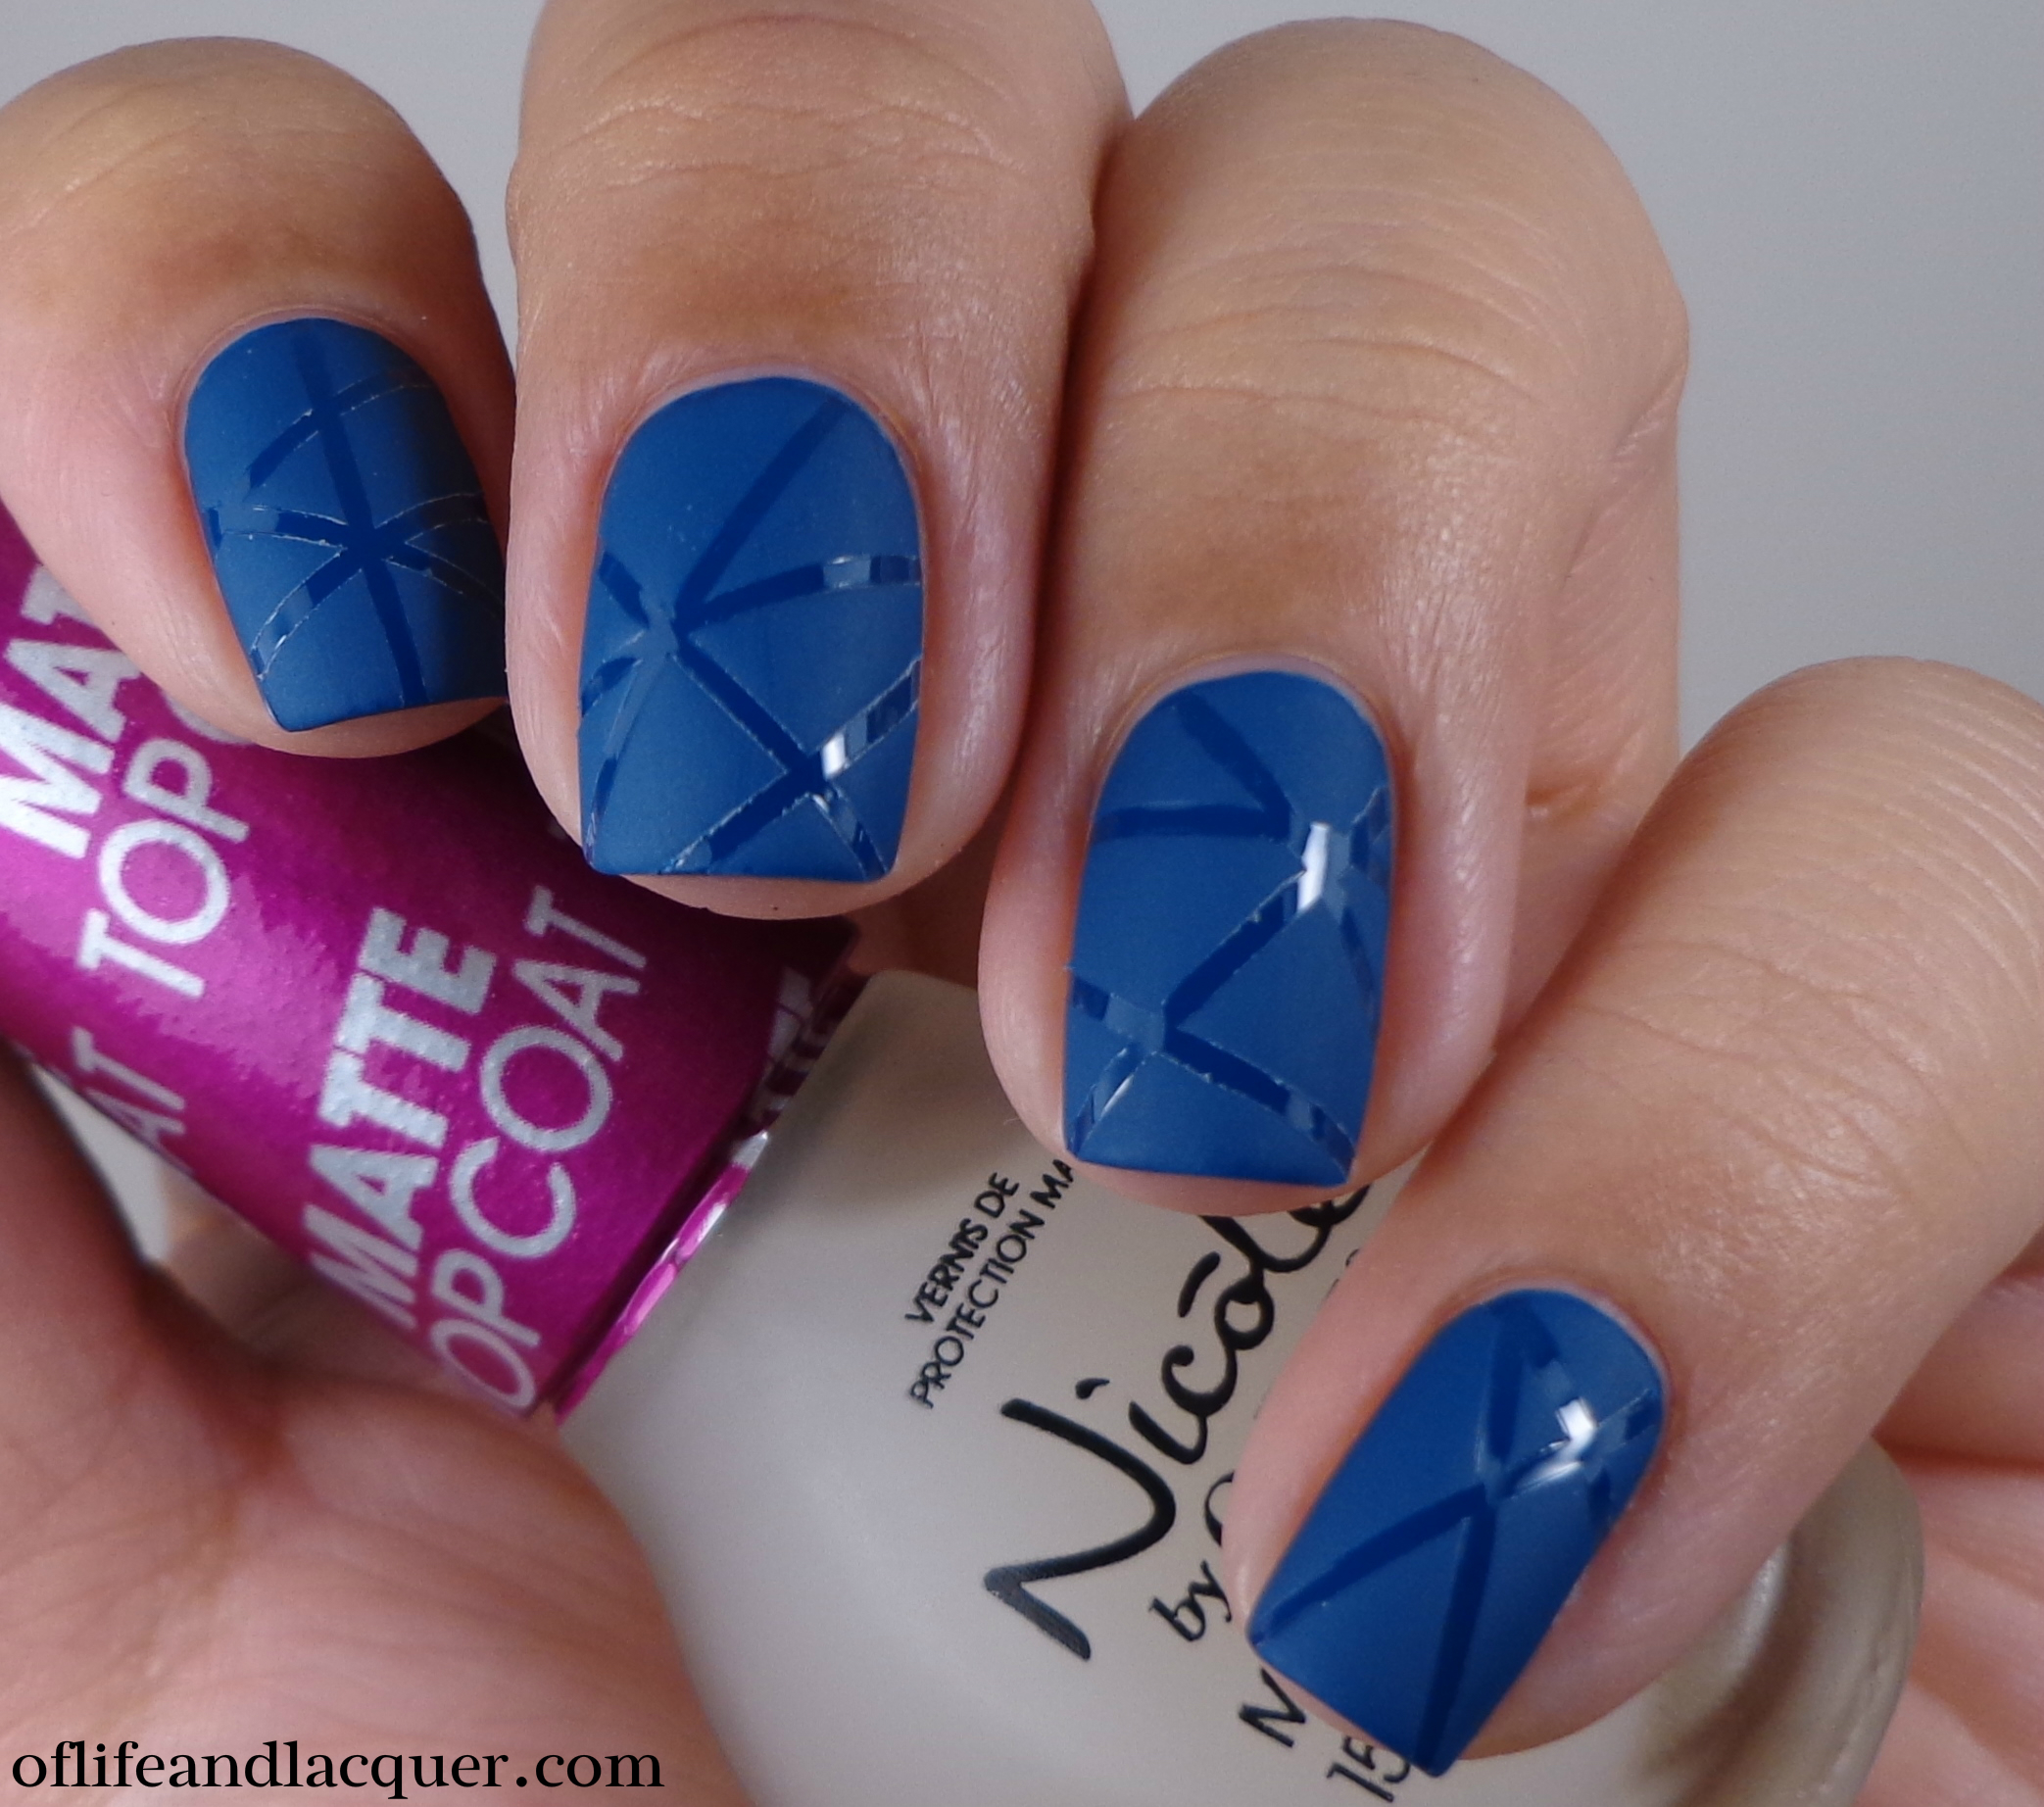
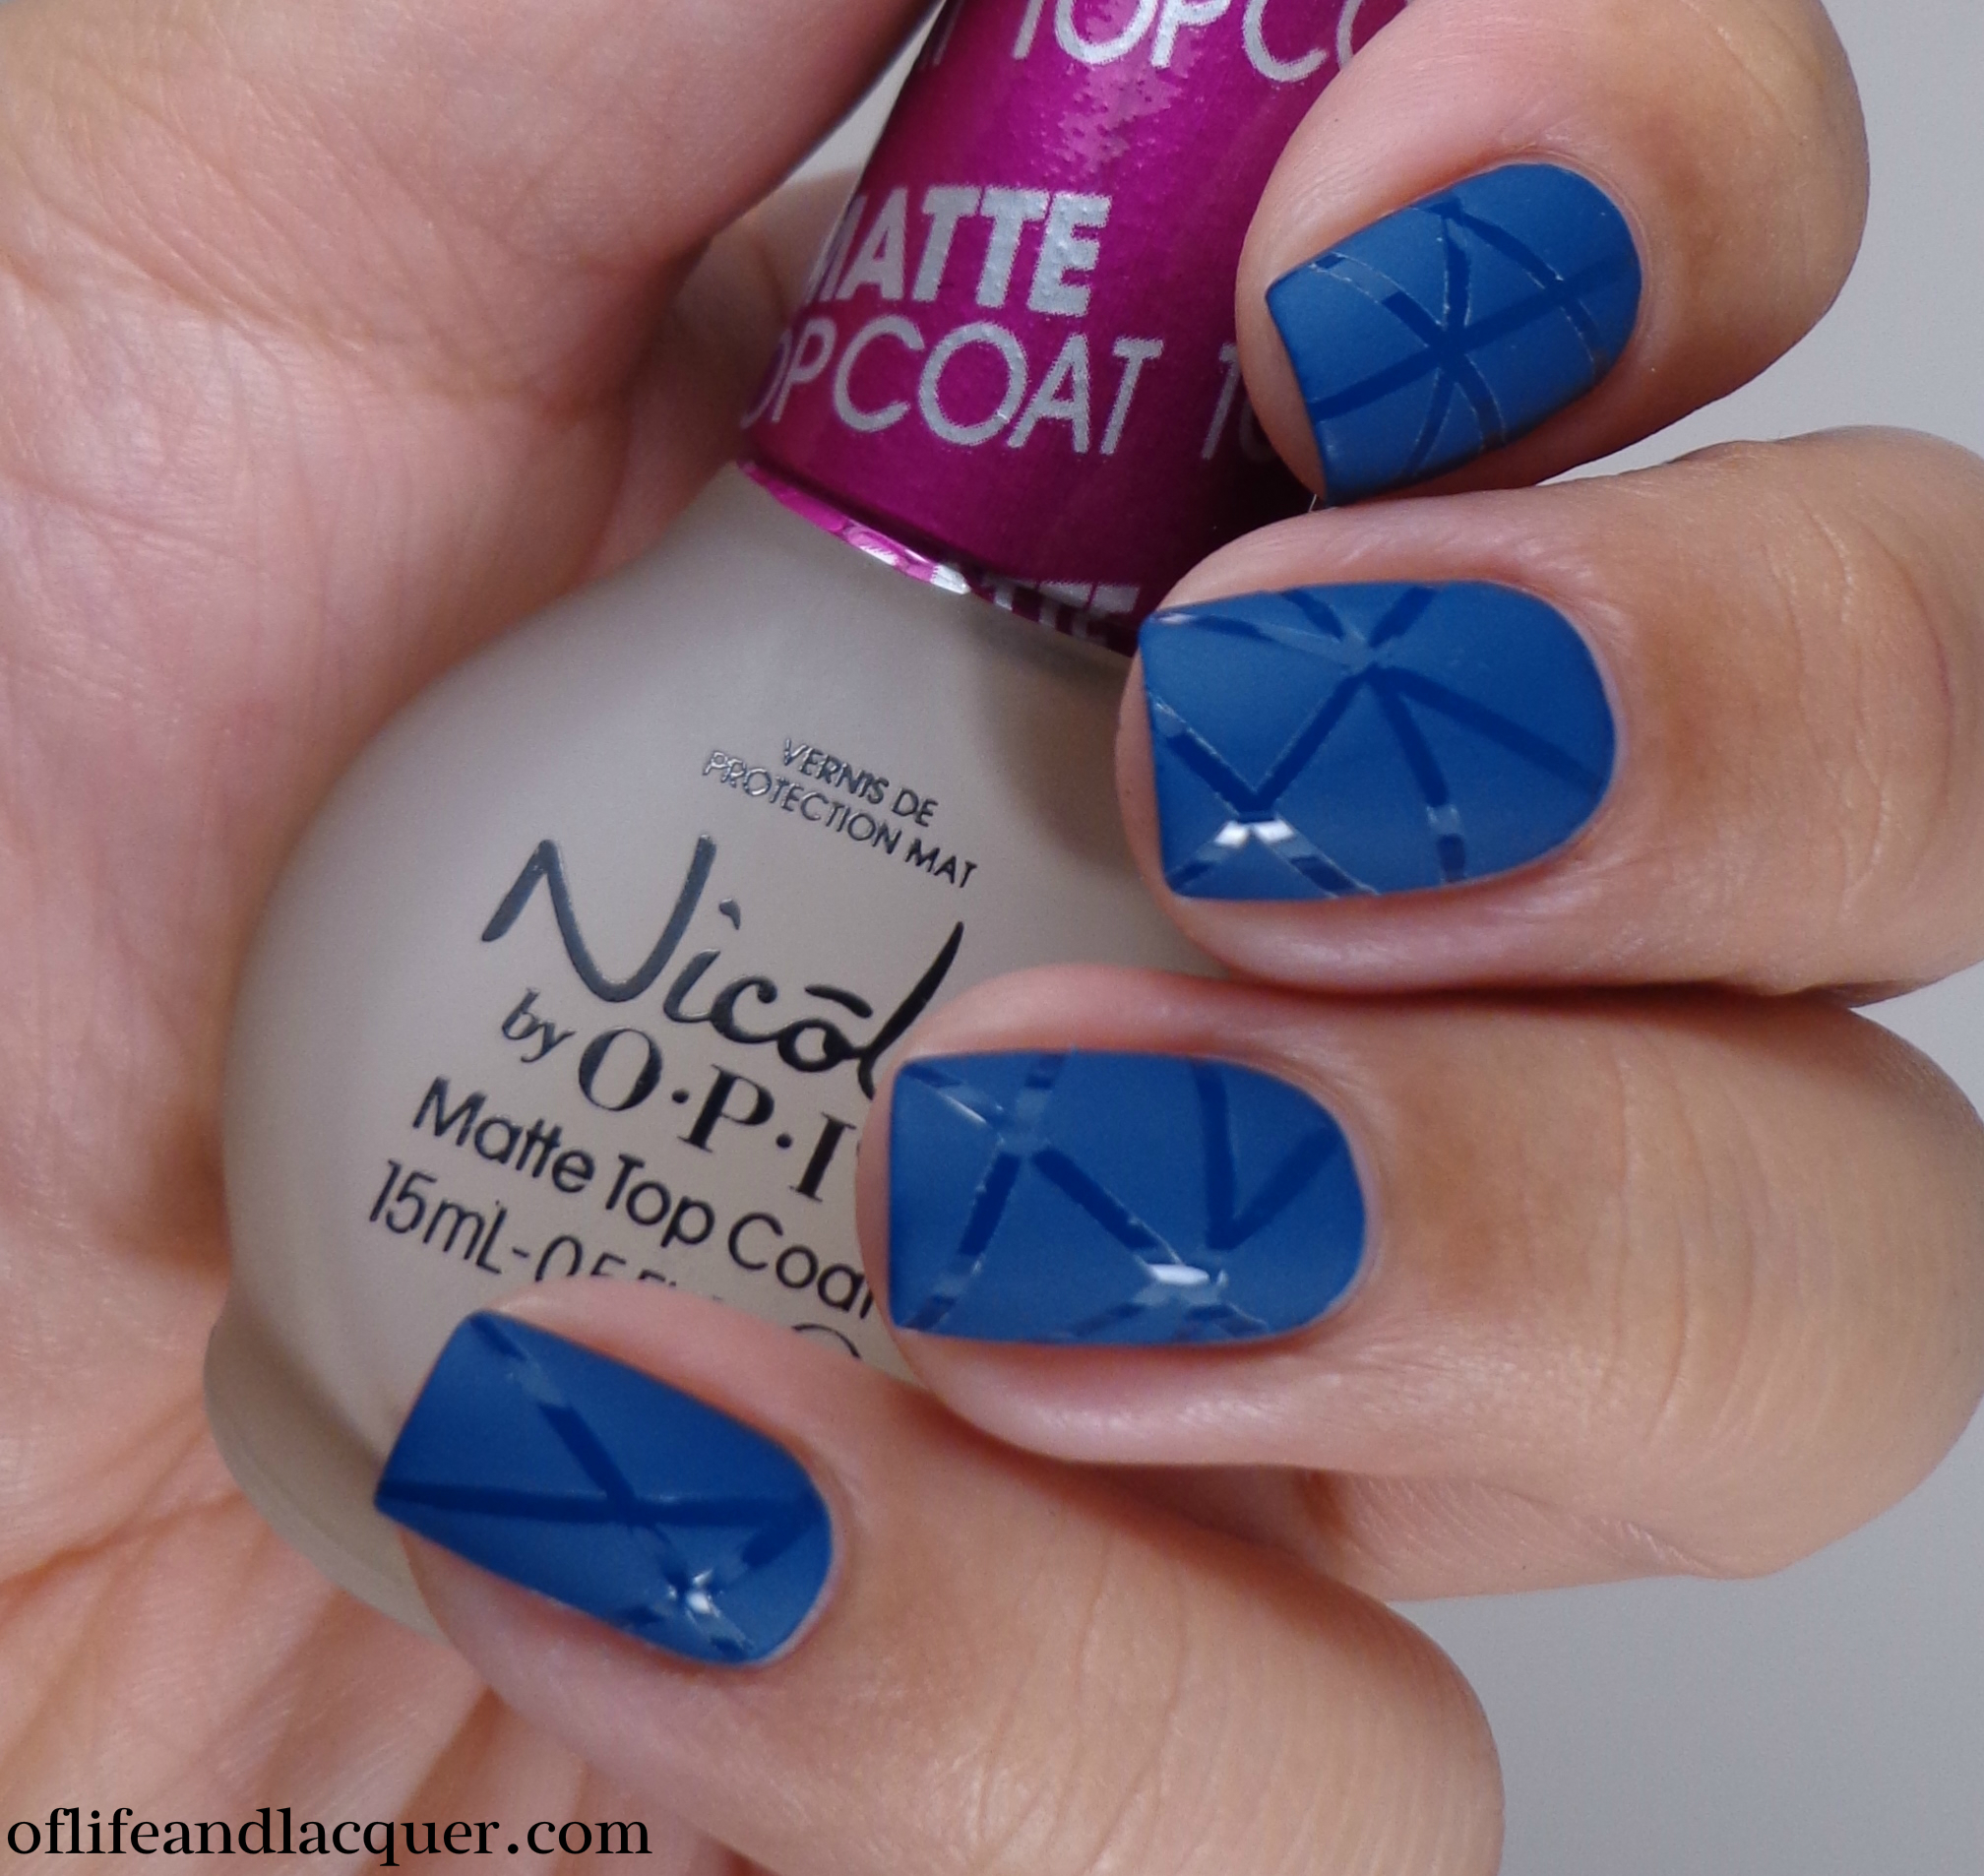 Since I’ve been trying to use striping tape a lot more lately, I decided to use it here to make a simple design. The possibilities are endless when trying out a design like this and any matte top coat will here. Here I used my Nicole by OPI Matte Top Coat (press sample) which I have been using a lot lately.
Tonight I’ve been working on swatching one half of the new China Glaze Spring 2014 Collection so I hope to have that up for you tomorrow. I was so excited when I saw this at my local nail place so I basically grabbed one of each and took off like a lunatic. I still haven’t been able to get my hands on the Sea Goddess Collection which is starting to irritate me, but I know I will get it eventually. Anyway, I hope you’re all doing well, and I will talk to you soon!