Tag: Matte About You

Sephora by OPI XOX Betsey

Since I have the big interview tomorrow, I wanted to wear something really lady-like today to get me in the mood for tomorrow. I already have my nail polish picked out for the intereview, and I hope that it brings me lots of luck but I’ll show that to you tomorrow. Today’s mani features Sephora by OPI XOX Betsey which I purchased on super sale a few months ago.

Sephora by OPI XOX Betsey Swatch

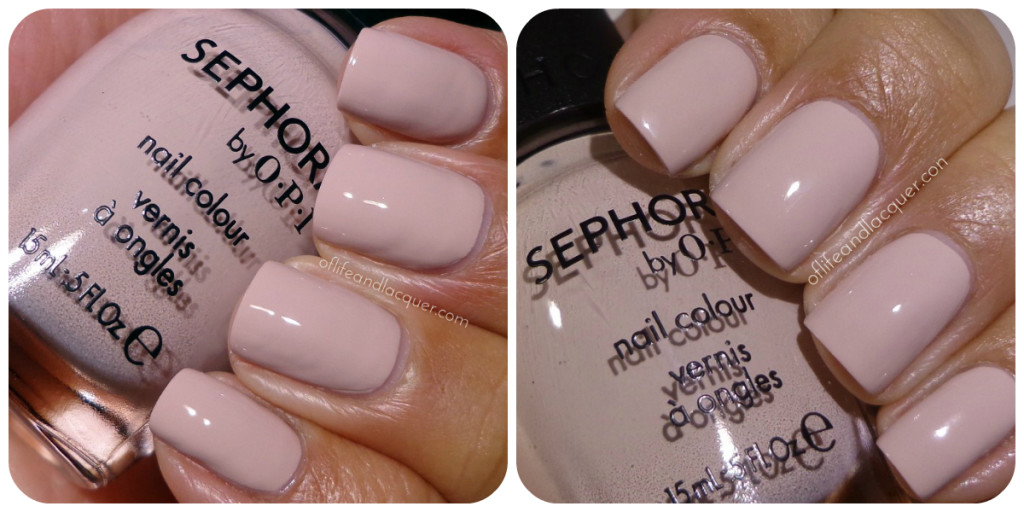
There are always colors that my camera manages to hate and this is one of them. I swear it was capturing this color in all sorts of crazy ways. Sephora by OPI XOX Betsey is a pinky-peachy putty color that I liked way more than an I anticipated. I was super surprised byt he wide brush–did all the SOPI polishes change over to this thicker and wider brush? If they did, I am really loving it!

Tutorial
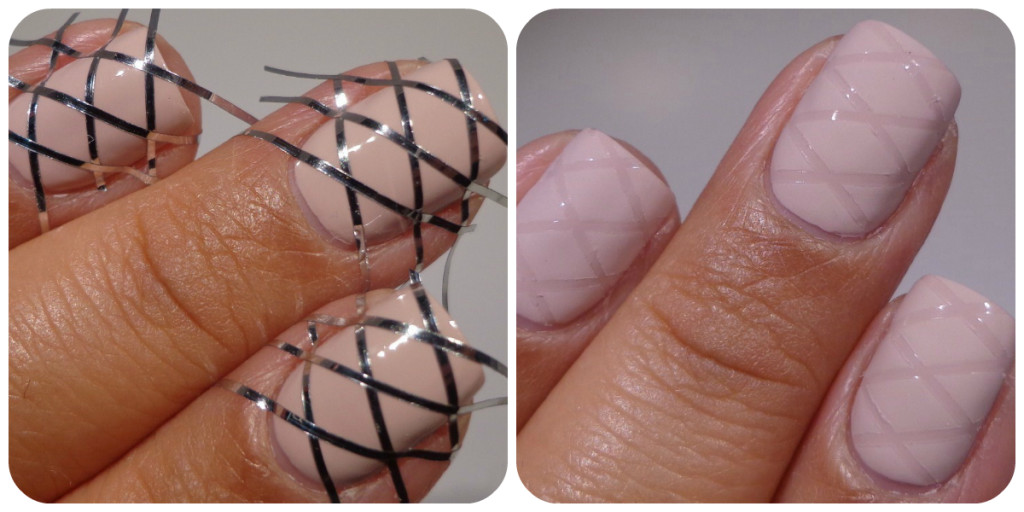
Jen from The Polishaholic had this really cute nail look a few months ago, and I knew I had to recreate it. You can see her mani here. There really is nothing difficult to create this mani unless you think it’s difficult to place the stripping tape. Once you have applied the stripping tape, you just apply a matte top coat and quickly remove the tape. I prefer to do one nail at a time because you don’t want the top coat to completely dry before you remove the tape.

Sephora by OPI XOX Betsey Strippin Tape Rhinestones

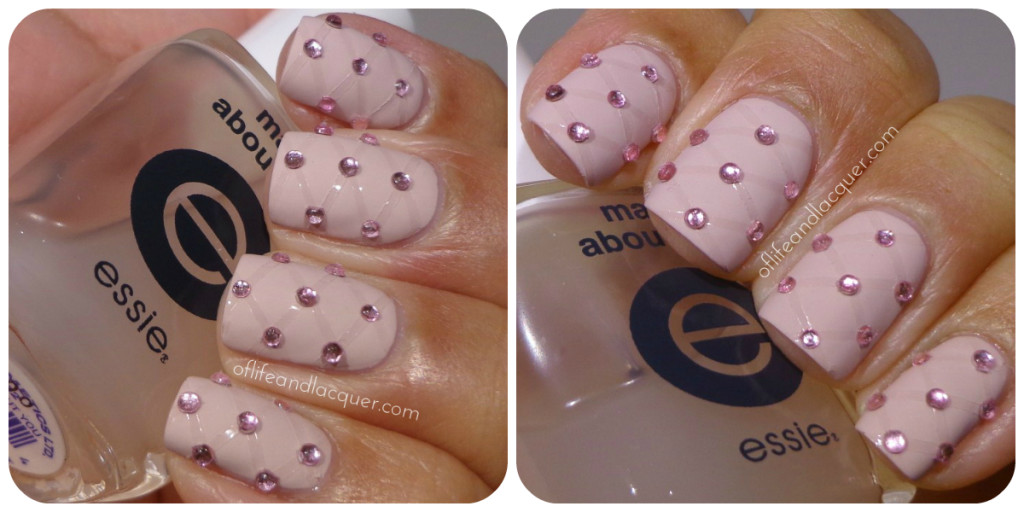
Once you have removed the stripping tape, you can add the rhinestones where the stripping tape criss-crossed. This looks so girlie but a little badass too. I was going to use studs but wanted to keep this whole mani pink.

What do you think of this mani? Pink overload, perhaps? Thanks for stopping by today, and I will talk to you soon!

P.S. Please wish me luck for tomorrow’s interview. I really need this job to come through!!! 🙂

Butter London Wallis

I was super excited this morning because I landed an interview for tomorrow morning and then I got called back to see if I could come in on Monday instead. WAH WAH WAH!!!

I swear that I heard that noise in my head when I got that call. Sometimes I think that my life truly has a soundtrack and, sadly, most of the sounds can be found on Looney Toons Cartoons. Anyway, I am glad they called to reschedule and not cancel so now I just have to wait until Monday. I was already planning out my outfit–black suit, cream colored blouse and some “sensible” black pumps. Oh my God I am a grown up!!!!!!!! I was also trying to decided what to do with my nails. I was vacillating between a french manicure or Butter London All Hail The Queen but since the interview got rescheduled, I decided to do something a little more interesting today. I was already looking through my Butter Londons so I decided to use Wallis.

1

I knew I wanted to do some dots and also mattify everything so I took at out polishes and tools that I would need: Butter London Wallis, China Glaze Liquid Leather, Essie Matte About You and a dotting tool.

Butter London Wallis Swatch

When I first bought Butter London Wallis, I honestly thought that it was kind of ugly: one of those polishes I wouldn’t buy from looking at it in the bottle unless it was on super sale.  I love this brand so I decided to give it a chance because that’s what polish hoarders do. This polish is pretty darn pigmented and easy to apply so all I needed was two coats.

Butter London Wallis Matte

I can’t remember where I first saw Wallis mattified, but I fell in love with it. Look at it!!! It has this amazing depth to it and the color changes and looks almost velvety. I have a few mattifying top coats that I rotate but they all pretty much work the same. If you’re looking for an inexpensive matte top coat, I recommend NYC Matte Me Crazy which can be purchased for $2–can’t beat that price!

Butter London Wallis Black Dots

Can you tell that I love dots? I am really diggin’ this dotticure. I thought about mattifying the whole thing but I ended up liking the contrast of the shiny black dots. There is seriously no easier way to spruce up a manicure than to bust out a dotting tool.

While I was editing this post, I was also talking to Nicole on twitter and I told her that I was going to make an egg and chorizo burrito. We then proceeded to have a conversation about what kind of chorizo to use and how to prepare it. Nicole likes to say that she’s Mexican on the inside…I guess I can let her keep that honorary title since she did try to use the word “carniceria” nonchalantly during our conversation. You may thank Nicole for the following…

collage1

Crumble some chorizo and cook it in a skillet. This is my special omelette skillet! You should drain some of the fat that the chorizo releases because it’s A LOT. I use 1 egg yolk and 3 egg whites and scramble them.

collage2

I then pour the beaten eggs into the hot skillet with the chorizo and scramble them together. You can add salt and pepper at this time if you like. Take your favorite flour tortilla and warm it up. Once the tortilla is warm, place the egg and chorizo filling on the flour tortilla. Some people might want to add some cheese but I prefer it without. Make sure that you don’t overcook the eggs because they will continue to cook when you roll the whole thing up.

7

And voilà…here is your egg and chorizo burrito. I love this for breakfast, but I really felt like eating this tonight for dinner. The egg and chorizo mixture will make 2 burritos in case you were wondering.

Well, I hope you liked my Wallis dotticure and my burrito! Thanks for catching up with me today and talk to you soon.


Disclosure: All items featured in this post were purchased by me except for the Winstonia Store dotting tool which was provided to me by the manufacturer. For more information, please visit my disclosure policy tab.