Silly Lily J-E-L-L-O & A Giveaway!

Is there always room for Jello? I always find it strange when I meet people who say they don’t like Jello. I have loved Jello since I was a little kid mostly because it seemed like such a fun thing to eat. It’s colorful, squishy and candy-like…how can a kid not like it? I had quite a few mail surprises today–some expected and some not. Aren’t those unexpected packages the best? I don’t know about you, but I rip through those babies as if they were Ho Ho’s and I was craving chocolate.  I have something super fun to share with you today: Silly Lily J-E-L-L-O! But before I show you this lovely top coat, let me show you what I wore underneath.

Sation Teacher's Pet Swatch

This is Sation Teacher’s Pet from their Class Of Sation Collection. The last time I went Sation hunting, I found this one at one of my local beauty supply stores so I snatched it up immediately because I really don’t have a delicate baby pink like this one. Unfortunately, the application was a little challenging because it was thick and went on really streaky. It was still a little streaky after the second coat, so I added some thinner to the bottle and applied a third thin coat to my nails. This seemed to fix the polish right up, but don’t ask me why I didn’t add thinner after the first coat. I guess I can attribute it to a brain fart.

Silly Lily J-E-L-L-O Swatch

And this is two coats of Silly Lily J-E-L-L-O. This polish is chock full of square matte glitters in rainbow colors in a clear base. I got a little too excited with the confetti-like look so I think that I applied a wee bit too much. I think it would look better with a thinner application. The possibilities are endless as to what base color you can use! For a polish so full of glitter, I was surprised that it wasn’t thick as glue. It was fairly easy to apply the glitter which I always appreciate.

I have an extra bottle of this cute polish and guess what? One of you can win it! Just enter using the rafflecopter widget below. As always, this giveaway is open internationally, but please make sure that you know if there are any customs restrictions in your country.
a Rafflecopter giveaway

You should check out all of Lily’s other polish creations at her Etsy shop here. You can also follow her on facebook  for updates and discount codes. In fact, she currently has a promo code for 10% off to celebrate 500 sales! Just enter WOOHOO10 at checkout to get the discount which is valid until 1/31/13.

I hope that you have enjoyed this super fun polish as much as I’ve enjoyed wearing it. Thanks so much for stopping by, and I will talk to you soon!


Disclosure: The products featured in this post were purchased by me. Silly Lily J-E-L-L-O was purchased by me at a reduced rate for review and giveaway purposes.  For more information, please see my disclosure policy tab here.


Miss Professional Nail: Sation Candylandia

Second post of the day? Why, yes! I couldn’t wait until tomorrow to share this because:

  1. I am beyond impatient.
  2. You all know I love me some yummy Sation polishes.
  3. CANDYLANDDDDDDDDDD!


Print

SATION SWEETENS THE NEW YEAR WITH CANDYLANDIA

Miss Professional Nail (Miss) has announced the launch of “Candylandia,” their Limited V nail lacquer collection. The flavored, fantasy-themed line presents 12 candy-coated colors with a mouth-watering range of confectionary names. Candylandia was inspired by the edible escapism of Hasbro’s Candy Land board game, a classic favorite spanning six decades. Miss loved the bright, playful visuals of the swirly rainbow board, which sparked the creation of its own irresistibly sweet polish palette. This whimsical collection offers winning colors that will stir up memories of childhood imagination and endless game-playing.

Embark on a magical, manicured journey filled with fun characters and luscious lacquers. Sweeten up your new year when Candylandia hits the shelves this January.

Polish players, take your places at the Sation starting line!

  • AbbacaDazzle: Ta-da! You’ll go bonkers for this yummy sunflower yellow
  • Cast a Spill on You: A bewitching cornflower blue with a pearl sheen will hypnotize you
  • Chocolate Chip Resistant: A creamy cookie dough with a sugary glaze
  • I’m so Ogre it: Reach for this sleek steely gray for those moody mani days
  • Lollipop! Goes the Princess: Pucker up for this pale, pretty periwinkle
  • Paint Some Sugar on Me: This sparkly blue-raspberry shade will give you a sugar rush
  • Peppermint Pedi: Your nails will be in mint condition with this refreshing vermilion
  • Plenty of Frogs: A toad-ally awesome grassy green with a kiss of shimmer
  • Queenie in a Bottle: Blink blink blink for this royally rich pink!
  • Super Nail-tural Powers: A potent indigo-grape will keep your players spellbound
  • Unicorns are Teal: No one can clip your wings when wearing this mystical turquoise
  • You’re My Lacquer Charm: Cross your fingers and flash this pop-rock pink for good luck!


Isn’t this collection absolutely precious? I want them all! Do you have any you’re already eyeing?


All Miss products are free of DBP, Toluene and Formaldehyde
Miss is an MBE (Minority Business Enterprise) certified company

Julep Alma

Sweet baby Jesus on rollerskates I’m tired. Book learnin iz hard. My brain is being crammed with so much information at work that I feel almost like a zombie once I get home. To be honest, I am enjoying learning so much new stuff so I shouldn’t complain–it’s just a lot of work! If you can believe it, I haven’t been wearing nail polish to work because I’m still getting a feel for things. Since I don’t want to cause any type of waves during my probation period, I am remaining very conservative…just wait until this passes because I’ll be causing some nail tsunamis for sure! Today I decided to use the other Julep polish that I got recently: Julep Alma.

Julep Alma Swatch

Oh, Alma! You’re one of those pretty/ugly polishes that I always think is going to look better on me than it actually does. Actually, this color reminds me a lot of the creme version of China Glaze Trendsetter! I had a little weird issue with this polish and I’m wondering if it’s just my bottle or if other people had the same happen to them. When I was applying this polish, I noticed little chunks–like super tiny little balls. After the first coat, I thought that maybe I hadn’t primed my nails well and I had some residue from another product, but the second coat also had the little chunks. Remember Chunk?

Anyway, once I applied the top coat, I think the chunks pretty much disappeared, but it was definitely strange! I applied two coats here and got good coverage.

Julep Alma BM 310

I just realized that I have used this stamp combination quite often. I just absolutely love it! Both of the images can be found on Bundle Monster plate BM 310. I used the inverted full coverage stamp as my accent nail, and I love how it looks almost leather-like since I didn’t apply top coat after stamping. If you’re a stamper, I’m curious if you know of a black polish that works for stamping. I haven’t found any others that are as pigmented as my Konad Black.

You know I’m going to say it so here it is: If you’re interested in becoming a Julep Maven for just a penny, you can use my referral link here and enter the code JULEPVIP. You can’t really beat one cent, can you? I am looking to explore more subscription type boxes so feel free to leave me a comment if you know of others that are good. I have been very satisfied with the Julep boxes because I think the subscription service is a great deal. Definitely give them a try if you’re curious!

I am BEYOND excited that I only have two more days before the weekend. WEEKENDDDDDDDDDDDDDDDD! You know what kinda sucks, though? It might be raining here. It literally was in the 80’s earlier in the week and now it’s getting cold and rainy…get it together, bipolar California! Do you have anything fun planned this weekend?

Let me know what you think about this polish and stamping. I love reading all your comments! Thanks for stopping by today, and I will talk to you soon.


Disclosure: Julep Alma was provided to me by the manufacturer or their PR firm.  All other products featured in this post were purchased by me.  For more information, please see my disclosure policy tab here.

Julep Trina

Well, hello there friends! I am a little disappointed in myself that I didn’t post anything after my first day of work, but I had forgotten how exhausting sitting in a training class for 8 hours can be! I actually did do my nails last night with the intention of posting them, but I felt like my nail mojo just disappeared. I seriously took about 50 pictures and not a single one turned out–they all looked shit-tastic. So I just gave up. Today I got home super flustered because I had so much stuff to do–who knew that having a job again would leave me with absolutely no time at all? Ah, well…I shouldn’t complain because getting a paycheck again means I can continue to enjoy the luxuries I have become accustomed to such as a roof over my head, food in the fridge and electricity. After finishing up my laundry, grocery shopping, cleaning and preparing my lunch for tomorrow, I sat down and thought I’d give it another try. Want to know what polish I settled on? Julep Trina!

Julep Trina Swatch

Julep Trina is an amazingly rich and saturated metallic aubergine polish. It was a little on the thick side, but it was easy to work with. I only needed two coats for these swatches. Did you hear that the Julep boxes are getting holos? I hope it’s true because you doesn’t love holos??? If you’re interested in becoming a Julep Maven for just a penny, you can use my referral link here and enter the code JULEPVIP. Yep, for a penny. Awesomeness.

Julep Trina Pure Ice Silver Mercedes MASH 43

I then used an image from Mash plate MASH 43 which is kind of a strange flower and vine design. I am also wowed by the polish I used for stamping: Pure Ice Silver Mercedes. I finally found a decent Pure Ice display at a new Walmart and there was ONE of these babies left. This is such an amazing polish for stamping and you seriously can’t beat the under $2 price tag!

A lot of you have asked me about my new job and what I’ll be doing. I just wanted to say that I’ve made a very conscious decision not to discuss any details about my job. I’ve heard of way too many horror stories of people getting in trouble professionally about stuff they post online. While I do tend to share–and overshare–a lot about my personal life, that will not include details about my job. This will hopefully allow me to share funny people stories about my job–with names changed to protect the clueless, of course! I should have gone to bed about an hour ago but I stayed up to watch the series finale of Private Practice, and it was even more lame than I had anticipated. This show really jumped the shark about a year ago so I’m glad it’s over.

Well, I’m heading to bed now. It’s Wednesday tomorrow so I’m almost half-way through my first week of work. Woot! Hope you have a wonderful day, and I will talk to you soon.


Disclosure: Julep Trina was provided to me by the manufacturer or their PR firm.  All other products featured in this post were purchased by me.  For more information, please see my disclosure policy tab here.

Jessica Flash Fusion 2.5.2 Pedicure System

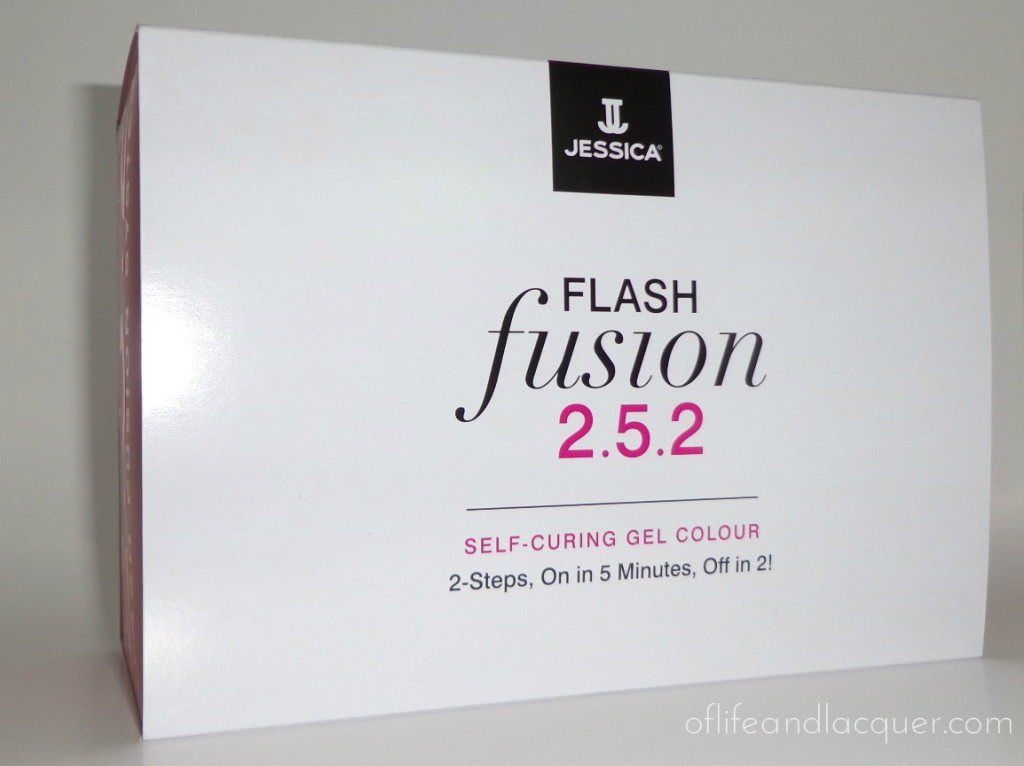
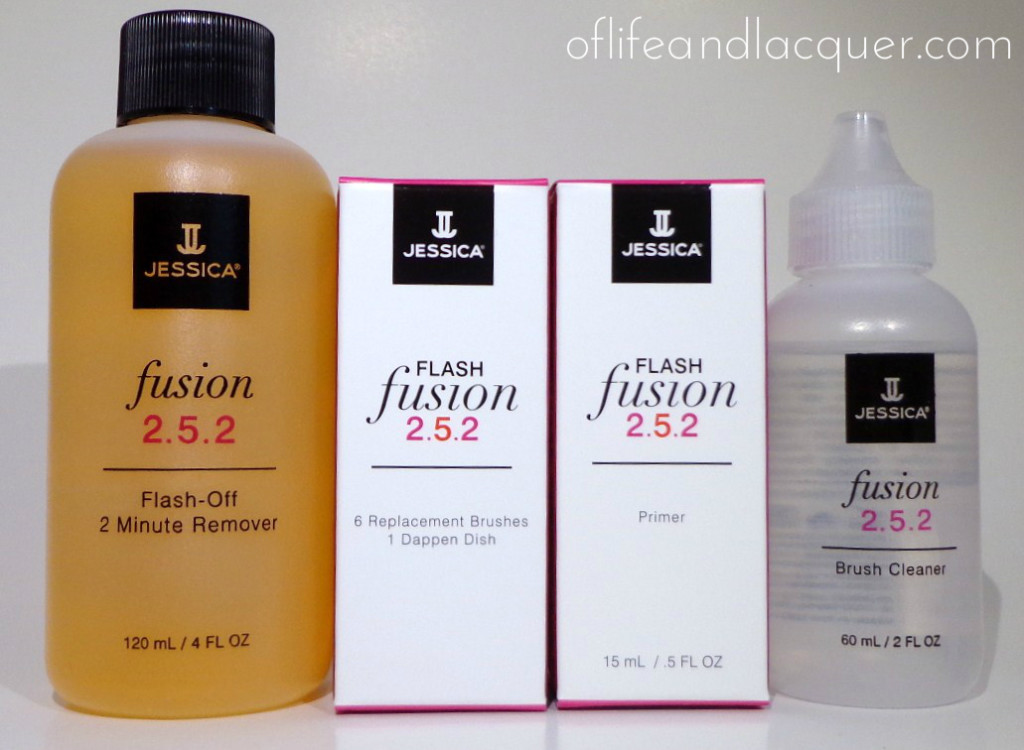
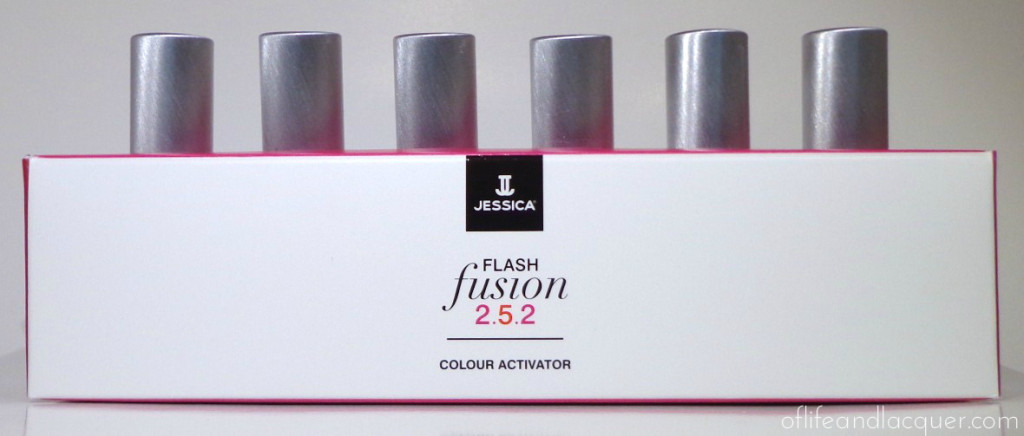
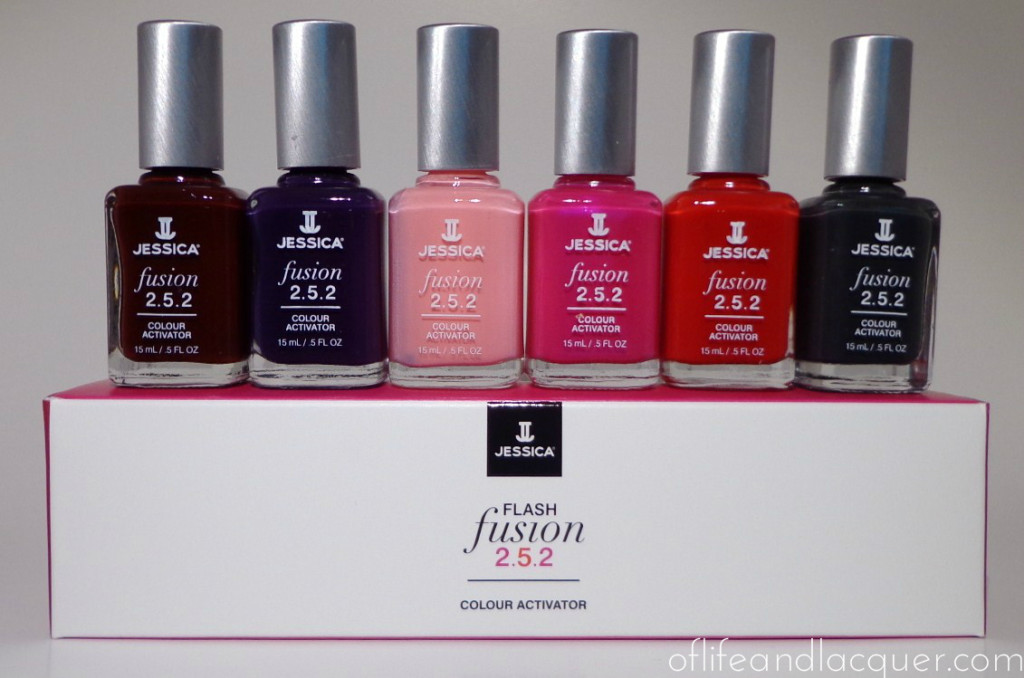
Today I have something pretty freaking cool to share with all of you. I know that gel manicures have been all the rage, but I just can’t jump on that bandwagon. As someone who can’t commit to a nail polish on my hands for more than two days–three days tops–I can’t even imagine wearing the same manicure for more than 2 weeks. However, I routinely let my pedicures go for weeks at a time because  frankly, my feet are usually covered up unless it’s summertime. Part of my issue with giving myself a pedicure is that the polish tends to chip so quickly and after all my Cirque du Soleil contortionist poses to apply the polish carefully, this seems like a big fat waste.  I also hate paying to get a pedi because again, the polish barely lasts a few days. I certainly don’t want to pay $20+ for a weekly pedi that’s going to chip immediately–hey, I’m frugal! So when I got the opportunity to try out the new Jessica Flash Fusion 2.5.2 Pedicure System, I have to admit that I was intrigued! I was even more intrigued when I realized that this system does NOT require a UV or LED light to cure. Hmm…interesting! Let me show you what the system includes:

a

b

c

d

When I first read the directions, I felt confused and just thought that I would be way too much work until I laid everything out and realized that it wasn’t as complicated as it seemed. Basically you apply the primer, then you apply the colour activator (and do a little brush cleaning in between) and that’s it! For the sake of being accurate, I’m going to share the official instructions:

First Coat: Begin On Left Side

Step 1: Once natural nail is prepped and wiped clean of oils or lotions, brush a complete layer of Primer on all five nails (as you would a basecoat), sealing the free edge and leaving nail wet and shiny. Do NOT get on cuticle. DO NOT let this layer dry.

Step 2: Apply a thin layer of Colour Activator to wet Primer on all five nails. Wipe Colour Activator on the side of the bottle to ensure thin application. Unlike polish, it flows so start away from the cuticle and seal the free edge. First layer will be sheet. Do not overwork colour during application.

Step 3: Pour small amount of Brush Cleaner into dappen dish. After applying Colour Activator to all five nails, wipe brush on Pro Touch Lint-Free Nail Wipe then place in dappen dish to clean for about 30 seconds. When soft, wipe again and place back in Colour Activator so it is ready for the next application. Repeat cleaning process after every 5 nails. If brush starts to harden, soak in Brush Cleaner again or replace.

Step 4: Repeat the three steps above on the right side: Primer, Colour Activator, wipe brush and put in dappen dish with cleaner. (The polish on the first application will be setting as you do the second.)

Second Coat:

Step 5: Go back to the left side and repeat the same steps…Primers, Colour Activator, wipe brush and put in dappen dish with cleaner. Finish with a final coat of Primer to seal in the application.

Step 6: Repeat same three steps on the right.

To Remove: Saturate cotton in Fusion Flash-Off Remover and place over entire surface of the nail. Wrap in aluminum foil sealing all the edges. Leave on for just two minutes then press firmly and rub slightly before removal. Wipe clean. No filing or buffing needed.

Now, let me tell you what I thought:

Step 1: The Primer is pretty thick so it wont be runny. Despite this, you still have to be careful not to get it on your skin and cuticles. The Primer smells exactly like nail glue and is super strong. I recommend that you use this in a very well ventilated area unless you want to start feeling loopy.

Step 2: The Colour Activator is very runny so for the love of sweet baby Jesus, use a tiny bit. It will spread and bond with the Primer like magic. The first coat will definitely be runny but don’t worry because the second coat will fix it.

Step 3: It is super important to clean the brush of the Colour Activator as indicated. It will get hard and unmanageable if you don’t. The Colour Activator will get goopy as well if you don’t keep the cap on but you can add a drop or two of the Brush Cleaner to thin it out a bit if needed.

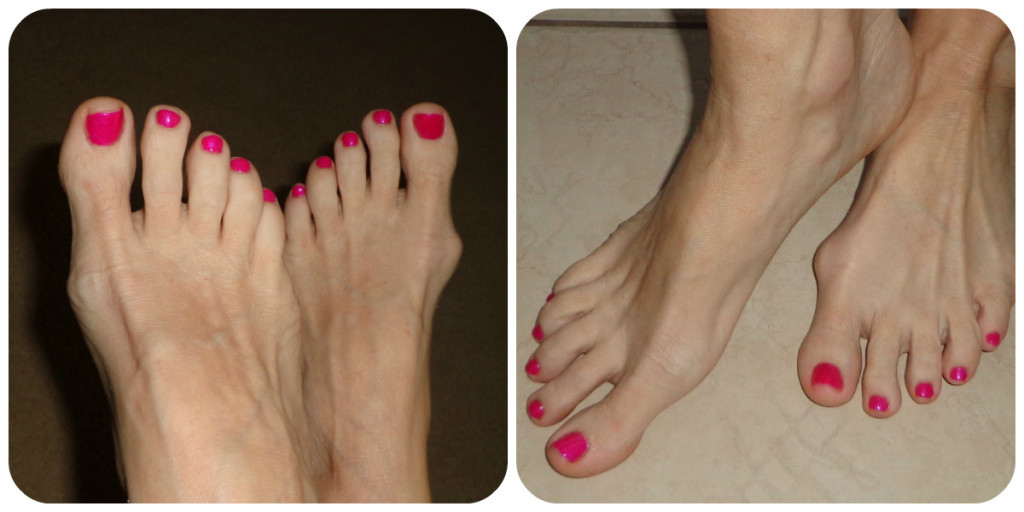
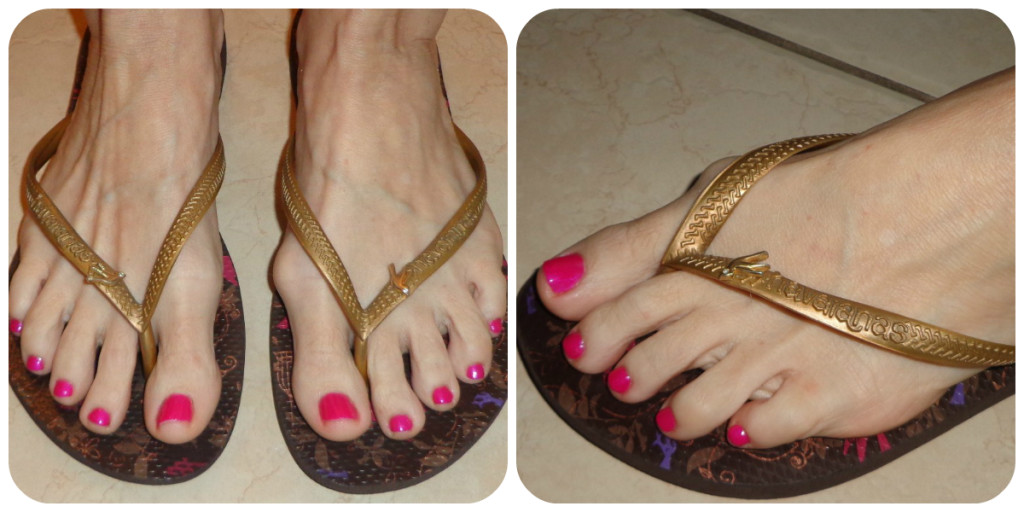
As far as clean up is concerned, the Colour Activator comes off from the skin pretty easily with some acetone. However, if you get Primer all over the place, that will be harder to remove because it gets hard and crusty. I gave myself a pedicure and then removed it to see how difficult it would be. I am happy and surprised to report that it was rather painless using the foil method. The Primer and Colour Activator came off easily and my nails did not looked messed up afterwards. After I knew I could do this correctly, I recruited one of my friends to be a foot model because frankly, my toes are a little horrific and I would not want to put any of you through that pain. After pouring over the 6 available colors, she decided to go with Adrenaline. Are you ready for some foot pictures?

collage1

collage2

We weren’t trying to be all Foot Zoolander in these pictures…we just wanted to get some decent shots of the pedicure that I did on her. I did a pretty good job on the pedi if I do say so myself. The pedicure set in about 5 minutes, was rock hard to the touch and extremely shiny.

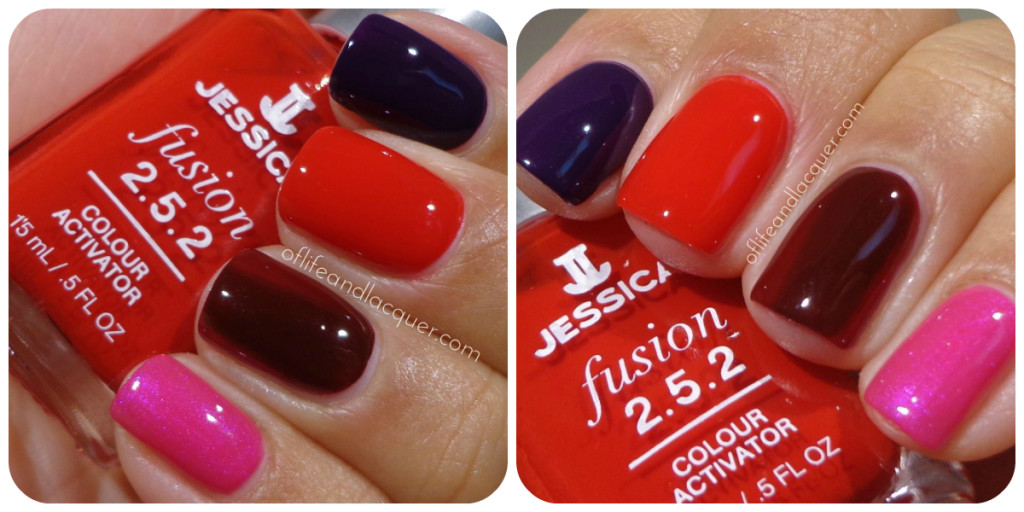
Even though this is a pedicure system, I decided to give it a whirl on my hands so I could give you a close-up shot of the finish and colors.

collage1

This is what the colors look like up close. This is two coats of Colour Activator plus a coat of Primer as a top coat. As you can see the colors are extremely shiny and wet looking despite being 100% dry and rock hard.

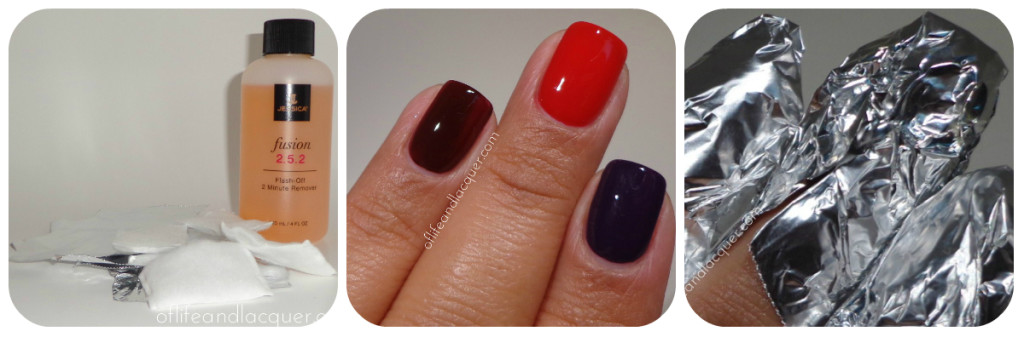
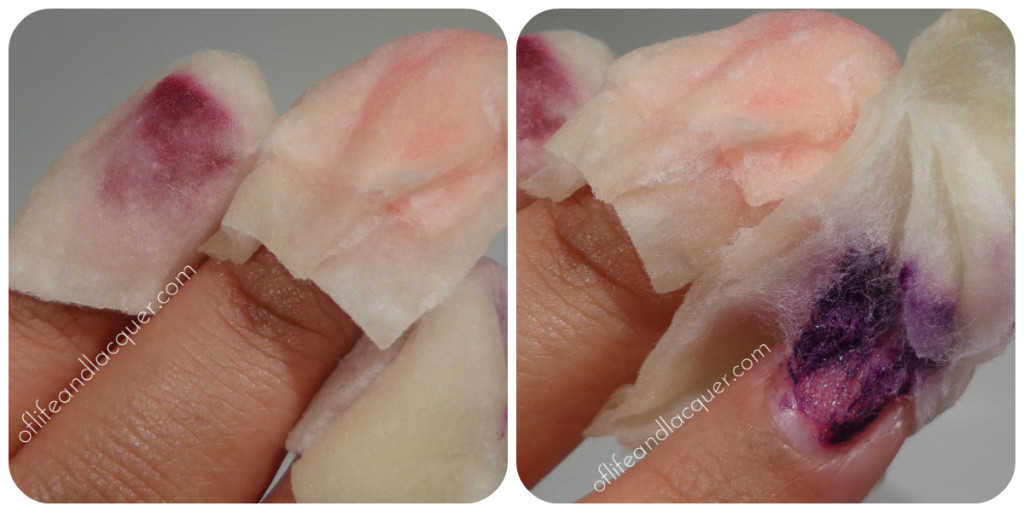
As far as removal is concerned, I think all of us  nailphiles are familiar with the foil method–especially if we dabble in chunky glitters.

collage2

The foil method consists of soaking some cotton with remover, placing it on your nails and then wrapping some aluminum foil around your nails to hold the cotton in place and giving it time to soak the polish off. You only really have to leave the cotton on your fingers for a couple of minutes.

collage

After the two minutes, I removed the tin foil and started to remove the cotton to show you how it had dissolved the polish. You don’t have to do any harsh scrubbing–just apply some pressure and rub off the color they way you would with any normal nail polish.

collage4

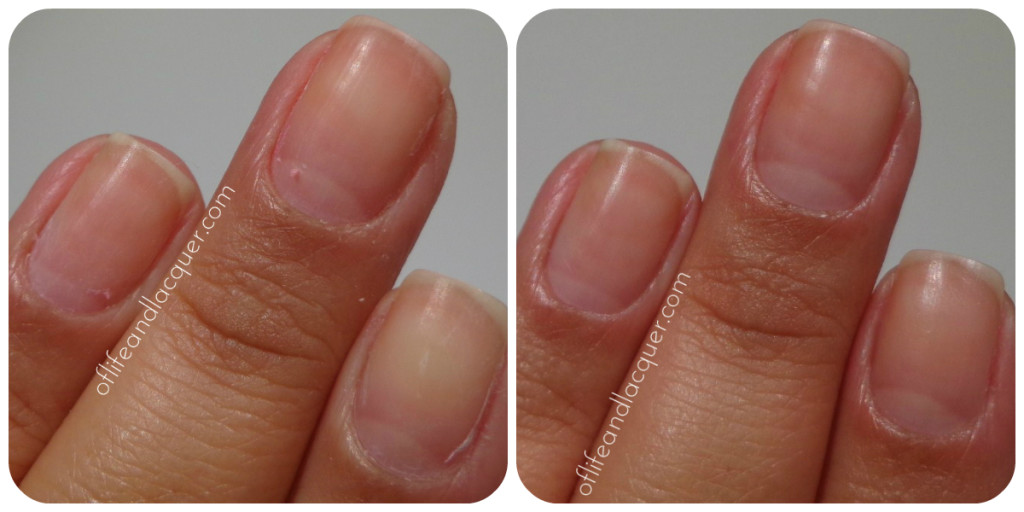
The first picture on the left show my nails immediately after I removed the cotton and rubbed off the color. I had a little residue left so I grabbed another cotton square with some remover and clean off the rest. And on the right are my nails after washing my hands and putting on a little moisturizer. As you can see, my nails look healthy–not damaged in the least bit.

So what do I think about the Jessica Flash Fusion 2.5.2 Pedicure System? As a gel newbie, I have to say that I am very impressed! Here are some of the things that I really liked:

1) The system is rather easy to use–just make sure you read the directions! As someone who routinely does not read directions and then I wonder why things blow up in my face, I found the directions were clear and easy to follow.

2) Time, time, time! I know we are all busy so being able to get this pedicure done so quickly is very important.

3) The system does not appear to be harsh on nails. I have heard some bad stories of damaged nails with traditional gel manicure systems so I was very happy–and relieved–when my nails were fine when I removed the manicure/pedicure.

4) No need of a UV/LED light. I know there have been concerns about long term exposure to these lights and what affects they may have on our skin.

Here are some things that I didn’t like:

1) Woah, Nelly the fumes are strong! I am used to painting my nails (obviously) and using stuff like acetone. The fumes from the primer were strong even for me.  You have to use this stuff in a well ventilated area, and I certainly learned my lesson the first time.

2) You have to be really careful when applying the primer which can be difficult if you are a little messy with your polish application in general. If you get Primer on your cuticles, it will look like a crusty mess and will be difficult to remove.

3) While the 6 color collection is nice, I think they need a little more variety. However, 12 more colors will be released this month so this is just a temporary complaint.

All in all, I think this is a great system and will definitely be using it for my pedicures. Since I still don’t have information on the longevity of the pedicure I did on my friend, I will be updating this review at the one week mark and again at the two week mark to let you know if she has experienced any issues. How do you feel about long-lasting results such as this? Do you get gel manicures or pedicures? Let me know! I’d love to hear what you think.

1/27/2013 Update Week 1: I spoke with my friend and she said that he pedicure is still intact. There is no chipping or peeling whatsoever and she said it still looks great!

For questions or to order Flash Fusion 2.5.2, you can contact Jessica at 1-800-582-4000 or online at www.jessicacosmetics.com

About Jessica:

A global powerhouse, the Jessica brand of nail care from Jessica Cosmetics International is available in more than 35 countries at the finest salons, spas and retailers and at www.jessicacosmetics.com. Jessica Vartoughian–founder and creator of Jessica Cosmetics–“The First Lady of Nails” by the New York Times and “Manicurist to the Stars” by Vogue. Her complete colour and treatment line has been designed to promote healthy, beautiful nails.


Disclosure: The products featured in this post were provided to me by the manufacturer or their PR firm.  For more information, please see my disclosure policy tab here.

Winner Announced – Sation Giveaway

Hi everyone! I always like to pick and announce winners for my giveaways immediately so I’m running a little behind. I was almost forgetting about it if you can believe it. Well, the winner was picked by my friend, Mr. Rafflecopter, and he has chosen…

winner

Yay,  Tami! I have emailed Tami, and she has 48 hours to respond or else I will be picking a new winner. Thanks to everyone for participating and don’t forget to enter my other giveaway for a set of OPI Liquid Sand Minis here.

Sation I Paint In Peace

Remember how I was complaining about how cold it has been lately? Well, today it’s going to be in the upper 70’s/low 80’s and here I am wanting to complain again. haha!  Is it so hard to just have nice mild and temperate weather that is season appropriate? I guess so! This weekend is supposed to be super nice so maybe I’ll take advantage of my last two days of unemployed freedom and go to the beach or something outdoorsy like that. How’s the weather in your neck of the woods? Since it’s getting warm, I decided to wear a polish that was a little brighter than what I wore previously which was essentially a black/purple polish. I settled on yet another lovely from the Sation Nailstock Colletion: Sation I Paint In Peace.

Sation I Paint In Peace SwatchSation I Paint In Peace is a beautiful dark and mossy green with a strong and noticeable silver shimmer. The first coat of this polish was super sheer so I was cringing inside thinking that I would have to apply 5 gazillion coats but it was perfect after the second coat. I should know better than to second guess my beloved Sations.

Sation I Pain In Peace Layla Flash Black Mash 47

I then used Layla Flash Black and a design from Mash plate MASH 47 for this subtle houndstooth design. Even though it looks super subtle in these pictures, you can really see the design in real life. I am so in love with using holos to stamp.

I hope you’re having a nice weekend. Thanks for stopping by today, and I will talk to you soon!


Disclosure: Sation I Paint In Peace was provided to me by the manufacturer or their PR firm.  Layla Flash Black was purchased by me. For more information, please see my disclosure policy tab here.

Seche Empress

Ever since I first reviewed my first Seche polish (Seche Irresistible review here), I’ve been wanting to try more of their polishes. When I saw that my nail place had gotten some new colors, I decided to pick up another one which is how I ended up with Seche Empress. This is such a Fall vampy color, but I am so going to rock it now. Today was so gorgeous and warm outside so it feels like the weather is finally more California-appropriate. I really enjoyed it! How unlike me! I can be such a grump…probably just like grumpy cat.

Seche Empress Swatch

Seche Empress is a very dark purple creme that looks basically black in most lighting. It is incredibly pigmented but doesn’t stain which is awesome. I did notice that the first coat was incredibly patchy and I had a few bald spots. I then applied a second thick coat ant that seemed to fix it. Since I have have tried two of these Seche polishes now, I think it’s safe to say that they are of good quality. However, I find that because they tend to dry a little quicker than other polishes, you have to work fast or else it gets goopy. They don’t dry like Seche Vite fast, but I did notice that these polishes dry faster.

Do you remember those ‘This is your brain on drugs.” commercials from the 80’s?

These are your nails.

1

These are your nails on drugs.

collage2

Yes, I like to call Max Factor Fantasy Fire, crack.  It is liquid crack for your nails. I really wish that my pictures could show how awesome this looks in real life. I wasn’t able to capture the purple/blue/green color shift in my pictures so poo to that, but I think most of you have probably already seen how amazing this polish can look in the sun.

Lastly, I wanted to mention that I will be closing my blog sale this Sunday. Thank you so much to everyone who helped me re-home so many of my pretties. It was hectic at times, but the money was a huge help while I was stressing about being jobless. Thankfully that is no longer a concern, but I still want to do one last purge. From now until Sunday, I will be offering a 20% discount on all orders (excluding shipping). While I have shipped internationally in the past, I will only be shipping to US addresses for this last round. You can check out the items I have for sale here.

Let me know what you think about my nails on crack. I’m kind of loving them right now! Thanks for stopping by, and I will talk to you soon.

Zoya Lovely Collection For Spring 2013 – My Three Picks

Can we all agree that we are all pretty ready for the milder Spring temperatures? I know that I am always saying I hate Summer, but it’s been colder than a witch’s tit here in So Cal which is just not right.  I mean, we’re supposed to be able to wear flip flops and shorts year round so what am I doing with scarves and gloves??? Anyway, I can at least dream of warmer days when I wear colors from some of the new Spring collections. I am sure that you’ve seen just about a million and a half swatches of the Zoya Lovely Collection for Spring 2013 so I’m not going to get all crazy in my review. When I saw that my nail supply place had gotten the polishes in, I debated about whether I really *needed* the whole collection. In the end, I picked the three polishes that most appealed to me. I hadn’t really seen too many swatches of the collection yet so I ended up being a little surprised. Let’s get to the swatches, shall we?

Zoya Piaf Swatch

Zoya Piaf was the color that I was most excited about. Why? Because I am obsessed with yellow polishes lately, and I wanted to love this one really badly because I am a huge Edith Piaf fan as well. So…uhm, yeah…I don’t like it as much as I wanted to. It’s nice and all, but for some reason–which is totally my fault–I thought this was a straight up creme. Next time I need to pay more attention. I am not that excited about polishes that have this metallic shimmer. They are pretty and all, but I would have preferred a lovely creme finish. The polish was rather streaky after the first coat, but it built up nicely. I ended up applying 3 thin coats for the swatches above.

Zoya Julie Swatch

Zoya Julie is actually my favorite of the three polishes I picked up. I love the beautiful and delicate lilac color of this polish even if it does have that metallic shimmer that I’m not too fond of. This one was also a little streaky, but I didn’t have any problems building up the color to opacity with 3 thin coats.

Zoya Neely Swatch

And lastly, this is Zoya Neely. Why did I get this color? I have seen a million dupes of this, and I always want them. My pictures make this polish seem more blue than it is. In real life, it is more minty green than this. As the only creme of the 3 I picked up, I was a little disappointed in how streaky it was. I’m sure you can see in my pictures some unevenness in the polish which is one of my biggest pet peeves when it comes to cremes. Oh well. It’s still a pretty color.

If you are new to Zoya, you can take advantage of using my referral link to create an account and get a coupon code for a free bottle of polish. All you have to do is pay for shipping!!! How cool is that? And if you buy two more bottles at the same time, you will also get free shipping. So what are you waiting for? Click here to get your free Zoya! 😉

Overall, I think these three polishes are nice but not really special. I always appreciate beautiful pastels so I don’t regret picking them up but I’m sure that we all have similar colors that may have a better formula.  I have a bunch of stuff to get done today so I’ll end it here. I had planned to post this yesterday but I ended up being out pretty much all day. I went shopping for some work clothes so that was pretty much an all day thing, and I also went to watch two movies with a friend. I have a few more things to purchase so hopefully I can be done with that already–I do NOT like shopping unless it’s polish related of course. Anyway, I hope you’re doing well. Let me know what you think about my three picks from the Zoya Lovely Collection. Thanks for stopping by and I will talk to you soon!

Cacee BFF Nail Lacquer Kim

I don’t know about you, but I get pretty excited when I get to try new brands of nail polish. There is a moment right before I open up a bottle of nail polish where I whisper a little wish into the universe hoping that the formula is great: not too thick, not too thin, not streaky, not smelly (I’m looking at you, Kleancolor!)…who am I? The Goldilocks of nail polish? Anyway, a couple of my nail places have some huge fully-stocked displays of Cacee BFF nail polishes, and I have kind of resisted purchasing them even though they have some pretty colors. Well, I finally caved so today I have a beautiful pastel to share with you: Cacee BFF Nail Lacquer Kim.

Cacee BFF Nail Lacquer Kim

Before I get into the details of this polish, I was looking up this polish line on the Cacee website and they call it BFE and the bottles do look like they say BFE but mine is clearly BFF.  BFF = Best Friends Forever. Ehhh…I am kind of confused. Does not compute. Moving on from the naming confusion, I want to say that the formula on this polish is pretty darn fantastic. Colors like this always scare me because I imagine streaky nightmares. However, this polish is extremely smooth and self-leveling. After the first coat, I could barely see any VNL so I decided to apply a second thin coat which made it look perfect. This line of polishes claims to be a one coat lacquer and maybe some of the darker, more saturated colors are, but this one looks best with two coats. This polish is a smooth and milky lavender tinged creme that is PERFECT for that demure and soft look–very girlie yet work appropriate.  It also dries to an incredibly high gloss shine.

Nubar Black Polka Dot

And now I just wanted to spice this up a little with a polish that literally looks like black pepper. This cute dot top coat is Nubar Black Polka Dot. I really love this little gem of a top coat. It was refreshing to not see bar glitter in this kind of polish and best of all, it was super smooth and not thick at all. It was a little hard to get the bigger black glitter so I just had to make sure I blended the polish well before using it.

So what do you think about the look of this polish combination? Have you ever tried Cacee polish or even seen them in your area?  Holy Toledo, I can’t believe I’ll be starting work next Monday! I am thoroughly enjoying my last week of freedom so today I had lunch with a friend, and we went to see Silver Linings Playbook. That movie is pretty darn fantastic. I have noticed that after my experience with being in mental institutions, I can get a little touchy about watching movies that depict mental illness or scenes of being in a psychiatric facility. Both my friend and I have been hospitalized in these types of facilities, but we both really enjoyed the movie despite certain scenes really hitting close to home.  If you haven’t gotten a chance to see this movie, I highly recommend it.

Anyway, I hope your week is going well, and I will talk to you later!