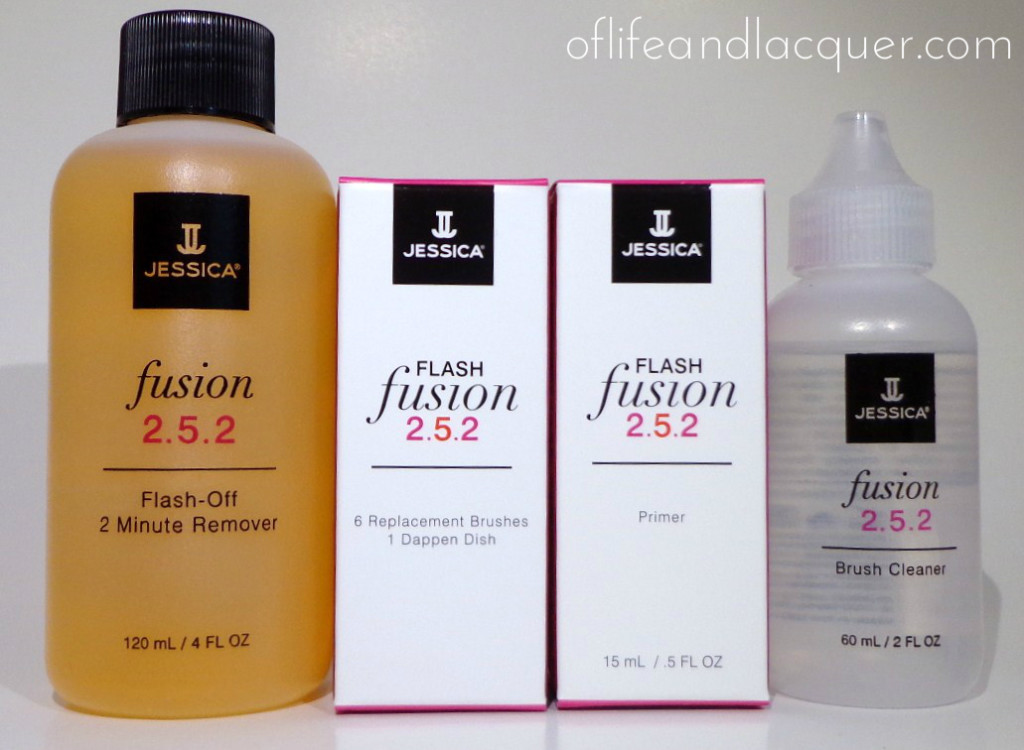
Today I have something pretty freaking cool to share with all of you. I know that gel manicures have been all the rage, but I just can’t jump on that bandwagon. As someone who can’t commit to a nail polish on my hands for more than two days–three days tops–I can’t even imagine wearing the same manicure for more than 2 weeks. However, I routinely let my pedicures go for weeks at a time because frankly, my feet are usually covered up unless it’s summertime. Part of my issue with giving myself a pedicure is that the polish tends to chip so quickly and after all my Cirque du Soleil contortionist poses to apply the polish carefully, this seems like a big fat waste. I also hate paying to get a pedi because again, the polish barely lasts a few days. I certainly don’t want to pay $20+ for a weekly pedi that’s going to chip immediately–hey, I’m frugal! So when I got the opportunity to try out the new Jessica Flash Fusion 2.5.2 Pedicure System, I have to admit that I was intrigued! I was even more intrigued when I realized that this system does NOT require a UV or LED light to cure. Hmm…interesting! Let me show you what the system includes:
When I first read the directions, I felt confused and just thought that I would be way too much work until I laid everything out and realized that it wasn’t as complicated as it seemed. Basically you apply the primer, then you apply the colour activator (and do a little brush cleaning in between) and that’s it! For the sake of being accurate, I’m going to share the official instructions:
First Coat: Begin On Left Side
Step 1: Once natural nail is prepped and wiped clean of oils or lotions, brush a complete layer of Primer on all five nails (as you would a basecoat), sealing the free edge and leaving nail wet and shiny. Do NOT get on cuticle. DO NOT let this layer dry.
Step 2: Apply a thin layer of Colour Activator to wet Primer on all five nails. Wipe Colour Activator on the side of the bottle to ensure thin application. Unlike polish, it flows so start away from the cuticle and seal the free edge. First layer will be sheet. Do not overwork colour during application.
Step 3: Pour small amount of Brush Cleaner into dappen dish. After applying Colour Activator to all five nails, wipe brush on Pro Touch Lint-Free Nail Wipe then place in dappen dish to clean for about 30 seconds. When soft, wipe again and place back in Colour Activator so it is ready for the next application. Repeat cleaning process after every 5 nails. If brush starts to harden, soak in Brush Cleaner again or replace.
Step 4: Repeat the three steps above on the right side: Primer, Colour Activator, wipe brush and put in dappen dish with cleaner. (The polish on the first application will be setting as you do the second.)
Second Coat:
Step 5: Go back to the left side and repeat the same steps…Primers, Colour Activator, wipe brush and put in dappen dish with cleaner. Finish with a final coat of Primer to seal in the application.
Step 6: Repeat same three steps on the right.
To Remove: Saturate cotton in Fusion Flash-Off Remover and place over entire surface of the nail. Wrap in aluminum foil sealing all the edges. Leave on for just two minutes then press firmly and rub slightly before removal. Wipe clean. No filing or buffing needed.
Now, let me tell you what I thought:
Step 1: The Primer is pretty thick so it wont be runny. Despite this, you still have to be careful not to get it on your skin and cuticles. The Primer smells exactly like nail glue and is super strong. I recommend that you use this in a very well ventilated area unless you want to start feeling loopy.
Step 2: The Colour Activator is very runny so for the love of sweet baby Jesus, use a tiny bit. It will spread and bond with the Primer like magic. The first coat will definitely be runny but don’t worry because the second coat will fix it.
Step 3: It is super important to clean the brush of the Colour Activator as indicated. It will get hard and unmanageable if you don’t. The Colour Activator will get goopy as well if you don’t keep the cap on but you can add a drop or two of the Brush Cleaner to thin it out a bit if needed.
As far as clean up is concerned, the Colour Activator comes off from the skin pretty easily with some acetone. However, if you get Primer all over the place, that will be harder to remove because it gets hard and crusty. I gave myself a pedicure and then removed it to see how difficult it would be. I am happy and surprised to report that it was rather painless using the foil method. The Primer and Colour Activator came off easily and my nails did not looked messed up afterwards. After I knew I could do this correctly, I recruited one of my friends to be a foot model because frankly, my toes are a little horrific and I would not want to put any of you through that pain. After pouring over the 6 available colors, she decided to go with Adrenaline. Are you ready for some foot pictures?
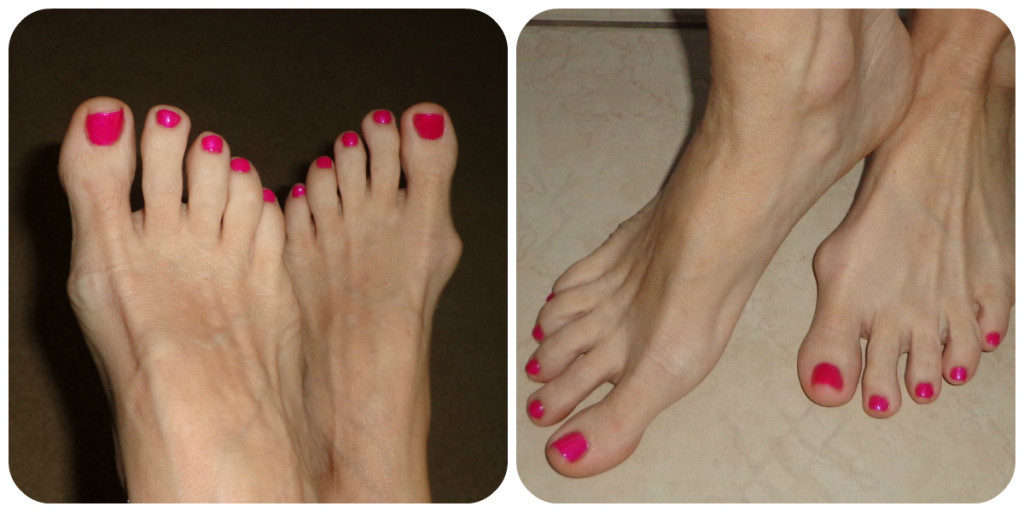

We weren’t trying to be all Foot Zoolander in these pictures…we just wanted to get some decent shots of the pedicure that I did on her. I did a pretty good job on the pedi if I do say so myself. The pedicure set in about 5 minutes, was rock hard to the touch and extremely shiny.
Even though this is a pedicure system, I decided to give it a whirl on my hands so I could give you a close-up shot of the finish and colors.
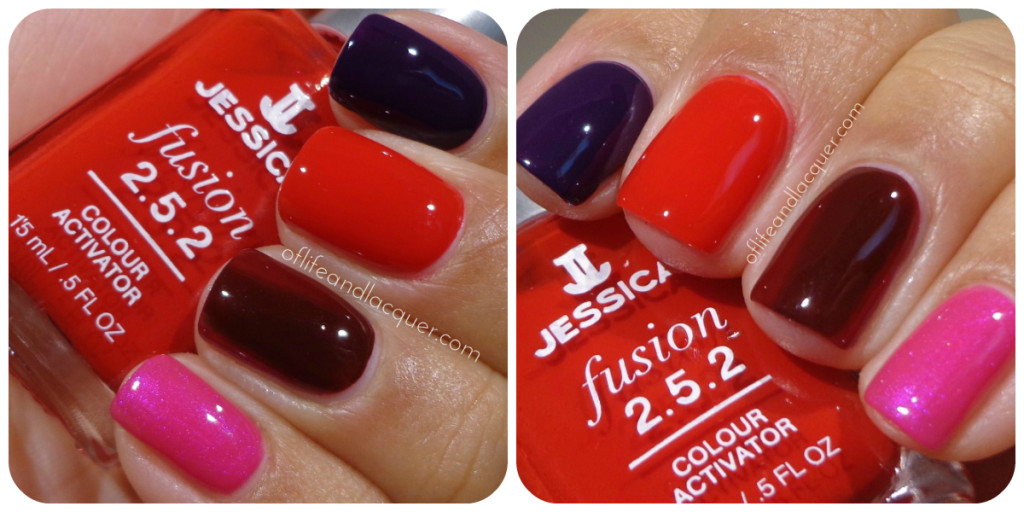
This is what the colors look like up close. This is two coats of Colour Activator plus a coat of Primer as a top coat. As you can see the colors are extremely shiny and wet looking despite being 100% dry and rock hard.
As far as removal is concerned, I think all of us nailphiles are familiar with the foil method–especially if we dabble in chunky glitters.
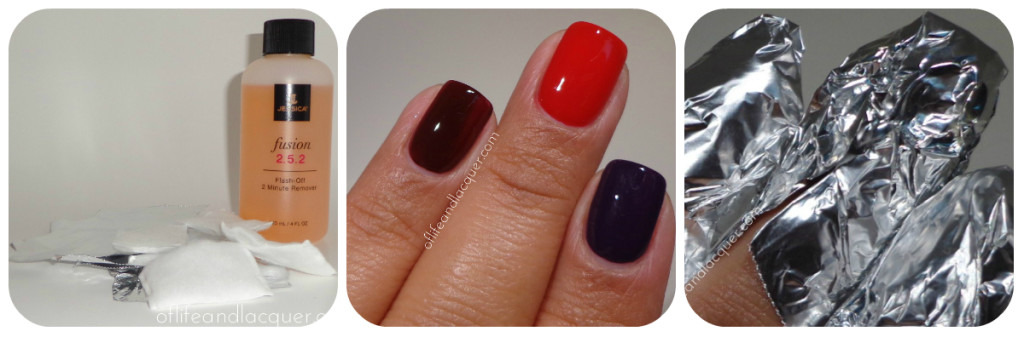
The foil method consists of soaking some cotton with remover, placing it on your nails and then wrapping some aluminum foil around your nails to hold the cotton in place and giving it time to soak the polish off. You only really have to leave the cotton on your fingers for a couple of minutes.
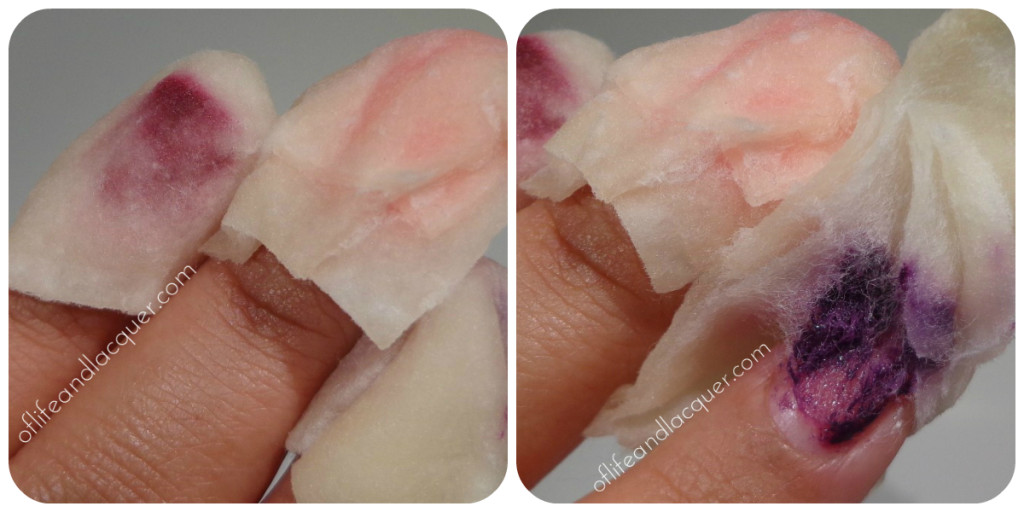
After the two minutes, I removed the tin foil and started to remove the cotton to show you how it had dissolved the polish. You don’t have to do any harsh scrubbing–just apply some pressure and rub off the color they way you would with any normal nail polish.
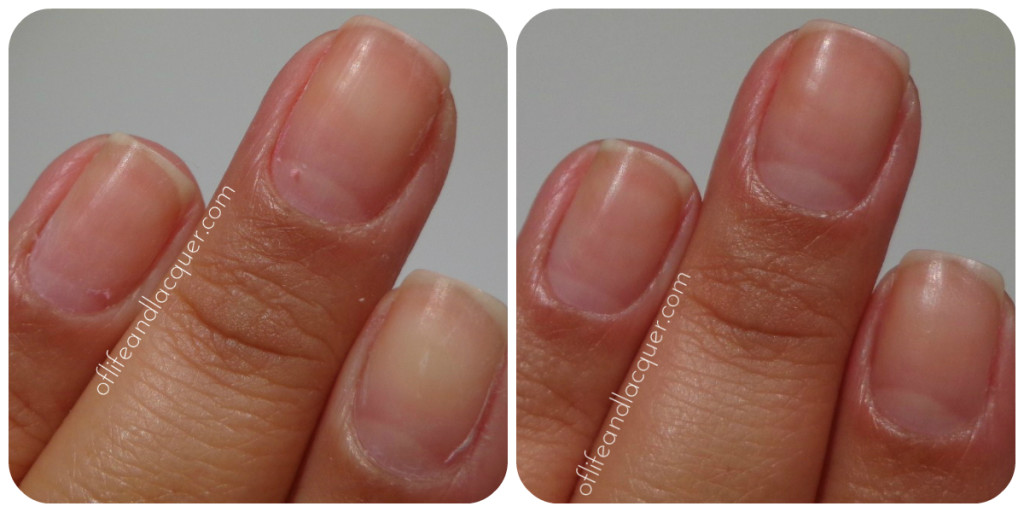
The first picture on the left show my nails immediately after I removed the cotton and rubbed off the color. I had a little residue left so I grabbed another cotton square with some remover and clean off the rest. And on the right are my nails after washing my hands and putting on a little moisturizer. As you can see, my nails look healthy–not damaged in the least bit.
So what do I think about the Jessica Flash Fusion 2.5.2 Pedicure System? As a gel newbie, I have to say that I am very impressed! Here are some of the things that I really liked:
1) The system is rather easy to use–just make sure you read the directions! As someone who routinely does not read directions and then I wonder why things blow up in my face, I found the directions were clear and easy to follow.
2) Time, time, time! I know we are all busy so being able to get this pedicure done so quickly is very important.
3) The system does not appear to be harsh on nails. I have heard some bad stories of damaged nails with traditional gel manicure systems so I was very happy–and relieved–when my nails were fine when I removed the manicure/pedicure.
4) No need of a UV/LED light. I know there have been concerns about long term exposure to these lights and what affects they may have on our skin.
Here are some things that I didn’t like:
1) Woah, Nelly the fumes are strong! I am used to painting my nails (obviously) and using stuff like acetone. The fumes from the primer were strong even for me. You have to use this stuff in a well ventilated area, and I certainly learned my lesson the first time.
2) You have to be really careful when applying the primer which can be difficult if you are a little messy with your polish application in general. If you get Primer on your cuticles, it will look like a crusty mess and will be difficult to remove.
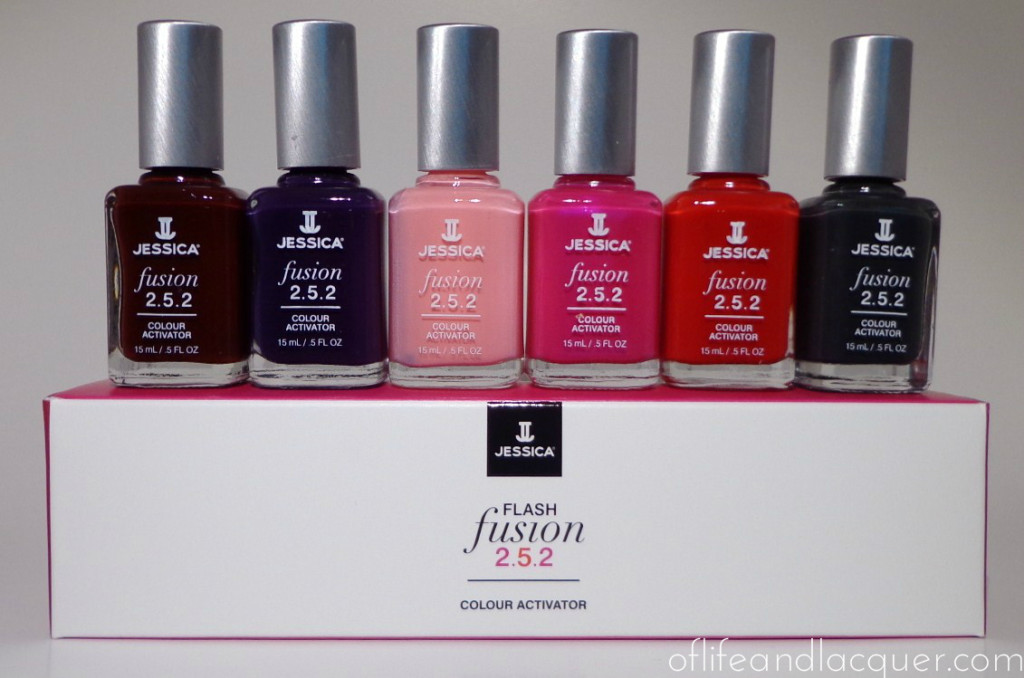
3) While the 6 color collection is nice, I think they need a little more variety. However, 12 more colors will be released this month so this is just a temporary complaint.
All in all, I think this is a great system and will definitely be using it for my pedicures. Since I still don’t have information on the longevity of the pedicure I did on my friend, I will be updating this review at the one week mark and again at the two week mark to let you know if she has experienced any issues. How do you feel about long-lasting results such as this? Do you get gel manicures or pedicures? Let me know! I’d love to hear what you think.
1/27/2013 Update Week 1: I spoke with my friend and she said that he pedicure is still intact. There is no chipping or peeling whatsoever and she said it still looks great!
For questions or to order Flash Fusion 2.5.2, you can contact Jessica at 1-800-582-4000 or online at www.jessicacosmetics.com
About Jessica:
A global powerhouse, the Jessica brand of nail care from Jessica Cosmetics International is available in more than 35 countries at the finest salons, spas and retailers and at www.jessicacosmetics.com. Jessica Vartoughian–founder and creator of Jessica Cosmetics–“The First Lady of Nails” by the New York Times and “Manicurist to the Stars” by Vogue. Her complete colour and treatment line has been designed to promote healthy, beautiful nails.
Disclosure: The products featured in this post were provided to me by the manufacturer or their PR firm. For more information, please see my disclosure policy tab here.
Hmmmm I’ve never had any interest in gel systems either because I change up my nails way too often for it to be practical for me. Plus, I wouldn’t have much of a blog if I was posting only once manicure every two weeks. For people who wear manicures for lengthy times them yes this makes total sense to try. I usually leave my toe nails the same color for weeks too…mostly because I rarely see my feet cause they’re always covered except in the summer and also they last for a very very long time. Even as a pedi system this type of product isn’t really for me.
Frosso recently posted..China Glaze Surreal Appeal and Some Striping
Totally agree on the gel mani thing. I can’t even imagine doing that even if I wasn’t blogging. lol I am definitely looking forward to using this during the summer when I pretty much live in my flip flopw. It’s just so easy to use but yeah–it’s definitely not for everyone. I now wonder if my friends aren’t going to ask me for pedis…haha
Boo to the fumes but I mean really… What can a person expect, I guess. It’s some strong shit! Haha. I would actually use this for my toes cuz I hate when they look all chipped and terrible, but even more than that I hate painting them! Haha. I can’t believe you showed feet tho. You probably lost some readers. You think it’s fun parading your friends’ feet all around in our faces? I think it’s selfish. Feet.
Nicole recently posted..Stars Made Of Stars? Mind= blown. 🙂
OMG…LMAO…You are my comment hero. Hahahahahahahahahahahaha! I think we are in the same boat–yes to gel pedicures and no to gel manicures. Like Frosso said: we’d have no blogs if we had gel manis. lol But for real…the fumes are strong.
Thoe are pretty colors. For someone like me who uses their hands a lot the gel is good. less chipping!
I agree, I have never had any desire for the gel system because I change so often, I would however though probably use it on my toes. As much as I change my hands, even during summer, Is till go about a week to sometimes two with my toe colors. These colors are really prety!
Amanda (mae) recently posted..NOTD 107 – Snow Angel, Shawn
I only do gel manicures if I know I’m going to be traveling, but sometimes not even then.
I am so with you on the pedicures. I feel kind of stupid spending $ on them, but then if I do it myself, it takes like two hours and I’m like, “Why am I spending all this time and going through this weird positioning when I could just spend $20 and be done in like 45 minutes?” Time vs. money on that particular day, I guess.
I have not done a gel pedicure, though, so this is pretty intriguing! The cons I see are with the primer – the smell and the “try not to get it on your skin” aspect because I’m pretty horrible with that. The runniness of the color worries me a bit, too, because, again, I am a spaz. However, I also agree with your pros, so it’s still quite interesting to learn about.
Foot Zoolander, hahaha!
Your toenails and fingernails look amazing! Great job on using the gels. Gel is become wildly popular and is often times the #1 request in my salon. This DIY could lessen my business 😉
Yes, they are getting very popular! Thank you for stopping by!