Tag: OPI

OPI DS Sapphire

OPI DS Sapphire

PurchasedMyself


I’m a lucky girl. And by lucky, I mean polish lucky. I have so many amazing dusties in my area that I always get excited when I go because I can feel that I’m going to find something amazing. There are certain stores that I wish I could just take a stool, sit on the floor and just go through everything. I am convinced that they must have some amazing polishes hidden in their ancient stashes. Unfortunately, some of the stores are super cramped and tiny so it’s not like I can spread out and take over the entire store. I’m sure that as soon as they see me coming, the owners must be thinking: “Not this asshole again.” Anyway, today’s polish was found at one of my dusties. In fact, they had like 4 DS Sapphires and 4 DS Signature and I bought them all. Don’t tell me that you wouldn’t do the same. OPI DS Sapphire is one of the old OPI linear holos that are sadly discontinued and will cost you an arm and a leg on evilbay. It’s so lovely! Let me get to the swatches.

OPI DS Sapphire 1OPI DS Sapphire 2
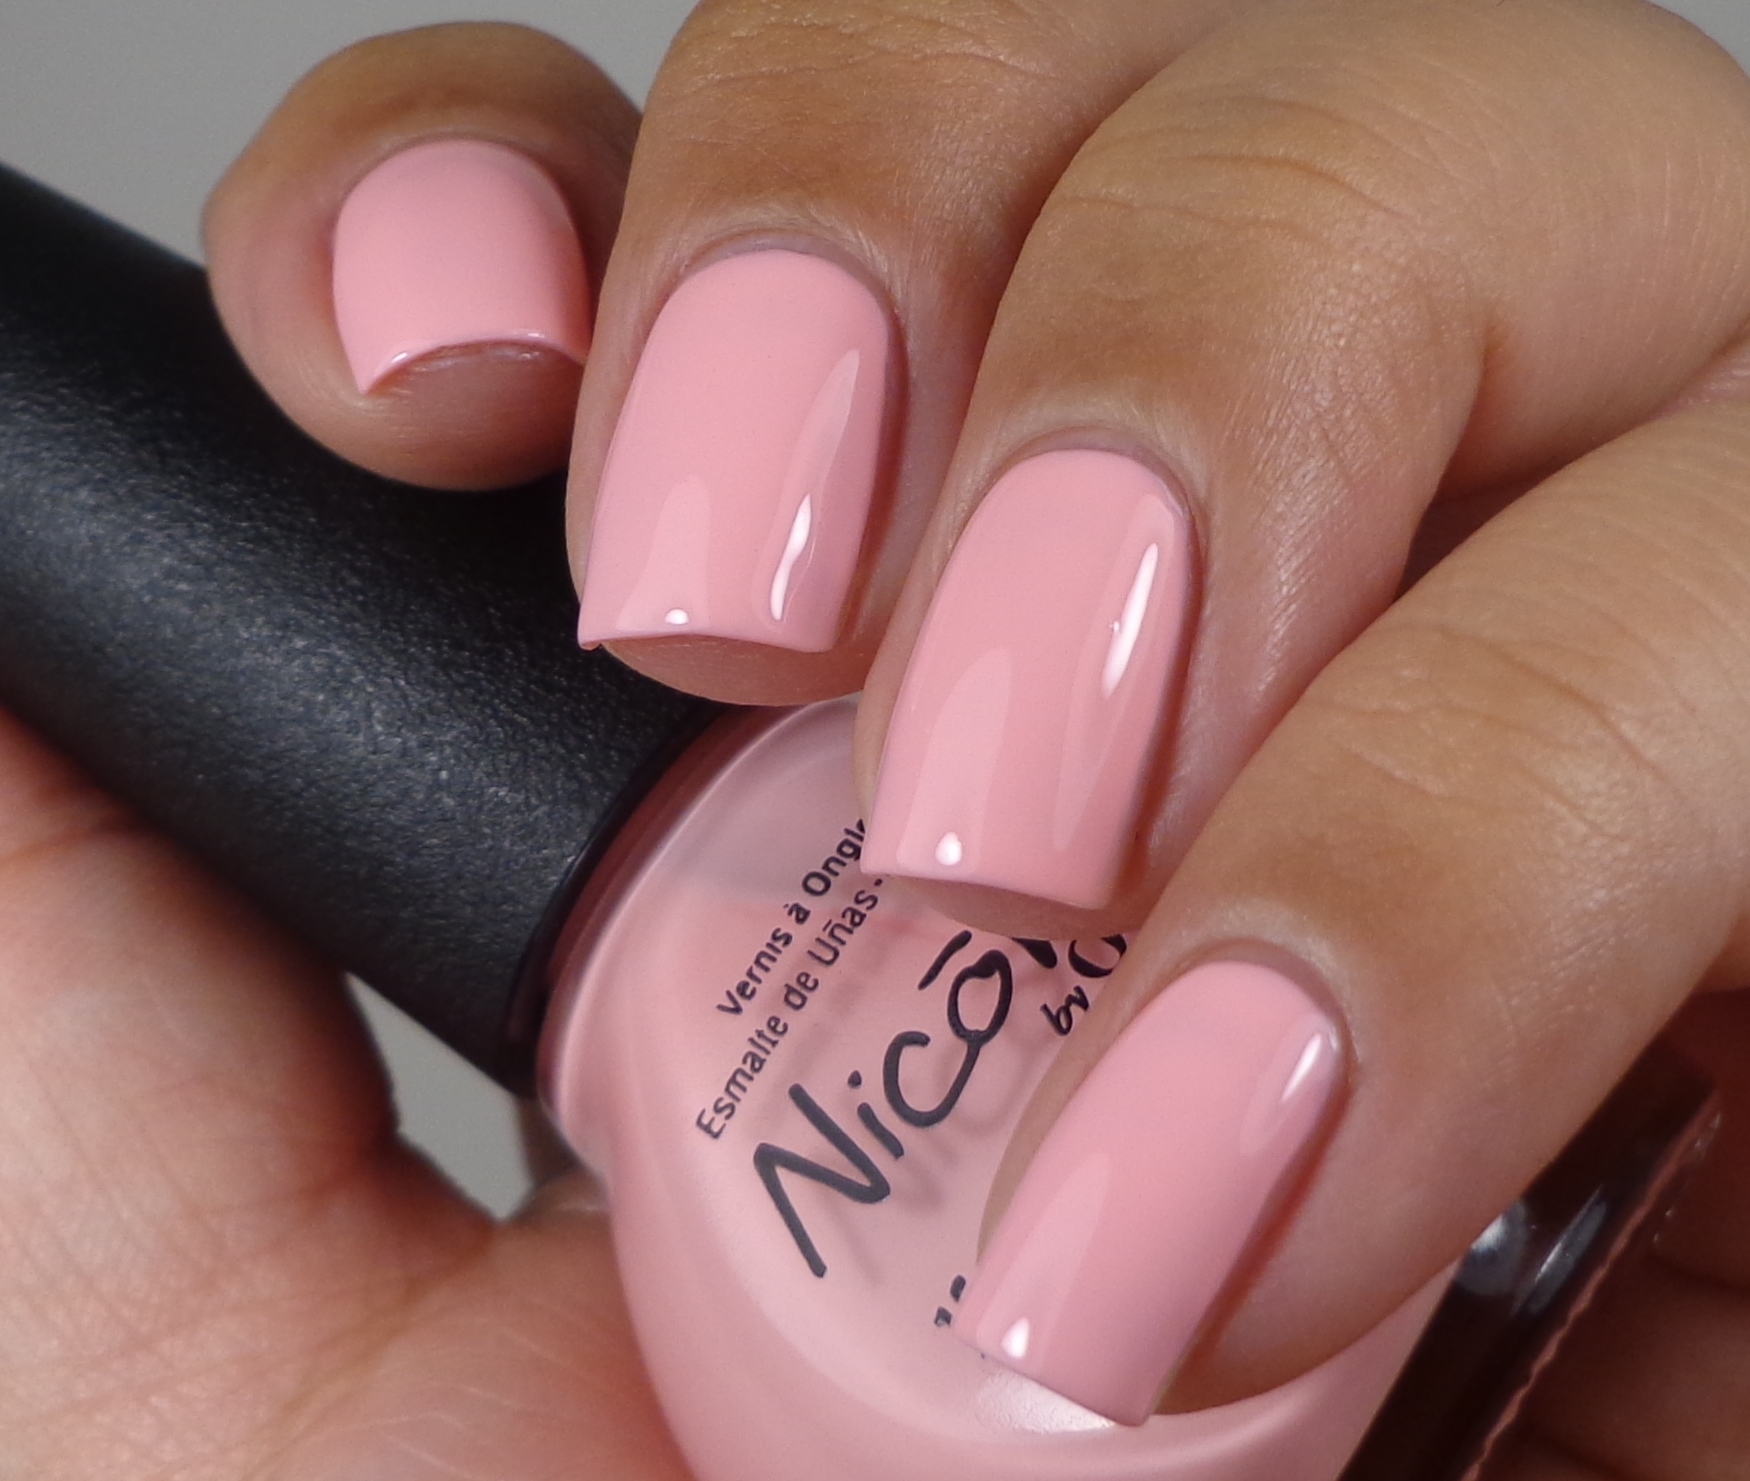
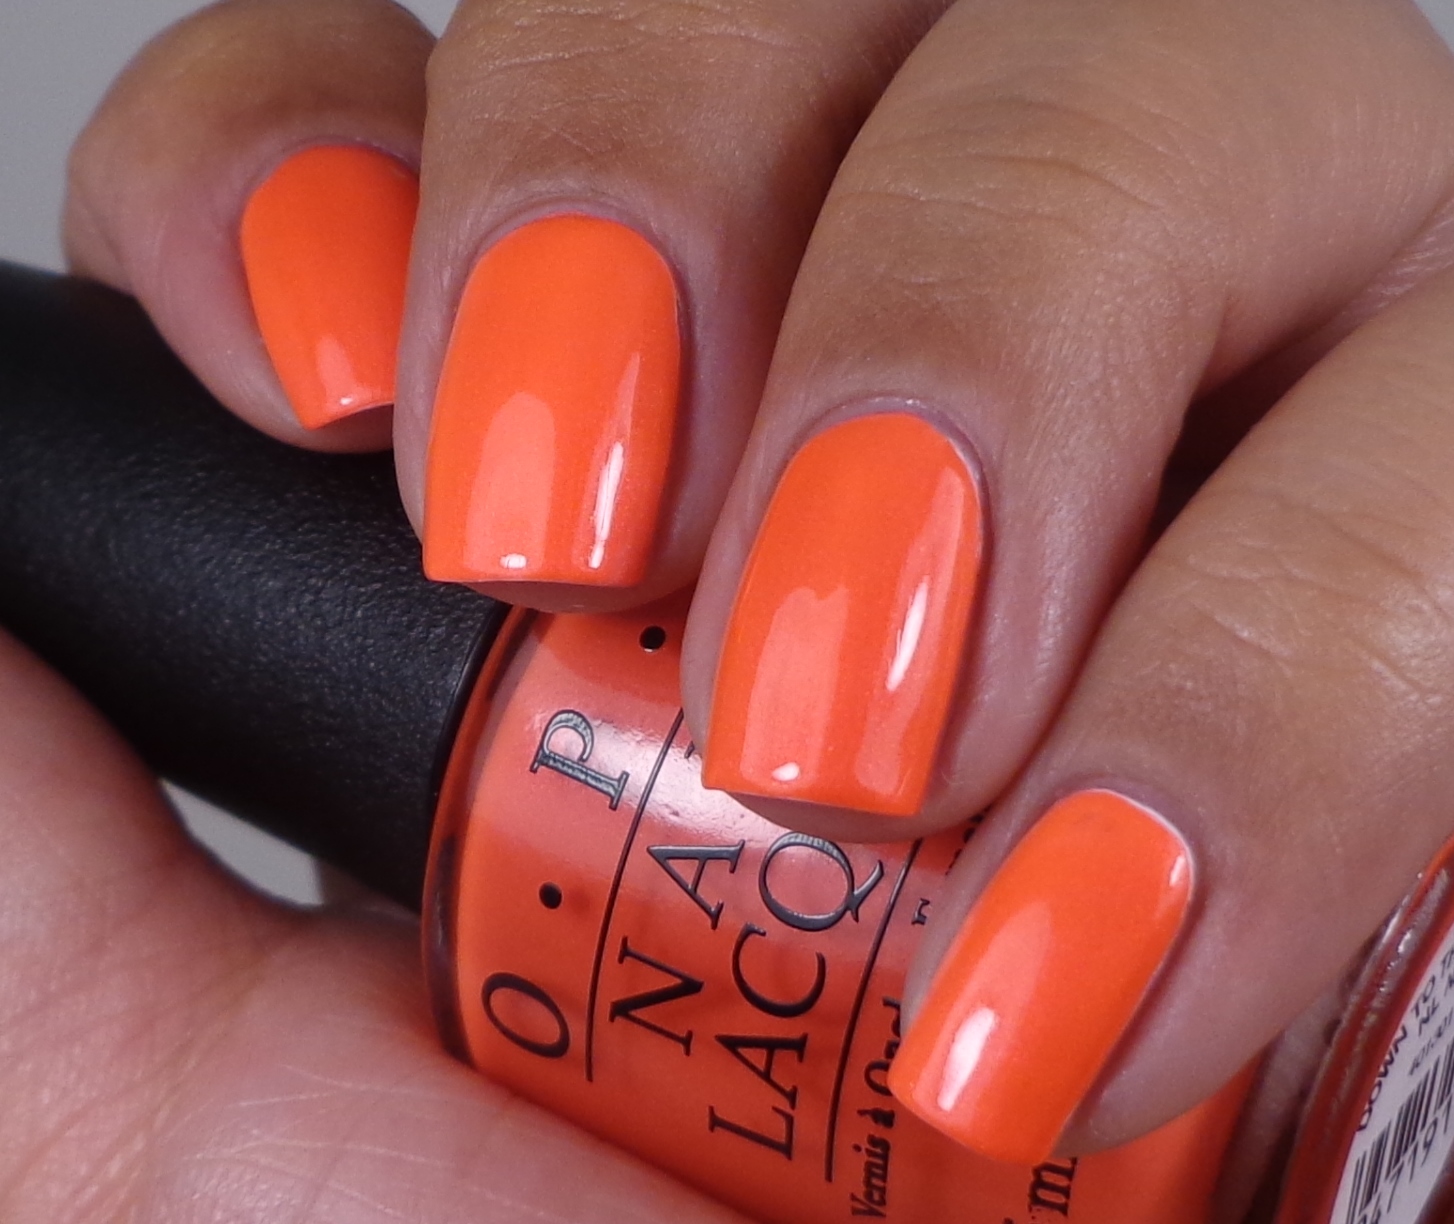
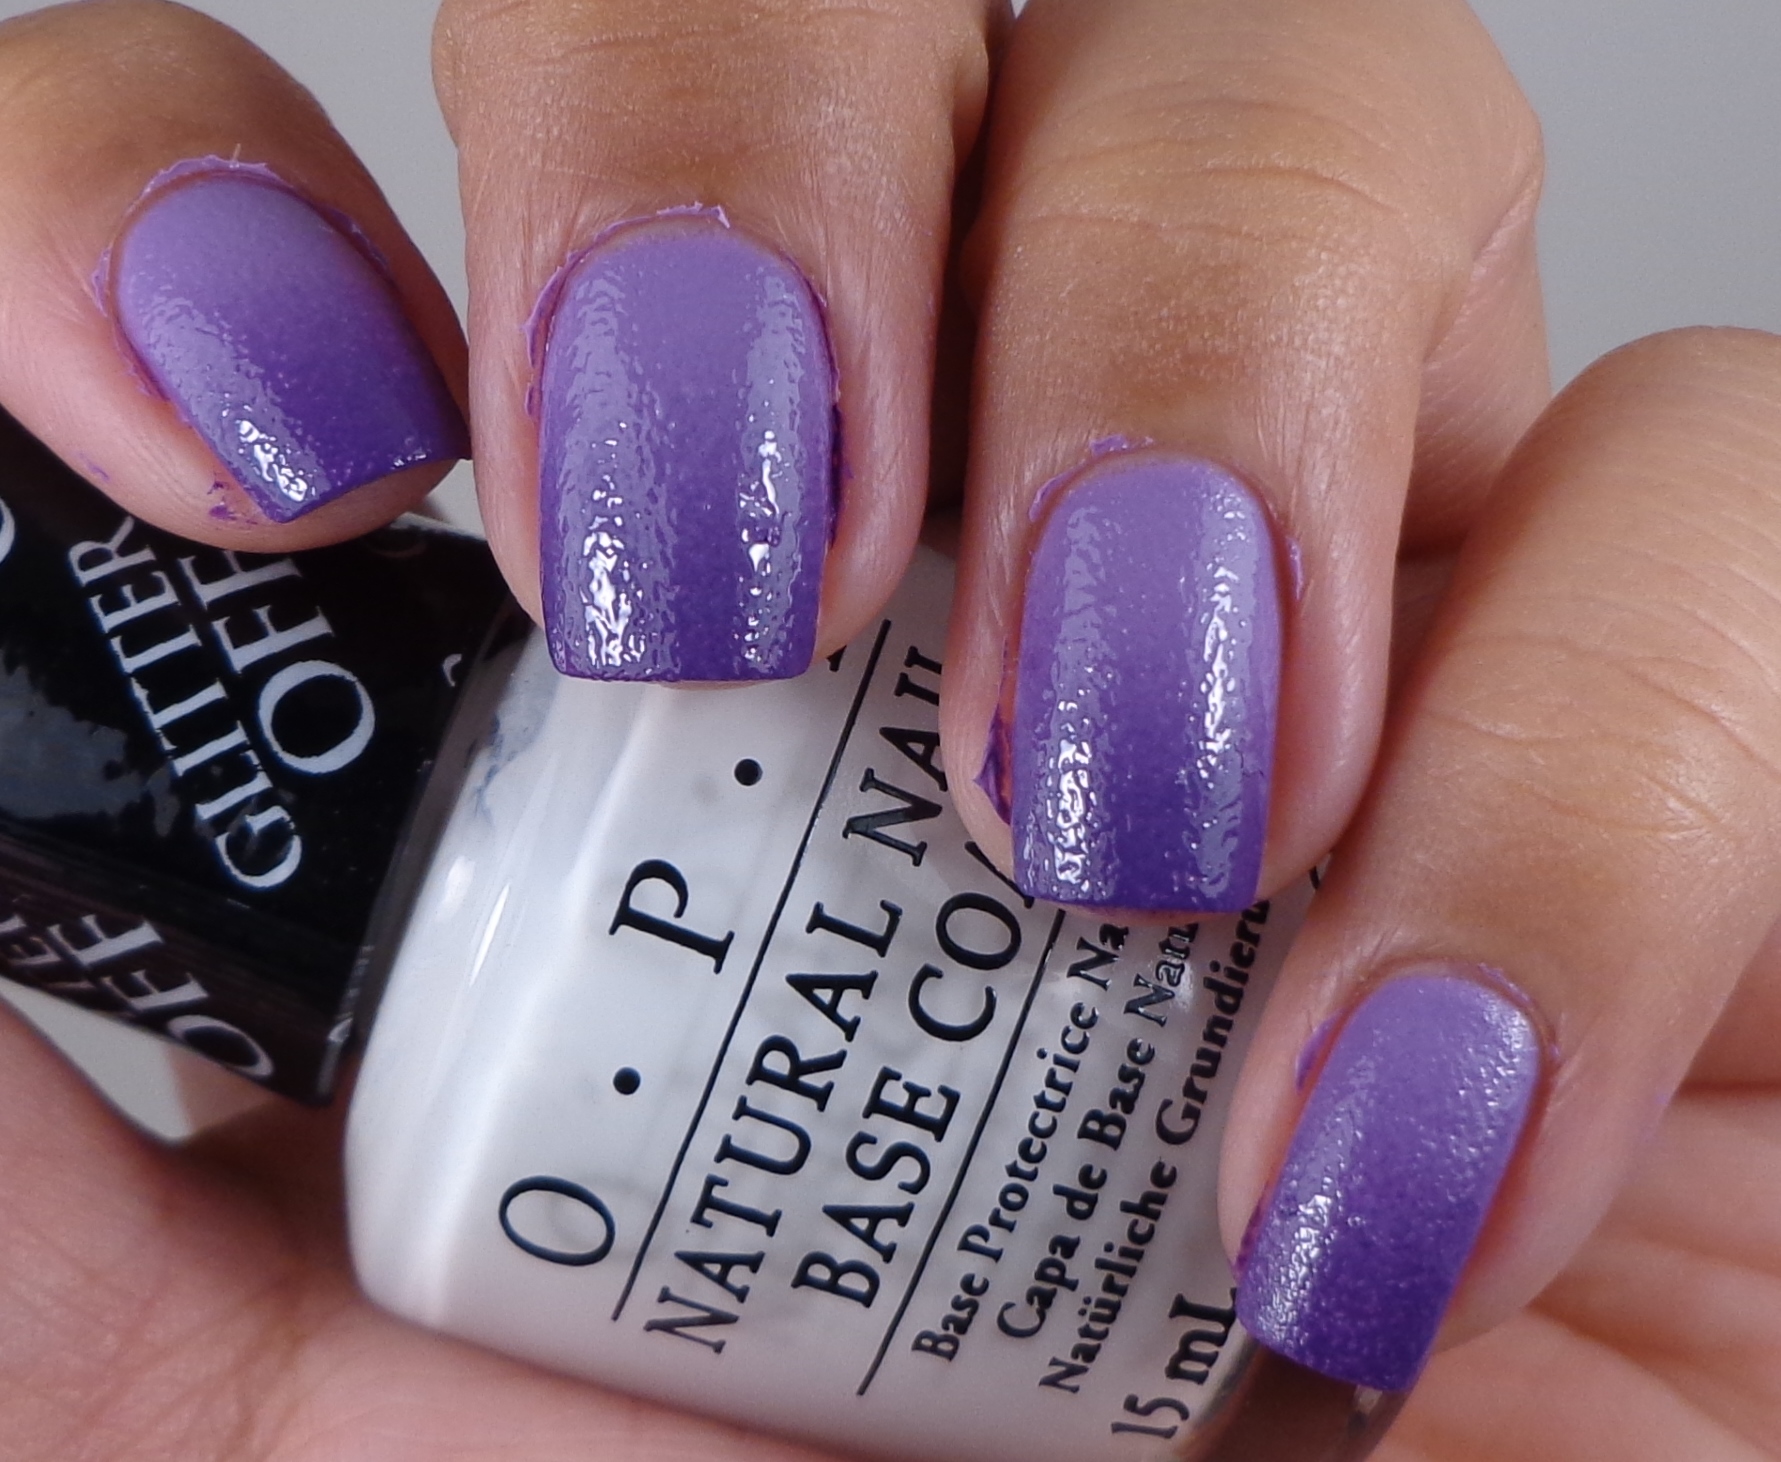
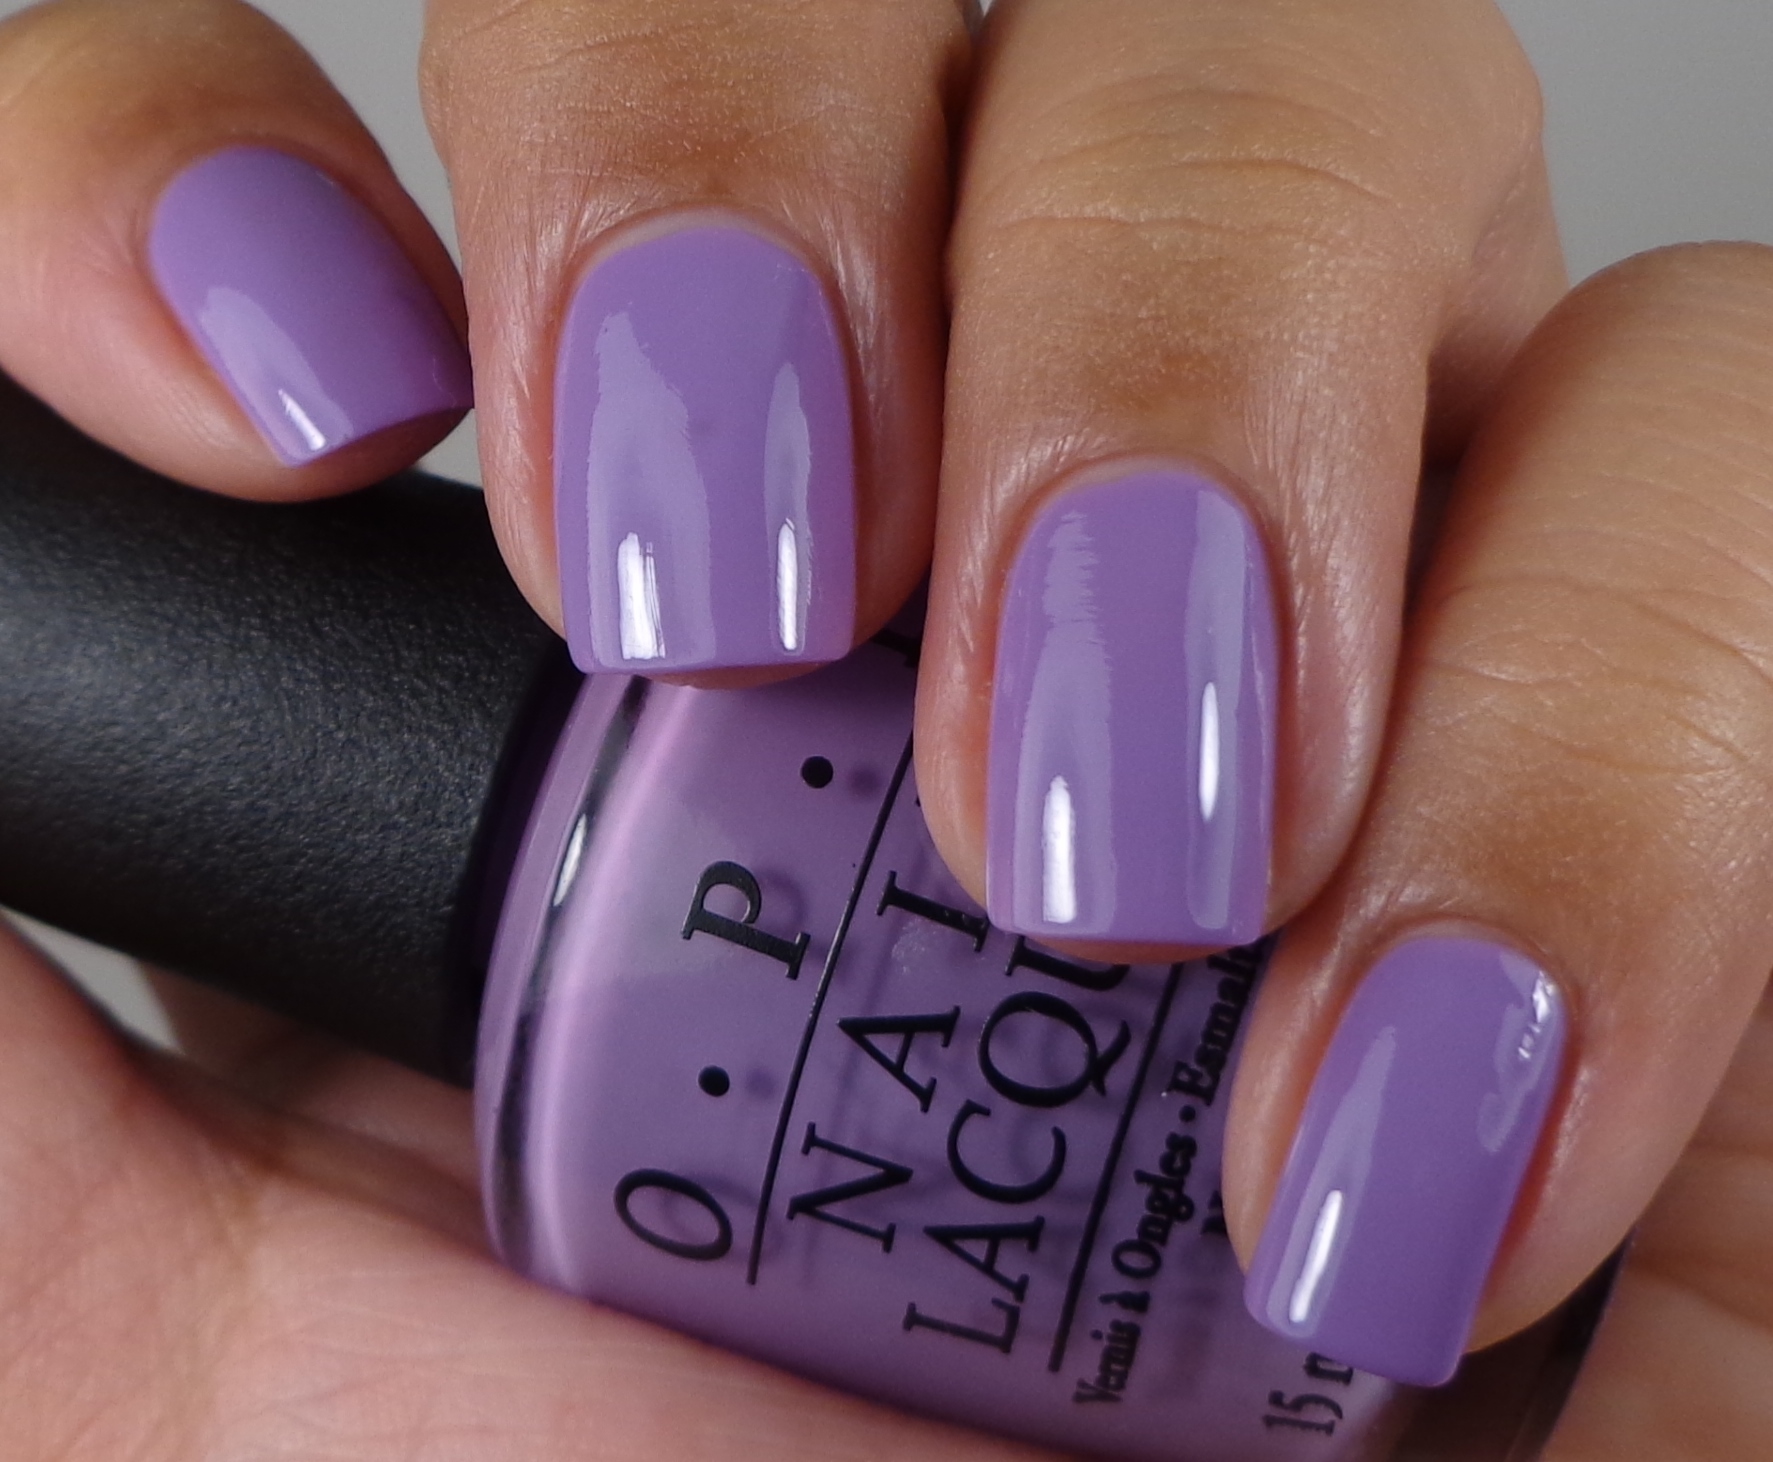
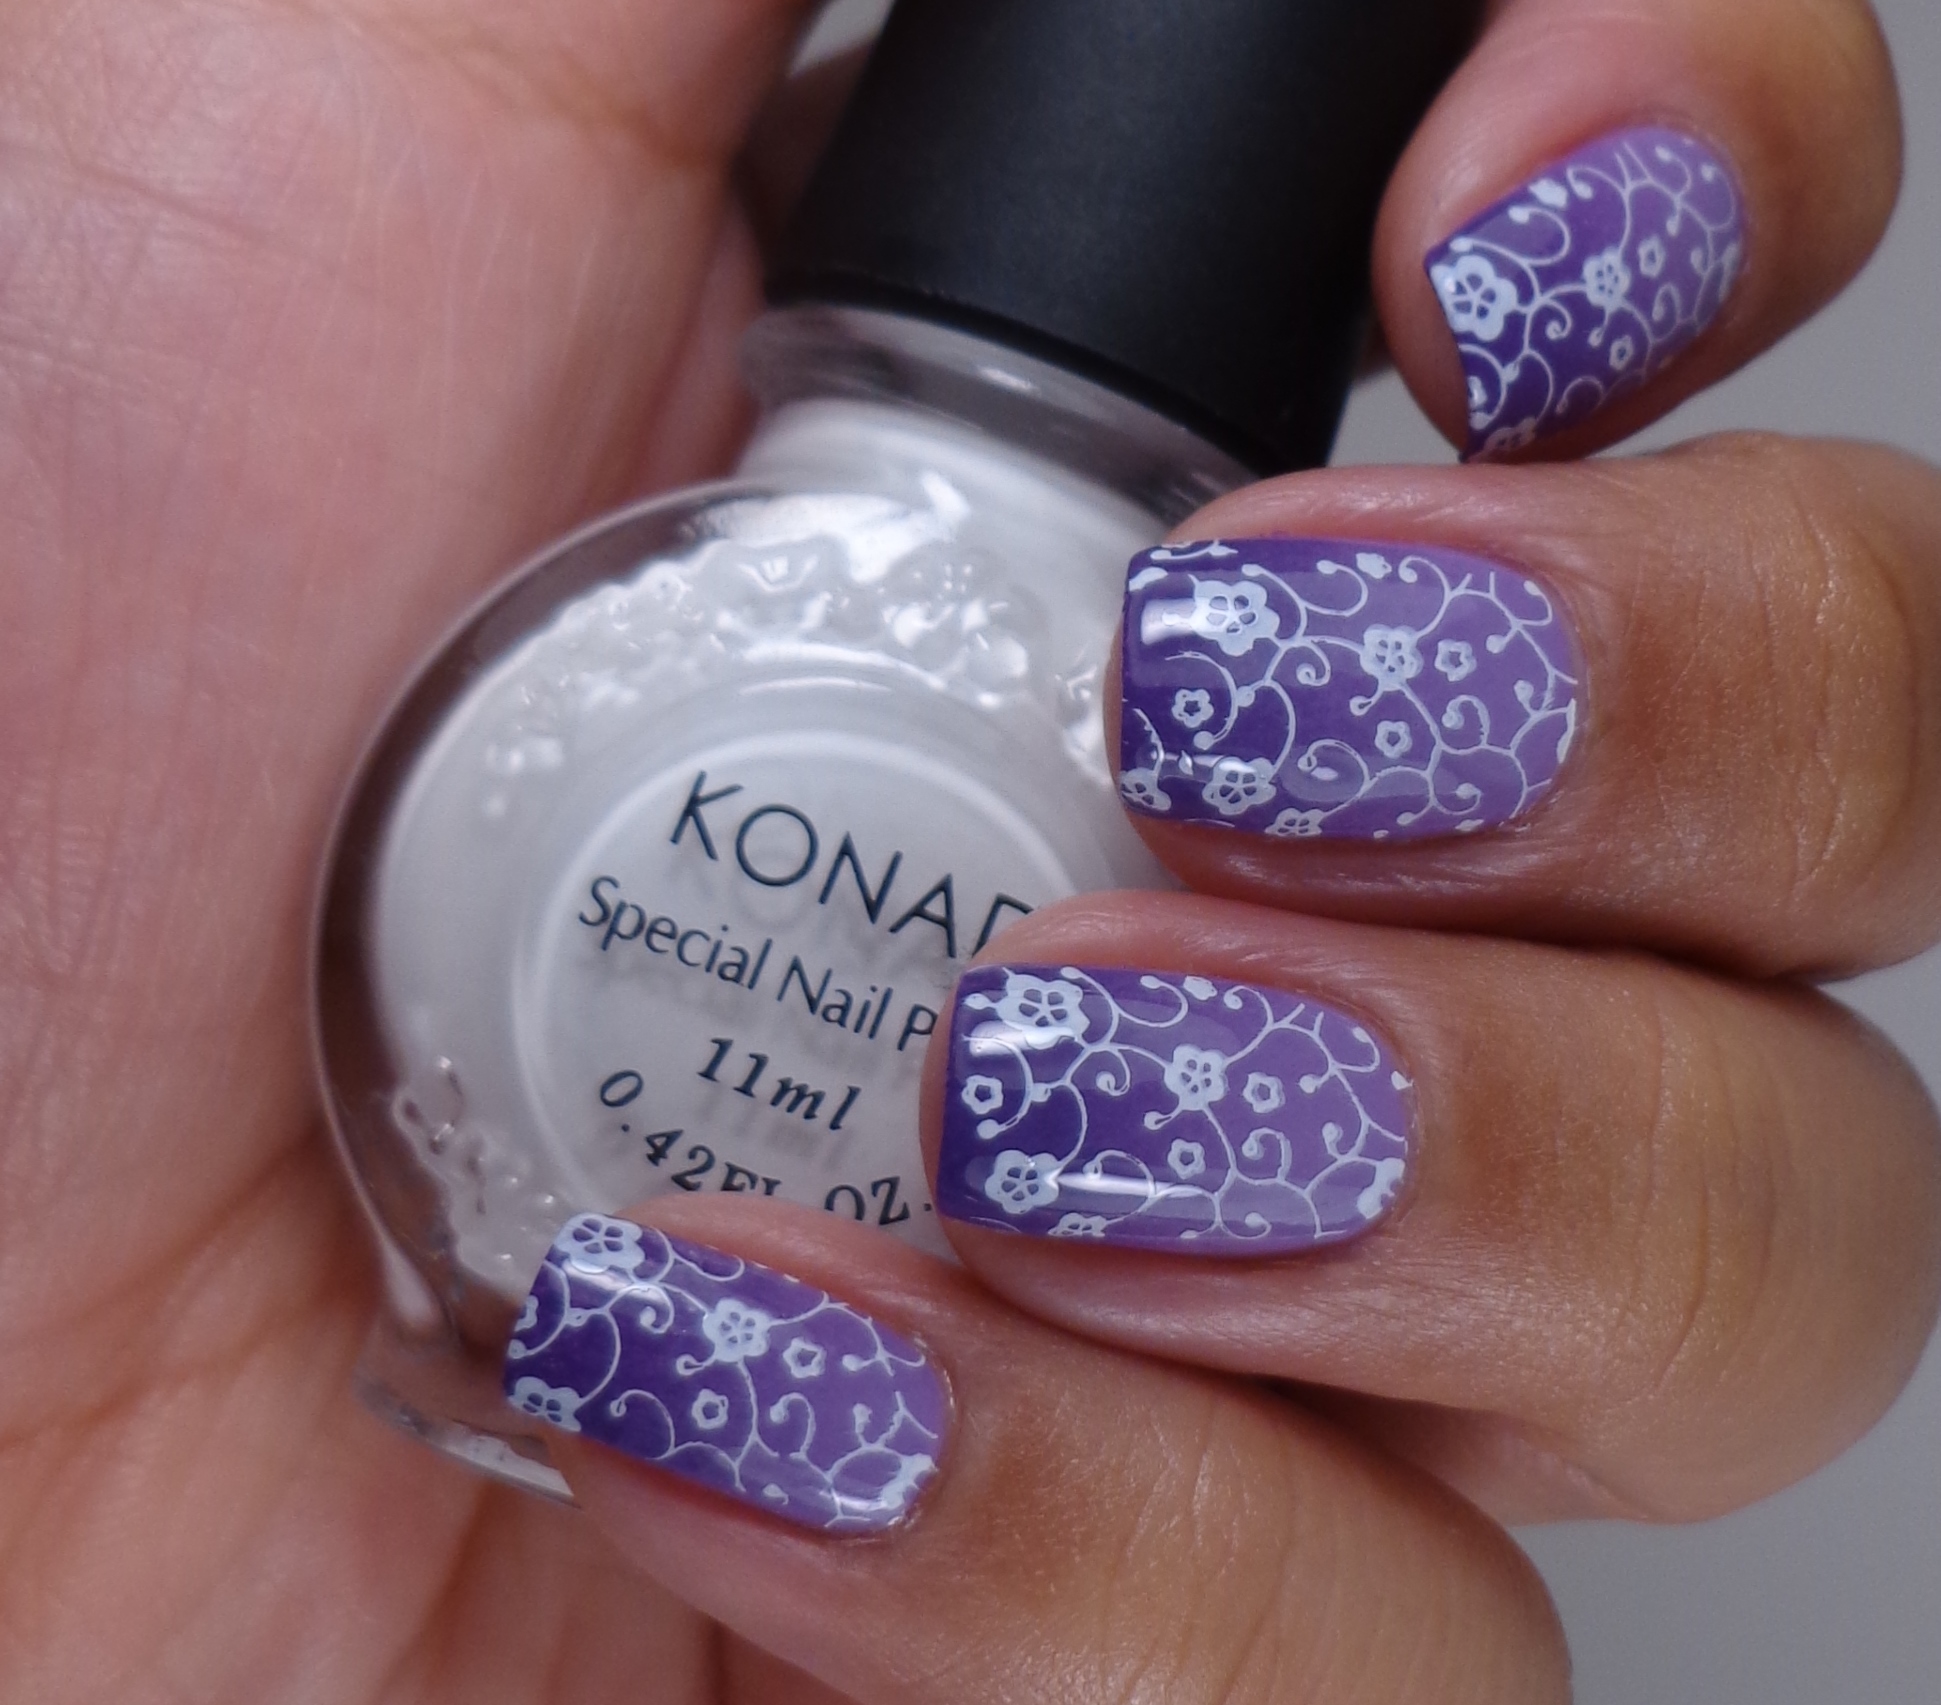
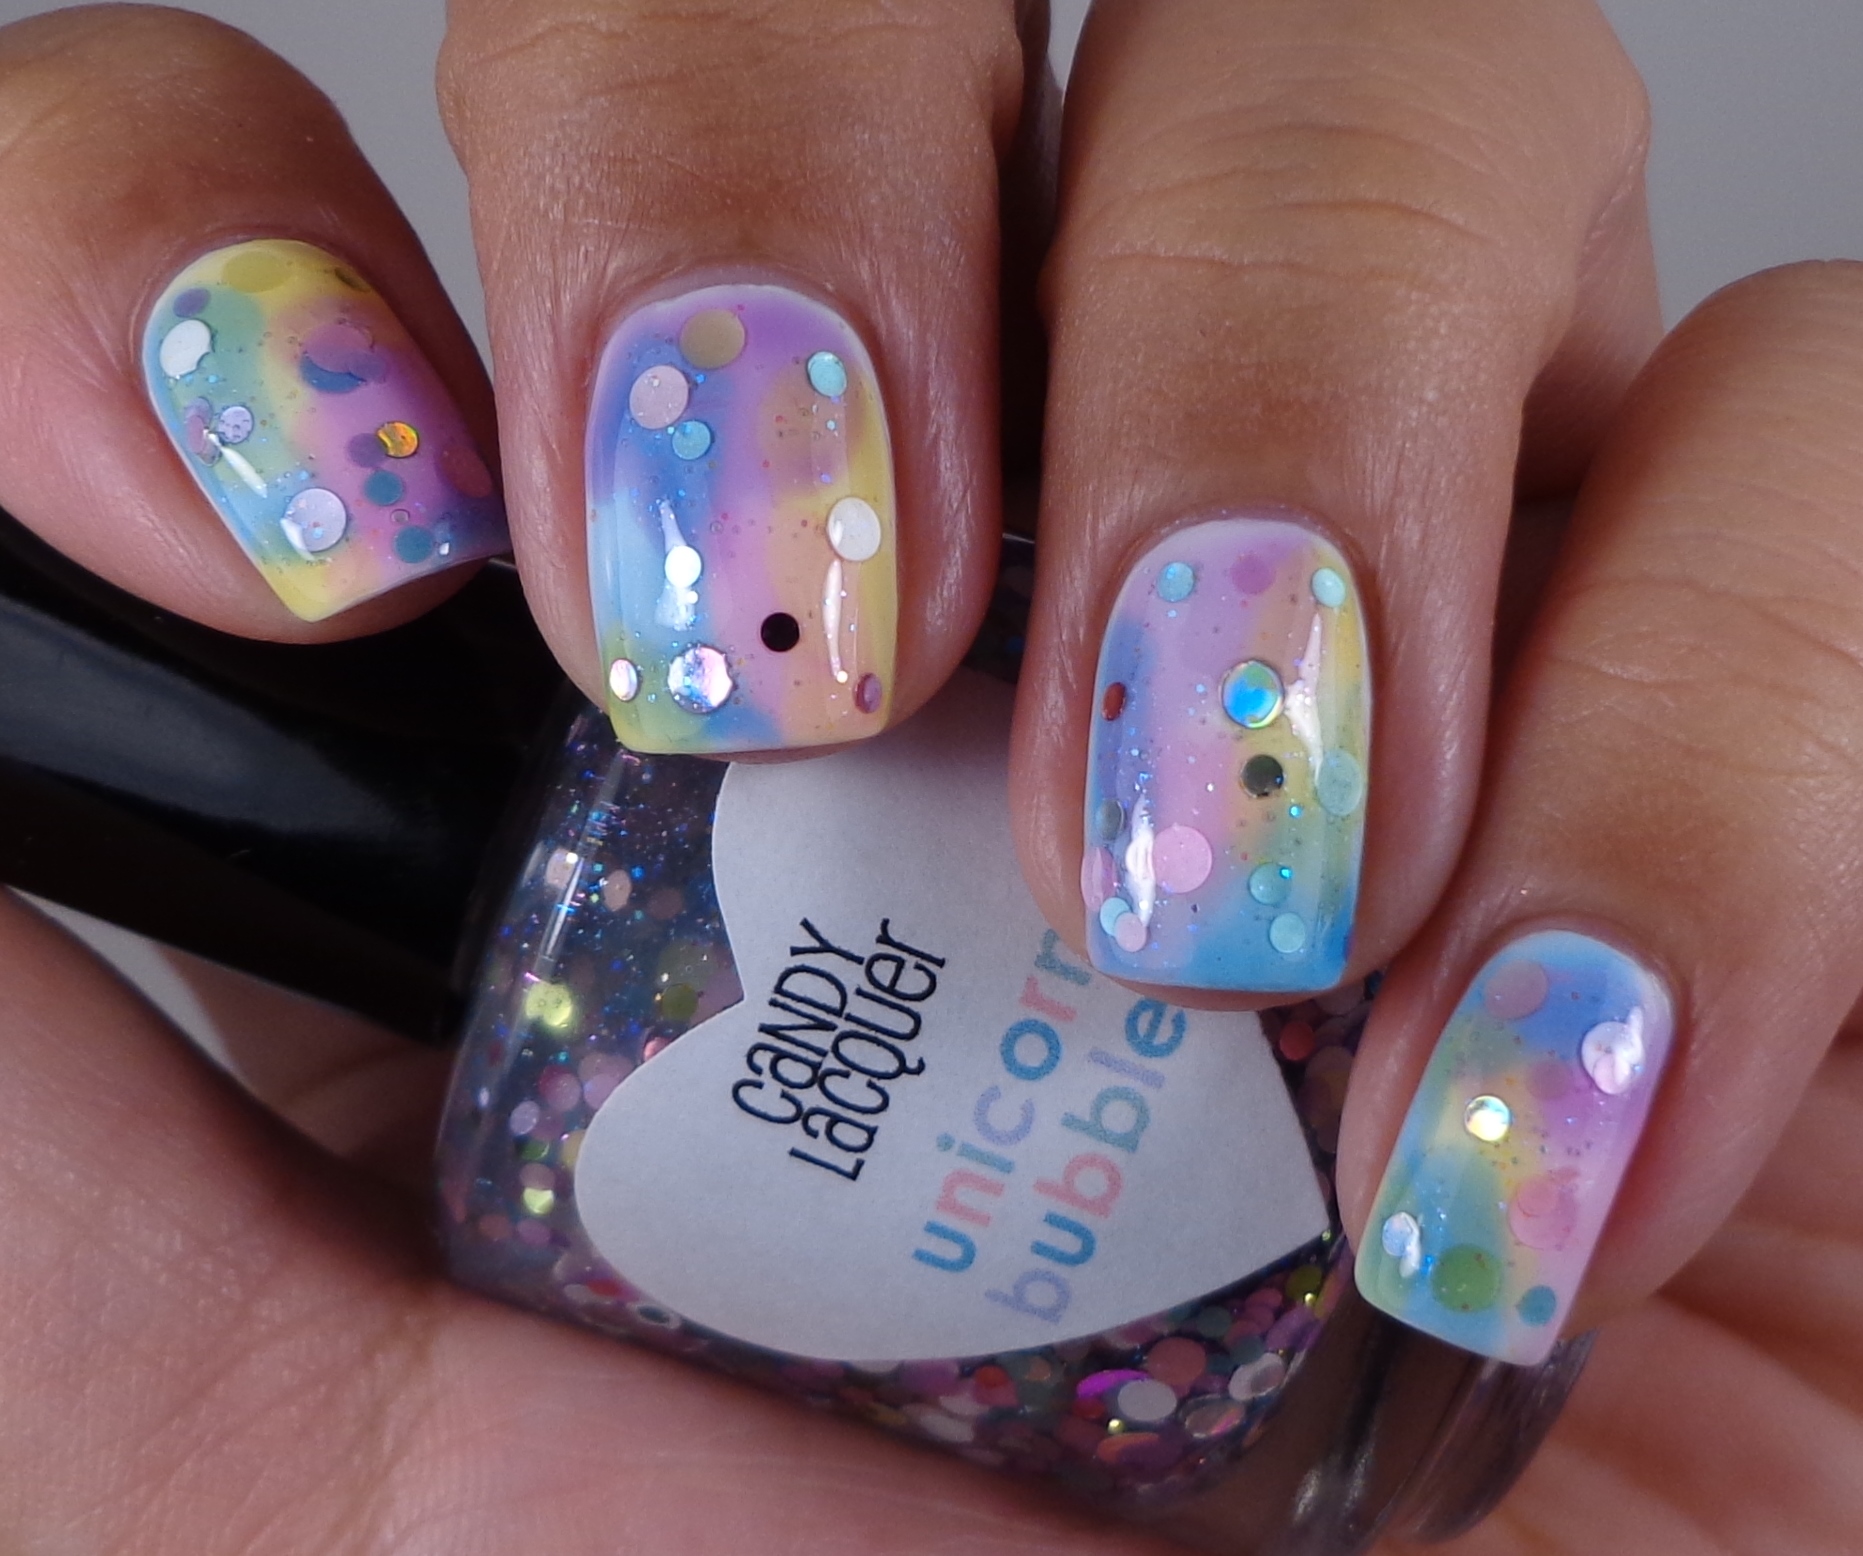
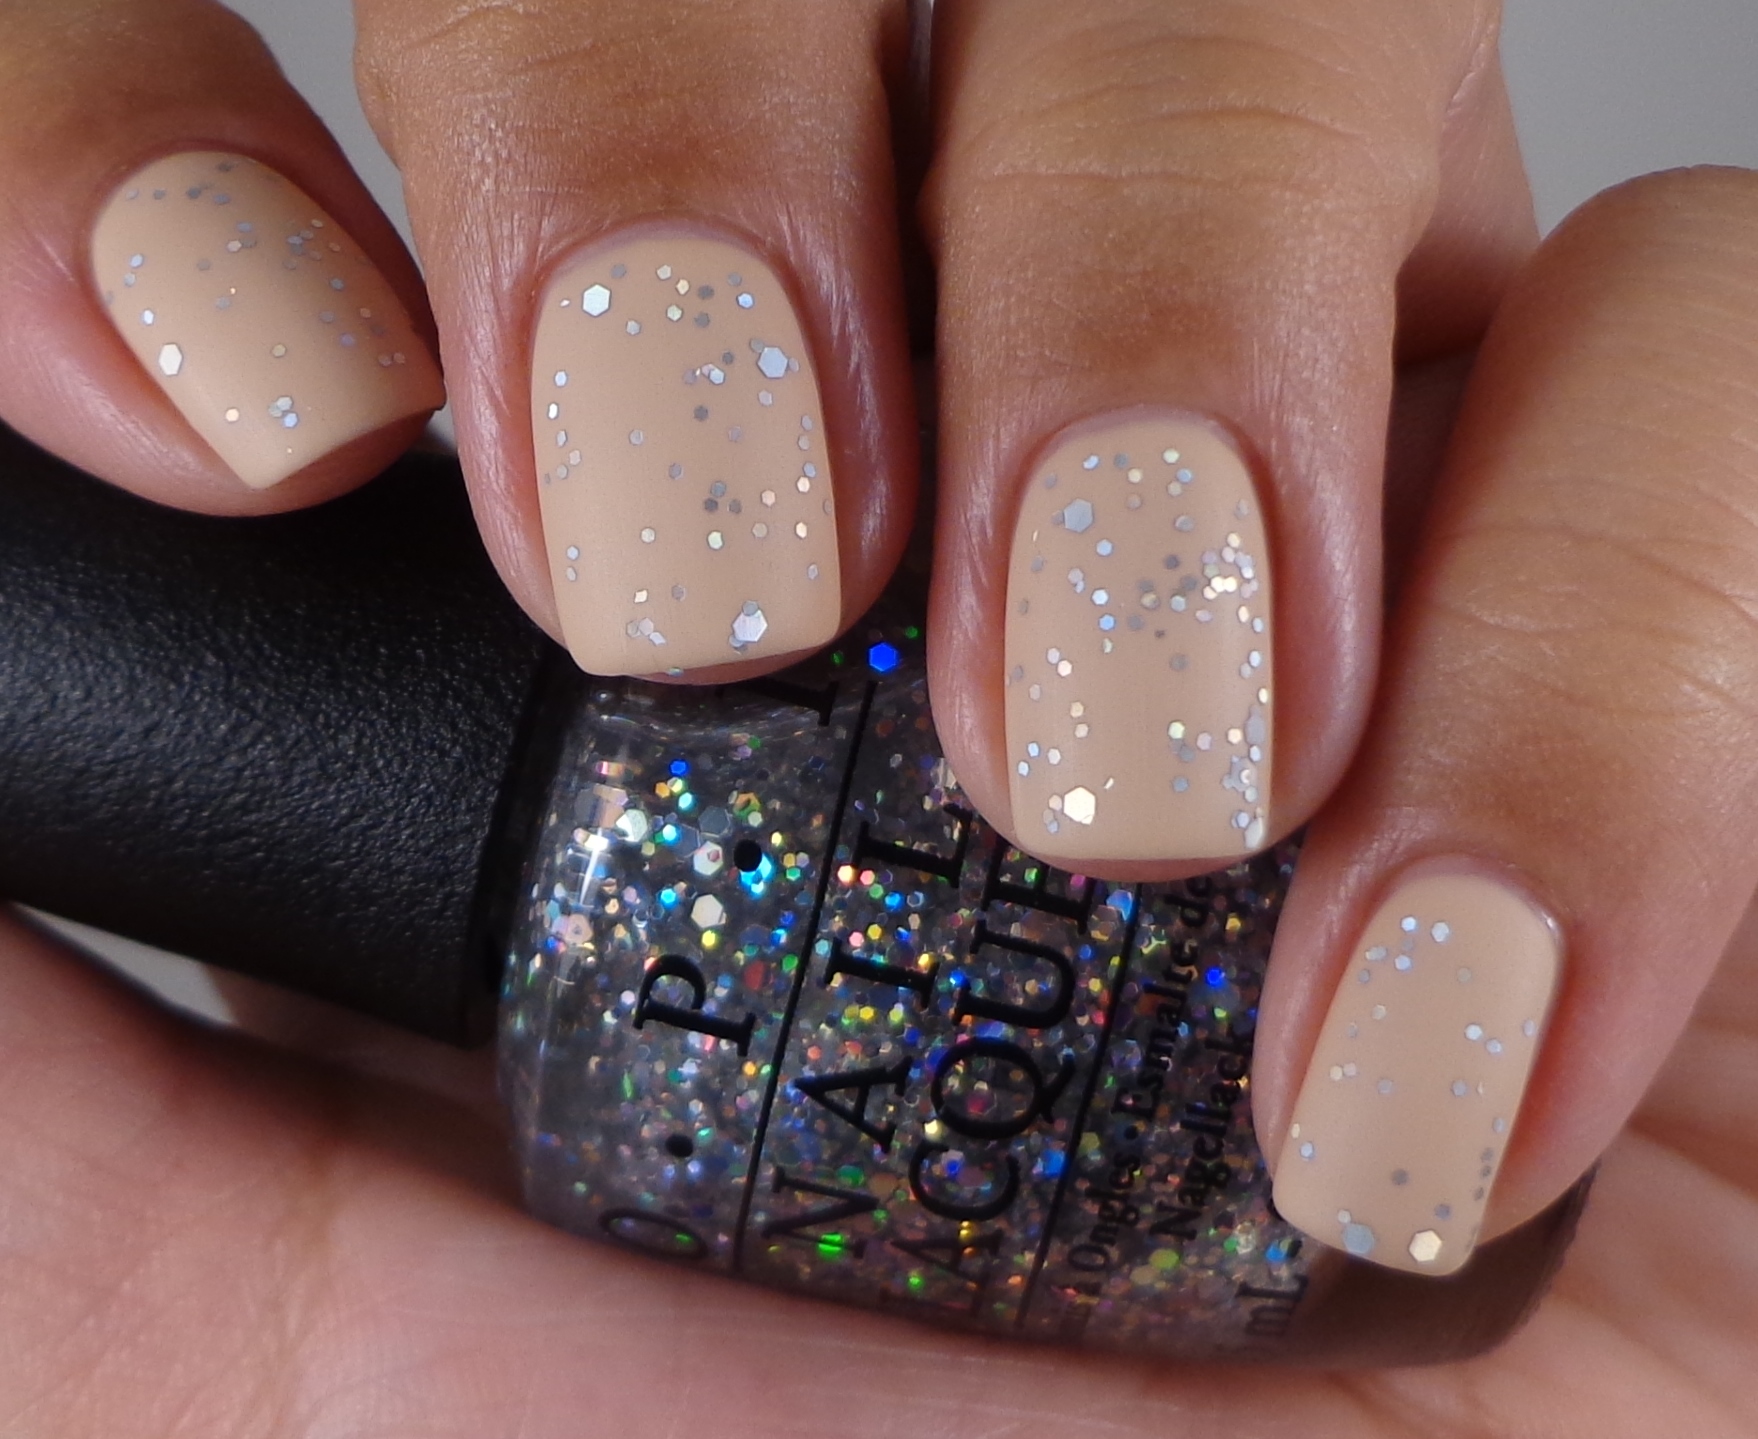
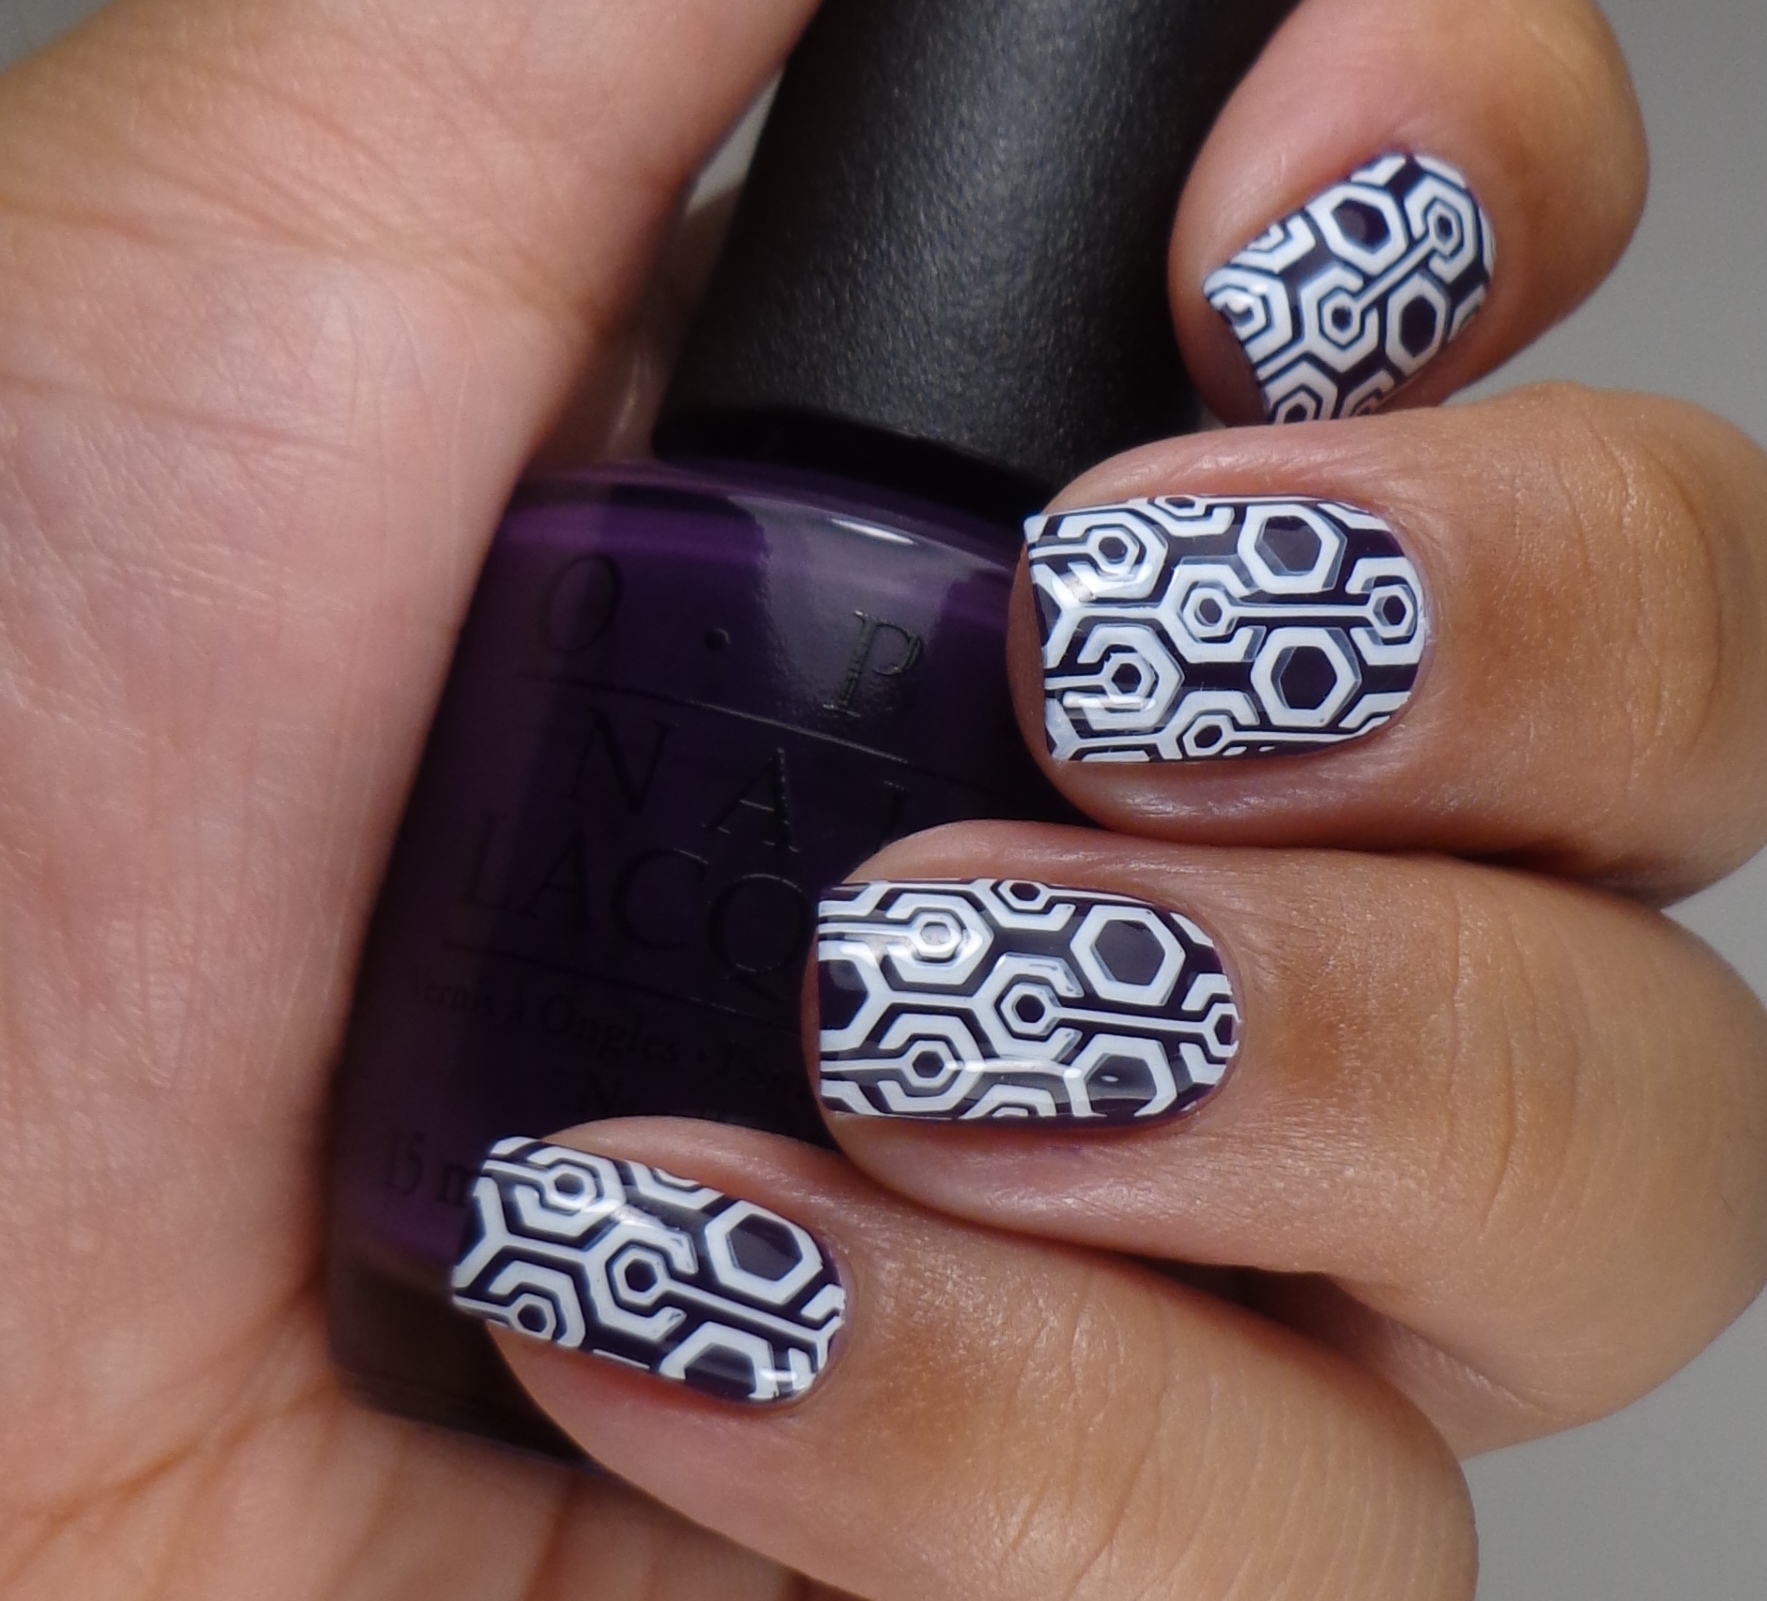
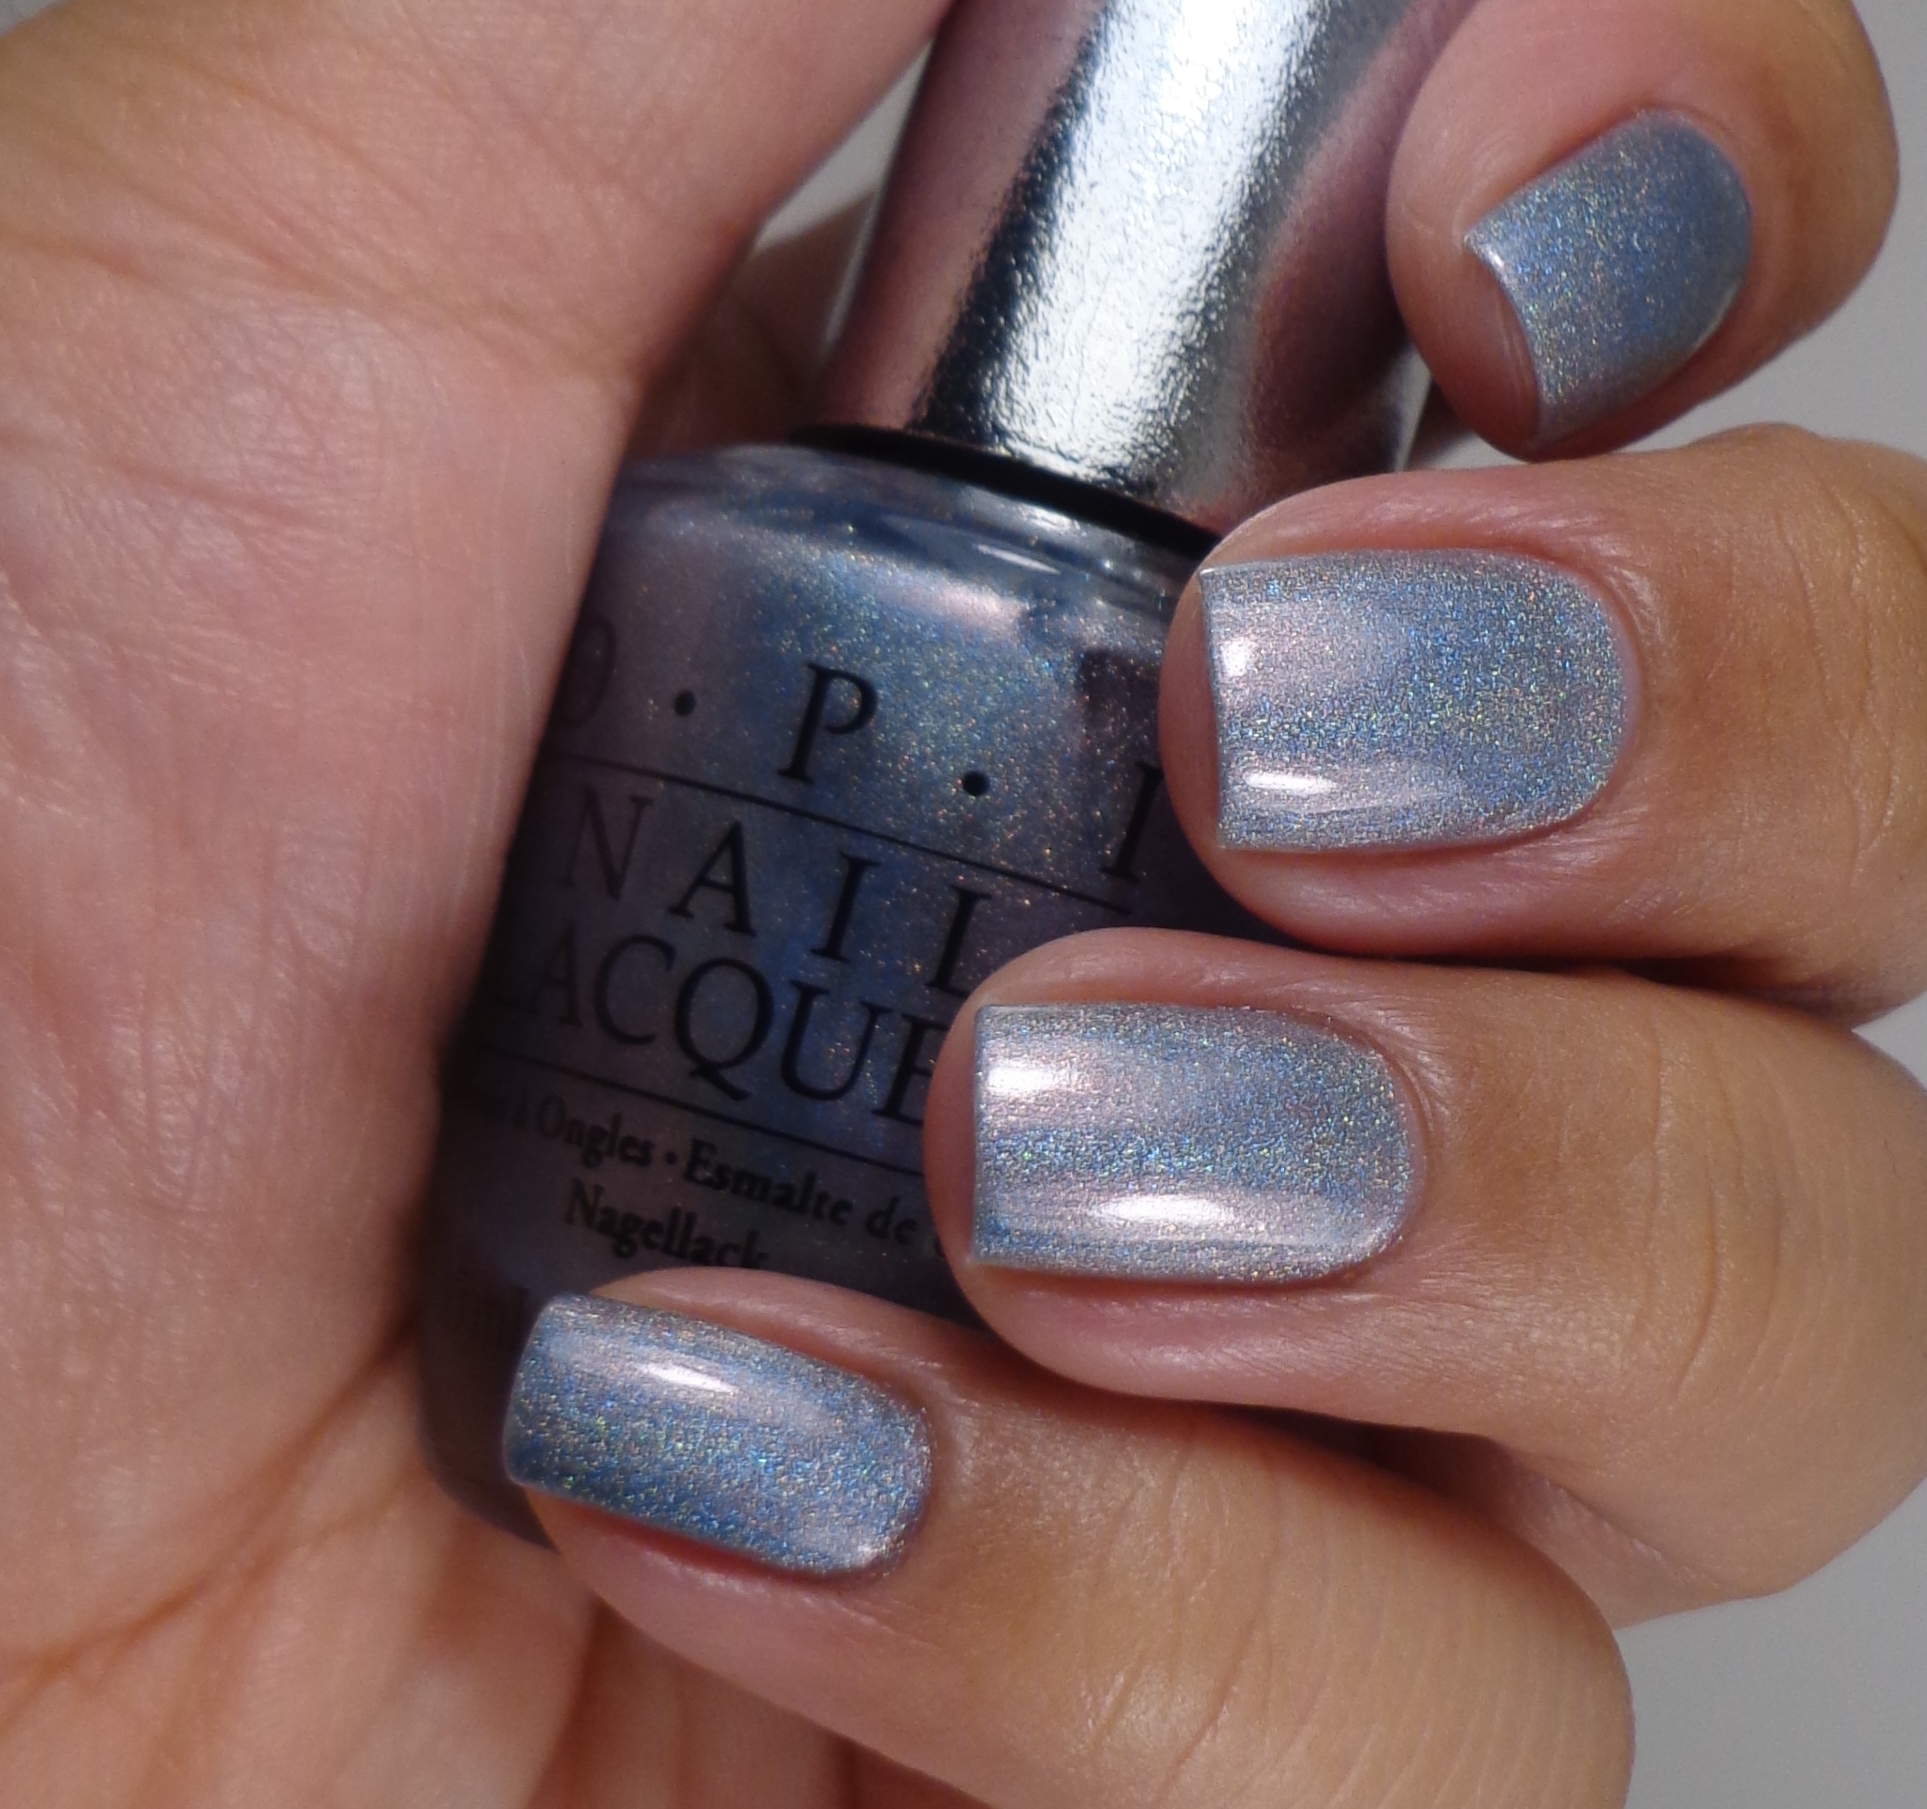
This polish is rather sheer so I had to apply 3 coats to get even coverage. This type of lighting definitely does not show off a holo polish so I had to use different lighting for the following pictures.

OPI DS Sapphire 3OPI DS Sapphire 4OPI DS Sapphire 5
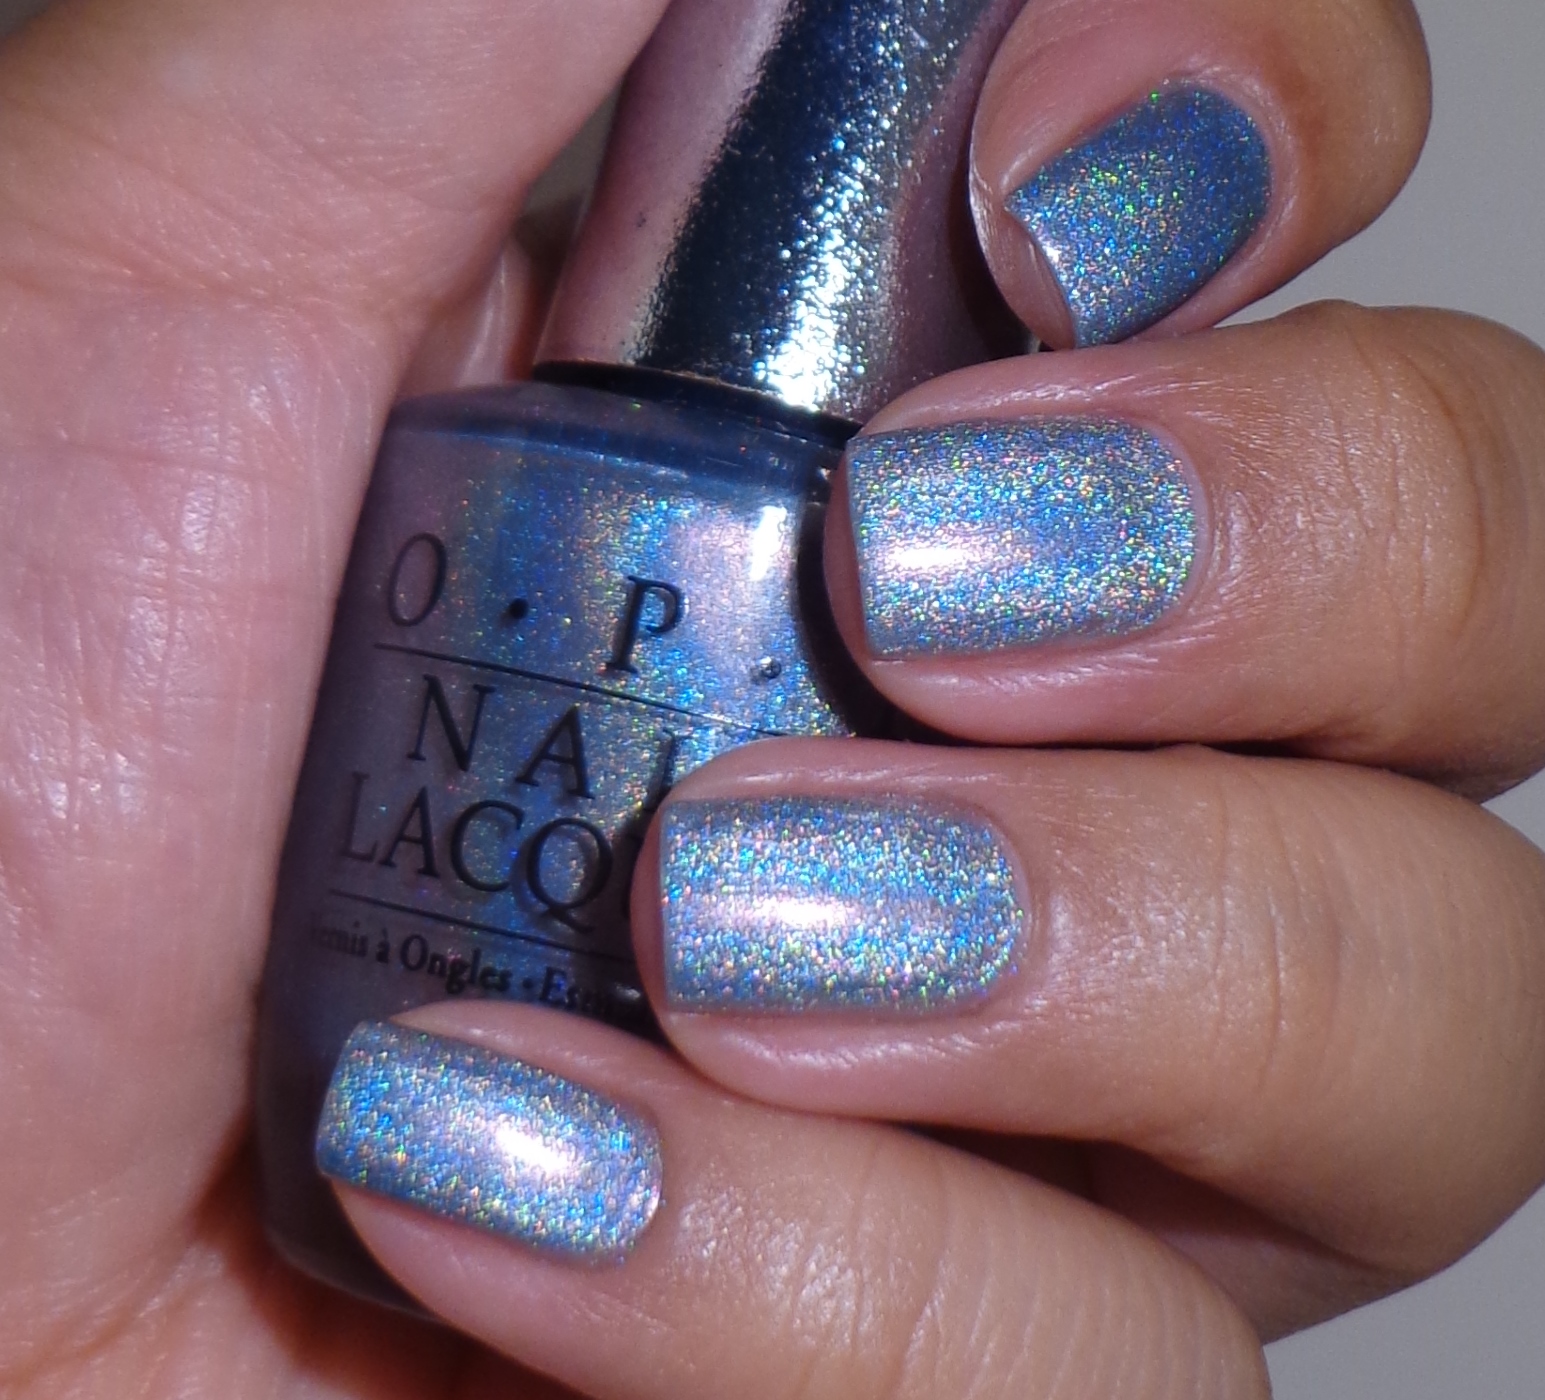
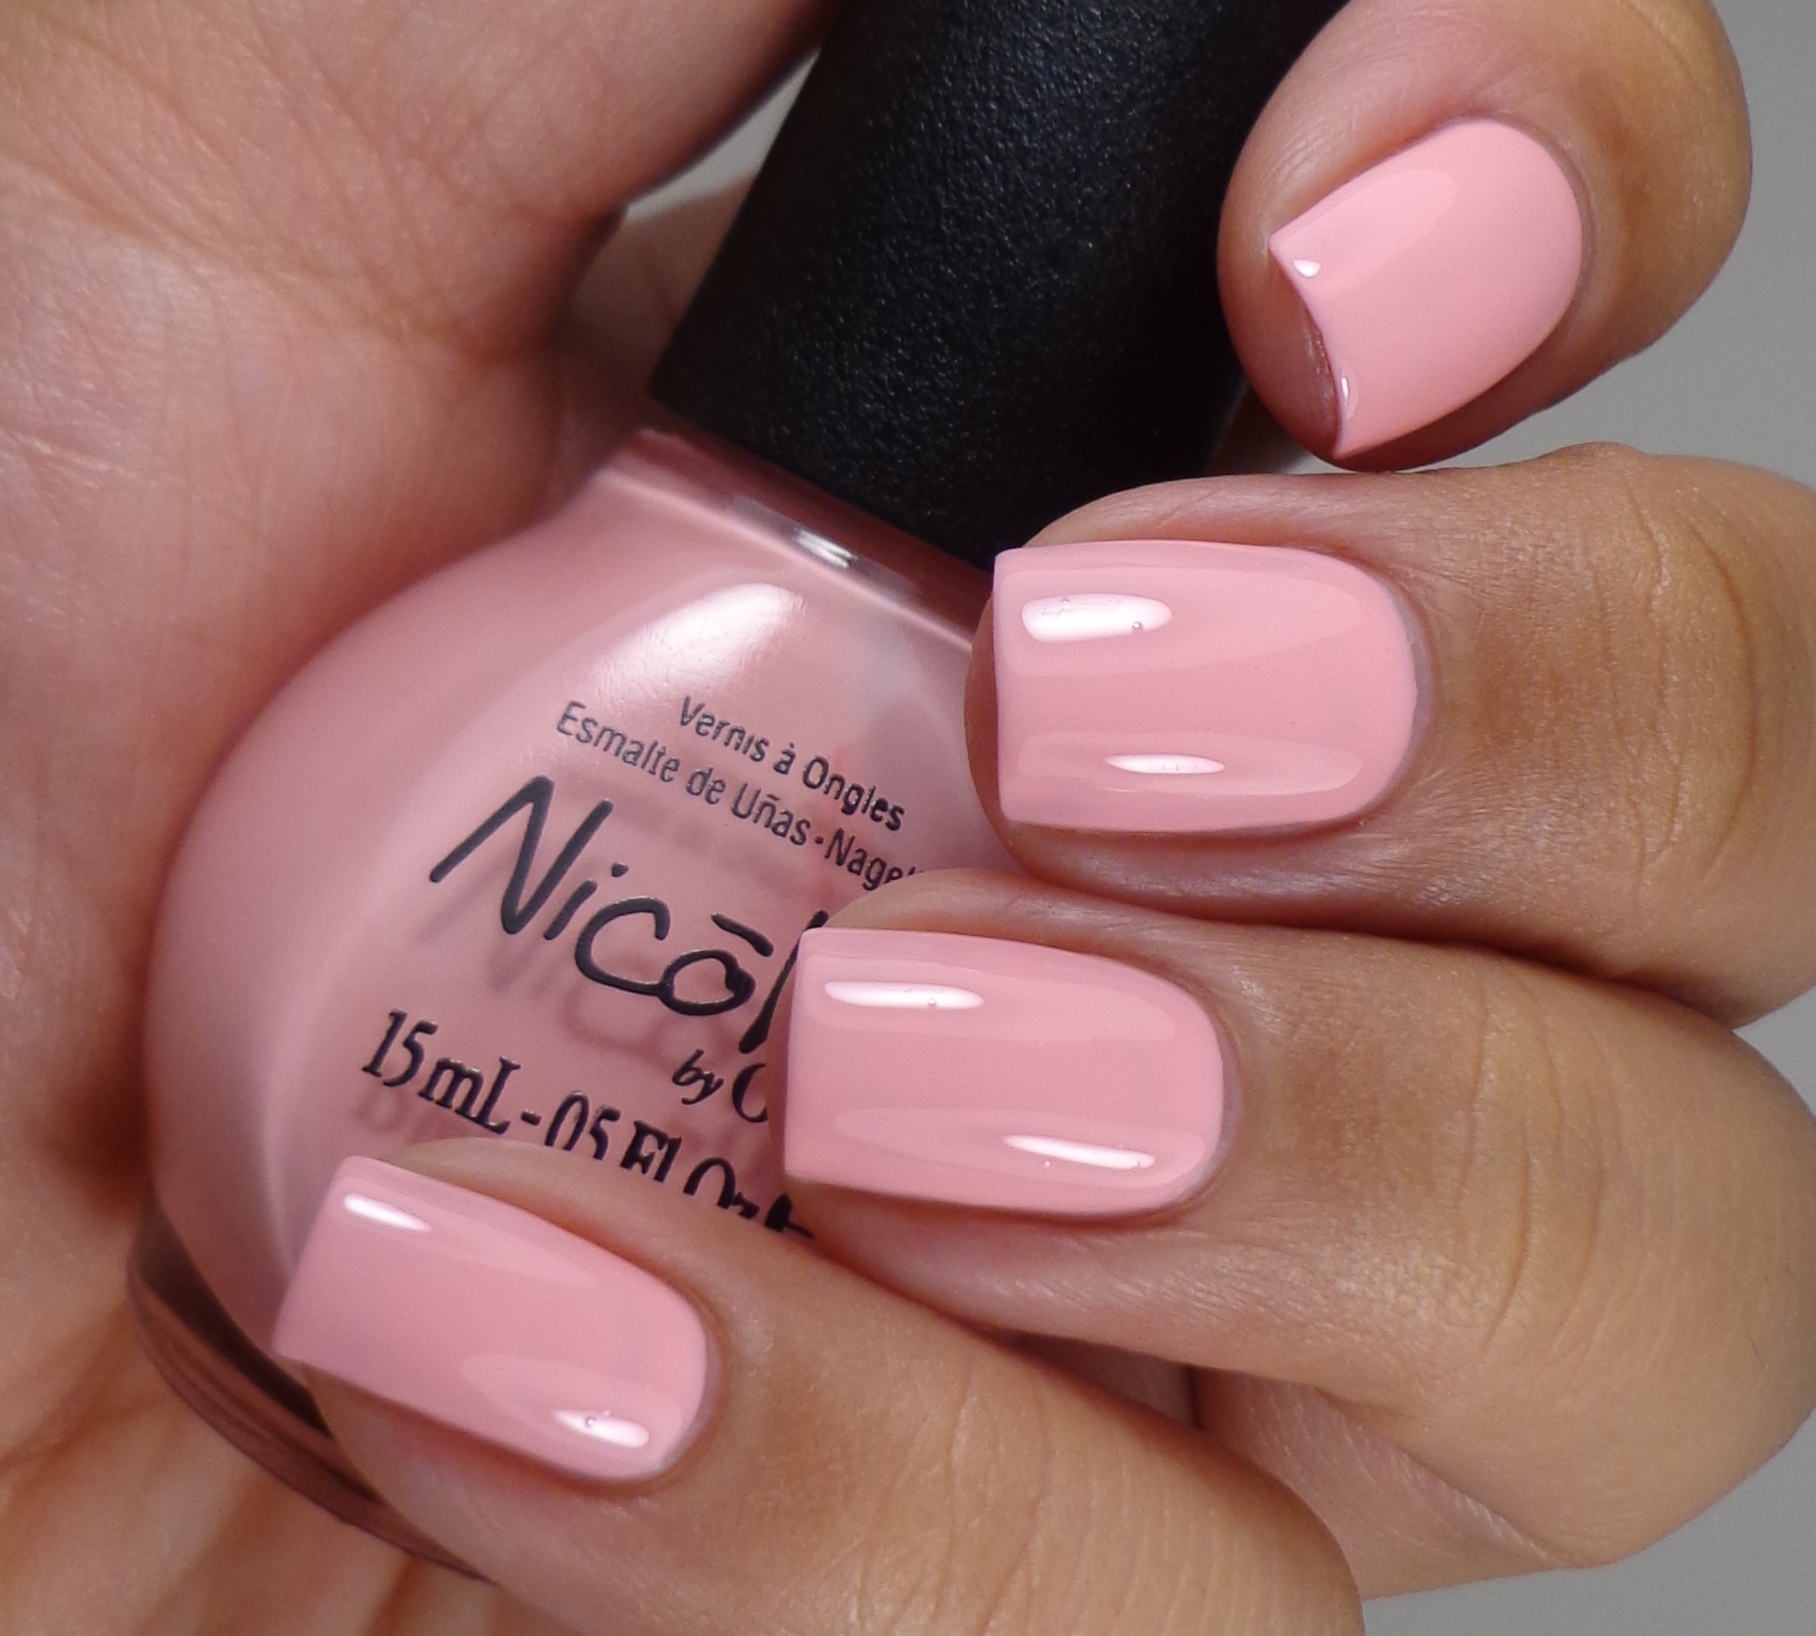
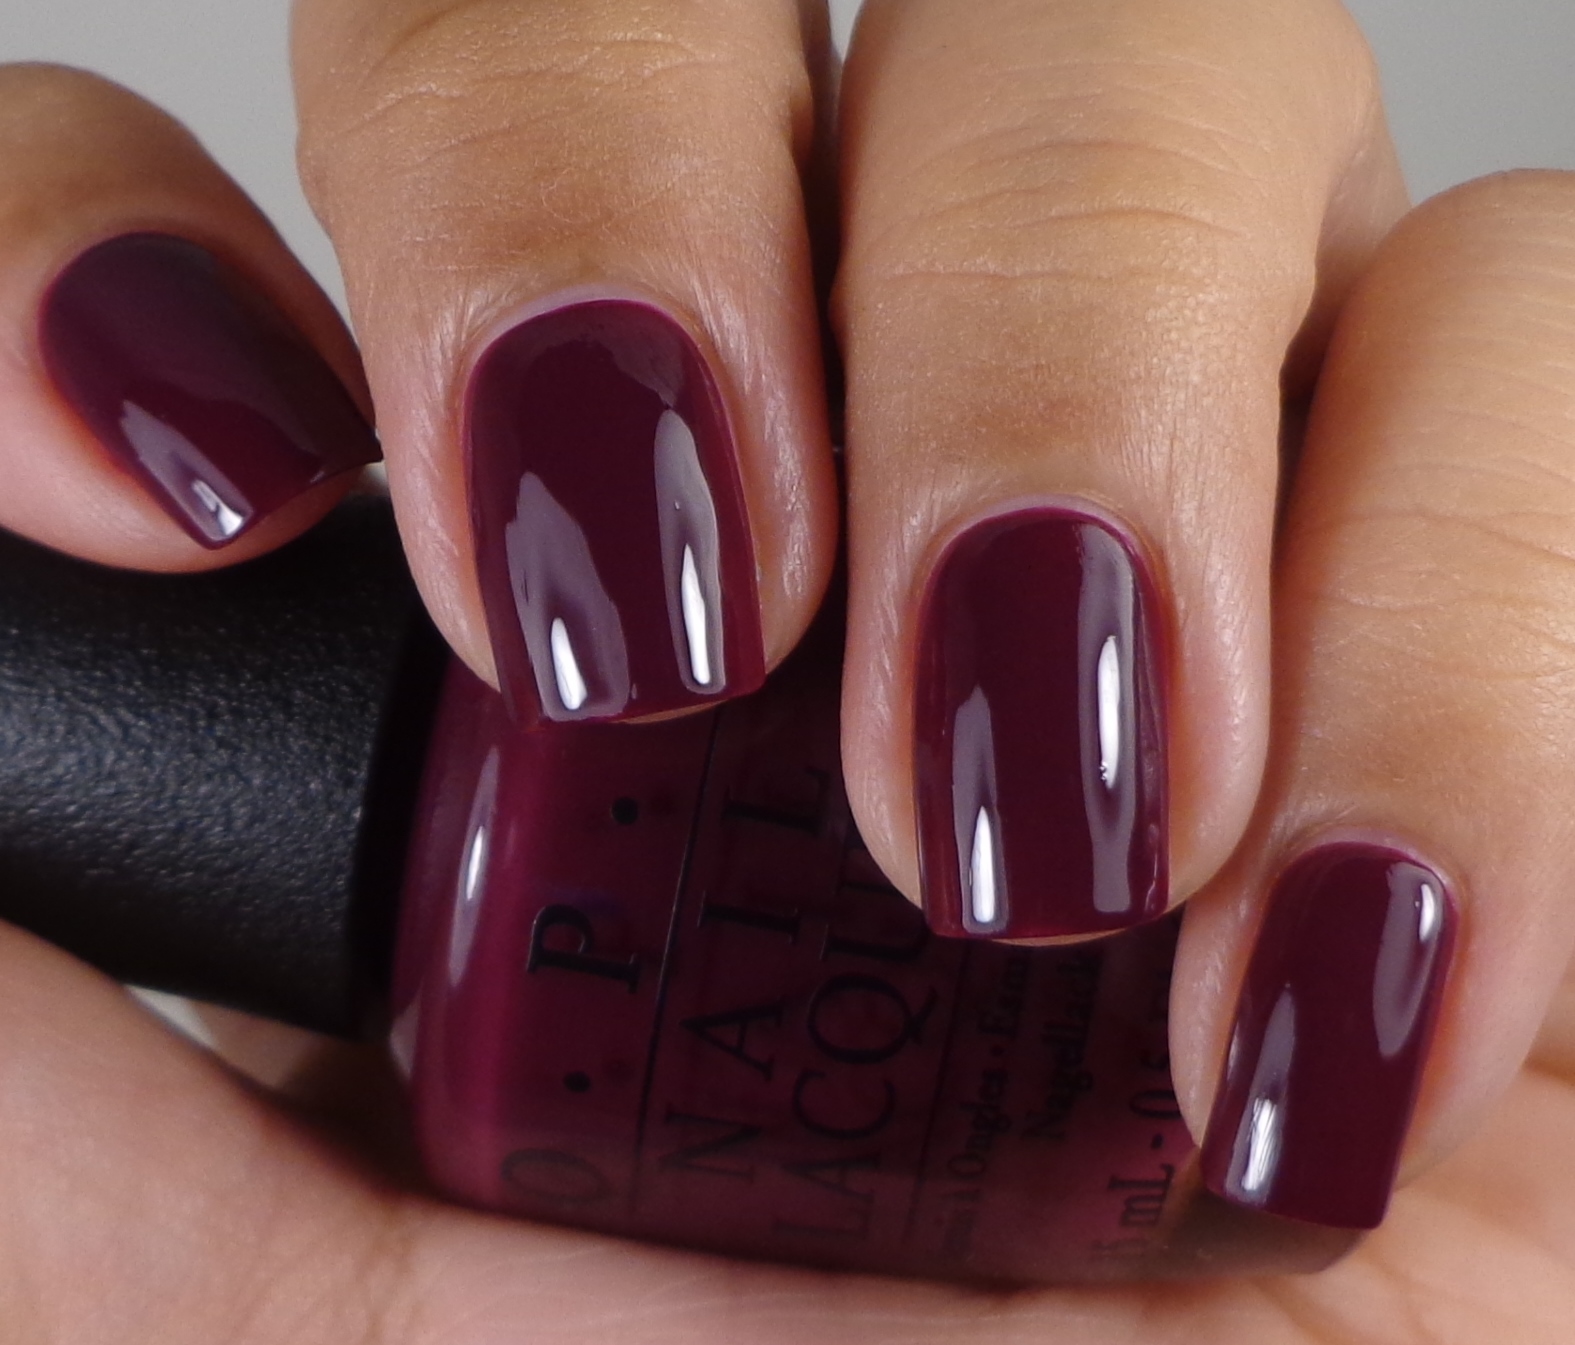
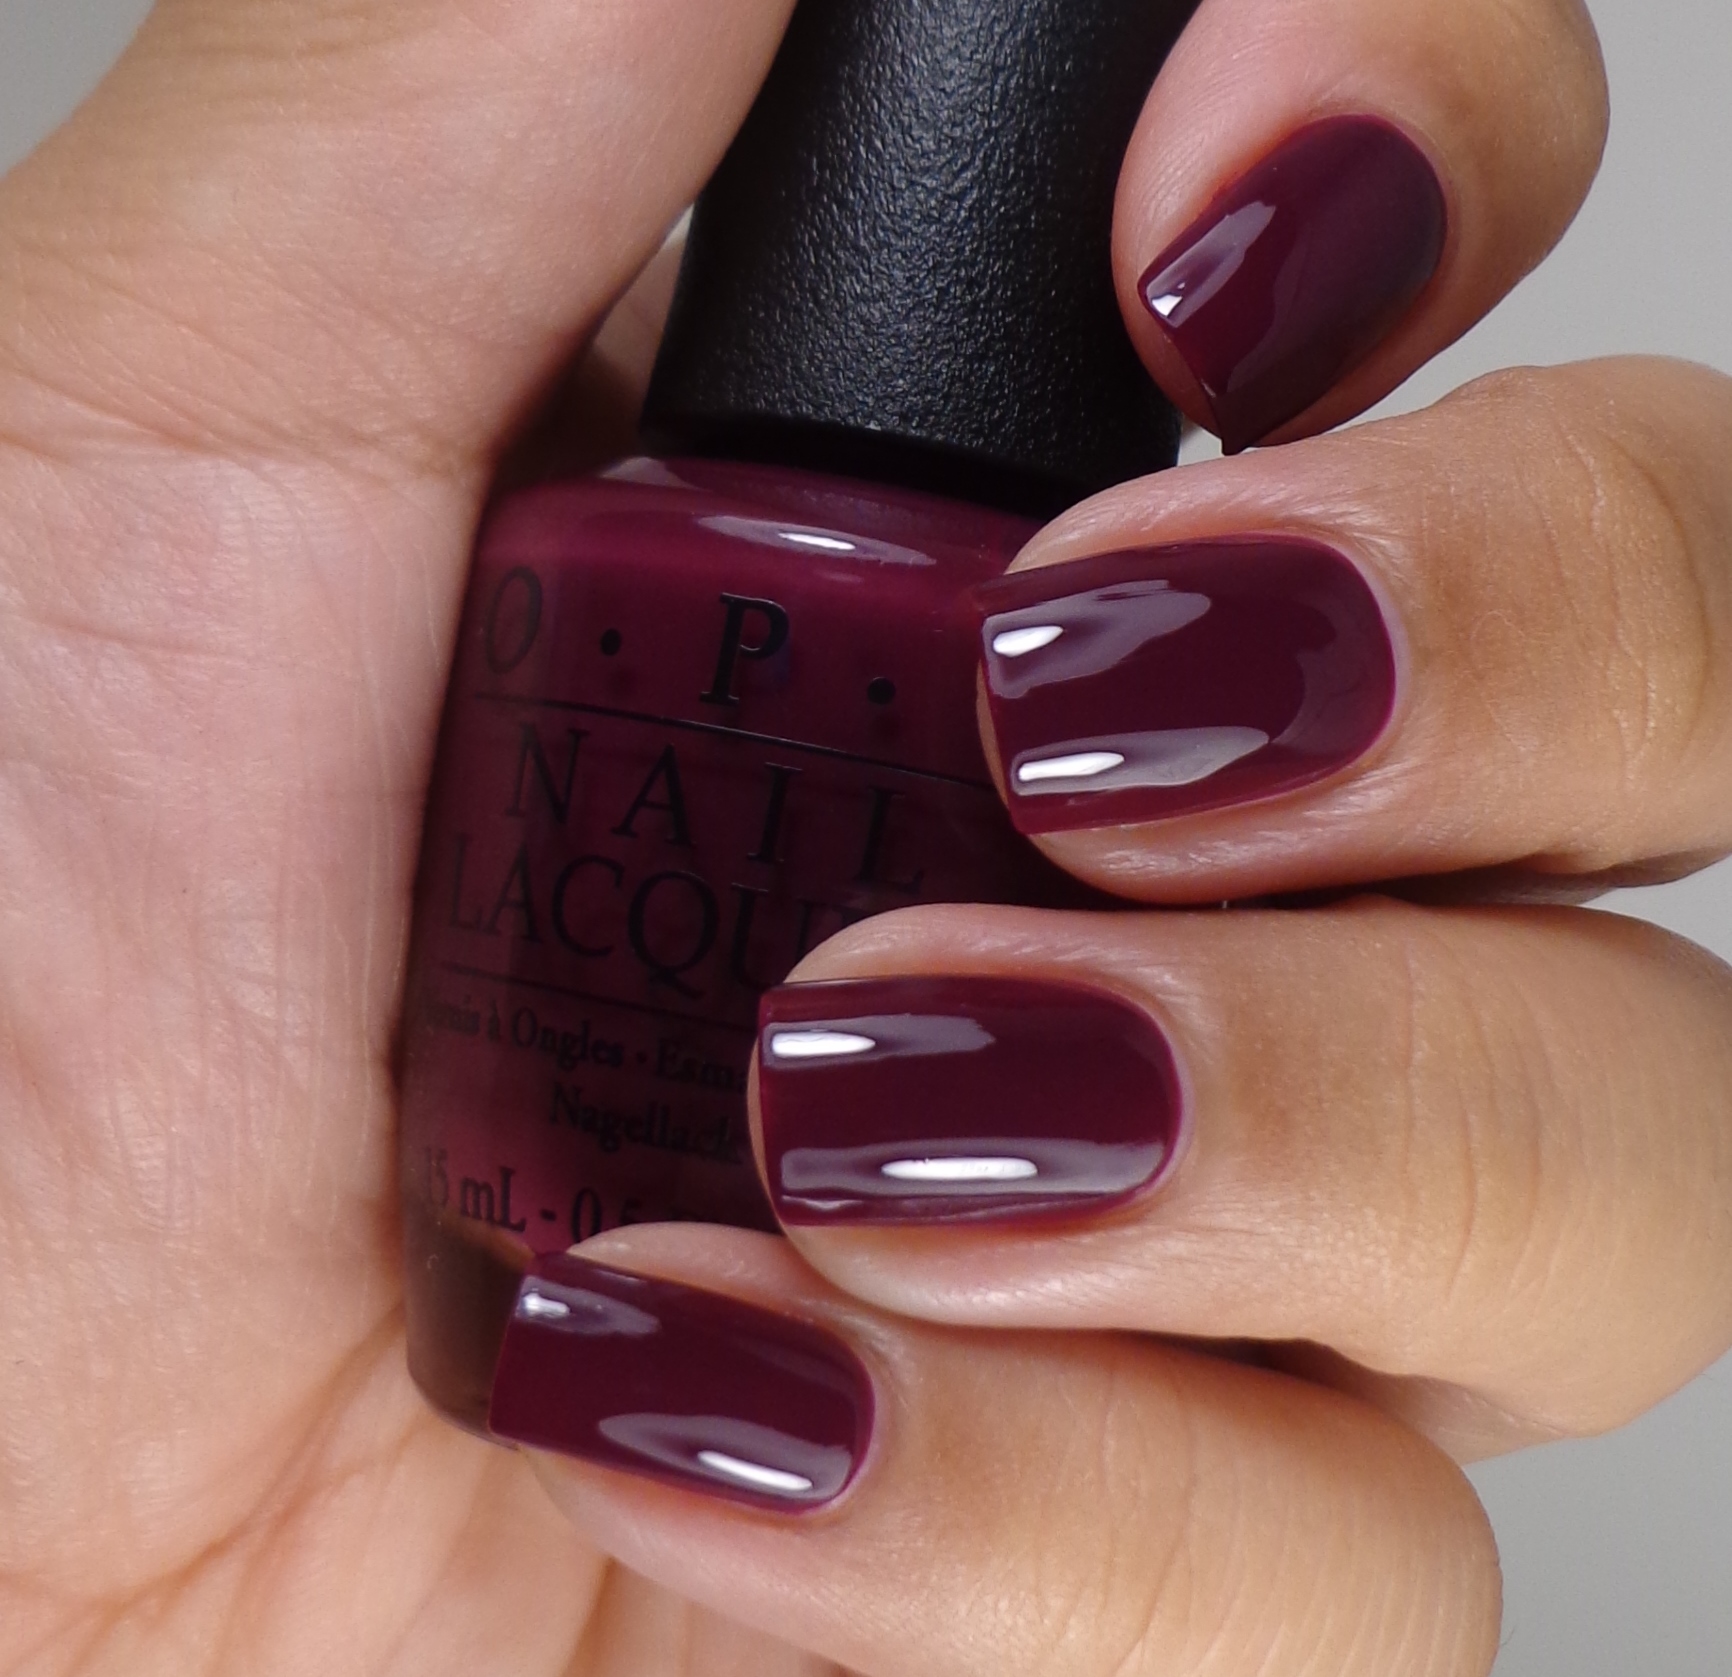
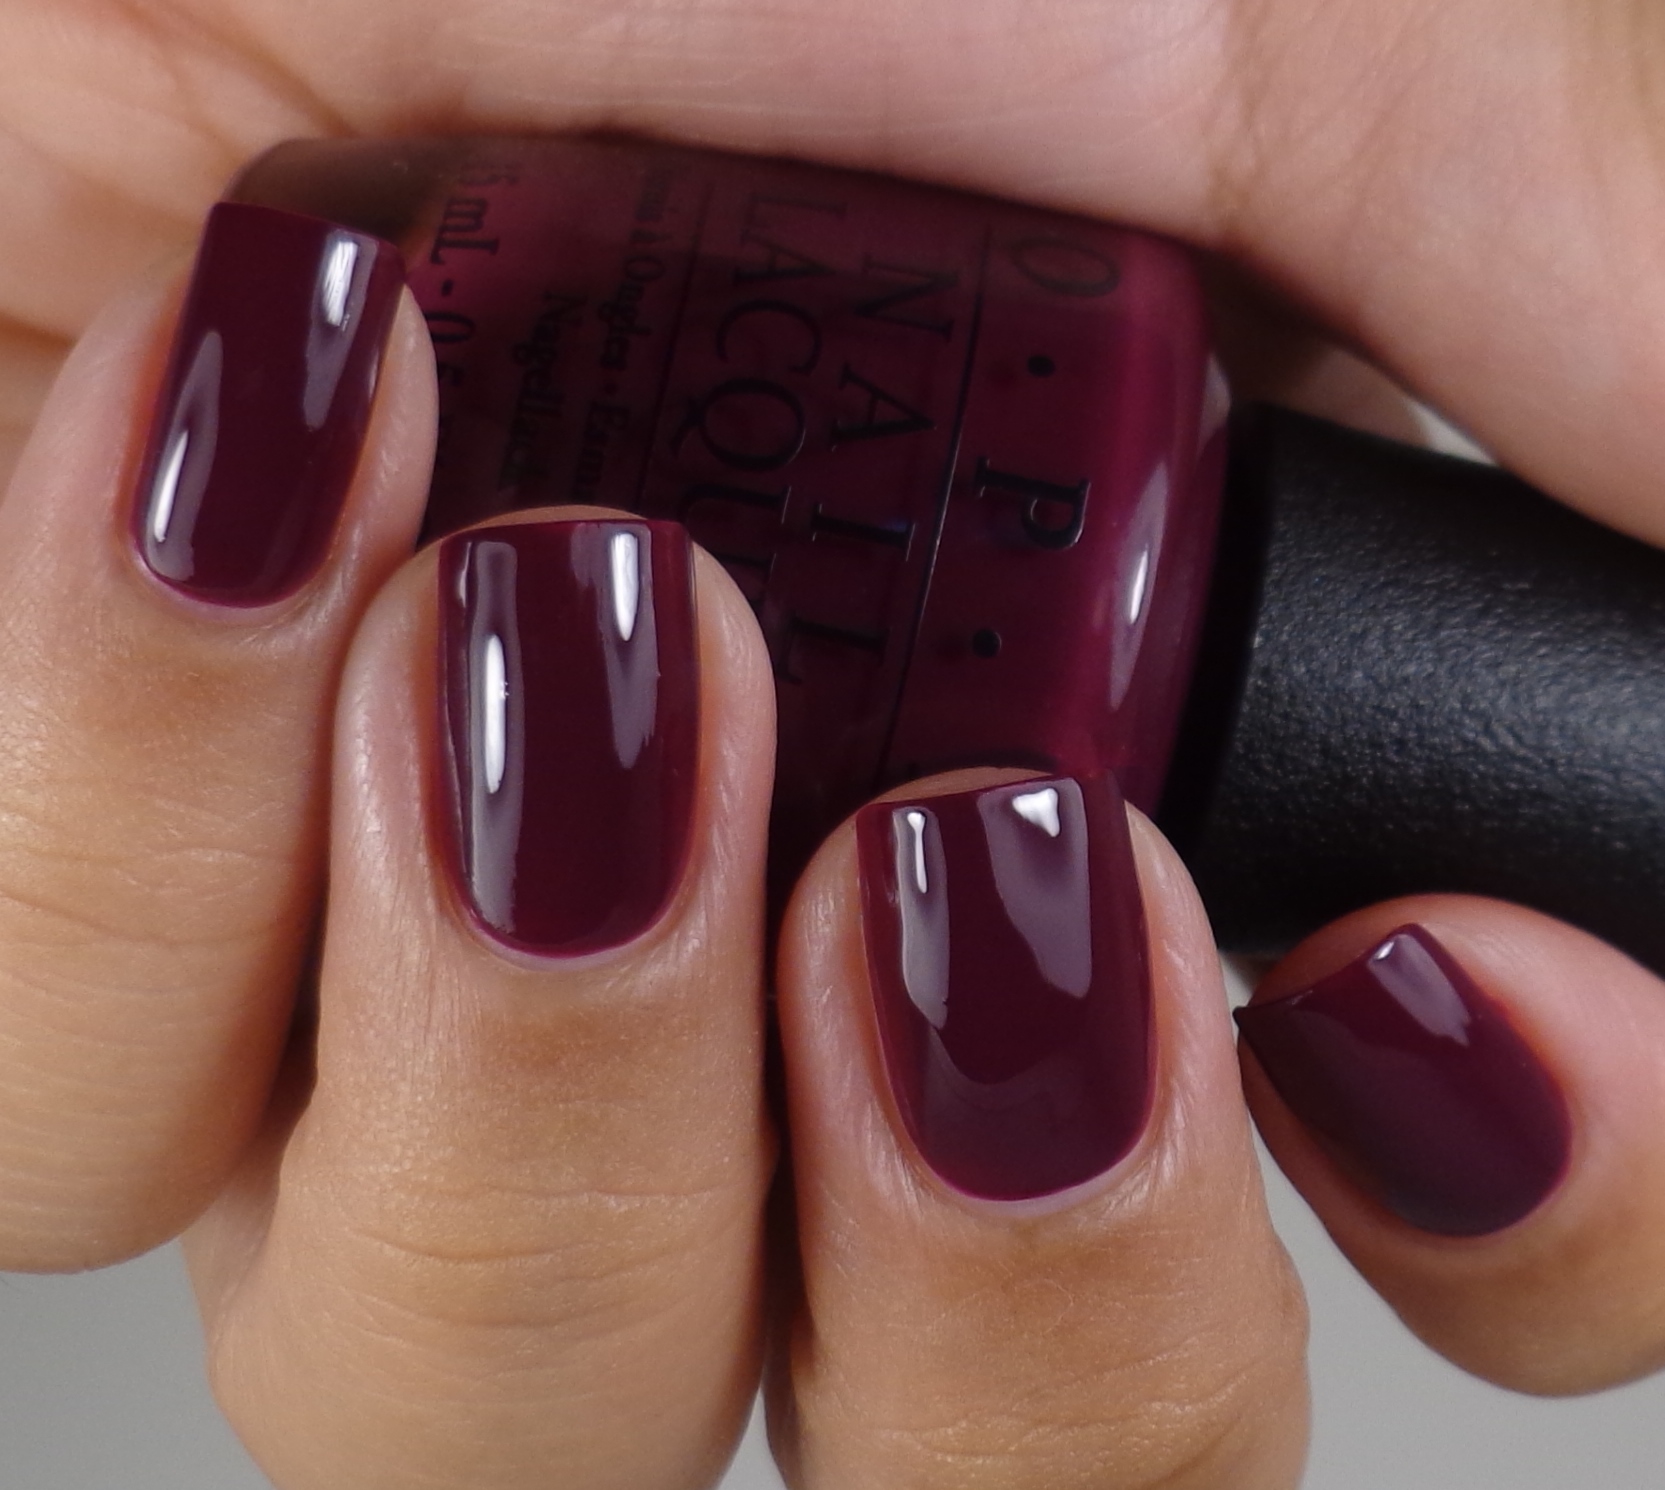
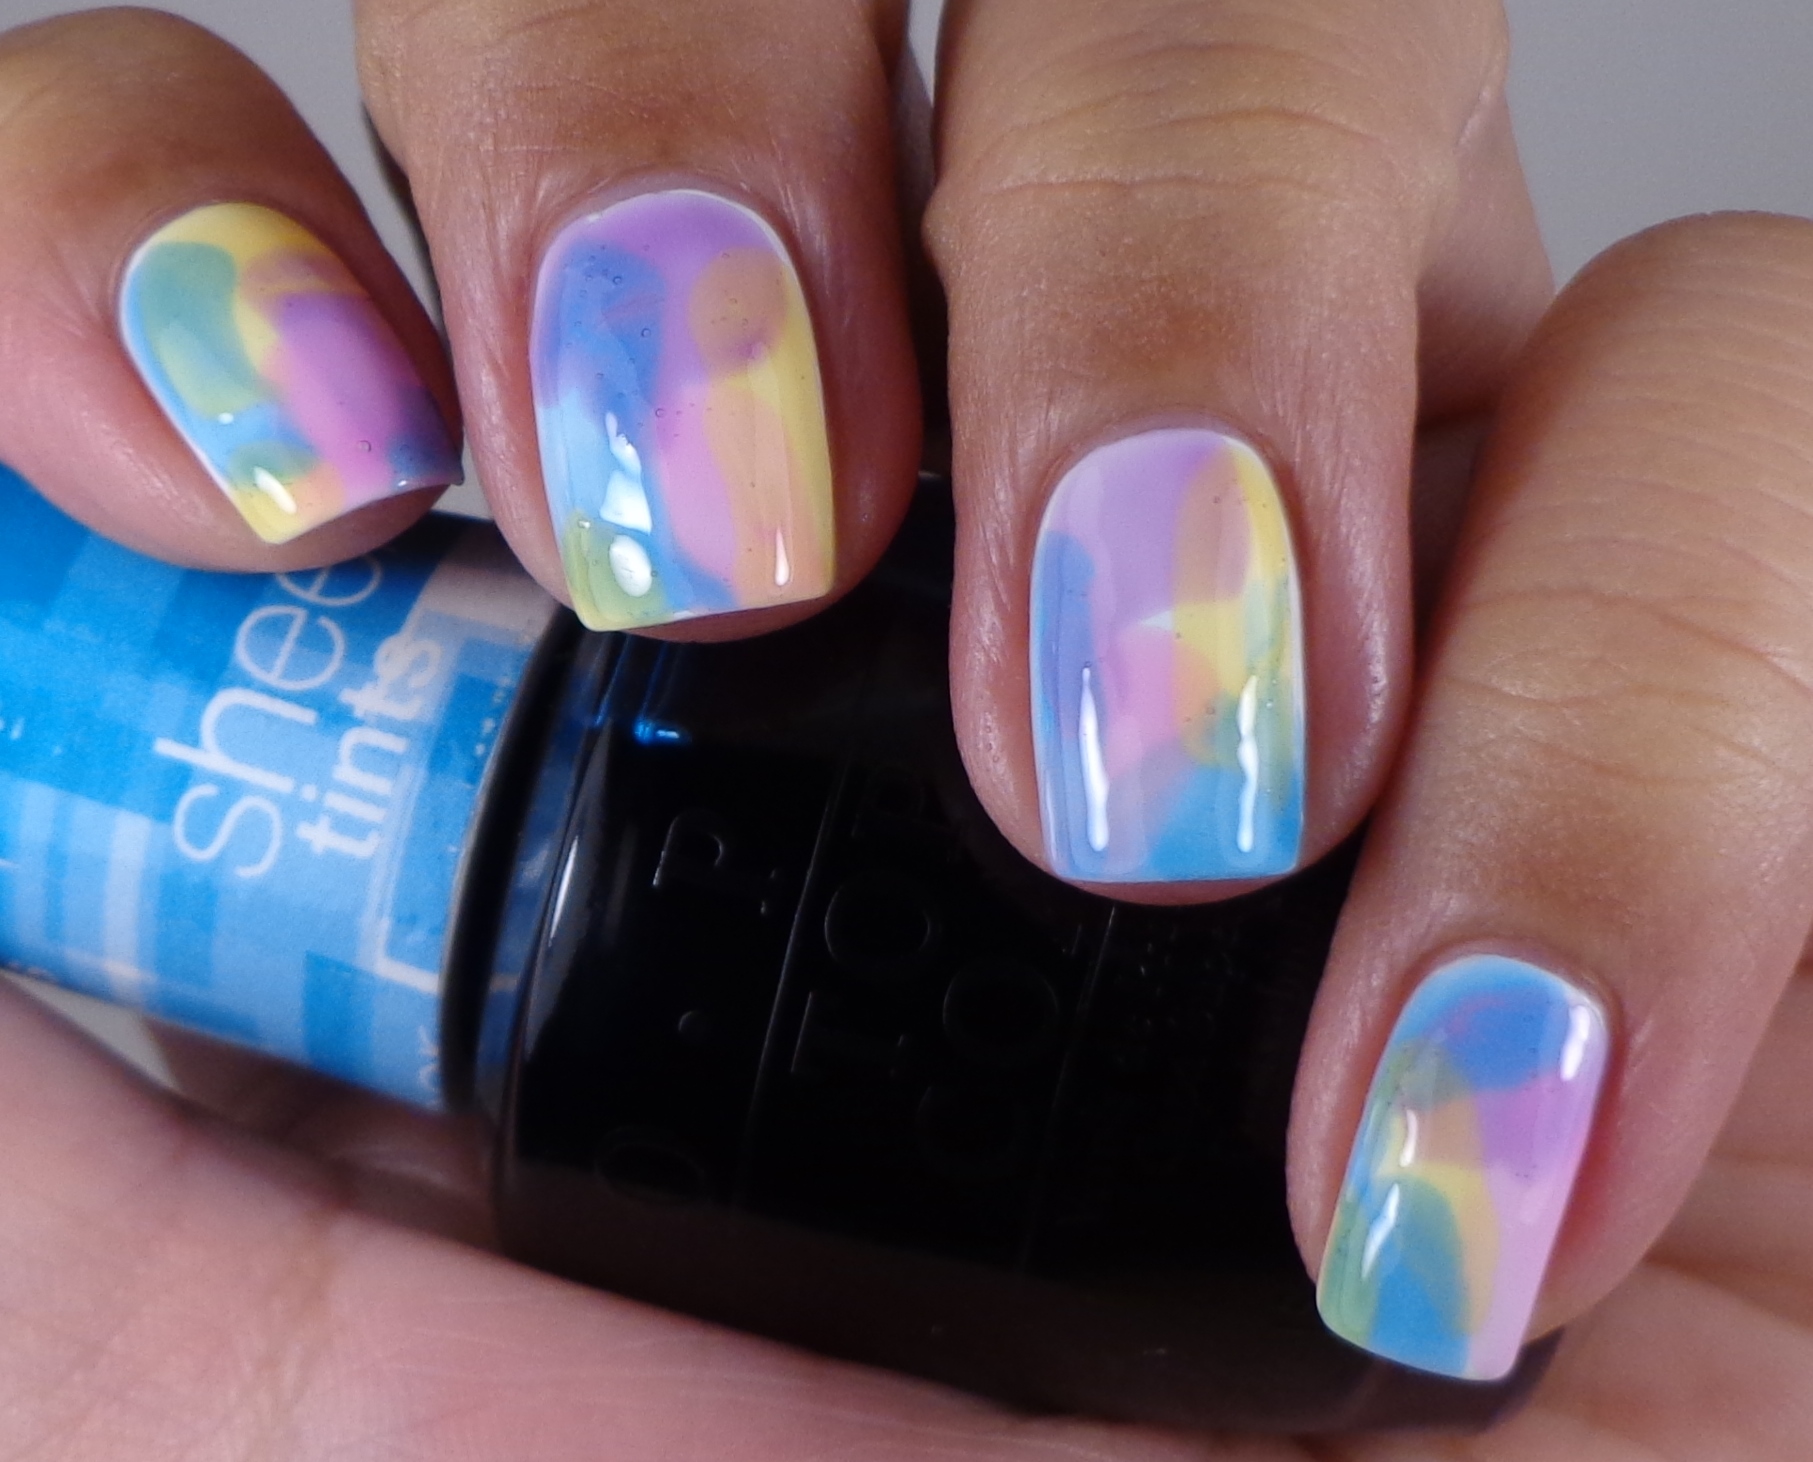
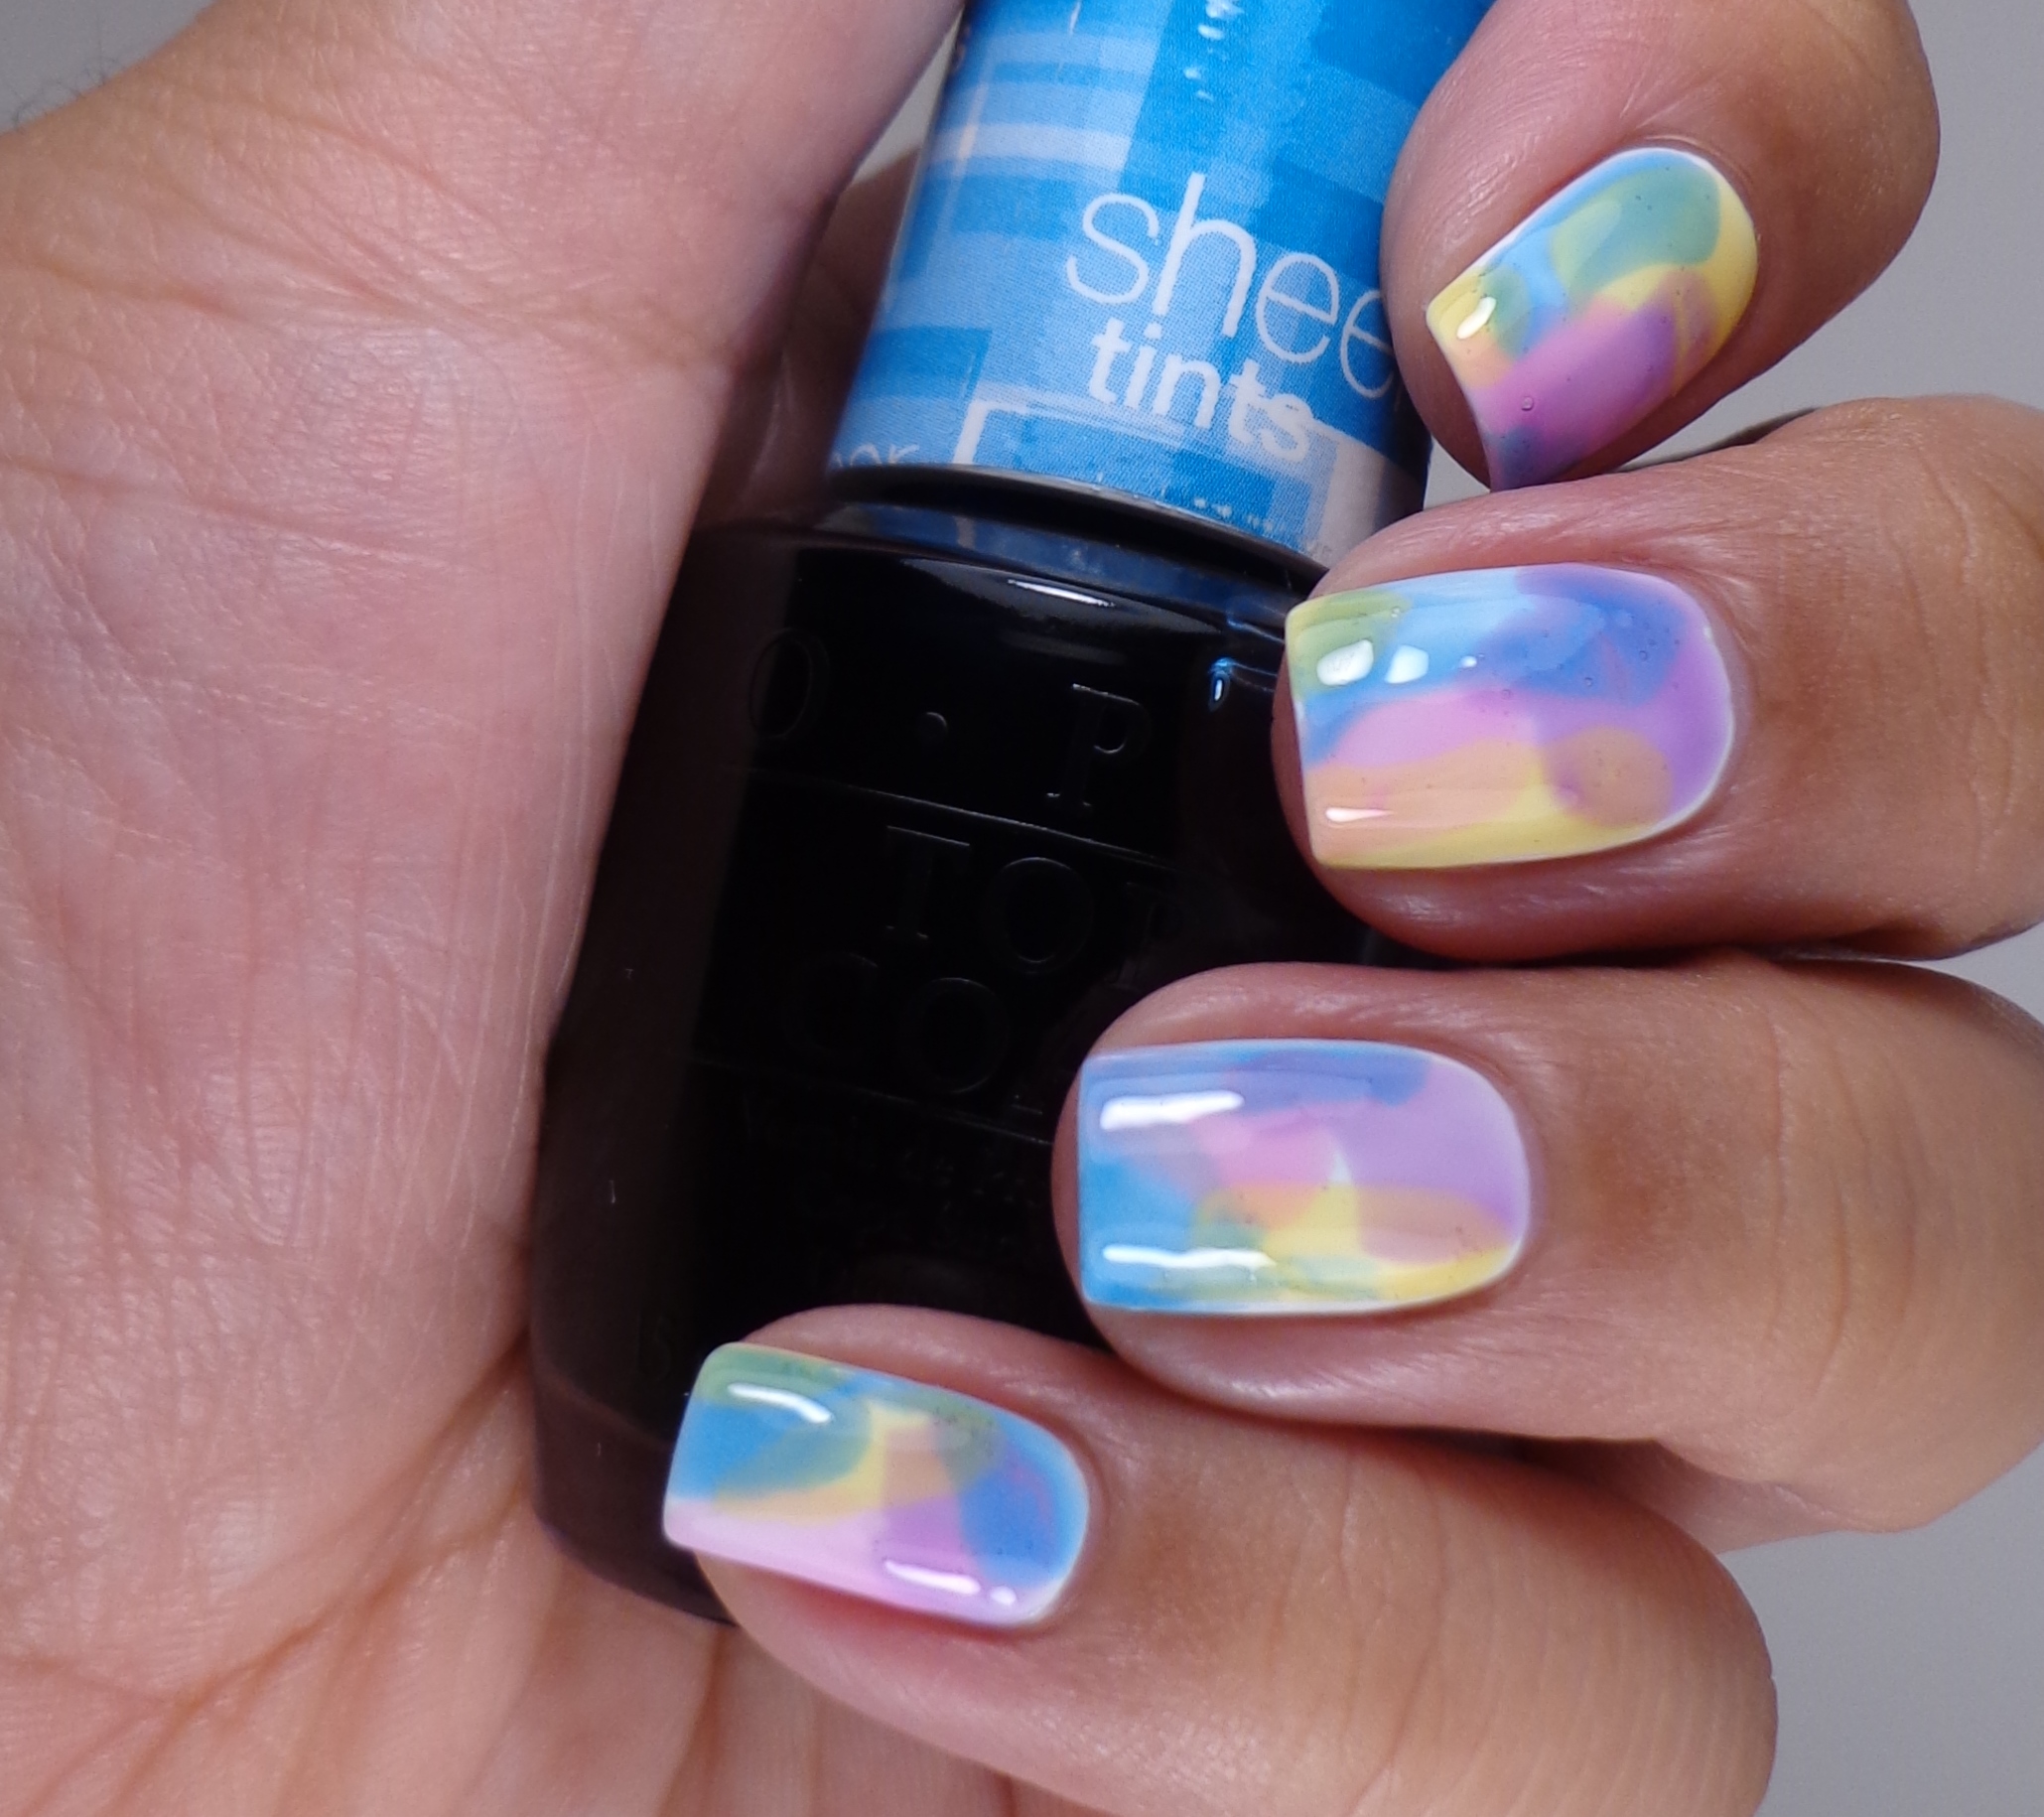
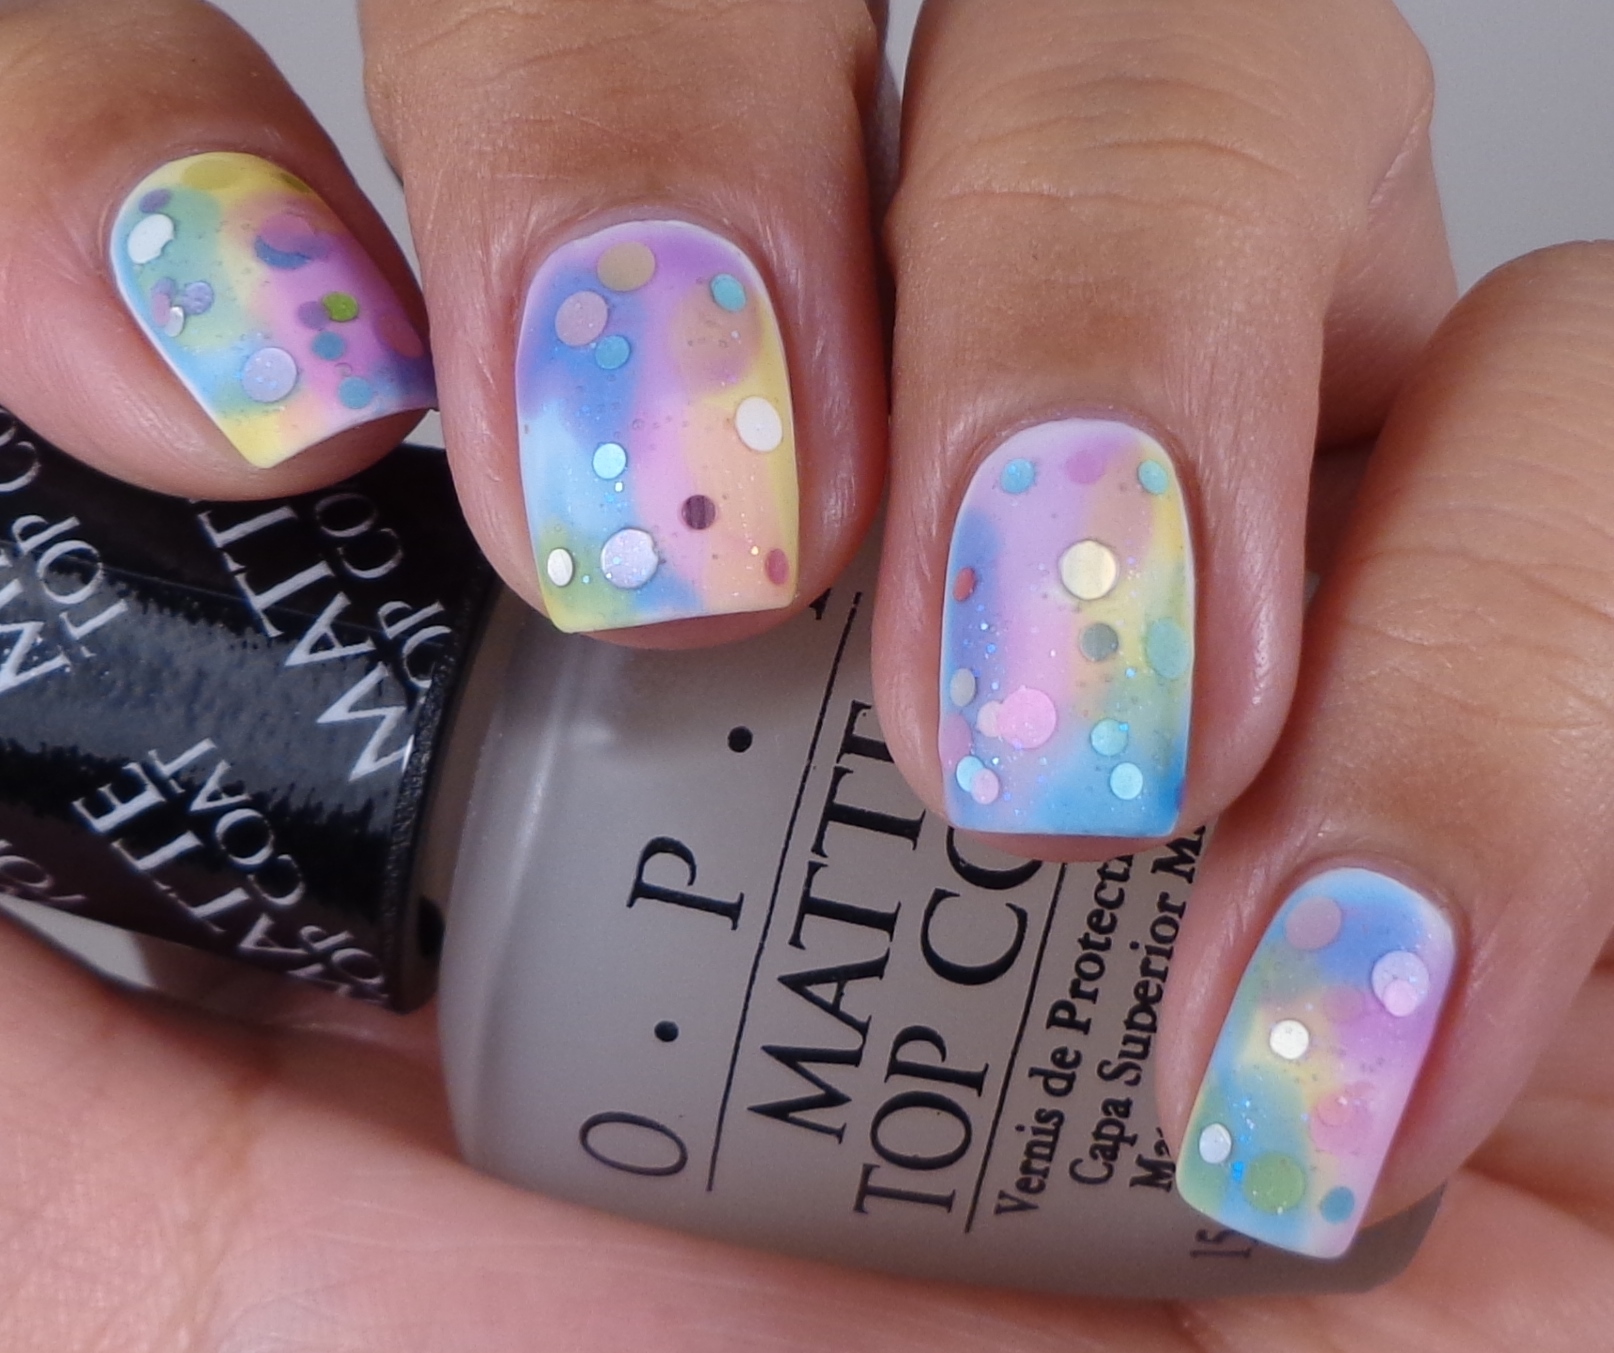
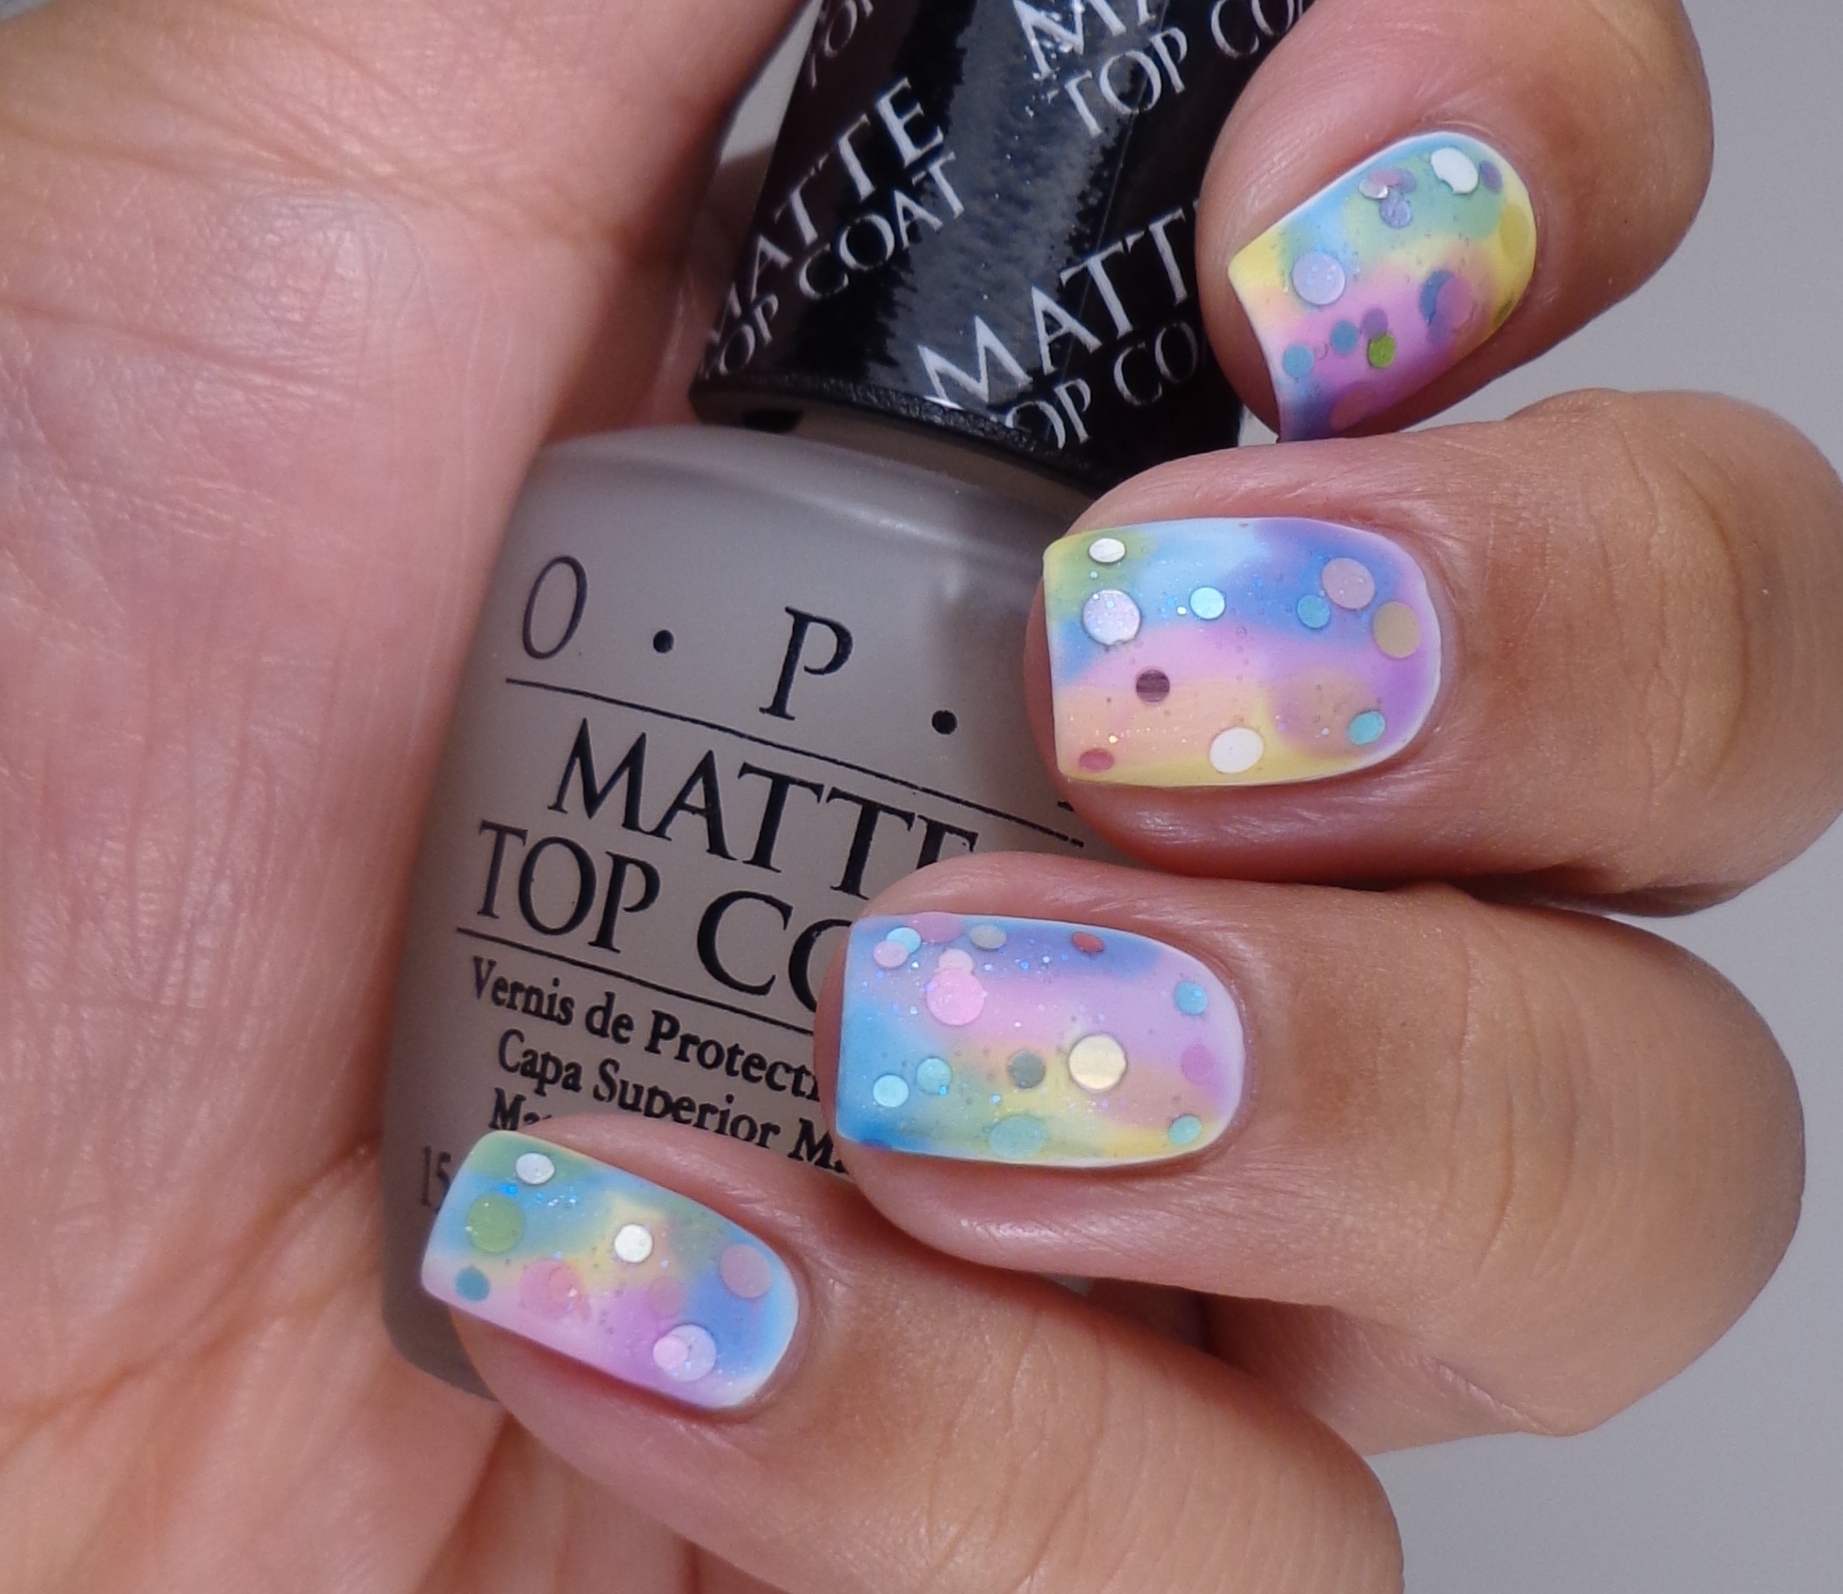
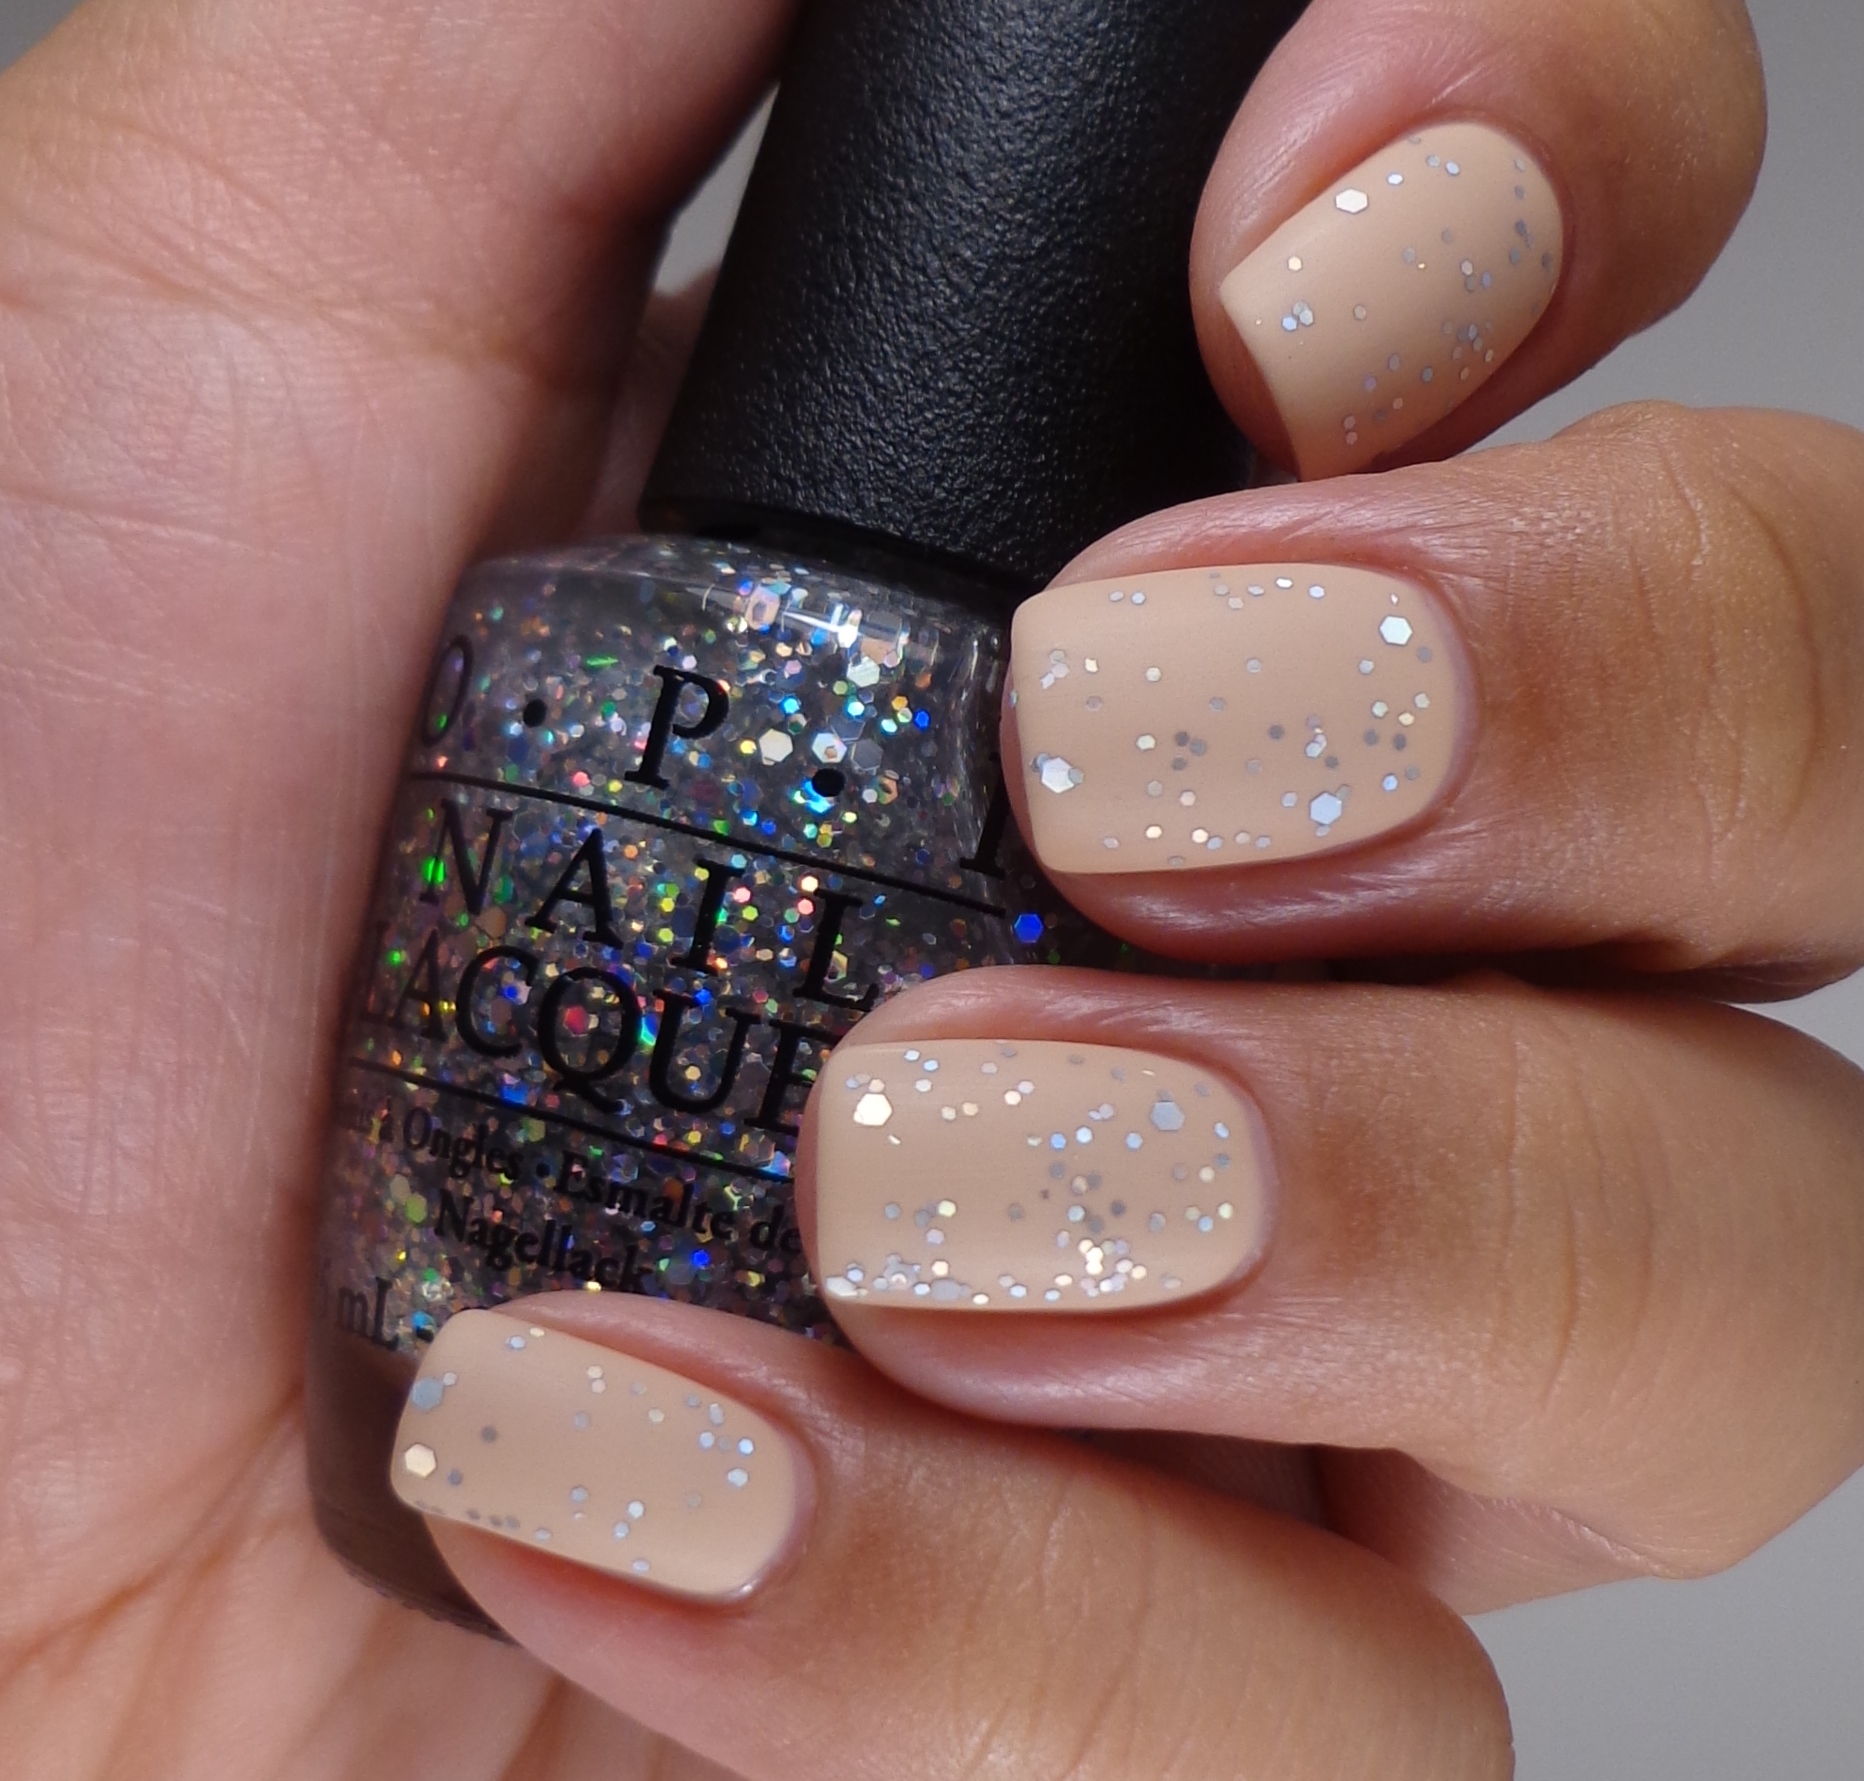
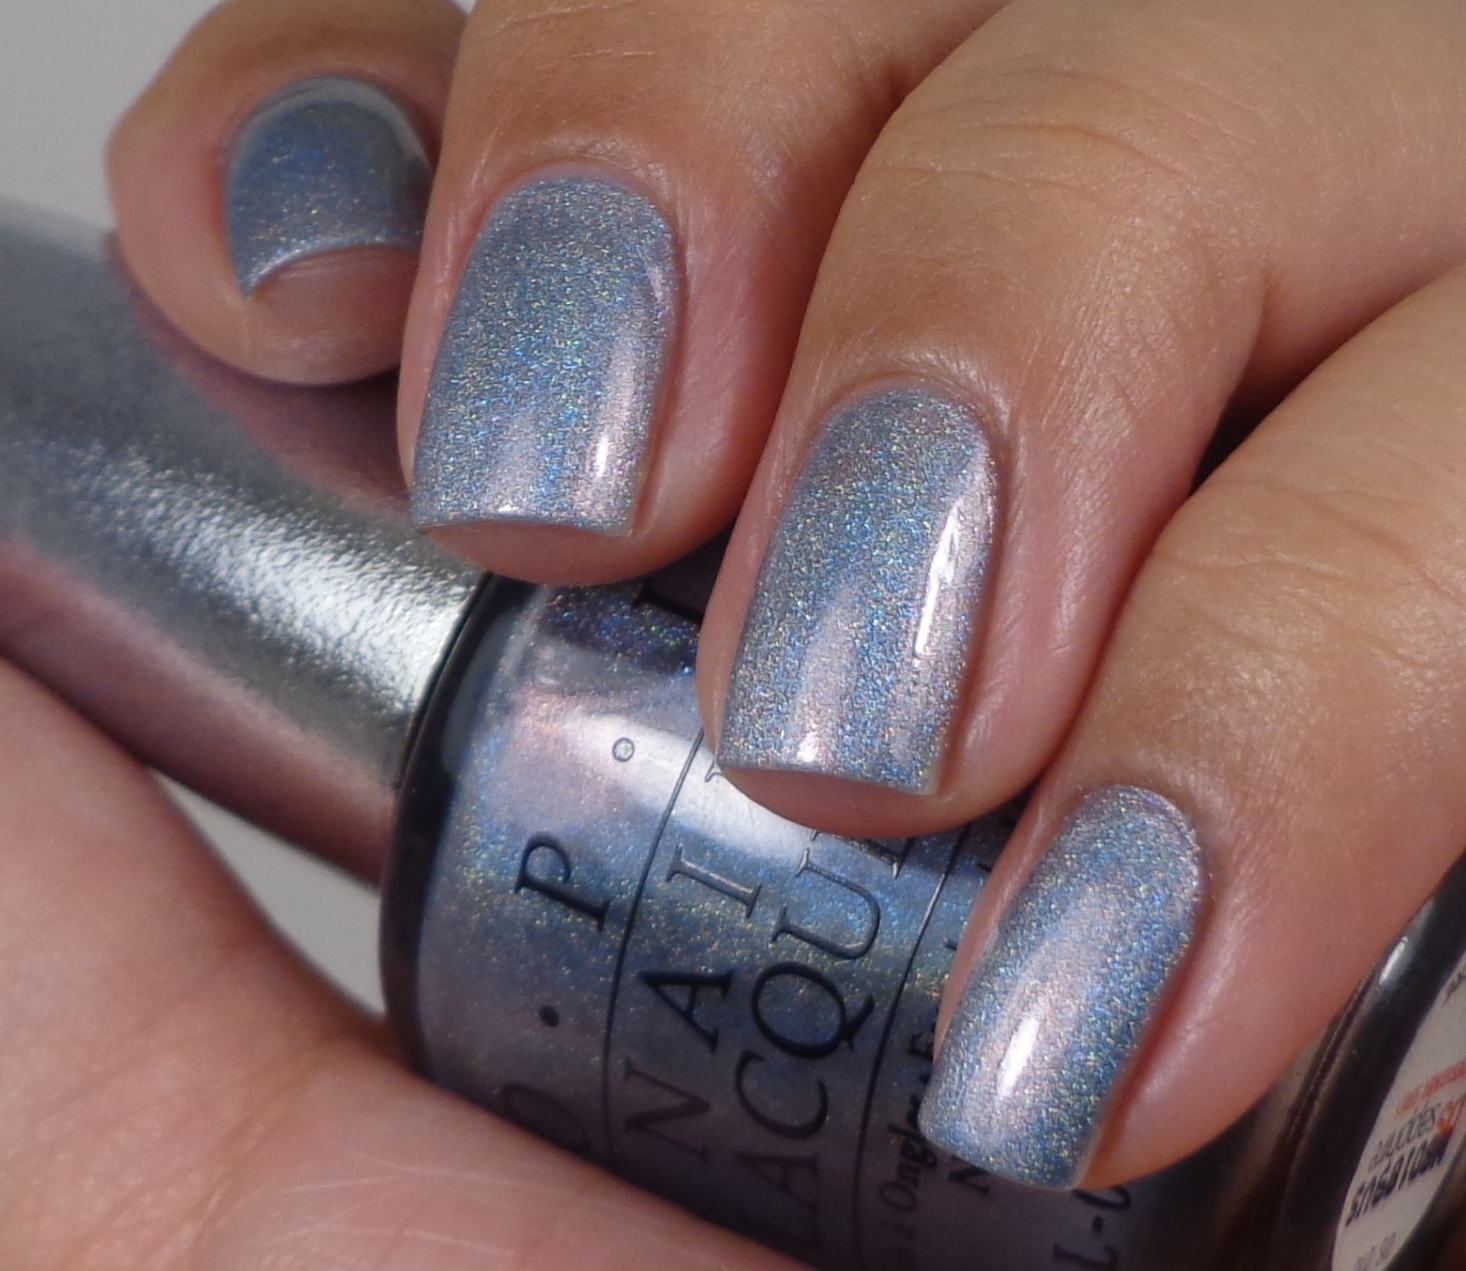
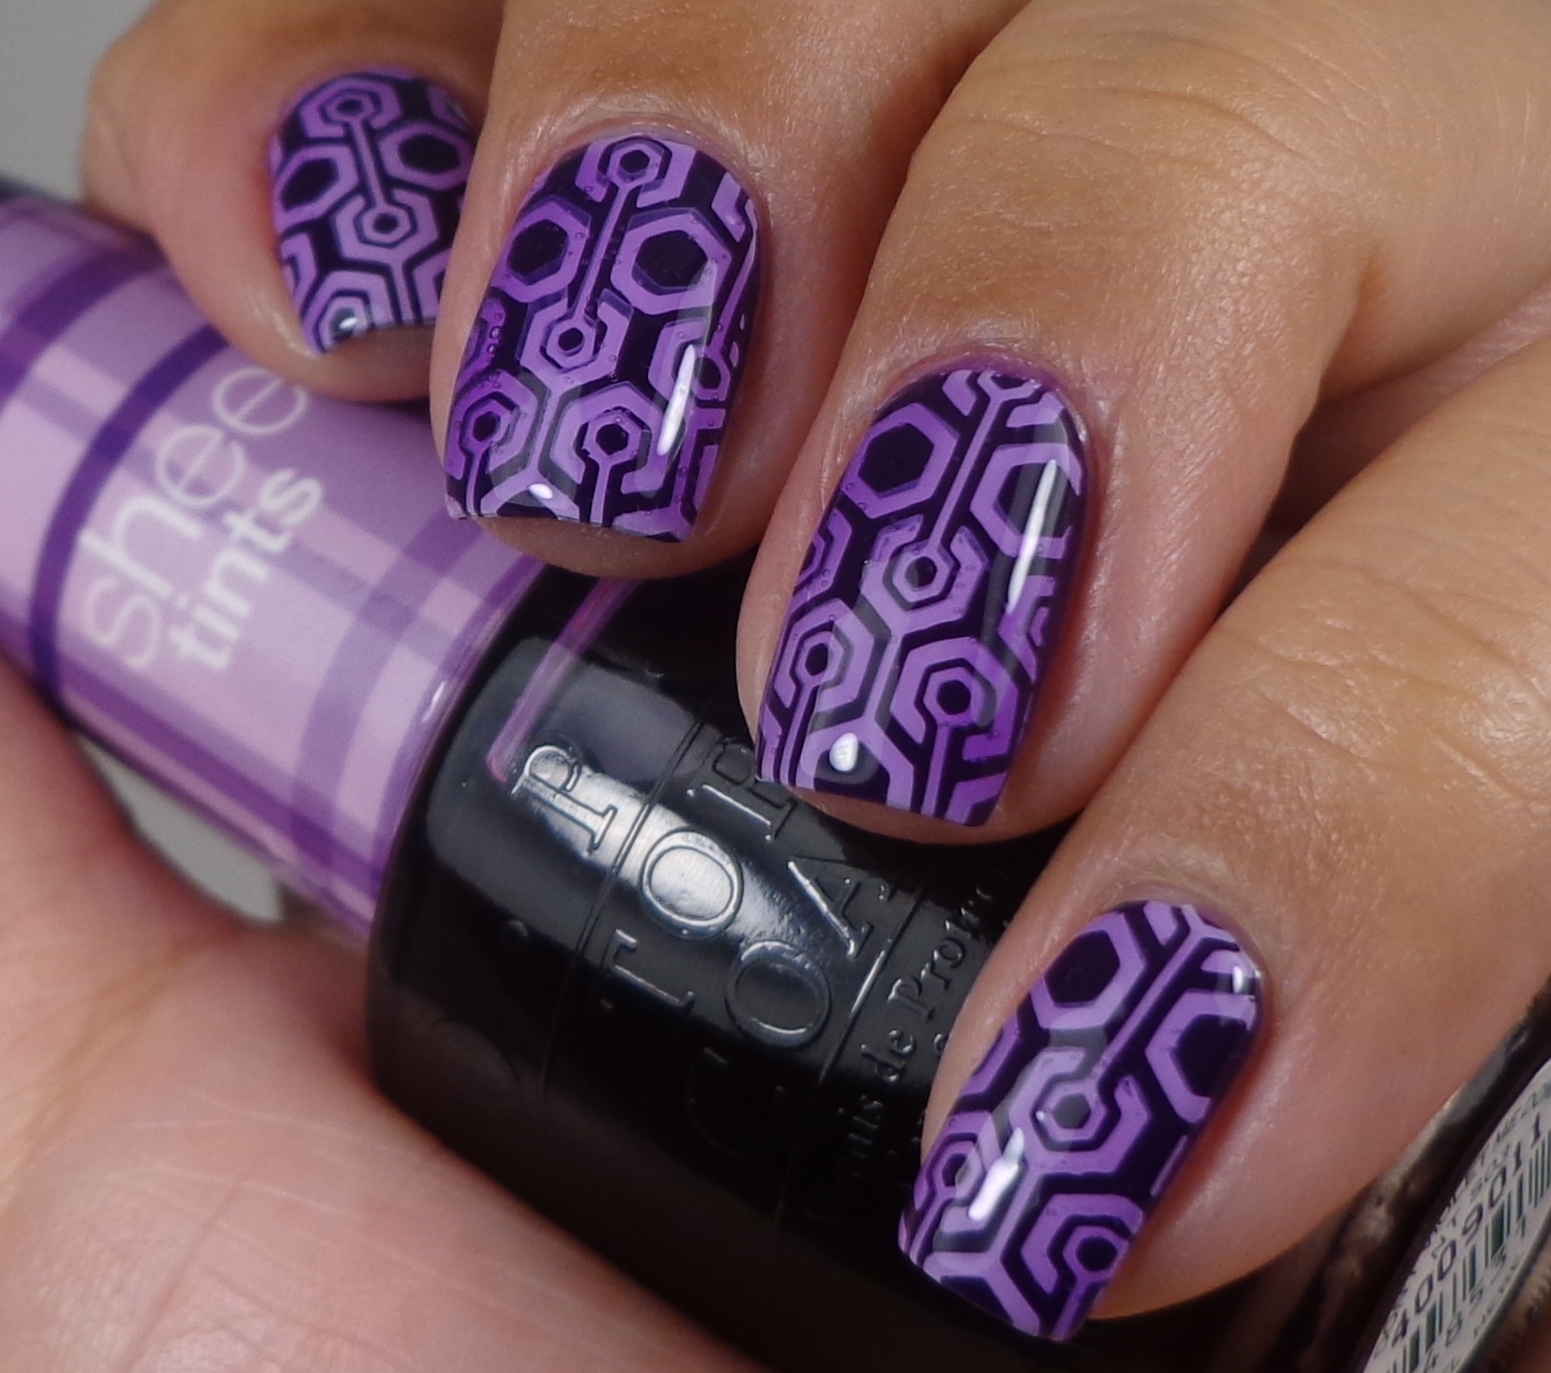
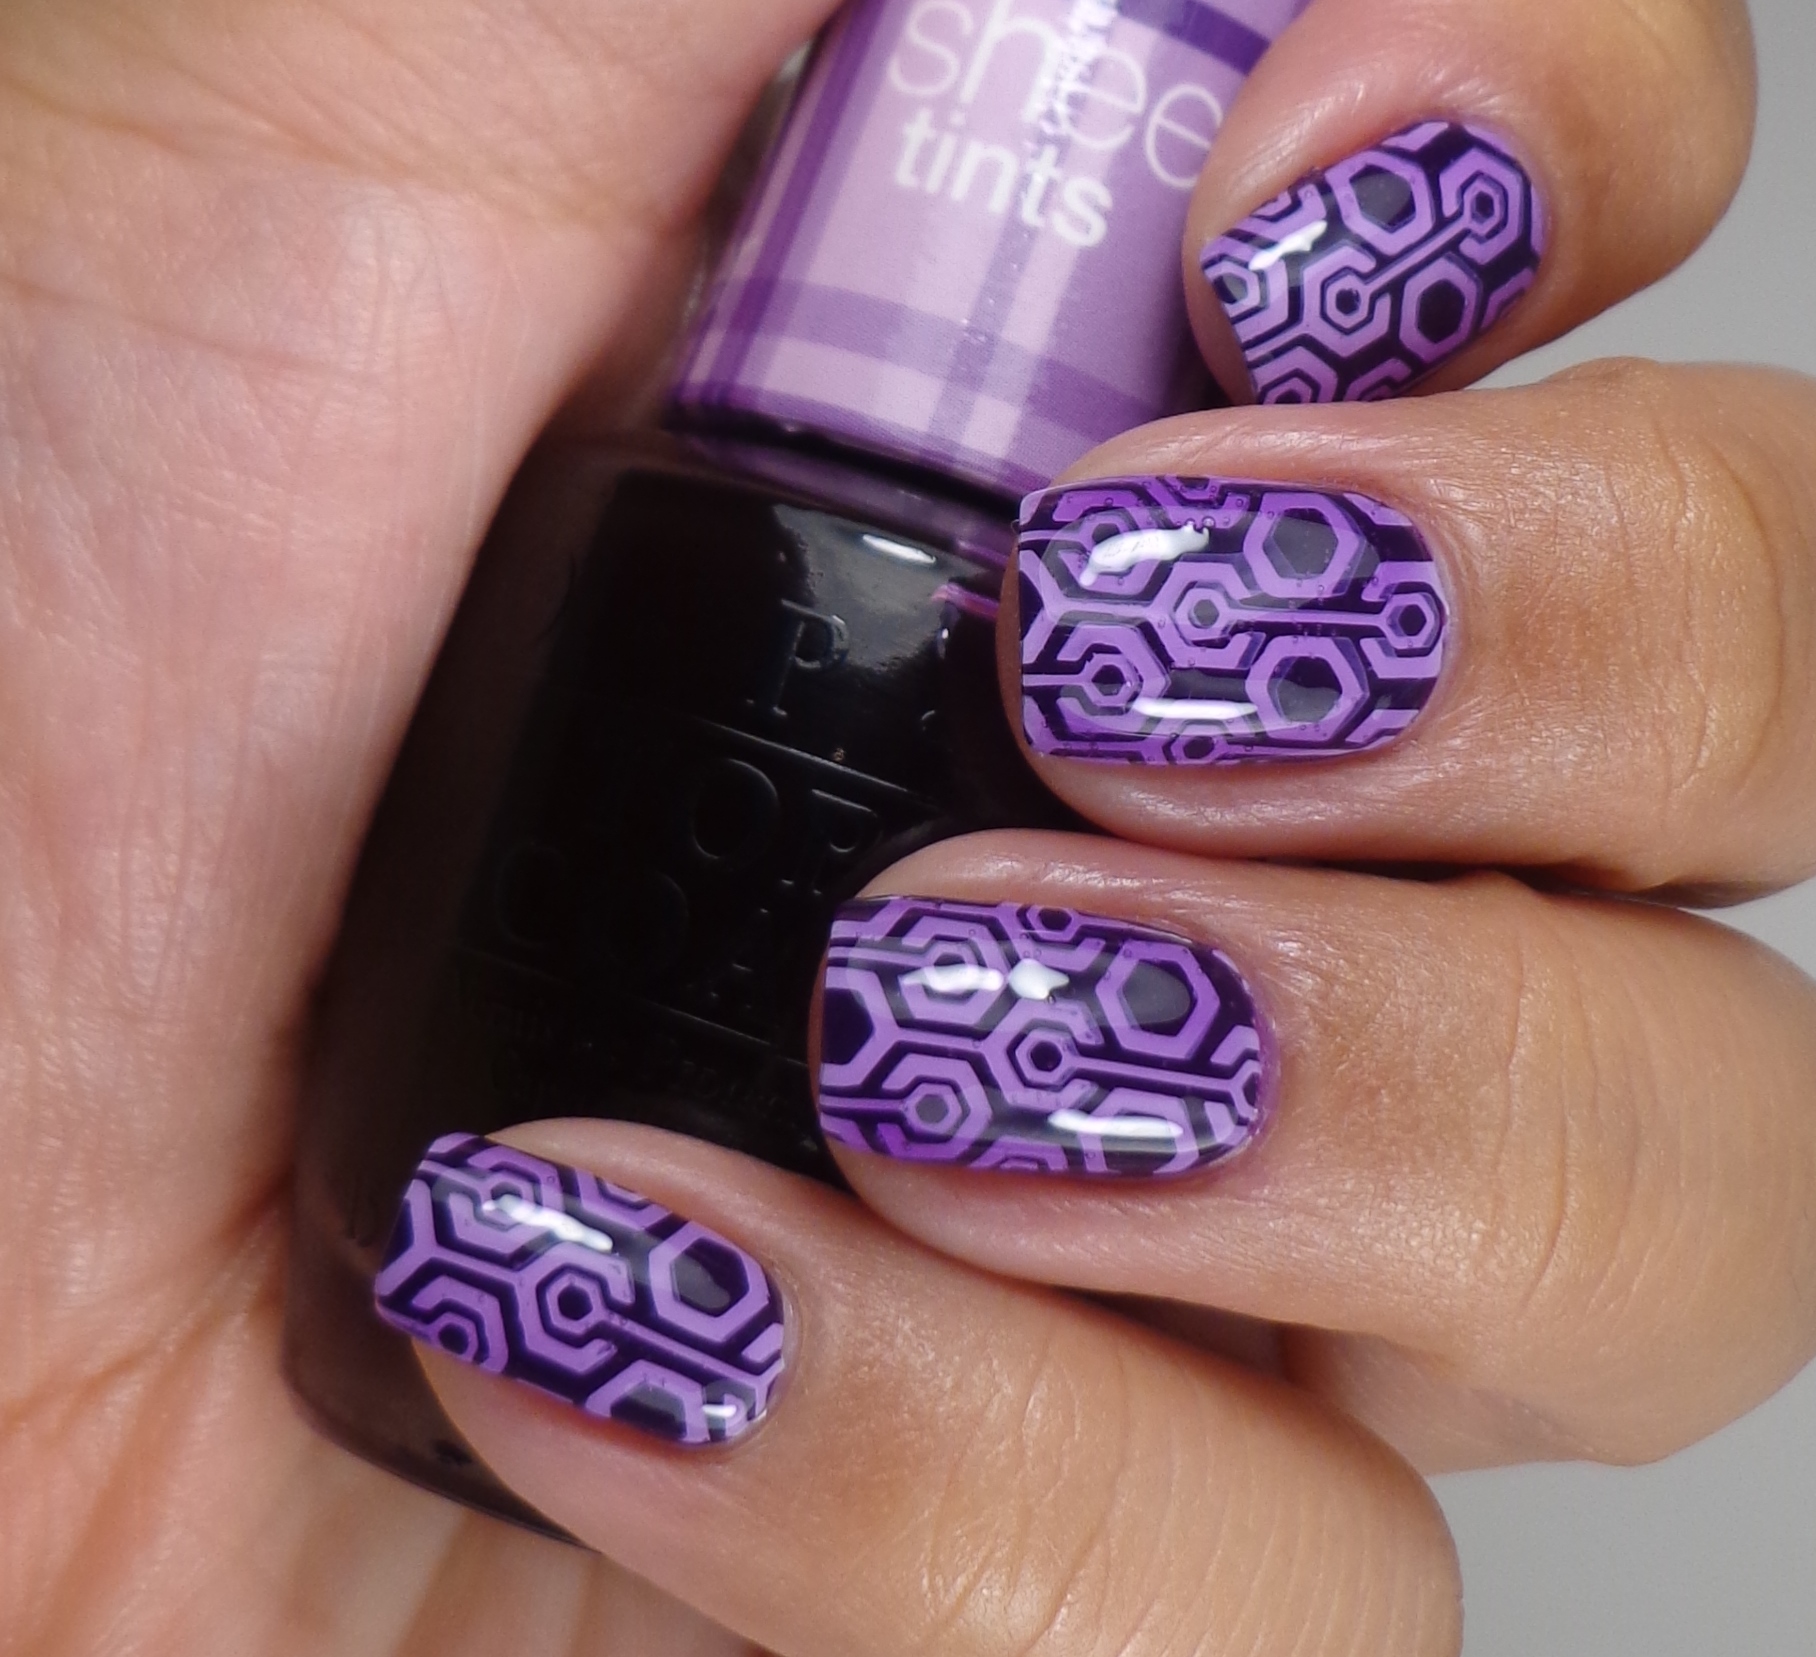
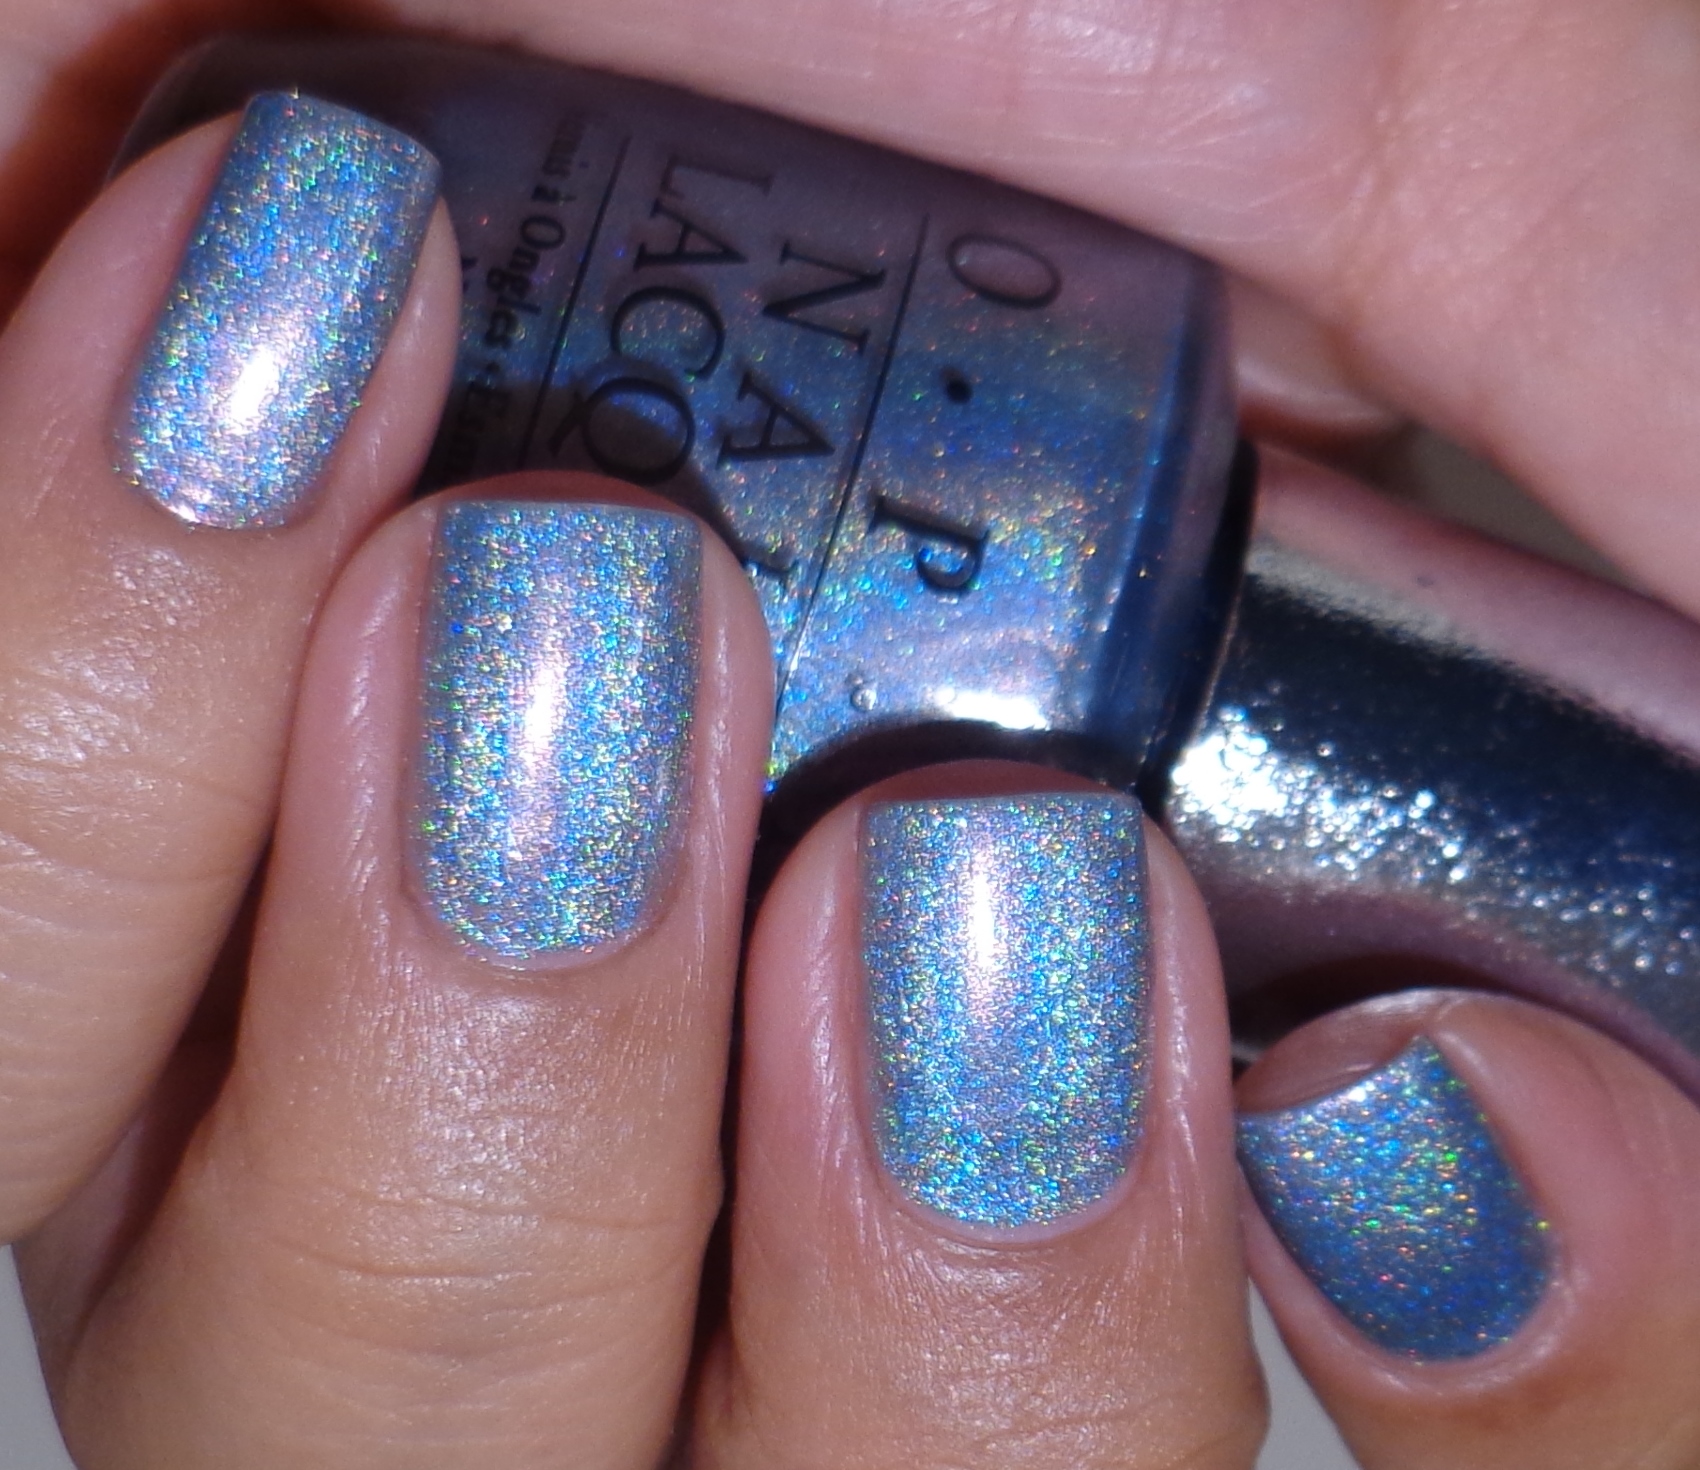
This beautiful polish is somewhat of a chameleon. It looks silver but it also looks blue depending on the lighting. The holo in this polish isn’t very linear…it’s like somewhat linear but also scattered. I just love it!

I thoroughly enjoyed my day off today especially because I always had to work holidays at my previous job. I guess this is one of the benefits of working for a public agency! If you’re in the US, I hope you had a nice Memorial day and that you took a minute to remember all the brave men and women in the armed forces who have fought and lost their lives. Thanks so much for stopping by today, and I will talk to you soon.


Stamping Saturdays #20

Stamping Saturdays #20

PressSample


I am super proud of myself for not missing a single Saturday since we started Stamping Saturdays and today I am on my 20th stamped mani for this series. Yay! This is definitely huge for me because I feel like such a quitter sometimes. I stayed up way too late to do this mani because I got wrapped up in watching a PBS documentary where actors discuss some Shakespearean plays. I nearly pissed myself when I watched the episode where David Tennant talks about Hamlet. My favorite Doctor and my favorite play? Ecstasy! Anyway, let me show you what I came up with because I could keep talking forever about the documentary.

MoYou London Back To The 70's - 03For today’s mani, I used the MoYou London Back To The 70’s – 02 plate which I have used a few times before. It has some really groovy designs. Sadly, I think it has been discontinued because I can’t find it on their website.

OPI A Grape Affair 1OPI A Grape Affair 2I started out with 2 delicious coats of OPI A Grape Affair. This lovely polish is part of the new OPI Coca-Cola collection which will be on the blog next week. This polish is absolute crème perfection and it’s very opaque so it only needed two coats. It dried super shiny and gorgeous.

MoYou Londo Back To The 70's 03 1MoYou Londo Back To The 70's 03 2And here is the image I chose from plate MoYou London Back To The 70’s – 03. What kind of design is this? It made me think of computers or something. When I was finishing up my clean up, I posted a picture on Instagram and Rei suggested that I apply a sheer tint on top of this. Hmmm…? I was a little hesitant to try it but look what happened!

OPI Don't Violet Me Down 1OPI Don't Violet Me Down 2I applied 1 coat of OPI Don’t Violet Me Down over my whole mani and it just looks awesome. Rei is a genius for suggesting this.

So what do you think about this stamped mani? Since I like it, I’m sure people are going to think it’s blah. Haha My cherry blossom mani got so much attention, and I seriously thought it was kind of blah. Well, I hope that you like this jelly stamped mani. I know that I am going to try this with other polishes because it creates such a cool effect. Do you have any plans this weekend? I’m dying to go see the new X-Men movie so hopefully I’ll go watch it later today. Thanks so much for stopping by today, and I will talk to you soon.

 Loading InLinkz ...


The Lacquer Ring – Cherry Blossoms

The Lacquer Ring – Cherry Blossoms

PressSample


After my orange debacle, I was sure that I was going to crash and burn on today’s challenge. Let me tell you that I am not one of those people who can do awesome freehand nail designs–there is a reason why I love stamping so much! I can admire the amazing skills that other ladies have when it comes to nail art, but I just don’t like it on my own nails because I want crisp lines and geometric patterns. I had to suck it up for this post because Nicole chose Cherry Blossoms as her second prompt for the month of May. You want to know what I kept thinking about? Ken Watanabe.

I kind of love him. Not as much as my childhood crushes, but he’s up there. I really like The Last Samurai even though I strongly dislike Tom Cruise. Rather, I strongly dislike Tom Cruise’s public persona and the whole Scientology thing but to each his own. Anyway, I kept thinking about what to do for this manicure so I took out some polishes to get started.

8Here you see Nicole by OPI At Least I Pink So, Nicole by OPI Promises After Dark and OPI Minnie Style (all press samples). I also needed a nail art brush to draw the branches.

Nicole by OPI At Least I Pink So 1Nicole by OPI At Least I Pink So 2To start with, I applied 2 smooth coats of Nicole by OPI At Least I Pink So which is a delicate and creamy baby pink.

Nicole by OPI Promises In The Dark 1Nicole by OPI Promises In The Dark 2I then used Nicole by OPI Promises In The Dark and my nail art brush to draw some tree branches. I feel that they look super sloppy. Grrrr!

OPI Minnie Style 1OPI Minnie Style 2OPI Minnie Style 3Finally I used the glitters in OPI Minnie Style to create the cherry blossoms. This was not very time consuming and I think it gives the whole mani a little bling factor. Maybe it’s a little tacky but I can be a little tacky with my manicures sometimes so who cares?

So what do you think? Be honest! I don’t totally hate it, but I’m not super happy with it either. To be honest, this was my second attempt. The first time, I used a base color that just looked awful so I removed everything and started all over again. I almost gave up completely, but I’m glad that I kept going because this is all about challenging myself. So, thanks Nicole for picking a design that I had never attempted before. Make sure that you check out the other Cherry Blossom manis from the other members of The Lacquer Ring. Thanks so much for stopping by today, and I hope you have a great Thursday!

GIVEAWAY REMINDER

There is about a week left! Have you entered my giveaway to win a full size 4 piece set of the OPI Sheer Tints? Click on the image below to go to the giveaway post. Good luck!

opi

 Loading InLinkz ...
OPI Neons Collection 2014

OPI Neons Collection 2014

PressSample


One of the only things–if not the only thing–that I love about Summer is the fact that we see tons of color everywhere and I’m not just talking about nail polish. Every Spring, I get giddy seeing previews of juicy Summer Collections and this year has been no exception. When I first started hearing about an OPI Neons Collection, I was very excited. Excited is not really the right word because I was going apeshit crazy for them. I don’t like to necessarily say that I have obsessive qualities in my personality, but you can definitely qualify my polish idiosyncrasies as such. Now, I do have to tell you that while I love bright neon colors, I definitely do not like neon formulas. I cannot stand the idea of 3+ coats of polish, and I just about lose my shit when I am told to use a white base under a polish. Do you understand my conundrum? For this review, I decided to follow OPI’s inscructions and used their Put a Coat On! white base coat which they state will further enhance color and basically make them pop. Look at me: following directions for once. Let’s take a look at my swatches before I break it down for you.

OPI You're So Outta Lime! 1OPI You're So Outta Lime! 2OPI You’re So Outta Lime!

OPI Life Gave Me Lemons 1OPI Life Gave Me Lemons 2OPI Life Gave Me Lemons

OPI Hotter Than You Pink 1OPI Hotter Than You Pink 2OPI Hotter Than You Pink

OPI Down To The Core-al 1OPI Down To The Core-al 2OPI Down To The Core-al

OPI Juice Bar Hopping 1OPI Juice Bar Hopping 2OPI Juice Bar Hopping

OPI Push 7 Pur-pull 1OPI Push 7 Pur-pull 2OPI Push & Pur-pull

Am I the only one doesn’t really see true neons here? Well, I shouldn’t say that because Life Gave Me Lemons is kind of electric. Other shades are very neon-esqe, but I was expecting something more retina-searing. Let’s get the ugly out of the way first: Push & Pur-pull, you are a beast. This polish was basically unmanageable. When I applied it over the white base, it never looked good. I applied 2 coats of the white base and 4 coats of Push & Pur-pull hoping that would make it look nice. NOPE. You may be thinking that I over-applied it, but I actually went really slowly and let each coat dry before making the decision to add another and another and another. Finally I took it all off and applied it without the white base coat which is what you see above. I am still not happy with it, but I would highly recommend that you skip the white base with this one. As far as the other 5 polishes are concerned, they weren’t horrible but they weren’t that nice either. Out of the collection, Life Gave Me Lemons had the best formula and coverage. For all of my swatches, excet Push & Pur-pull, I applied 2 coats of the white base and 2 coats of polish which I ten top coated with Seche Vite I am not a huge fan of the satin finish that most neons carry which is why I always Seche Vite the crap out all my manis. When did Seche Vite become a verb?

Let’s talk about the Put A Coat On! base coat…

hated-it-oYep, hated it. It is the strangest white polish I have ever used. It’s chalky and strange and it felt like it never dried. When I applied polish over it, it kind of came off and would get runny. It was just weird. Also, can I tell you how much I hate that no matter how hard I tried, I can see some of the white peeking out around the edges of my mani? It’s a huge pet peeve of mine so it’s driving me nuts that I’m posting what I feel are sloppy swatches. If you are able to apply the white base in one swipe, then you don’t need more than one coat. If you need to make a second pass, then you’re going to get a streaky mess which is why I applied 2 coats of the white base.

Overall, I’m not diggin’ this whole collection. The three that I really like are You’re So Outta Lime, Life Gave Me Lemons and Hotter Than You Pink. Hotter Than You Pink is much brighter in real life than my pictures show and it has some beautiful shimmer to boot. I’m so conflicted because I wanted to love this whole collection so much and now I don’t. The OPI Neons Collection will be available this month and will retail for $9.00 ($10.95 CAN)  at Professional Salons, including Beauty Brands, beautybrands.com, Beauty First, Chatters, Dillard’s, jcp Salons, Pure Beauty, Regis, Trade Secret, ULTA and ulta.com. What do you think of this collection? Will you be picking up any of these shades for the Summer? Thanks so much for stopping by today, and I will talk to you soon.

P.S. Have you entered my giveaway for a set of the OPI Sheer Tints? Come enter here.

OPI Glitter Off Base Coat

OPI Glitter Off Base Coat

PressSample


Yay me! I am done with clearing out my backlog of swatches and reviews that were in my drafts folder. I hadn’t posted my review of the OPI Glitter Off Base Coat because I noticed that I couldn’t find it anywhere!! I was going to pick up a second bottle and also wanted to get one for a friend, but none of my usual places have it. Hrrrrmmphh! Anyway, I know there were a lot of questions about if this was just Elmer’s glue in a fancy bottle so let’s talk a bit about the product, shall we?

OPI Glitter Off Base Coat 1The OPI Glitter Off Base Coat is meant to be used a a peelable base coat worn under difficult to remove glitters. When I first started blogging, I HATED glitter. You don’t understand. Glitter would make me angry. I hated what a pain in the ass it was to remove so I basically avoided it. Slowly, I began to see what I was missing out on so I saw the light and started to wear glitter until I was a complete convert. I still hated the removal process, but it was totally worth it. At one point, I did try Elmer’s Glue under my glitter polish, but I hated it because it actually peeled off some of my nail!!! I was a little dubious about how much better (or worse!) the OPI peelable base coat would be, but I’m glad to report that I had better results.

OPI Glitter Off Base Coat 2OPI Glitter Off Base Coat 3OPI Glitter Off Base Coat 4I found this base coat super easy to use. All you need is one coat, and you need to let it dry until it is completely transparent. After that, you can paint your nails with the craziest glitter ever and you won’t have issues with removal. I found that pushing the polish with an orange stick was an easy way to remove it. Initially I thought that the base coat would make my mani really weak, but I wore the same polish for 3 days and didn’t have any chipping or peeling.

OPI Glitter Off Base Coat 5OPI Glitter Off Base Coat 7OPI Glitter Off Base Coat 6When I started experimenting with gradients again, I was lamenting the pain of clean up when a few people recommended using blue on my fingers to make clean up more easy. Well, since I couldn’t find my bottle of Elmer’s glue, I decided to use the Glitter Off Base Coat for this as well. As you can see by my pictures above, it does work well. Would I recommend using it like this on the regular? No! It’s too pricey to be used this way but if you’re in a pinch, it will definitely do.

So what do I think of this product? Uhm, I feel it’s pretty darn similar to the Elmer’s Glue/water mixture that a lot of people have tried out. I don’t think it’s a must-have product, but it definitely did make glitter removal a lot easier for me so I will keep using it and will probably buy it once I’m out–if I ever find it in store, that is. Have you used this product yet? What do you think? Is it something that you’d buy? It is a little pricey at $9 a bottle, but I do like it. Thanks so much for stopping by today, and I will talk to you soon!


Stamping Saturdays #17

Stamping Saturdays #17

Holy shitballs you guys…I had a bad day yesterday. My day was a perfect comedy of errors so it’s not like something horrendous happened to me, it was just that EVERYTHING was going wrong. I ended up going to dinner with a friend and then we ended up drinking (a lot of beer–ha!) and watching the show My Strange Addiction. Do you know how much stranger that show is when you’re wasted? I am miraculously not hung over this morning which is great considering that I needed to put this post together. Thankfully I had completed my manicure yesterday when it was 5,000 degrees–even my fingers were sweating! Anyway, let’s get the polish show on the road!

OPI In The Cable Car-pool Lane 1OPI In The Cable Car-pool Lane 2OPI In The Cable Car-pool Lane 3For my base color, I used OPI In The Cable Car-pool Lane (press sample) which is simply goygeous. It is so shiny and squishy. I’m still loving the whole San Francisco Collection despite popular opinion.

MoYou London Pro Collection 18For my stamped design, I use my MoYou London Pro Collection 18 plate (press sample) and Essie Good As Gold.

MoYou London Pro Collection 18 1MoYou London Pro Collection 18 2MoYou London Pro Collection 18 3I really like how this turned out! I know this isn’t a very Spring/Summer manicure, but I don’t care. I will always wear whatever I’m in the mood for and this is what I wanted to wear yesterday.

It’s supposed to be a lot cooler this weekend (not in the 90’s) so I’m looking forward to not sweating while I sit on the couch and just watch TV. I’m also hoping to get some swatching done but there was a Zoya tragedy at the hands of Peanut yesterday. I’ll leave the story for the actual post. Thanks so much for stopping by today and I hope that you’ll link up your posts if you are participating in Stamping Saturdays. Have a great day, and I will talk to you soon!

 Loading InLinkz ...
Stamping Saturdays #16

Stamping Saturdays #16

Since purple is one of my favorite colors, I remember being obsessed with getting every purple and lilac polish known to mankind when I first started hoarding collecting nail polish. One of the very first polishes that made me swoon is OPI Do You Lilac It? and it is still a favorite. I decided to use it as the base color for my mani today so let’s take a look…

OPI Do You Lilac It 1OPI Do You Lilac It 2This is two buttery coats of OPI Do You Lilac It?, and it is still as gorgeous as I remember it.

KBShimmer Pansy-monioum 1KBShimmer Pansy-monioum 2I then used KBShimmer Pansy-monioum (press sample) to sponge on my gradient.

Konad M73 1Konad M73 2And lastly, I used an image from Konad plate M73 for this girlie and flowery design.

While I’m not in love with this final design, I think it is pretty. It’s a little more “girlie” than I tend to do, but sometimes change is good, right? Don’t forget t check out the other Stamping Saturdays looks below.  Also, if you’re interested in joining us in Stamping Saturdays, feel free to link your stamped manis below as well. We’d love to see what you come up with. As always, thanks for stopping by!

 Loading InLinkz ...
The Lacquer Ring – Unicorns Unite!

The Lacquer Ring – Unicorns Unite!

I almost didn’t get this post done, which would have been unfortunate because this is the inaugural post of…

TheLacquerRingWhat is this Lacquer Ring I speak of? Well, it’s a group of crazy polish chicks who spend way too much time emailing each other all day long about polish, life, woes and more polish. While we haven’t all technically met in person (except for me and Lesley and Amy and Frosso), we are pretty good friends and hope that we can all meet one day. Unfortunately, the universe will end that day because that much awesomeness is not allowed all in one place. While you may already know the ladies who make up The Lacquer Ring, let me introduce them all:

Amanda from Mae’s Beauty

Amy from The Fancy Side

Frosso from Lacquer Me Silly

Jessica from Once Upon A Polish

Lesley from IG @MisfitLesley

Nicole from Polish Me, Please!

Siobhan from For The Love Of Nail Art

Now that you know who will be participating in The Lacquer Ring, let me tell you that we will be posting twice a month and each month, one of us will be determining the two challenges for the rest of the group. For our very first post, we will all be using a special polish that Nicole got as a gift for all of us: Candy Lacquer Unicorn Bubbles. Let me show you what I did with this awesome glitter topper!

Jessica SharktoothI started with two creamy and delicious coats of Jessica Sharktooth (press sample). I’ve mentioned how much I love this polish many times because it is an amazing white polish.

OPI Sheer Tints 1OPI Sheer Tints 2I then used my OPI Sheer Tints (press sample) to create this watercolor design. Ever since I saw The Polish-Aholic’s post about this, I knew I had to do it. You can read more about it here. I should have used thinner coats of the Sheer Tints because I got some bubbling, but I decided to let it go since I was planning to put on a glitter topper anyway.

Candy Lacquer Unicorn Bubbles 1Candy Lacquer Unicorn Bubbles 2This is my very first Candy Lacquer, and I was quite happy with it. I love circle glitter so this is right up my alley. Like most glitter toppers, using the dabbing method will give you the best results. I ended up fishing the glitter out with a dotting tool because I was getting a lot of bubbling from the thick base. Although the base is clear, it does have some holographic micro glitter that kicks it up a notch.

OPI Matte Top Coat 1OPI Matte Top Coat 2Lately I have been obsessed with making everything matte, so I pulled out my OPI Matte Top Coat (press sample) and mattified my whole mani. I don’t know how you feel about the end result, but I absolutely love it. OPI’s Matte Top Coat has become my favorite amongst many others so I highly recommend it.

Currently I’m working through a lot of unpleasant stuff so excuse me if I’m not around as much. I had mentioned that I may not post as regularly for the time being, but I couldn’t miss out on the first post of The Lacquer Ring. Thank you so much for continuing to stop by despite my irregular posting. We were not very organized for our first post, so they will be trickling in as everyone gets a chance to publish. Some are already up, so make sure that you check them out below. Thank you so much for stopping by today, and I hope that you will join us for the next The Lacquer Ring post.

 Loading InLinkz ...
Morgan Taylor New School Nude

Morgan Taylor New School Nude

PurchasedMyself


How was your Sunday? I didn’t do anything exciting, but I did stop by my brother’s house to visit my little Peanut. He is so freaking adorable! I hadn’t seen him all week because my sister in law’s sister is visiting and she is babysitting him. I’m not a big Easter person but if you are, I hope you had a nice day with your friends and loved ones. I also wasn’t in the mood to do some cutesy Easter mani so I used a gorgeous nude that I bought a couple of weeks ago: Morgan Taylor New School Nude.

Morgan Taylor New School Nude 1Morgan Taylor New School Nude 2This is a gorgeous nude. It’s slightly beige and has a little bit of yellow in it. To be honest, I thought this was going to look hideous on me but I am quite liking it. If you haven’t used Morgan Taylor polishes before, this one is the usual creme perfection that I have come to expect from this brand. The polish was a tiny bit streaky so I ended up applying 3 coats, and it did not need top coat because it is beyond shiny on its own.

OPI Snowflakes In The Air Matte 1OPI Snowflakes In The Air Matte 2And just to make this a little more interesting, I applied a coat of OPI Snowflakes In The Air (press sample) and then used my OPI Matte Top Coat (press sample) to bring it all together. I’m quite happy with the way this turned out!

So I know that I mention work a lot and how much it stresses me out. I’m going to do my best to stop talking about work on here because my blog really is a sort of escape. At this point, I am physically sick from the stress so I know that something has to change. I hope that I don’t have to step away for the blog while I figure this out, but if my postings seem more sporadic, at least you will know why. Thanks so much for all the kind words and encouragement–they mean the world to me. I’ll talk to you soon…hopefully.

Clinique Really Rio

Clinique Really Rio

PurchasedMyself


I really wish I wasn’t feeling SO DAMN lazy today because I need to run some errands but I am sitting here in sweatpants and a tank top and do not want to move my butt off the couch. I’m watching a bunch of documentaries on Netflix as well so I really don’t want to do anything else. At the same time, I am dreading the start of another work week and I could literally cry. My friend Daniel posted this quote on his Facebook today: “The secret of health for both mind and body is not to mourn for the past, worry about the future, or anticipate troubles, but to live in the present moment wisely and earnestly.” It’s largely attributed to Buddah but according to google, it’s based on his teachings but not a verbatim quotation. Anyway, the whole point of sharing that with you is that I seem to never really enjoy anything because I’m constantly thinking about unpleasant things. Instead of enjoying my weekend, I have this cloud looming over my head about how much I don’t want to go to work. How does that even make sense? I don’t just do this with work, but with pretty much everything else in my life. I need to chill the f out before I give myself another nervous breakdown. Woe is me…blah, blah, blah. Instead of dwelling on this, let us talk polish now, ok? So I had these swatches of Clinique Really Rio done and edited a while back, but they got lost in my many desktop folders. I remember being really excited when the Clinique polishes were first released but now I am just feeling lukewarm about them. Let me show you what I did with this polish.

Clinique Really Rio 1Clinique Really Rio 2Clinique Really Rio is more of a coral leaning polish even though it looks fairly orange here. I can blame it on my lighting, but the color also freaked out my camera because it’s almost neon. Double whammy! The formula was nice and only needed two coats for full opacity.

Clinique Really Rio 3Clinique Really Rio 4

Then I figured I could play around with it by using the OPI Matte Top Coat (press sample), and I really love how this looks!!! I like matte finishes but not as much as shiny and glossy beauties. However, I much prefer this polish mattified.

And because I haven’t showed you any recent pictures of my little nephew, here he is:

DSC06507He just keeps getting cuter and cuter. I have a hard time getting him to smile when I take his picture because he is so interested in looking at the camera that he ignores any of my efforts to make him smile. He just melts my heart!!!

One last thought about the Clinique nail polishes: when I bought them, they were $16 and now I see that the prices have been lowered to $12.50. I guess this means that the polishes weren’t selling at the higher price point which I can totally understand. I bought two of them when they first came out just because of the novelty, but I was not planning to buy more because I found them way too pricey. I might be tempted to buy more now that they are priced a bit more reasonably but only if the color is unique. Have you tried any of these Clinique polishes? Let me know if you have any colors to recommend. Thanks so much for stopping by today, and I will talk to you soon.

P.S. Hey, have you checked out my blog sale recently? I’ve reduced my prices on many items, and I have also added tons of new polishes.

Capture